
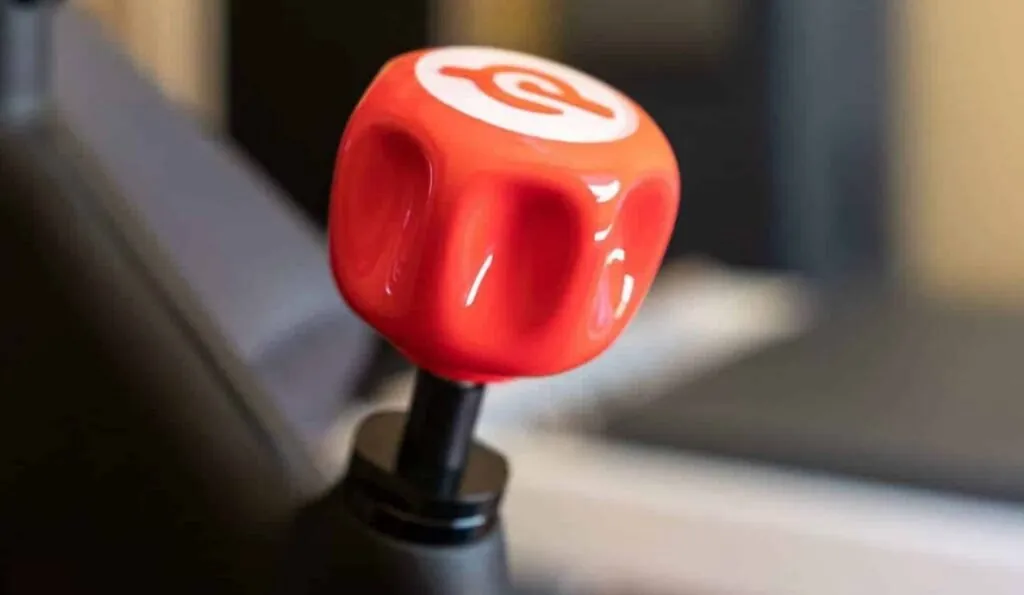
A Peloton resistance knob typically fails due to cable tension issues or loose internal connections. If the knob spins freely without changing resistance, the internal cable has likely slipped or snapped.
Common causes for a Peloton resistance knob not working
This table outlines the typical reasons your resistance system might stop responding. You should review these to identify the most likely culprit based on how your bike feels when you turn the handle.
| Cause | How common | How to confirm it | Fix it yourself? |
|---|---|---|---|
| Loose tension cable | Very common | Knob turns without resistance | Yes with care |
| Damaged internal magnet | Common | Resistance is stuck fixed | No |
| Stripped knob threads | Occasional | Knob feels loose or wobbly | Yes |
| Broken plastic housing | Occasional | Visible cracks near knob | No |
| Sensor board failure | Rare | No data on screen | No |
| Seized resistance rod | Rare | Knob won’t turn | No |
If the knob spins freely without changing the flywheel drag, the tension cable has likely slipped from its anchor bolt. Check the cable housing for fraying before tightening it back into the clamp.
If you feel a grinding sensation while turning, stop immediately. You have likely stripped the plastic threads inside the knob. Continuing to force it will destroy the metal rod underneath, turning an inexpensive repair into a full assembly replacement.
If the resistance remains stuck at one intensity level despite the knob moving, the internal magnet carriage is jammed. Don’t attempt to pry this open. High-tension springs inside can snap, causing significant injury to your fingers. If you see a “0” or “null” reading on your monitor when the knob turns, the magnetic sensor board has failed. This requires a complete console or sensor unit swap.
Tension cable issues
A loose or disconnected tension cable is the primary reason for a lack of resistance on the bike. The cable connects the knob to the magnetic resistance assembly near the flywheel. When this cable loses its tension or slips off the internal pulley, the knob effectively disconnects from the resistance mechanism. This leaves the magnets in a fixed position, meaning your ride won’t get harder even if you turn the handle to the right.
To confirm this, first ensure the bike is turned off and unplugged. Rotate the knob all the way to the right and then all the way to the left. If you feel no change in the physical resistance or if the knob feels like it’s spinning in thin air, the cable has likely failed.
A common mistake is forcing the knob beyond its stop point, which can snap the internal wire or strip the plastic gears. This mistake often results in a permanent loss of tension that requires a replacement cable kit.
If the cable is merely loose, you might be able to adjust the tension settings by following the official guide provided by the manufacturer. You should only attempt this if you’re comfortable working with basic hand tools.
If the cable is snapped or frayed, you can’t fix it with temporary patches. In that case, you must contact customer support to order the correct replacement parts for your specific bike model. Using the wrong cable length or gauge will prevent the magnets from clearing the flywheel safely.
Stripped knob threads
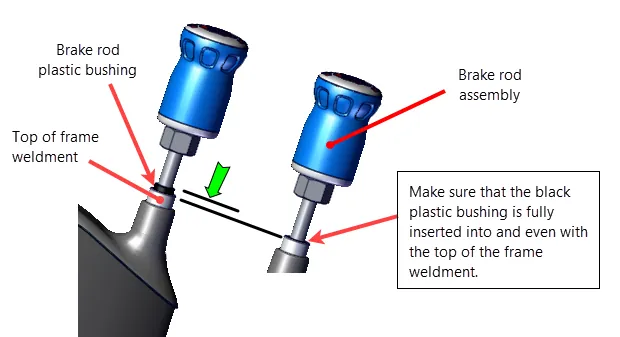
Stripped threads occur when the plastic internal components of the knob become worn down from frequent, aggressive use. You can tell this is the problem if the knob feels loose, wobbly, or if it clicks while you’re trying to turn it. Unlike a cable issue, the resistance might still change occasionally, but the knob will feel unstable under your hand. This happens because the small teeth inside the knob housing no longer grip the metal rod effectively.
This condition is common if you often turn the knob very quickly or with too much force during high-intensity intervals. If the knob spins but doesn’t actually advance the resistance rod, the internal plastic teeth have likely been ground down. You can check this by pulling gently on the knob; if it pulls away from the frame slightly, the mounting hardware or the plastic threads are compromised.
You can often fix this by removing the knob and inspecting the internal plastic teeth for signs of damage or debris. If the plastic is visibly smooth or cracked, you’ll need to replace the knob assembly itself.
This is a relatively simple task that involves removing the set screw and sliding the old knob off the metal shaft. Always ensure the new knob is seated fully on the shaft before tightening the set screw to prevent the new threads from stripping immediately.
Damaged internal magnets
Internal magnet damage occurs when the magnetic assembly inside the frame becomes misaligned or physically blocked. Unlike cable issues, this problem often results in the resistance being stuck at one level, or the magnets rubbing against the flywheel during every rotation. You can distinguish this from other issues because you’ll hear a rhythmic scraping or grinding noise coming from the flywheel area whenever the wheel spins.
This problem is often caused by debris getting trapped between the magnets and the flywheel. If you see visible metal shavings or dust around the magnetic assembly, don’t continue using the bike, as this can score the flywheel surface. A scored flywheel creates permanent vibration, which eventually destroys the bearings.
This is a mechanical failure that requires a professional technician to realign the magnets or replace the resistance housing. Never attempt to pry the magnets apart yourself. These high-strength neodymium magnets can snap shut with enough force to crush skin or shatter the ceramic coating.
If the resistance lever feels loose but the tension remains locked, the internal cable has likely snapped, leaving the magnets in a fixed position. If the resistance changes but the noise persists, the magnet housing is physically bent.
Rare mechanical failures
Sensor board failure occurs when the console stops recording resistance levels. If your screen remains blank while you pedal, the internal digital sensor has likely lost its connection. You can confirm this by checking if the cadence sensor still registers movement.
A seized resistance rod leaves the knob physically locked in place. This is almost always caused by internal corrosion from sweat dripping into the housing. If you feel resistance grinding before it locks, stop immediately to prevent snapping the internal tension cable.
Frame mounting damage manifests as a persistent rocking sensation during high-intensity intervals. If the assembly feels loose, tighten the primary bolts to 15 foot-pounds. If the wobble remains, the frame’s mounting bracket is likely fatigued.
An electrical short triggers a persistent error code on the console. This requires a full diagnostic by a technician. Never attempt to bypass the fuse, as this often fries the entire motherboard.
What a professional repair involves
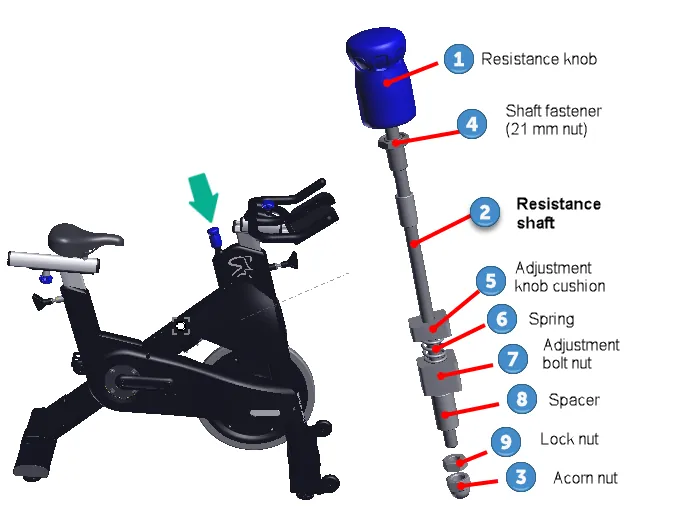
Fixing a resistance issue usually requires either a simple part swap or a complete housing replacement. If the issue is a simple knob or cable, the fix involves using a hex key to remove the old component and sliding a new one into place. This is roughly the same level of effort as changing a battery in a small electronic device. The time required depends on whether you’re replacing a single knob or the entire resistance assembly.
If the internal magnet housing is damaged, you’ll likely need a technician to perform the repair. A professional will have the specialized tools to align the magnets to the exact distance from the flywheel, which is vital for smooth operation.
You can get a real quote for these services by visiting the official support portal and entering your bike’s serial number. The final cost depends on your warranty status and whether the bike requires a simple adjustment or a full replacement of the resistance mechanism.
Related guides
- How to Lubricate a Foosball Table: Smooth Rods Fix in 2026
- Foosball Table Replacement Parts Rods: How to Fix Them in 2026
- How to Repair a Foosball Table: Fix Stuck Rods in 2026
Frequently Asked Questions
Can I still ride if the resistance is stuck?
It isn’t recommended to ride if the resistance is stuck because you can’t control the intensity, which may lead to muscle strain. If the magnets are rubbing against the flywheel, you could also cause permanent damage to the bike’s finish. It’s much safer to address the mechanical failure before your next training session to ensure your equipment remains in good working order.
How long does a replacement knob take to install?
A standard knob replacement usually takes about 10 to 15 minutes for a user with basic tools. You’ll need a standard Allen wrench set to loosen the set screw and remove the old knob. If you find the replacement process is taking longer, check your bike’s specific assembly manual to ensure you have removed all the fasteners before pulling on the part.
Is it safe to use lubricants on the resistance knob?
No, you should never apply lubricants to the resistance knob or the internal magnets. Lubricants can attract dust and debris, which will cause the magnets to stick or grind against the flywheel. If the knob feels stiff, it’s usually a sign of internal wear or a misaligned cable, and adding oil won’t solve the underlying mechanical friction.
Why does my knob make a clicking sound?
A clicking sound usually indicates that the internal plastic teeth of the knob are stripped or the cable tension is too loose. When the teeth can’t grip the metal rod, they skip over each other, creating that distinct noise. You should inspect the knob for visible wear and check if the cable has enough tension to pull the mechanism tight against the resistance rod.
Does the resistance level matter if the knob is broken?
The resistance level matters significantly because an uncontrolled resistance setting can disrupt your workout and cause overexertion. If the knob is stuck at a high resistance, you may find it impossible to maintain a steady cadence. If it’s stuck at a low level, you won’t be able to achieve the desired intensity for your training goals, making the bike ineffective for your fitness routine.
What happens if I ignore a loose resistance cable?
Ignoring a loose cable often leads to the cable snapping completely or the internal pulley becoming misaligned. Once the cable snaps, you’ll lose all control over the resistance, and the bike will likely default to the lowest or highest setting. It’s always better to address the loose tension early to avoid a more complex repair that might involve opening the main housing.
Conclusion
If you’re still having trouble after checking the connections, don’t hesitate to reach out to the support team. They’ll help you figure out if you need a technician’s visit or a simple part swap. You’ll be back to your favorite rides in no time once the bike’s feeling right again.
