
Electrical grounding provides a safe path for excess electricity to enter the earth, preventing shocks and fires by stabilizing voltage levels during faults.
This system relies on three primary factors that shift depending on your location and building age.
Who needs to understand electrical grounding
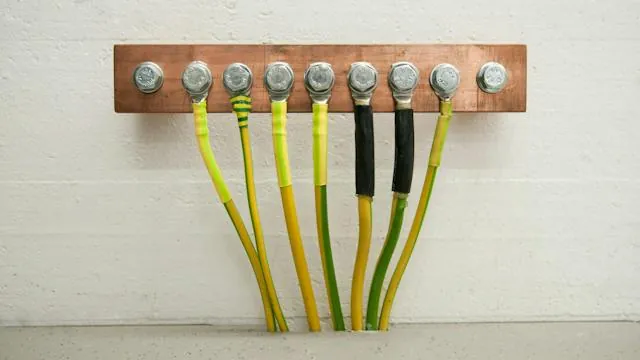
Homeowners, DIY enthusiasts, and property managers often look for this information to ensure their electrical systems meet modern safety standards. You might be a homeowner updating an older property with two-prong outlets, or perhaps you’re a property manager checking if your building’s grounding path remains intact after recent renovations.
This page serves those who need to understand the basic principles of electrical safety and how to identify if their system requires professional attention. It assumes you possess a basic understanding of home electrical panels but have no formal training as a licensed electrician. If you’re looking for specific instructions on installing a new main service entrance, you should consult a professional instead.
What decides the grounding performance
System effectiveness depends on physical conditions that dictate current flow during a fault. The soil moisture level is the most significant variable, as dry or rocky ground resists current flow more than moist, loamy earth. You can check your soil type by observing how quickly water drains after rain; if it drains instantly, your ground rod may need to be driven deeper to reach stable moisture.
The grounding electrode’s depth and surface area matter, as longer rods provide more earth contact. People often make the mistake of installing a rod that’s too short for their specific soil conditions, which fails to meet the required resistance thresholds. Main panel bonding integrity is crucial. Loose connections compromise the path to the earth. Ensure the grounding wire clamp is tight and corrosion-free.
Steps for verifying your grounding system
Verifying that your system is functional requires careful observation of your main electrical service components. If you’re unsure about any step, stop and contact a licensed electrician, as your service panel carries dangerous voltage.
- Locate your main electrical service panel and find the thick copper or aluminum wire connected to the grounding bus bar.
- Follow this wire to its connection point, which is typically a metal water pipe or a driven ground rod outside your home.
- Inspect the grounding electrode clamp to ensure it’s tight and shows no signs of loose metal or heavy rust.
- Check that the grounding wire is continuous from the panel to the electrode without any breaks, splices, or bypasses.
- Verify that your metal water piping system is bonded to the grounding system with a jumper wire across the water meter.
- Look for a second ground rod if your local code requires a “made electrode” system, often indicated by two rods spaced at least 6 feet apart.
- Confirm that all connections are secure by giving the wires a firm, gentle tug while the power is off.
The single judgment call that separates a safe system from a dangerous one is the presence of a “low-impedance path.” If you see signs of melting, charred insulation, or loose connections, your system can’t safely dissipate a fault. These signs indicate a system failure requiring professional attention.
Grounding variations at a glance
| Situation | Action | Requirement | What to watch for |
|---|---|---|---|
| Dry, sandy soil | Drive deeper rods | High effort | High resistance readings |
| Metal water pipe | Inspect bond clamp | Low effort | Corrosion on clamps |
| Concrete foundation | Use Ufer ground | Expert installation | Rebar continuity tests |
| Old home wiring | Add ground wire | High cost | Ungrounded outlets |
| Rocky terrain | Use chemical rods | High cost | Moisture retention levels |
Quality of electrical connections
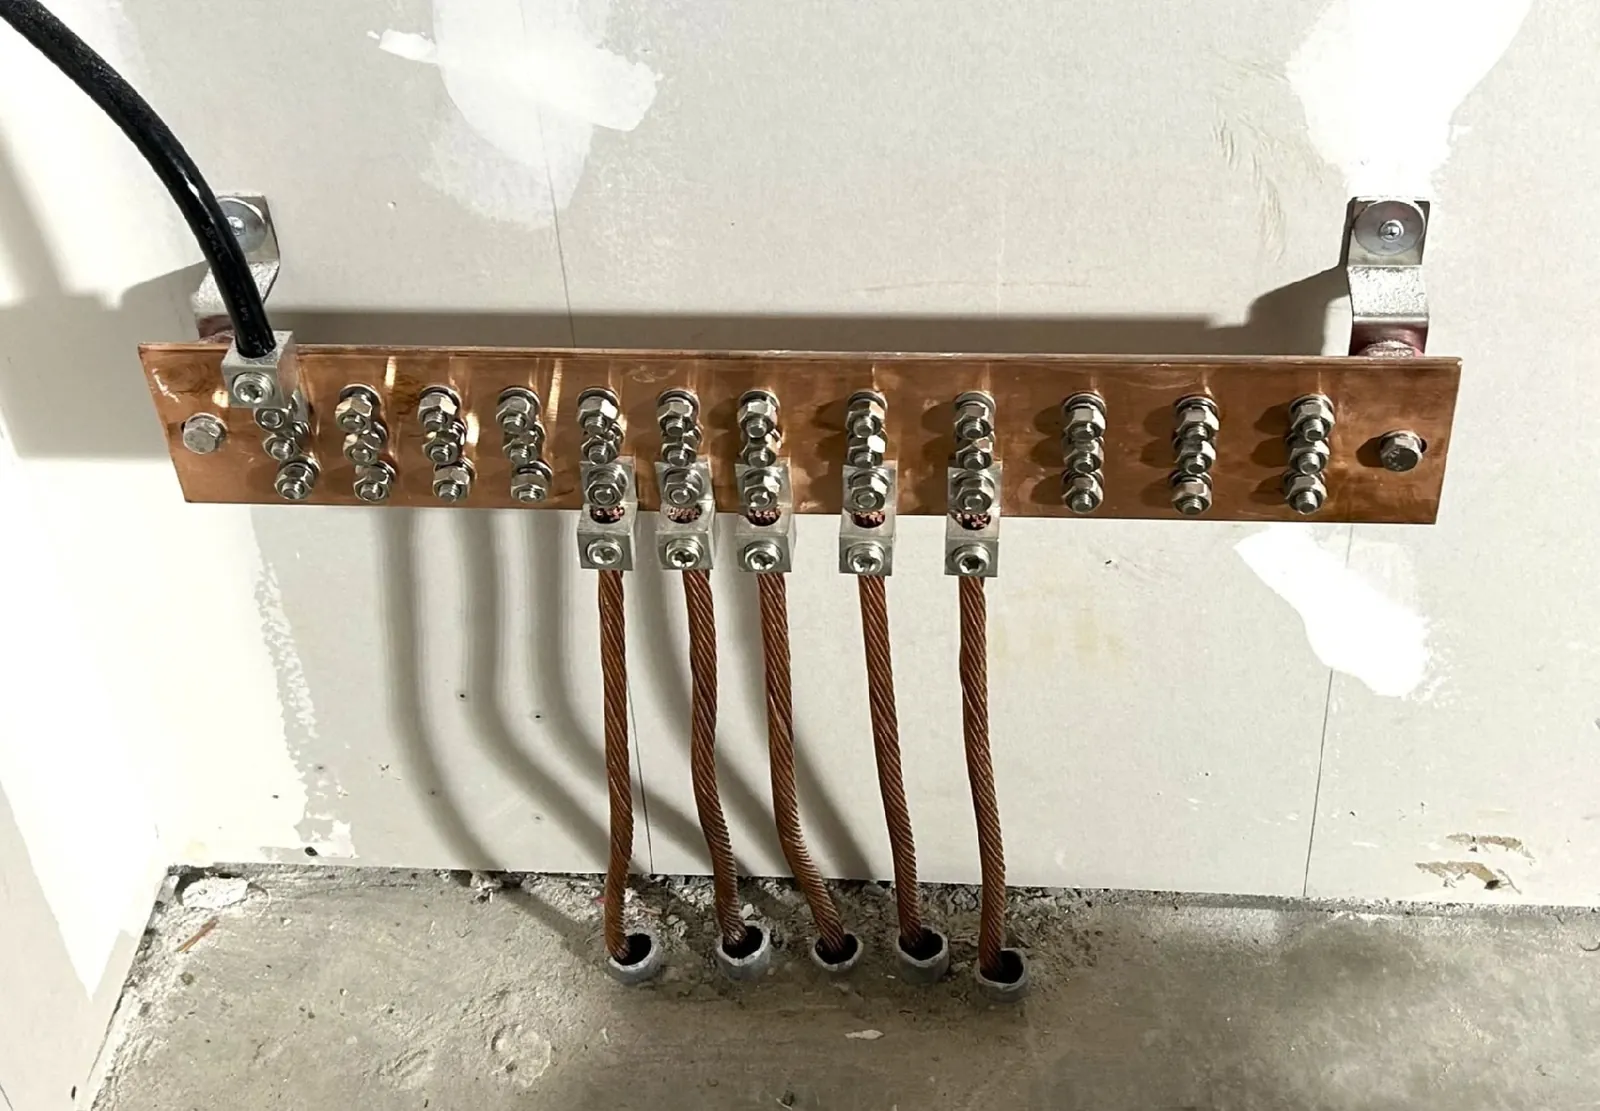
Preparing the grounding path
Installers clean contact points of paint, rust, or oxidation before tightening clamps. Conductive grease prevents corrosion, ensuring long-term low-resistance contact. Skipping cleaning creates insulation that blocks fault current.
Maintaining the connection order
Professionals bond the grounding electrode conductor to the neutral bus. This order follows National Electrical Code requirements to ensure the entire system remains referenced to the earth’s potential. Neutral and ground wires must remain distinct outside the main panel to prevent stray current.
Common grounding issues and fixes
If you notice your lights flickering when a large appliance starts, your grounding or neutral path may be unstable.
| What you notice | What it means | What to do first | How to stop it |
|---|---|---|---|
| Loose clamp | High resistance | Tighten clamp | Use lock washers |
| Corroded wire | Weak path | Replace wire | Apply anti-oxidant |
| Warm panel | Fault current | Call electrician | Check for shorts |
| Humming noise | Ground loop | Check appliances | Isolate equipment |
| Loose pipe bond | Broken path | Install jumper | Test continuity |
Legal standards and safety rules
The standards for electrical safety are defined by the National Fire Protection Association in the National Electrical Code, which is adopted by most local jurisdictions in the United States. These rules specify the minimum size of the grounding electrode conductor based on the size of your service entrance conductors. Never attempt to modify your main service grounding system if you don’t have the proper permits, as this can void your home insurance policy and create significant legal liability.
The true costs of grounding
Grounding costs vary based on the complexity of your home’s electrical system and the local soil conditions. A simple replacement of a loose ground clamp might cost only the price of a new clamp and a few minutes of labor.
However, installing a new grounding electrode system in rocky soil can require specialized equipment like a jackhammer or a core drill, significantly increasing the cost. You should compare quotes from at least three licensed electricians to get an accurate estimate for your specific property.
Long-term system maintenance
To keep your system safe, perform a visual inspection of your exterior ground rod and clamp once a year. Look for signs of ground movement, such as soil erosion around the rod or the wire pulling away from the clamp. If you notice the ground wire has become frayed or the clamp is visibly covered in green corrosion, you should clean it or replace it.
When to avoid DIY methods
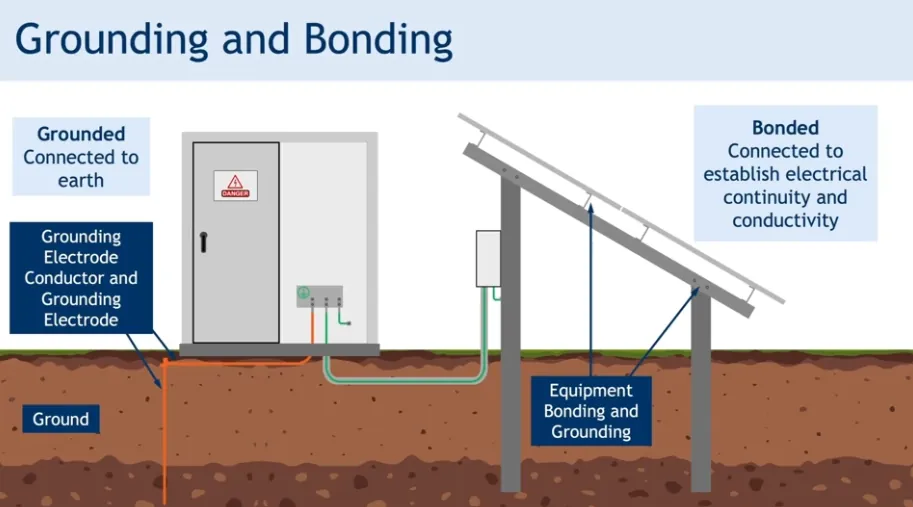
You shouldn’t attempt to modify or expand your electrical grounding system if you aren’t comfortable working with the main service panel. If your home has an older “split-bus” panel or if you see signs of heat damage on your main service wires, the system requires a professional assessment.
Furthermore, if you’re installing a new grounding system for a sub-panel, you must follow strict rules regarding the separation of neutral and ground wires. Always defer to a licensed electrician for any work involving the main service entrance or the primary grounding electrode.
Frequently asked questions
How deep must a ground rod be?
A ground rod must be driven at least 8 feet into the earth to ensure proper contact with moisture. If the rod hits rock before this depth, it can be driven at an angle.
Can I use a metal pipe for grounding?
You can use a metal water pipe as a grounding electrode if it’s in direct contact with the earth for at least 10 feet, provided it’s supplemented by an additional grounding electrode. It must be bonded to the main panel.
Is it safe to touch a ground wire?
It isn’t safe to touch a ground wire because it could be carrying current during a fault. Always treat all wires in your electrical panel as live and dangerous.
How do I know if my home is grounded?
You can verify your home is grounded by checking for a copper wire running from your panel to a metal pipe or a rod outside. If you find none, consult an electrician.
What happens if the ground wire breaks?
If the ground wire breaks, your home’s metal components lose their safety path to the earth. This increases the risk of electric shock if an appliance develops a short circuit.
Does the ground wire need a specific color?
The ground wire is typically bare copper, green, or green with yellow stripes. These colors are standard under the National Electrical Code to distinguish them from current-carrying wires.
Conclusion
Start by locating your main grounding electrode near your service panel to verify it’s secure and free of corrosion. A properly grounded home will show stable voltage readings and have secure connections at all points. If you see charred wires or feel heat near the panel, stop immediately and call a licensed electrician.
