
The solution casting method creates polymer films by dissolving a polymer in a solvent and pouring the mixture onto a flat surface to evaporate. As the liquid leaves, the remaining polymer chains settle into a solid, uniform sheet. This simple process uses gravity and controlled drying to produce a smooth, consistent finish.
Materials used in the solution casting method
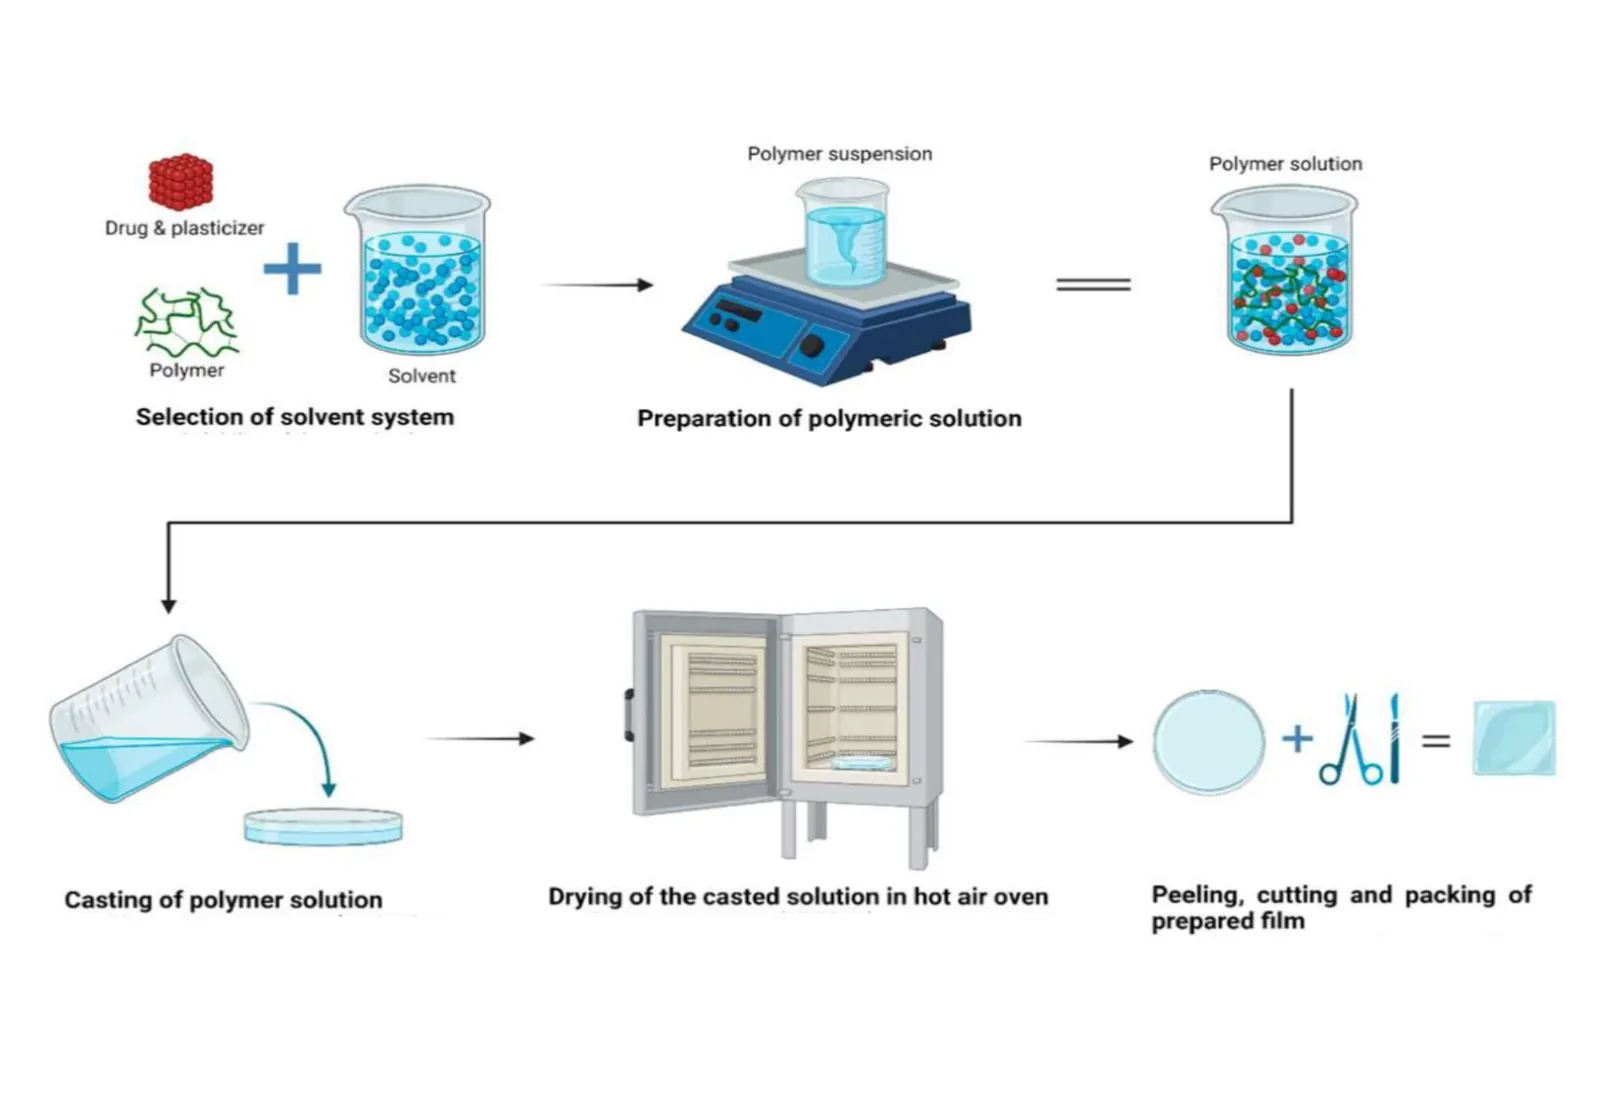
The quality of the final film depends on the tools and raw materials used during the process. If you use a tool meant for high-viscosity resins on a thin solution, the result will be uneven. Always ensure your tools are appropriate for the viscosity of your solution; using the wrong tool leads to bubbles or tearing.
| Part or input | What it does | What you notice when it goes wrong |
|---|---|---|
| Polymer resin | Provides the structural base | Film becomes brittle or weak |
| Solvent | Dissolves the polymer resin | Cloudy spots or thick patches |
| Glass substrate | Holds the liquid flat | Film sticks or cracks upon removal |
| Doctor blade | Levels the liquid thickness | Inconsistent thickness across the surface |
| Drying oven | Evaporates the solvent | Bubbles trapped inside the film |
Steps in the solution casting method for polymer films
- Prepare the polymer solution by mixing the resin into the solvent at a ratio appropriate for your specific material type.
- Stir the mixture until it reaches a uniform consistency, which usually takes 30 to 60 minutes depending on the polymer’s molecular weight and the batch size.
- Pour the liquid onto a clean, level glass plate, ensuring you use enough volume to cover the desired area without spilling over the edges of the substrate.
- Draw the doctor blade across the glass at a steady speed to set the initial wet thickness, which typically ranges from 100 to 500 microns.
- Place the plate into a controlled drying environment, setting the temperature to 10 degrees Celsius below the solvent’s boiling point to prevent rapid, uneven evaporation.
- Allow the film to dry for 2 to 24 hours, depending on the solvent volatility and the required final thickness, until it’s completely dry to the touch.
- Carefully peel the finished polymer film from the glass substrate, using a thin blade if necessary to lift the edges without causing any tears or creases.
Why process control determines film quality
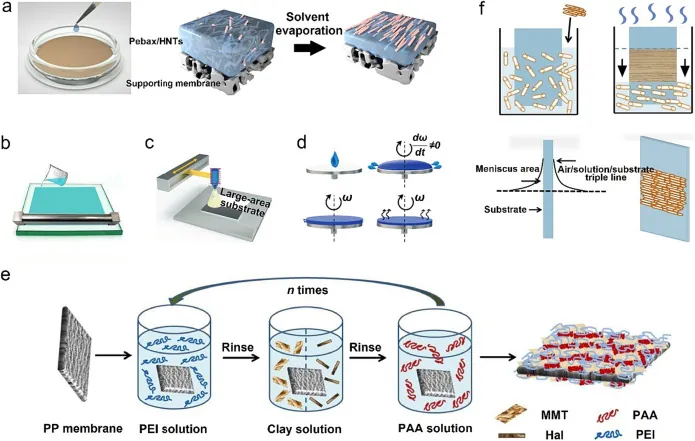
The connection between the evaporation rate and the film’s physical properties is the most critical part of this method. If the solvent leaves the mixture too quickly, the polymer chains don’t have enough time to arrange themselves into a stable structure. This results in internal stress, which causes the film to curl or crack later. A slow, steady evaporation ensures the molecules pack tightly, creating a film that’s strong and flexible.
Temperature variations in the drying environment are the most common cause of failure. If one side of the film dries faster than the other, the surface will ripple or develop a skin that traps solvent underneath. This trapped solvent remains as a liquid pocket, which weakens the entire structure and ruins the transparency of the film. To avoid this, you must keep the airflow and temperature constant across the entire surface.
Surface preparation also plays a massive role in the final result. Any microscopic dust or oil on the glass will prevent the polymer from adhering evenly, leading to holes or “fish-eyes” in the finished sheet. If you see these defects, it’s usually because the substrate wasn’t cleaned thoroughly before pouring. A perfectly level surface is required, as even a one-degree tilt will cause the liquid to pool on one side.
Variables in the casting environment
What you control
- The amount of polymer added to the solvent.
- The speed at which you move the doctor blade.
- The temperature and humidity of the drying area.
- The cleanliness of the glass casting surface.
Fixed by design
- The chemical compatibility of the solvent and polymer.
- The boiling point of the chosen solvent.
- The minimum thickness limits of the polymer grade.
If you require specific chemical resistance or extreme heat tolerance, you must use industrial-grade equipment and specialized ventilation systems. Handling volatile solvents often requires professional-grade fume hoods and safety gear. If you’re working with hazardous chemicals, consult your local safety office to ensure your workspace meets legal ventilation requirements before you start.
Improving the casting outcome
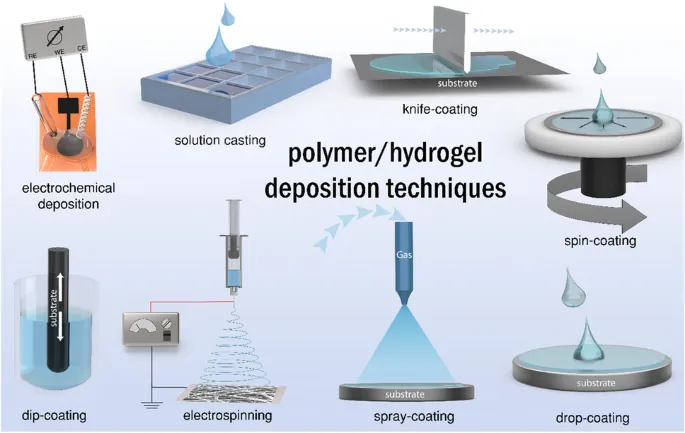
Achieving a high-quality film requires consistency in every batch. If you notice the film is too thin, increase the gap on your doctor blade by 50 microns for the next attempt. Always record the exact drying time and temperature for every session, as these two values determine the final clarity of the film. A logbook helps you identify which environmental change caused a specific defect in your previous trials.
Most beginners fail by rushing the drying phase. If you introduce heat too early, the surface skin sets before the solvents underneath can escape, leading to trapped bubbles or “pinholing.” If you see these micro-voids, lower your ambient temperature by five degrees and extend the drying time by twenty minutes.
Keep your workspace free of drafts, as moving air creates uneven drying patterns that are impossible to fix once the film sets. If you’re working in a humid climate, consider using a dehumidifier to keep the air around the film dry.
High humidity often causes the polymer to turn white or opaque as it dries. Finally, always clean your glass plates with a residue-free solvent before every single pour. Even a fingerprint can cause the film to pull away from the surface during curing.
Related guides
- How to Hide Office in Living Room: 5 Fast Design Solutions
- 10 Best Wood Workshop Heaters for Reliable Heating Solutions
- 5 Best Light Bulbs for Pump House Lighting Solutions in 2026
Frequently asked questions
How long does it take to dry a polymer film?
The drying time typically ranges from 2 to 24 hours, depending on the solvent’s volatility and the film’s thickness. You can check if the film is ready by gently touching the edge with a gloved finger; if it leaves no mark and feels firm, the solvent has fully evaporated.
Why is my polymer film cloudy?
Cloudiness usually happens because the solvent evaporated too quickly or the environment had high humidity during the process. Ensure your drying oven is set at least 10 degrees Celsius below the solvent’s boiling point to allow the polymer to stabilize slowly without trapping moisture or solvent vapors inside.
Can I reuse the glass substrate?
Yes, you can reuse the glass substrate as long as it’s cleaned thoroughly with a compatible solvent after every single use. Any leftover residue from a previous batch will create surface defects like dimples or bubbles in your next film, so inspect the glass under a bright light before you begin.
What happens if the surface isn’t level?
An unlevel surface causes the polymer solution to pool on one side, resulting in a film that’s too thick on one edge and too thin on the other. Use a spirit level on your casting table before you pour to ensure the liquid spreads evenly and reaches the target thickness across the plate.
Is it safe to cast films at home?
It’s generally not safe to cast films at home because many solvents release harmful vapors that require professional ventilation. You should only perform this process in a lab or a workspace equipped with an industrial-grade fume hood to avoid inhaling toxic fumes or creating a fire hazard.
Does the thickness of the film matter?
Yes, the thickness determines the flexibility and strength of the final product, which you control by adjusting the doctor blade gap. If your application requires high durability, you must measure the thickness with a micrometer after drying to confirm it meets the specific requirements of your project.
How do I prevent bubbles in the film?
Bubbles form when you pour the solution too quickly or stir it in a way that traps air, so always let the mixture sit for 10 minutes before casting. Allowing the solution to rest lets the trapped air bubbles rise to the top and pop, resulting in a much smoother and clearer finish.
Conclusion
Once your film has fully dried, carefully peel it from the surface to inspect the texture. You’ll find that small changes in the room’s temperature or the drying speed can create different results. Don’t be afraid to experiment with these settings, as they’re key to perfecting your very own custom materials.
