
Replacing a gas cylinder in office chair mechanisms means knocking the old lift free from the seat plate and the wheelbase with a rubber mallet. The entire repair takes about 15 to 30 minutes, costs only the price of a generic replacement piston, and rates as medium effort because metal parts stick together under body weight. You must have the correct diameter replacement cylinder on hand before taking anything apart.
Tools to replace your office chair cylinder
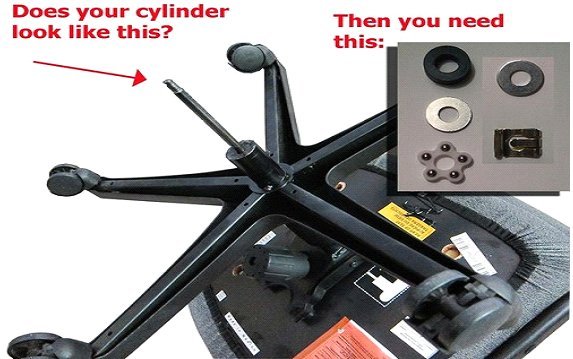 Photo: www.coopersystem.com.br on Google
| Item | How much | Why it’s needed | A substitute |
|---|---|---|---|
| Replacement cylinder | 1 unit | Restores lift function to chair | none — don’t swap this |
| Rubber mallet | 1 tool | Knocks parts free without damage | Wood block with steel hammer |
| Pipe wrench | 1 tool | Grips cylinder body to twist | Locking pliers with extension |
| Penetrating oil | 3-5 squirts | Loosens tight metal friction joints | none — don’t swap this |
| Old towel | 1-2 rags | Protects floor and catches grease | Cardboard drop sheet |
| Work gloves | 1 pair | Protects hands from sharp metal | Thick garden gloves |
Before you start
- Push down the lift lever completely to let the seat sink to its lowest mechanical point.
- Clear a 5-by-5-foot floor space and lay down your drop cloth to catch dirty black grease.
- Pull the chair caster wheels away from office rugs so oily residue doesn’t ruin the fabric.
- Skipping the penetrating oil soak causes the most trouble because factory taper joints lock tight from years of daily sitting.
- If your chair features an integrated mechanical shell where the cylinder is fully welded to the tilt mechanism, stop immediately; consult a professional office furniture repair service instead of forcing the joint.
Step by step
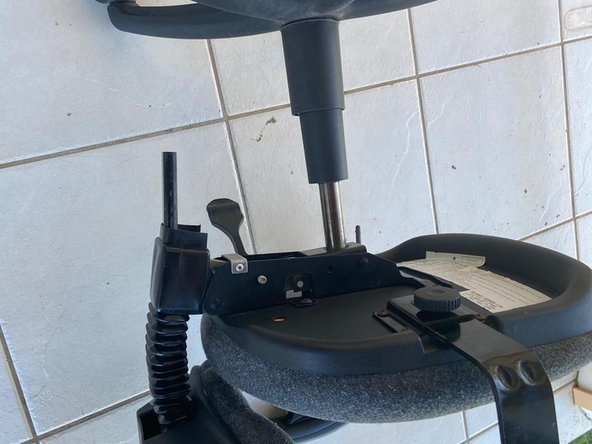 Photo: www.ifixit.com on Google
- Lay the chair sideways on your soft cloth to expose the bottom mechanism. The chair rests steady on its side so you can reach the lift tube easily without it rolling away.
- Spray three bursts of penetrating oil around the connection where the piston enters the wheelbase socket. Let the oil sit for 10 minutes so it creeps into the tight metal seam.
- Twist the cylinder body firmly using an 11-inch or larger pipe wrench clamped near the top edge. The grip is secure once the teeth bite into the outer metal shell without slipping around.
- Strike the underside of the wheel star base with your rubber mallet, hitting close to the central hub. Two to four solid strikes push the wheelbase right off the wide bottom tube.
- Apply four drops of oil around the top joint where the small cylinder shaft locks into the seat mechanism. Wait 5 minutes to allow the penetrating oil to work into the tapered joint.
- Strike the seat bottom plate directly next to the cylinder tip using angled mallet blows directed outward. The seat plate separates from the lift column once the tapered bond breaks free from the metal.
- Confirm your new replacement lift meets standard durability benchmarks, such as the ANSI/BIFMA X5.1 office chair standards, before sliding it into place. The industry labels stamp these safety ratings directly onto the outer metal sleeve.
- Drop the wide bottom end of the new cylinder directly into the center opening of your five-star wheelbase. The tube slides in smoothly and rests upright without requiring extra screws or hardware.
- Lower the seat mechanism directly onto the top pin of your new cylinder, aligning the hole straight down. The chair body stays level once the receiver sleeve settles over the piston top.
- Sit down squarely on the chair seat cushion using normal body weight to seat the tapers. You’ll feel the assembly settle downward by half an inch as the friction joints lock securely.
How to know it worked
The chair stands level without leaning sideways, and the base turns smoothly across 360 degrees without scraping the floor. Pull the height lever while standing up; the seat should rise rapidly and silently to its top limit in about two seconds. Sit down firmly in the center; the cylinder must hold your position immediately without dropping down a fraction of an inch. A sharp metallic clunk or a slow downward sinking indicates the taper has slipped or the internal seal failed. If the seat wobbles loosely when you shift weight, the top shaft isn’t seated fully into the tilt plate receiver. Stand up and sit down three separate times to verify the height stays locked.
If something goes wrong
| What happened | Why | What to do |
|---|---|---|
| Cylinder won’t twist | Pipe wrench teeth are dull | Use larger wrench with cheater pipe |
| Wheelbase won’t release | Rust locked the joint together | Soak seam with penetrating oil overnight |
| New lift sinks instantly | Release button pin is stuck | Adjust seat lever bracket clearance screw |
| Base drags on floor | Replacement cylinder column is too long | Order cylinder with shorter outer casing |
| Chair tilts to side | Mechanism or base socket is cracked | Inspect the base socket and mechanism plate for structural damage |
How often to do this
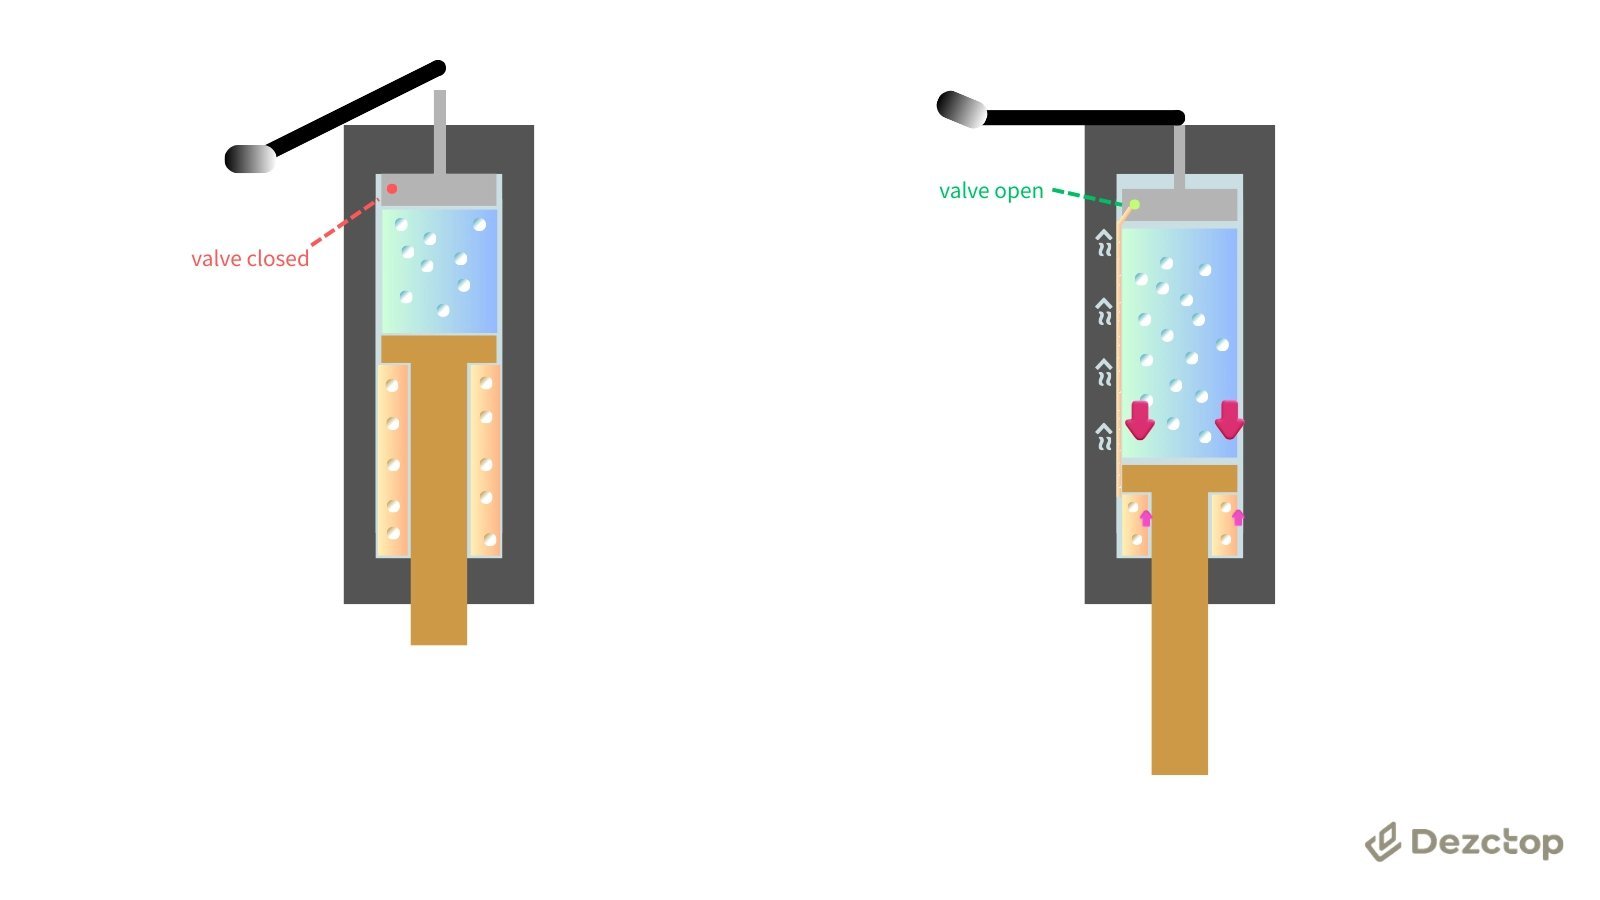 Photo: dezctop.com on Google
Replace the gas cylinder only when the original piston loses pressure and drops during use. Most standard desk chairs go through this repair once every four to seven years under daily eight-hour use. Two conditions change this timeline drastically: user body weight and operating habits. Users near the upper weight rating of the hardware cause internal rubber seals to wear faster, requiring a swap in two to three years. Dropping heavily into the seat cushion shocks the hydraulic valves, which cuts component life in half compared to sitting down gently.
Frequently asked questions
Can I replace a chair cylinder myself?
Yes, anyone can do it using basic hand tools like a mallet and pipe wrench. The mechanical joints hold together by tapered friction rather than threaded bolts, so you don’t need specialty equipment. Just take care when striking metal parts near plastic wheel housings.
Why does my office chair keep sinking?
Your cylinder seals are worn out, allowing internal pressurized nitrogen gas to leak past the chamber rings. When you sit down, the mechanical pressure forces fluid through damaged gaskets because the chamber can no longer maintain structural lift. A sinking cylinder can’t be refilled safely and requires complete replacement.
How long does a chair cylinder swap take?
About 20 minutes from start to finish under normal conditions. If the old metal parts have bonded from rust or long use, waiting for penetrating oil to loosen the taper joints can stretch the whole repair job to roughly an hour.
Is it safe to open a gas cylinder?
No, never attempt to puncture, cut, or open the steel housing of an office chair cylinder. The internal casing holds high-pressure nitrogen gas that can cause severe physical injury if breached with tools. Discard the old sealed unit whole at an approved scrap recycling facility.
What happens if I buy the wrong cylinder size?
Your chair will sit either uncomfortably tall or too low for your work desk. While the standard outer diameter across office furniture is 2 inches (50 mm), the travel stroke length varies between models, so measure your original casing before ordering a replacement.
Does the chair brand matter for replacement parts?
No, most standard office chairs use universal class-4 cylinders with standard tapered shafts. Premium ergonomic brands sometimes use proprietary activation cables or unique base depths, so check your manufacturer label underneath the seat before buying third-party generic hardware online.
Related guides