
To find the best kitchen faucet pull-down spray head replacements, match the thread size and finish of your existing unit, as universal parts are rare. Major brands like Delta, Moen, and Kohler use proprietary connections, so you must use the specific part number from your manual to ensure a perfect seal.
Checking your kitchen faucet pull down parts
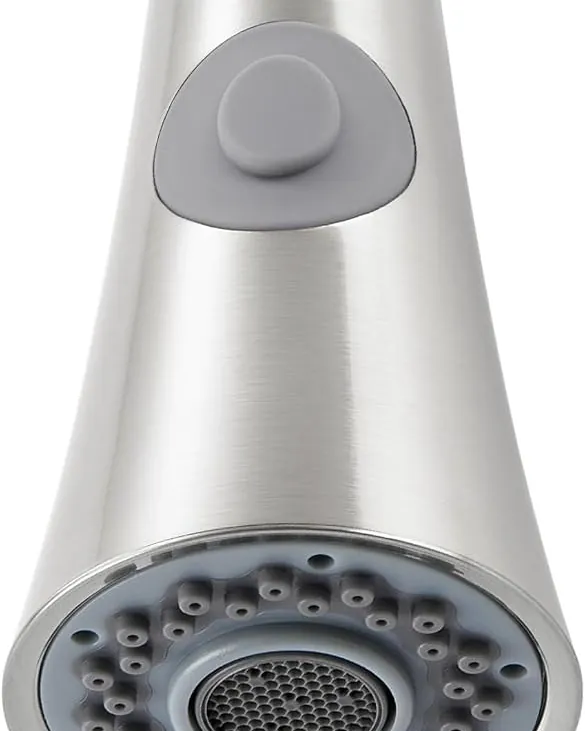
A common mistake is buying a generic replacement head that looks correct but fails to thread onto your hose. Most pull-down faucets use a standard 1/2-inch or 3/4-inch threaded connection, but the internal diameter and the way the hose docks into the spout vary by manufacturer.
Before purchasing, verify your faucet’s brand and model number. Many manufacturers provide official replacement parts documentation to help you match the correct spray head to your system, as these components are often tested for flow rates and material safety.
It’s helpful to understand that the spray head isn’t just a nozzle. It contains a check valve and an aerator, which help maintain water pressure and reduce splashing. If you have low water pressure, the issue might be a clogged aerator inside your current head rather than a broken unit.
If the water flow is weak, try soaking the head in a mixture of white vinegar and water for one hour before buying a replacement. If the flow doesn’t improve, the internal components have likely failed.
How to Install a New Spray Head
Replacing a spray head is a simple task that requires no special plumbing training. Follow these steps to ensure you don’t damage your hose or leak water under your sink.
- Turn off the water supply valves under your kitchen sink.
- Pull the spray head out until you reach the connection point.
- Use a soft cloth to grip the hose firmly so it doesn’t retract while you work.
- Unscrew the old spray head by turning it counter-clockwise.
- Check the rubber washer inside the hose; if it looks cracked or flattened, replace it with a new one of the same size.
- Screw the new spray head onto the hose by hand, turning it clockwise until it’s snug.
- Turn the water back on slowly and test for leaks around the connection.
If you find that the head doesn’t screw on smoothly, don’t force it. A cross-threaded connection can ruin the metal threads on your hose, which would then require a full hose replacement. If the new head feels tight, back it off and try again to align the threads properly.
Best Kitchen Pull Down Spray Head Replacements Compared
| Feature | What to look for | Why it matters |
|---|---|---|
| Thread Size | 1/2-inch or 3/4-inch | Prevents leaks and ensures a secure fit |
| Finish | Brushed nickel, chrome, or matte black | Must match your existing faucet for aesthetics |
| Flow Rate | 1.5 to 2.2 GPM | Determines how fast you can fill a pot |
| Button Type | Toggle or push-button | Affects how easily you switch between spray and stream |
| Docking | Magnetic or weighted | Keeps the head from sagging over time |
Before buying, unscrew your current head and check the connection point. If the threads are recessed inside the hose rather than protruding from the head, you likely need a proprietary adapter. Most universal replacements fail because they ignore this specific internal geometry.
Aim for a flow rate that matches your local water pressure. If you live in a high-rise building with restricted pressure, choose a 1.5 GPM model to maintain velocity. If your home has standard residential pressure, a 2.2 GPM head prevents the frustratingly slow fill times that plague low-flow alternatives.
Match the finish by checking the manufacturer’s code on the faucet base. A “brushed nickel” from one brand often looks like “satin stainless” from another.
Test your docking mechanism by pulling the head out six inches and releasing it. If it hangs lower than the spout, the weight is insufficient. You should add a secondary weight to the hose line under the sink to force a clean, flush retract.
Prioritize toggle switches over push-buttons if you frequently wash large pans. A toggle stays locked in spray mode even when you turn the water off. Push-buttons reset to stream mode every time the pressure drops, forcing you to manually reset the spray setting every time you reach for the faucet.
Getting the Best Results
Experienced users know that the secret to a long-lasting spray head is proper cleaning. Hard water deposits can build up on the rubber nozzles and cause the spray pattern to become uneven or blocked. The frequency of cleaning depends on your water usage, so consult your owner’s manual for maintenance guidance.
If the spray pattern is already distorted, submerge the head in a 50/50 mix of white vinegar and water for one hour. Never use abrasive scrubbers on the spray head finish. These tools strip the protective coating and invite permanent corrosion.
If you’re replacing a head because the docking mechanism is loose, check the weight under your sink. Over time, the weight can slide down the hose, preventing it from pulling the head back into the spout. If the head hangs low, move the weight three inches higher up the hose to increase the pull. Ensure the weight clears all pipes and garbage disposal cables when the hose is fully extended.
If you’re wondering if your faucet is compatible with a third-party head, check the hose connection. If it uses a proprietary quick-connect clip, you must use the original manufacturer’s part. Using a universal adapter on a proprietary line often leads to slow leaks that rot your cabinet floor.
Test the connection by turning the water on at half-pressure first. If you see a bead of water forming at the collar, the seal is compromised. You must disconnect it immediately and revert to the factory-supplied head to avoid water damage. If the connection is a standard threaded fitting, you can safely swap brands, provided the thread pitch matches the hose diameter.
Fixing Common Spray Head Issues
| What you notice | What it usually means | What to do first |
|---|---|---|
| Weak water flow | Clogged aerator | Soak the head in white vinegar |
| Leaking at connection | Worn rubber washer | Replace the washer with a new one |
| Spray pattern is uneven | Limescale buildup | Clean nozzles with a soft toothbrush |
| Head won’t dock properly | Misplaced weight | Reposition the weight on the hose |
If your flow remains weak after soaking, check the diverter valve inside the faucet body. A stuck valve often mimics a clogged aerator but requires a full cartridge replacement instead of a simple soak.
When replacing a washer, match the thickness exactly. A washer that’s even 1/16th of an inch too thin will fail to create a watertight seal, forcing you to overtighten the nut and risk cracking the plastic threads.
If cleaning the nozzles with a toothbrush fails, the blockage is likely inside the spray head assembly. Use a needle to clear individual ports, but never force it deeper than a quarter-inch to avoid puncturing the internal rubber diaphragm.
For docking issues, ensure the hose weight is positioned at the lowest point of the loop under the sink. If the weight hits the cabinet floor or tangles with supply lines, the head will hang loose.
Distinguish between a worn washer and a cracked housing by drying the connection thoroughly with a paper towel. If moisture appears on the threads, replace the washer. If water beads on the head itself, the body has developed a hairline fracture and must be replaced entirely.
Legal and Safety Standards
In the United States, kitchen faucets and their components must comply with specific standards regarding lead content and water efficiency. The Safe Drinking Water Act requires that plumbing fixtures are “lead-free,” meaning they contain less than 0.25% lead by weighted average. When you purchase a replacement head, look for the NSF/ANSI 61 certification mark on the packaging. This ensures the materials in contact with your drinking water are safe and won’t leach harmful chemicals into your supply.
If your faucet is part of a high-end system, it may have a specific flow rate limit set by local building codes. While most residential spray heads are rated at 1.8 or 2.2 gallons per minute (GPM), some areas require lower flow to conserve water.
Always check your local plumbing codes if you’re unsure about the GPM requirements for your home. Using a head with a significantly higher flow rate than your original could theoretically cause pressure issues in older plumbing systems.
Many homeowners mistakenly assume that all universal replacement heads fit every faucet body. This error often leads to stripped threads or leaks at the connection point. Before buying, verify your faucet’s thread type, as manufacturers frequently use proprietary sizes that don’t follow standard plumbing threads. If your faucet features a pull-down sprayer, confirm the hose connection diameter.
If you live in a state with strict drought mandates, such as California, your fixtures must meet the WaterSense label requirements. These products are tested to ensure they perform well at lower flow rates. If you install a high-flow head in a restricted zone, you risk failing a home inspection during a future property sale.
You can identify your current flow rate by checking the aerator, which is usually stamped with the maximum GPM. If the stamp is missing, a simple five-second test with a measuring cup will reveal your actual output.
Maintaining Your Kitchen Hardware
Once you have installed your new spray head, simple maintenance will keep it functioning for years. Every six months, unscrew the head and inspect the connection point for any signs of debris or sediment.
If you notice a drop in pressure, remove the aerator—usually found at the very tip of the head—and rinse it under running water to clear out any trapped particles. This small step prevents the internal valves from becoming clogged, which is the most common cause of premature failure in high-quality faucets.
If you find that the finish is losing its shine, avoid harsh chemicals like bleach or ammonia. These can damage the finish and void your warranty. Instead, use mild soap and warm water to clean the surface, then dry it immediately with a soft, lint-free cloth.
This prevents water spots from forming and keeps the finish looking new. If you notice the hose itself is beginning to fray or crack, inspect it for leaks; if the inner tube is compromised, replace the entire hose assembly to avoid water damage.
When to Choose a Full Faucet Replacement
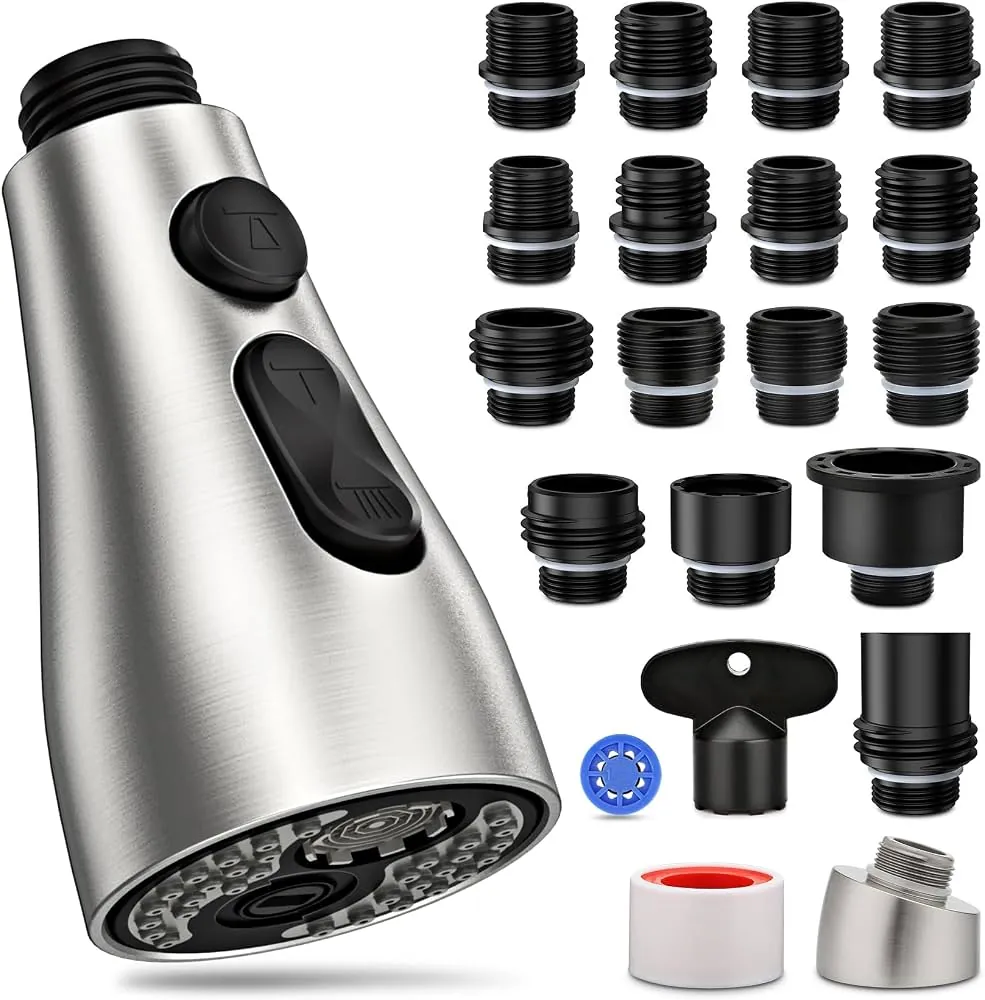
There are times when a replacement spray head isn’t enough to solve your problems. If the main faucet body is leaking from the base or the handle is loose, replacing just the spray head won’t fix the issue. In these cases, it’s often more cost-effective to replace the entire faucet unit. Additionally, if your faucet uses a proprietary, discontinued connection system that no longer has available parts, a new faucet is the only way to restore full functionality.
Look closely at the finish. If you see pitting or deep, bubbling corrosion on the metal surface, the internal brass or zinc alloy is likely degrading. Surface-level cleaning can’t reverse this structural decay. Replacing the unit now prevents a catastrophic pinhole leak that could spray water behind your backsplash or into your wall cavity.
Check the mounting nuts beneath your sink. If the metal has fused to the faucet shank due to years of mineral buildup, you’re likely to snap the supply line or crack the porcelain sink basin if you force it. If you can’t loosen the nut, stop immediately, as forcing a stuck valve is expensive relative to the cost of a professional repair.
You should also replace the entire unit if your current faucet lacks a modern ceramic disc valve. Older compression-style faucets require washer replacements when they begin to drip. If you find yourself tightening the handle more often to stop a drip, you’re wasting water and risking a sudden seal failure.
If you notice persistent dampness inside your cabinet, consult a professional to rule out slow leaks. A plumber ensures that all connections are properly sealed and that your water pressure is balanced correctly. This prevents the hidden mold growth that often follows a botched DIY installation.
Related guides
- 10 Best Kitchen Faucets for Smooth Control and Durability in 2026
- Best Smart Kitchen Gadgets in 2026
- Best Kitchen Washcloths That Dont Smell in 2026
Frequently asked questions
Can I use a universal spray head on any faucet?
No, most kitchen faucets use proprietary connections, so a universal head won’t fit. You must match the thread size and connection style of your current faucet. If you can’t find a matching part, contact the manufacturer directly for assistance.
How long should a kitchen faucet spray head last?
A high-quality spray head should last several years with regular cleaning. The actual lifespan depends on your water hardness and how often you switch between modes. In areas with very hard water, mineral buildup can shorten this lifespan.
Is it safe to replace a spray head myself?
Yes, it’s a safe DIY project as long as the water supply is turned off before you begin. You don’t need professional plumbing training to unscrew an old head and attach a new one. If you notice existing damage to the supply lines, call a plumber.
What happens if I use a spray head with a higher flow rate?
Using a spray head with a higher flow rate than your original could cause excessive splashing and may not comply with local codes. Always check the flow rate specification of your current faucet before choosing a replacement. Stick to the manufacturer’s recommended flow rate to ensure performance.
How do I know if my spray head is the cause of low pressure?
You can determine if the spray head is the problem by unscrewing it and checking the water flow from the hose. If the water flows normally from the hose but is weak through the head, the aerator is likely clogged. Soak the head in vinegar to clear the blockage.
Conclusion
Keeping your kitchen faucet in good condition starts with these simple checks, ensuring that your water flow remains steady and clean for all your daily needs. Replacing a worn spray head is a straightforward process that restores the utility of your sink without the need for complex tools or expensive professional services.