
Yes, wall ovens are designed specifically to be installed in cabinets, provided the enclosure meets the exact heat clearance and weight requirements set by the manufacturer. You can safely mount these units in custom millwork or pre-built cabinetry if you follow the structural guidelines found in the installation manual for your specific unit. Most modern kitchens can accommodate this, but the success of the project relies on three things: cabinet material strength, internal dimensions, and proper ventilation for the electrical components.
Where wall ovens fit in cabinets
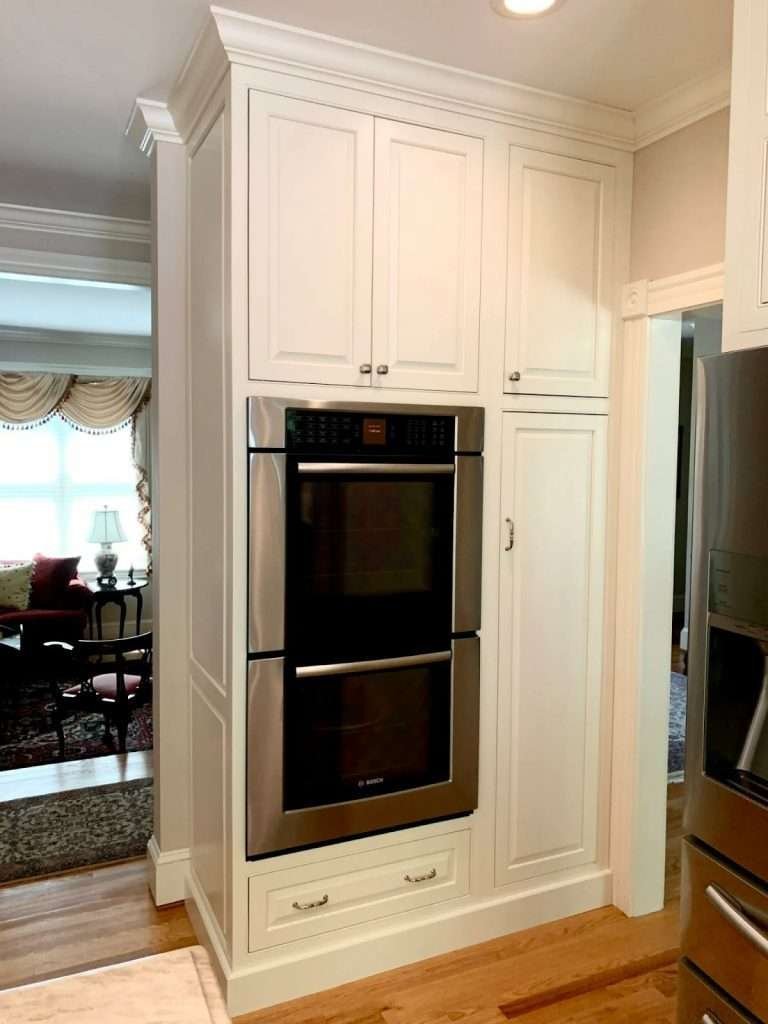
Homeowners planning a kitchen renovation often look for ways to streamline their floor plan by separating the oven from the stovetop. This approach serves people who want a more ergonomic cooking station, as it allows them to place the oven at eye level to avoid bending down. It also benefits those designing a multi-cooker kitchen, where a wall oven acts as a secondary unit alongside a range. This page is for those who already have a specific model in mind or are in the design phase of a kitchen remodel.
If you’re just looking for a simple upgrade to an existing range, this guide may be more technical than you need. The information here assumes you have access to a qualified carpenter or cabinet installer who understands structural support. If you’re a DIY enthusiast, you must possess advanced experience with heavy-duty electrical wiring and cabinet framing. Those who don’t have the tools to reinforce a cabinet base to support 150 pounds or more should hire a professional. This page serves the person who wants to ensure their cabinetry won’t sag or catch fire under the heat of a high-temperature cleaning cycle.
What decides the outcome
The most critical factor is the load-bearing capacity of the cabinet base. An oven is heavy, and the floor of the cabinet must be reinforced with plywood or metal rails to prevent it from bowing or collapsing. You should check the weight specifications in your manual and ensure the cabinet base is rated for that load.
Heat management is the second factor, as ovens require specific air gaps to prevent the surrounding wood from scorching. If you don’t leave the exact clearance specified by the manufacturer, the oven may overheat and shut down prematurely. This varies by model — check the label on the unit or the installation manual to see the required air-gap distance.
The electrical supply is the third factor that changes the result. Wall ovens often require a dedicated 240-volt circuit, which is different from a standard household outlet. If your current cabinet location isn’t near a junction box, you’ll need an electrician to run a new line. People often make the mistake of using an existing outlet, which can lead to tripped breakers or dangerous wiring conditions.
Cabinet depth is the final factor. You must ensure the cabinet is deep enough to house the entire chassis plus the required space for the door hinge swing and electrical connections. A shallow cabinet will leave the oven protruding, which looks unfinished and can be a safety hazard. Always measure the interior depth, not just the front opening, before you buy the unit.
Steps for cabinet preparation
- Turn off the power at the main circuit breaker to ensure the area is safe for work.
- Measure the cutout height, width, and depth of your cabinet exactly as listed in the manufacturer’s manual.
- Reinforce the base of the cabinet using a 3/4-inch piece of plywood or steel support brackets to hold the oven weight.
- Verify that the side walls of the cabinet are plumb and level; an uneven cabinet will cause the oven door to seal poorly.
- Drill a hole through the cabinet wall or back panel for the electrical conduit, ensuring it aligns with your home’s junction box.
- Attach the oven to the cabinet frame using the provided mounting screws, as these prevent the unit from tipping when the door is opened.
- Confirm the oven is secure by pulling gently on the handle; there should be zero movement in the frame.
- Restore power at the breaker and run a test cycle to confirm the oven heats correctly without blowing the circuit.
The judgement call that separates a professional job from a poor one is the final leveling of the unit. If the oven isn’t perfectly level, the internal convection fans may vibrate, and the door won’t lock during self-cleaning. Always use a spirit level on the oven floor before tightening the final mounting screws. If the cabinet feels flimsy, don’t proceed, as the Underwriters Laboratories safety requirements for household cooking appliances demand a stable, non-combustible base to maintain structural integrity.
Variations in installation types
The way you mount an oven depends on the cabinet style and the specific unit design. Use this table to understand the common scenarios.
| Situation | Action Required | Currency | What to watch for |
|---|---|---|---|
| Flush mount | Recess cabinet face | High effort | Cabinet heat shield |
| Standard mount | Attach to frame | Moderate effort | Leveling base |
| Stacked ovens | Double support frame | High effort | Total weight limit |
| Retrofit cabinet | Expand opening | High effort | Wiring access |
| Custom millwork | Add ventilation gap | Moderate effort | Airflow clearance |
Most installers fail by ignoring the weight distribution of stacked units. If your total appliance weight exceeds 150 pounds, a standard shelf will sag over time. You must install a reinforced steel support frame to prevent structural failure.
Distinguish between a retrofit and a new build by checking your junction box location. If the power supply is buried behind the oven chassis, you’ll lack the clearance required for a flush fit. In this case, move the junction box to an adjacent cabinet. If you force the fit, you risk crimping the conduit and creating a fire hazard. Always prioritize airflow; ensure your custom millwork meets the specific ventilation clearance requirements listed in your oven’s installation manual.
What separates a good result from a poor one
Structural stability and support
Professional installers always prioritize the base support before sliding the unit into place. A good result means the oven remains completely still when you pull on the handle, even with the door fully open. Beginners often skip the reinforcement step, which causes the cabinet floor to flex under the weight of a heavy turkey or a cast-iron dish. This flexing can eventually pull the mounting screws out of the wood, leading to the oven tilting forward during use. Always use the mounting screws provided by the manufacturer to secure the oven to the cabinet face frame.
Heat dissipation and airflow
A quality installation respects the need for the unit to breathe during the cooling cycle. Experienced installers check that the cabinet has the manufacturer’s required air vents, which allow hot air to escape from the back of the chassis. A poor result occurs when someone seals the oven too tightly inside a cabinet, causing the internal electronics to overheat. You can tell if your installation is good by checking the temperature of the surrounding cabinet wood after an hour of use at 400 degrees Fahrenheit.
What goes wrong, and what to do
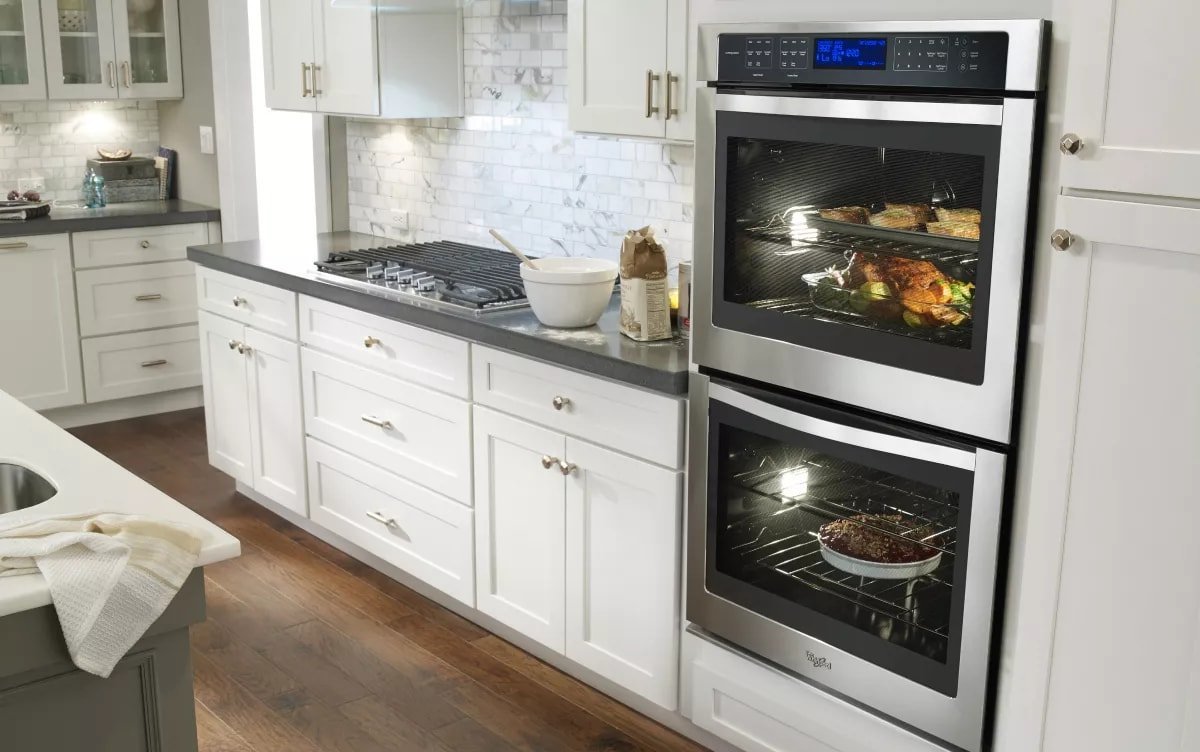
Troubleshooting depends on identifying the symptom early. Use this table to manage common issues safely.
| What you notice | What it usually means | What to do first | How to stop it |
|---|---|---|---|
| Oven tilts forward | Loose mounting screws | Re-attach to studs | Use heavy-duty anchors |
| Door won’t close | Unit isn’t level | Re-level the base | Check floor plumb |
| Breaker trips | Circuit overload | Check wire gauge | Hire an electrician |
| Wood feels hot | Poor ventilation | Add air vents | Increase gap size |
| Fan noise | Vibrating chassis | Tighten screws | Shim the base |
Most users mistake a tripping breaker for a faulty appliance. If the breaker trips immediately upon activation, check the wire gauge against the manufacturer’s amperage requirements. Using 14-gauge wire on a 20-amp circuit is a common, dangerous error that risks fire.
If your oven door fails to seal, verify the floor plumb before adjusting the hinges. If the floor is off by more than 1/8 inch, the frame will twist regardless of hinge tension. Always use a spirit level along the front-to-back and side-to-side axes of the base. If the base isn’t level, you must shim the entire base support to ensure it’s flat and level. Never force a door shut, as this often cracks the internal glass panel.
The rules that apply
Building codes and safety standards dictate how you manage heat near combustible materials. According to the National Electrical Code, any hardwired appliance must have a clearly accessible disconnect or breaker. You must verify that your local jurisdiction allows the specific cabinet materials you’re using, as some areas require fire-resistant liners for high-heat built-in units.
If you’re working with gas-powered wall ovens, the rules are much stricter regarding gas line placement and leak detection. You should check the installation manual for the specific BTU requirements and venting needs, as these often require professional certification to handle safely. If you don’t have experience with gas plumbing, you must hire a licensed plumber to connect the supply line. Never attempt to modify the gas regulator or the intake pipe yourself, as a leak in a confined cabinet space creates a significant fire and explosion risk.
Always refer to your local building department’s website to confirm if a permit is required for replacing or installing a new built-in oven, as this varies by city and county. A common mistake is assuming a simple swap-out requires no paperwork. If the new unit draws more amperage than the existing circuit, you must upgrade the wire gauge to avoid a fire hazard. If the breaker trips immediately upon startup, stop and call an electrician; your circuit is likely undersized for the new load.
What it costs you
The real cost of this project is a mix of labor, materials, and potential electrical upgrades. While the oven itself is the main expense, the installation often requires a carpenter to modify existing cabinets, which can range from a modest fee to a full cabinet refacing project. If your electrical panel needs a new circuit, expect to pay for the electrician’s time and the cost of the heavy-duty copper wire required for 240-volt appliances.
The biggest hidden cost is the potential for damage to your kitchen if the oven is installed without proper heat shielding. Replacing scorched or warped cabinets is far more expensive than installing the correct ventilation kit or insulation at the start. When planning your budget, set aside 20 percent of the oven’s purchase price to cover the cost of trim kits, mounting hardware, and potential carpentry adjustments. If you’re hiring professionals, ask for a quote that includes the disposal of your old appliance, as some installers charge extra for the heavy lifting and recycling fees involved in removing old, bulky units.
Keeping it right afterwards
Maintaining your built-in oven requires regular checks of the seal and the mounting hardware. Over time, the heat cycles can cause screws to loosen slightly, so you should check the stability of the unit regularly. If you notice the oven door is sagging or the seal isn’t airtight, check the level of the unit first. You can usually fix this by adjusting the leveling feet or adding shims under the base of the cabinet.
Clean the air vents around the cabinet trim every time you perform a deep clean of the oven interior. Dust and grease buildup in these vents can block necessary airflow, which forces the cooling fans to work harder and reduces the lifespan of the control board. If you notice a burning smell that persists after the oven has cooled, check the space between the oven and the cabinet for debris. Never store flammable items like oven mitts or plastic containers in the drawer directly beneath or above the unit, as these areas can get much warmer than the rest of the kitchen.
When this is the wrong approach
Installing a wall oven is the wrong choice if your kitchen layout can’t support the required electrical load or the necessary ventilation. If your home has an older electrical system with limited amperage, you might be unable to support the dedicated circuit required for a modern oven. In this case, a standard slide-in range is a safer and more cost-effective alternative that doesn’t require major cabinet reconstruction.
You should also avoid this project if your cabinets are made of particle board or laminate that shows signs of moisture damage. These materials often lack the structural integrity to hold the heavy frame of a wall oven, and they may crumble under the heat and weight. If your cabinet structure is failing, don’t attempt to reinforce it. Instead, replace the cabinet unit entirely with a high-quality hardwood frame designed to support the weight of a built-in appliance. If you’re unsure about the condition of your cabinets, have a professional cabinet maker inspect them before you purchase the oven, as returning a heavy, pre-wired appliance is both difficult and expensive.
Frequently asked questions
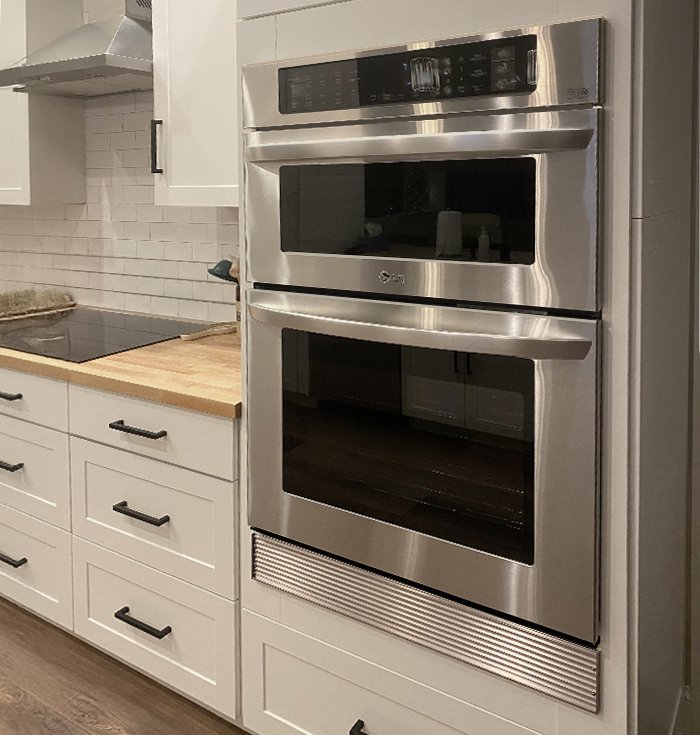
Can wall ovens be installed in cabinets made of wood?
Yes, wall ovens can be installed in wood cabinets if you provide the necessary clearance and heat insulation. You must follow the manufacturer’s instructions regarding the required air gap between the oven chassis and the wood to prevent scorching or fire hazards during high-temperature cycles.
Is it safe to install a wall oven under a countertop?
Yes, it’s safe to install a wall oven under a countertop, provided the cabinet is built to support the weight. You must ensure the oven is properly secured to the cabinet frame to prevent tipping, and that the countertop material can withstand the heat radiating from the top of the unit.
How long does it take to install a wall oven?
A standard installation takes about two to four hours if the electrical and cabinet space are already prepared. If you need to run new wiring or rebuild the cabinet base to support the unit, the job can take a full day or longer depending on the complexity of the carpentry.
What happens if the cabinet isn’t deep enough?
If the cabinet isn’t deep enough, the oven will protrude from the front, creating an uneven look and a potential safety hazard. You must ensure the interior depth matches the manufacturer’s requirements, or the door hinges may hit the cabinet face and fail to open or close properly.
Does it matter if the cabinet is level?
Yes, it matters because an unlevel cabinet prevents the oven door from sealing correctly and can cause the internal fans to vibrate. You must use a spirit level on the base of the cabinet before installing the unit to ensure the oven functions as intended and the door locks securely.
Can I install a wall oven myself?
Yes, you can do it yourself if you have experience with heavy-duty electrical wiring and carpentry. You must strictly follow the manufacturer’s installation manual and local building codes, as improper installation can lead to electrical fires or structural failure that could void your warranty.
How much weight must the cabinet base support?
The cabinet base must support the full weight of the oven, which typically ranges from 100 to 200 pounds for standard models. Check your specific oven’s manual to find the exact weight, and ensure your cabinet base is reinforced with plywood or metal rails to handle this load safely.
Wall ovens, in short
Before starting, confirm the power is fully disconnected at the breaker box and verify your cabinet measurements against the manual. A successful installation should result in a secure, level unit that sits flush with your cabinetry. If you find the cabinet base is soft or the wiring doesn’t meet local code, stop immediately and consult a professional electrician or cabinet maker to avoid damaging your kitchen or creating a fire risk.
Related guides