
Finding a puddle around the base of your toilet is a frustrating experience, but if you have discovered your toilet is leaking from tank bolts, you’re likely dealing with a worn-out rubber seal rather than a cracked porcelain fixture. This specific issue occurs when the rubber washers or gaskets that secure the tank to the bowl have deteriorated over time, allowing water to escape from the tank connection. Repairing this is a common DIY project that typically costs between $10 and $35 for parts, depending on whether you purchase a universal kit or a manufacturer-specific replacement set. Addressing this immediately prevents floor damage and keeps your bathroom area sanitary.
Key Takeaways
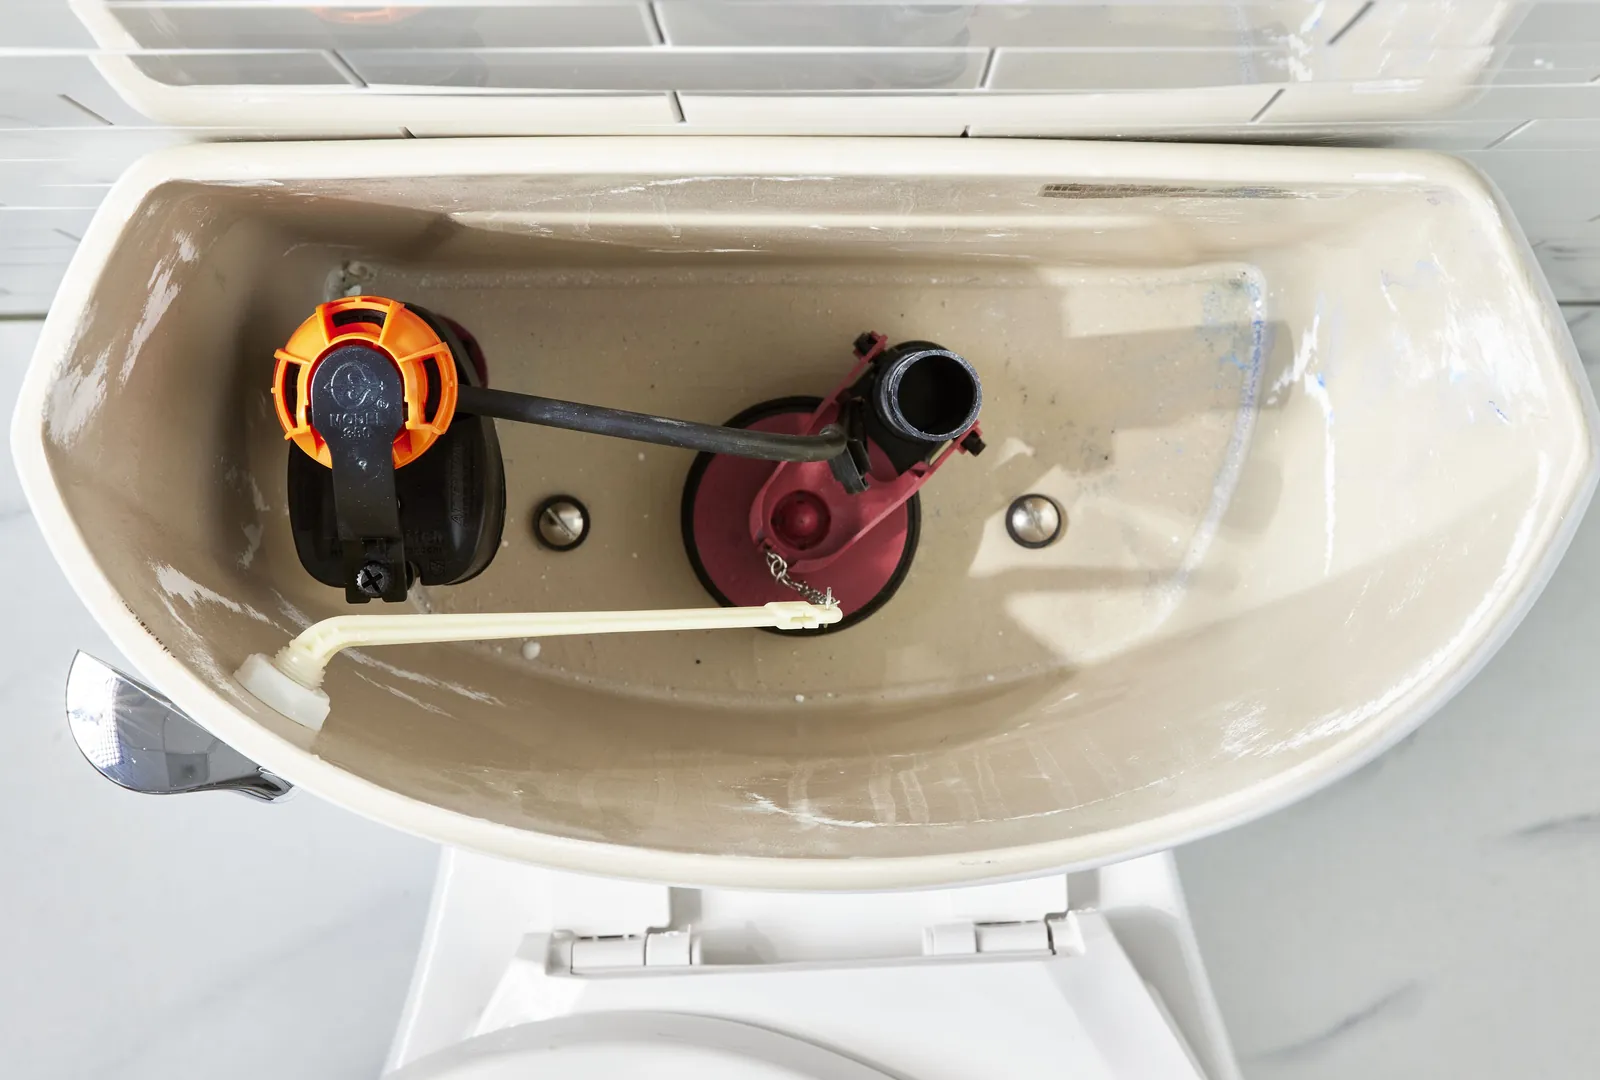
- Leaking tank bolts are almost always caused by degraded rubber gaskets or loose hardware.
- Always shut off the water supply and drain the tank completely before beginning any disassembly.
- Use a high-quality replacement kit that includes brass or stainless steel bolts to prevent future corrosion.
- Don’t over-tighten the nuts, as this can easily crack the ceramic tank or bowl.
- Verify the tank-to-bowl gasket is seated perfectly to ensure a watertight seal.
Causes of Tank Bolt Leaks
The primary reason for water seepage at these connection points is the breakdown of the rubber seals. Over many years, the chemicals found in municipal water supplies, combined with the natural aging of rubber, cause these components to lose their elasticity and crack.
When the seal fails, water from the tank trickles down the bolt shank and onto the bathroom floor. In some cases, the metal bolts themselves may have corroded, especially if they were made of low-grade steel rather than brass or stainless steel, leading to a compromised fit.
| Component | Common Failure Mode | Expected Lifespan |
|---|---|---|
| Rubber Washers | Cracking and brittleness | 5–10 years |
| Tank Bolts | Corrosion and oxidation | 10–15 years |
| Tank-to-Bowl Gasket | Compression set/deformity | 7–12 years |
| Wing Nuts | Stripped threads | 10+ years |
Tools Required for Repairs
Before you start the repair, gather all necessary tools to ensure the process goes smoothly. Having everything within reach prevents you from having to leave the bathroom mid-repair with a partially disassembled toilet.
- Adjustable wrench or deep-well socket set.
- Bucket for residual water.
- Large sponge for drying the tank.
- Flathead and Phillips screwdrivers.
- Replacement tank bolt kit.
- Penetrating oil, such as PB Blaster, if hardware is seized.
How to Drain the Toilet
Shutting off the water is the most critical step. Locate the shut-off valve on the wall behind or to the side of the toilet. Turn the handle clockwise until it stops. Once the water is off, flush the toilet to empty the tank. Use a sponge to remove the remaining water from the bottom of the tank; even a small amount left behind will spill onto your floor the moment you loosen the bolts.
Removing the Old Hardware
If the bolts are heavily corroded, they may be difficult to remove. Apply a small amount of penetrating oil and let it sit for ten minutes. Use your screwdriver to hold the bolt head steady inside the tank while using your wrench to loosen the nut underneath. If the nut is rusted solid, a small hacksaw can be used to carefully cut the bolt, though you must be extremely cautious not to chip the porcelain.
What is the Correct Bolt Kit?
Choosing the right replacement is essential. Most standard toilets use a universal bolt kit, but some high-end or older models require specific proprietary parts. Inspect your old hardware to determine the length and diameter of the bolts. According to the American Society of Mechanical Engineers, standard plumbing fittings follow specific dimensional tolerances to ensure compatibility across various fixture brands. Always ensure your new kit includes:
- Stainless steel or brass bolts.
- New rubber washers for the inside of the tank.
- New rubber or metal washers for the underside.
- New wing nuts or hex nuts.
Installing New Tank Bolts
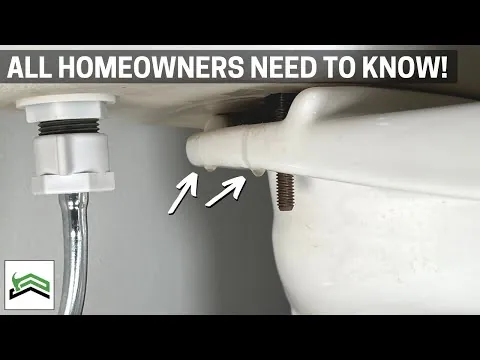
Place the new rubber washer onto the bolt, then insert the bolt through the hole in the tank base. Inside the tank, the rubber washer must be against the porcelain to prevent water from entering the bolt hole. On the underside of the tank, place the remaining metal washer and nut. Tighten the nuts by hand, then use a wrench to give them an additional quarter-turn. Don’t force them, as the porcelain tank can crack under excessive pressure.
Aligning the Tank Perfectly
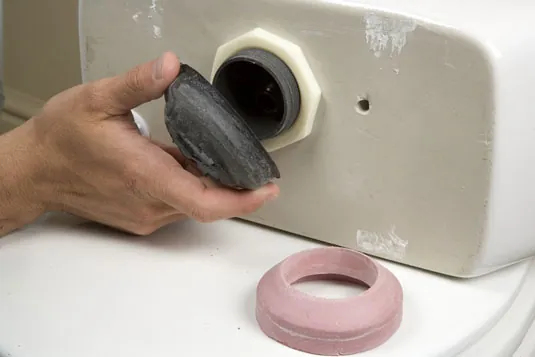
When reattaching the tank to the bowl, ensure the tank-to-bowl gasket is properly seated in the center of the flush valve opening. If this gasket is crooked or pinched, the toilet will leak from the center even if the bolts are perfectly tight. Carefully lower the tank onto the bowl, aligning the bolts with the holes in the bowl’s mounting rim. Tighten the nuts evenly, alternating between the left and right sides to ensure the tank remains level.
Testing Your Repair Job
Once everything is tightened, turn the water supply valve back on slowly. Observe the bolts for several minutes. If you see water beading around the bolt heads, tighten the nut underneath by another quarter-turn. If the leak persists, you may need to remove the bolt and check if the rubber washer is pinched or if there’s debris preventing a flush seal against the tank bottom.
Troubleshooting Persistent Leaks
If the bolts are tight but water still appears, the issue might be a hairline crack in the tank itself. Examine the ceramic around the bolt holes with a flashlight. If you see a crack, the tank will need to be replaced, as repairs to porcelain are rarely permanent. Another possibility is that the flush valve nut under the tank is loose, which can mimic the symptoms of a leaking bolt.
Comparing Repair Options
| Strategy | Cost Range | Effort Level | Longevity |
|---|---|---|---|
| DIY Bolt Replacement | $10–$35 | Moderate | High |
| Professional Plumber | $150–$350 | Low | High |
| Full Toilet Replacement | $250–$800 | High | Very High |
When to Call a Pro
While replacing bolts is straightforward, some situations necessitate a professional. If you have an antique or wall-mounted toilet, the complexity of the internal plumbing may be beyond standard DIY repair. Additionally, if the shut-off valve is stuck or leaking, you’ll need a plumber to replace the valve before you can safely work on the tank. Never force a stuck valve, as breaking the pipe inside the wall can lead to a major household emergency.
Frequently Asked Questions
Is it safe to tighten the bolts further?
Only tighten the nuts until they’re snug. Over-tightening is the most common cause of cracked toilet tanks. If the leak persists after a moderate tightening, the rubber washer is likely the issue. Remove the bolt, inspect the washer for cracks, and ensure it’s seated flat against the porcelain. If the washer is damaged, it must be replaced rather than tightened further.
Can I reuse the old tank bolts?
You should never reuse old tank bolts. Even if they appear clean, the metal may be weakened by microscopic corrosion, and the rubber washers will have lost their ability to create a waterproof seal. Buying a new hardware kit is an inexpensive way to ensure that your repair lasts for many years. Always replace the entire set of bolts and washers at the same time.
Why is the tank wobbling after repair?
A wobbling tank indicates that the bolts weren’t tightened evenly or the tank-to-bowl gasket isn’t seated correctly. Ensure the tank is sitting level on the bowl rim. If the tank rocks, tighten the bolts in small, alternating increments until the tank is stable. If the wobble persists, check that the tank isn’t touching the wall behind the toilet, which can prevent a proper fit.
How long does a tank bolt repair take?
For an experienced DIYer, replacing tank bolts typically takes 45 to 90 minutes. This includes time to drain the tank, remove the old hardware, clean the mounting surfaces, install the new parts, and verify the seal. If you encounter rusted or seized bolts, budget extra time to remove them carefully. Always allow yourself plenty of time so you don’t feel rushed during the reassembly process.
Does the water supply need to be off?
Yes, the water supply must be turned off, and the tank must be completely emptied before you start. If you don’t empty the tank, water will pour out of the bolt holes as soon as you remove the nuts, creating a significant mess in your bathroom. Use a sponge to soak up the final cup of water from the bottom of the tank before proceeding.
What if the bolt holes are cracked?
If the porcelain around the bolt holes is cracked, the tank is compromised. Unfortunately, there’s no reliable way to seal a crack in a ceramic toilet tank. The pressure of the water and the tension of the bolts will eventually cause the crack to spread, leading to a major leak. In this scenario, the only safe solution is to replace the toilet tank or the entire toilet unit.
Conclusion
The final step is to monitor the area for the next twenty-four hours after completing the installation. Place a dry paper towel underneath each bolt head; if the towel remains dry after one full day, you have successfully resolved the leak. If you notice any dampness, perform a final, gentle adjustment to the wing nuts before resuming normal use of your bathroom.
