
Maintaining a reliable plumbing system starts with understanding the hardware inside your cistern, as choosing the best toilet flush valves can prevent water waste and annoying leaks. When your toilet runs constantly, fails to flush completely, or makes a loud hissing noise, the culprit is almost always a failing valve. Replacing these components is a manageable DIY task that can save you significant money on utility bills while restoring your bathroom’s efficiency. Costs for these components typically range from $12 to $65 per unit, depending on whether you’re purchasing a basic flapper-style kit or a high-end dual-flush conversion system.
Key Takeaways
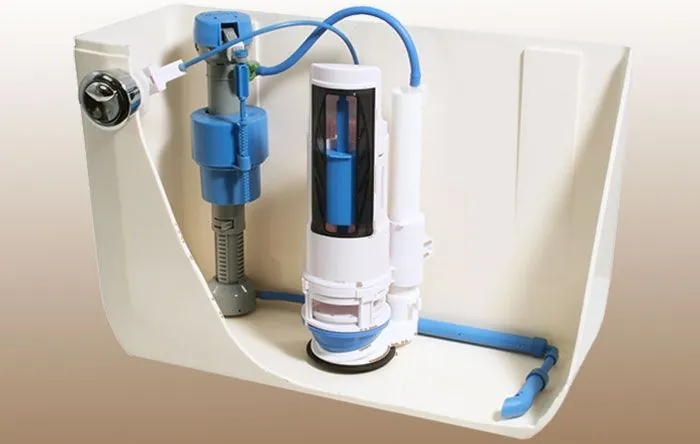
- Measure your existing flush valve height and drain opening diameter before purchasing a replacement to ensure compatibility.
- Prioritize universal kits that include adjustable water levels and overflow tubes to accommodate various tank sizes.
- Check your toilet’s GPF (gallons per flush) rating to maintain water efficiency compliance in your home.
- Inspect the tank-to-bowl gasket whenever you replace a flush valve, as these often degrade at the same rate.
- Use silicone-based lubricants on rubber seals to extend the lifespan of your new installation.
Selecting the Right Valve Type
The market offers several designs, each serving specific toilet configurations. Understanding these differences is critical because flush valves aren’t universally interchangeable across all brands or models. You must identify whether your toilet uses a gravity-fed system with a flapper or a pressurized system.
Flapper Flush Valves
These are the most common valves in residential homes. They utilize a rubber or silicone flap that lifts when the handle is pushed, allowing water to rush into the bowl. When the tank empties, the flap drops, creating a seal.
- Korky Universal Plus
- Fluidmaster 507AKR
- Kohler Genuine Part 1036306
Tower Flush Valves
Tower designs lift vertically to allow water to exit from all sides, which often provides a stronger, more consistent flush than traditional flappers. These are frequently found in modern, high-efficiency toilets.
- Toto THU499S
- Kohler 3-inch Tower
- American Standard Flush Tower
Dual-Flush Conversion Valves
These allow you to choose between a low-volume flush for liquids and a high-volume flush for solids, significantly reducing total water consumption. These are ideal for homeowners looking to upgrade older toilets without replacing the entire fixture.
When Should You Replace It?
Many homeowners wait until a toilet is completely non-functional, but subtle signs often indicate a valve is reaching the end of its service life. If you notice the water level in the tank slowly dropping or the fill valve cycling on and off at random intervals, the flush valve seal is likely compromised.
| Symptom | Primary Cause | Recommended Action |
|---|---|---|
| Constant running water | Warped flapper/seal | Replace flapper or valve body |
| Weak flush power | Clogged ports or low lift | Clean ports or adjust chain |
| Handle feels loose | Corroded lift chain | Replace chain or lift arm |
| Hissing sound | Leaking tower seal | Replace tower assembly |
Pro Tip: If you suspect a slow leak, place a few drops of food coloring into the tank and wait thirty minutes without flushing; if the color appears in the bowl, your flush valve seal is leaking and requires immediate replacement.
How to Install New Valves
Replacing a flush valve requires basic tools: an adjustable wrench, a pair of slip-joint pliers, and a bucket to catch residual water. Always ensure you have a clean workspace and a towel to protect your floor.
- Shut off the supply: Turn the water shut-off valve located behind the toilet clockwise until it’s fully closed.
- Drain the tank: Flush the toilet to remove as much water as possible, then use a sponge to remove the remaining liquid.
- Remove the old valve: Unscrew the locknut located on the underside of the tank. You may need pliers to grip the nut if it has become calcified over time.
- Clean the mounting surface: Remove mineral deposits or old gasket residue from the tank hole to ensure the new seal sits perfectly flat.
- Install the new unit: Place the new valve into the hole, tighten the locknut by hand, and then give it a final quarter-turn with your wrench. Don’t overtighten, as this can crack the porcelain tank.
Essential Compatibility Considerations

Before purchasing, you must determine if your toilet uses a 2-inch or 3-inch flush valve. Most older toilets utilize 2-inch openings, while newer high-efficiency models often feature 3-inch or even 4-inch openings. Using the wrong size will prevent the valve from seating, resulting in a permanent leak.
- Measuring the drain: Measure the diameter of the hole at the bottom of the tank.
- Checking the tank height: Ensure the overflow tube height is at least one inch below the tank lever hole to prevent flooding.
- Identifying brand-specific parts: Some manufacturers, like Toto or Gerber, use proprietary flush valve shapes that require specific original equipment manufacturer (OEM) replacements.
What is the Best Material?
The longevity of your plumbing components depends heavily on the materials used during manufacturing. High-quality valves typically utilize chemical-resistant rubber or durable ABS plastic.
Rubber vs. Silicone Seals
Silicone seals are generally superior because they don’t degrade as quickly when exposed to common drop-in tank cleaning tablets that contain bleach. Bleach can cause standard rubber flappers to swell or dissolve, leading to premature failure.
Plastic vs. Metal Hardware
While some heavy-duty valves offer metal locknuts, high-quality plastic is often preferred for flush valves because it’s resistant to corrosion. In areas with “hard” water, metal components can seize, making future repairs significantly more difficult.
Troubleshooting Common Flush Issues
Even with the best hardware, minor adjustments are sometimes necessary to keep the system operating smoothly. If your toilet continues to exhibit issues after installation, check these specific components.
- The Lift Chain: If the chain is too long, the flapper won’t lift high enough to allow a full flush. If it’s too short, the flapper won’t seat correctly, causing a leak.
- The Overflow Tube: Ensure the tube isn’t cracked or leaking. If the water level rises above the top of the overflow tube, the fill valve is set too high.
- Mineral Buildup: Hard water can create scale on the valve seat. Use a mild vinegar solution and a non-abrasive scrub pad to clean the seat before installing a new flapper.
Warning: Never pour concentrated chemical drain cleaners into your toilet tank to resolve flush issues, as these substances can damage the plastic and rubber components of the flush valve and potentially harm the porcelain glaze.
Water Efficiency Standards
Modern plumbing fixtures are subject to strict regulations to ensure conservation. The Environmental Protection Agency provides guidelines for high-efficiency toilets, which generally use 1.28 gallons per flush or less. When selecting your replacement valve, ensure the product is compatible with these flow rates to maintain the efficiency of your fixture. Choosing a high-flow valve for a low-flow tank can result in poor waste removal, while choosing a low-flow valve for an older, high-volume tank might lead to incomplete flushing.
Comparing Leading Valve Brands
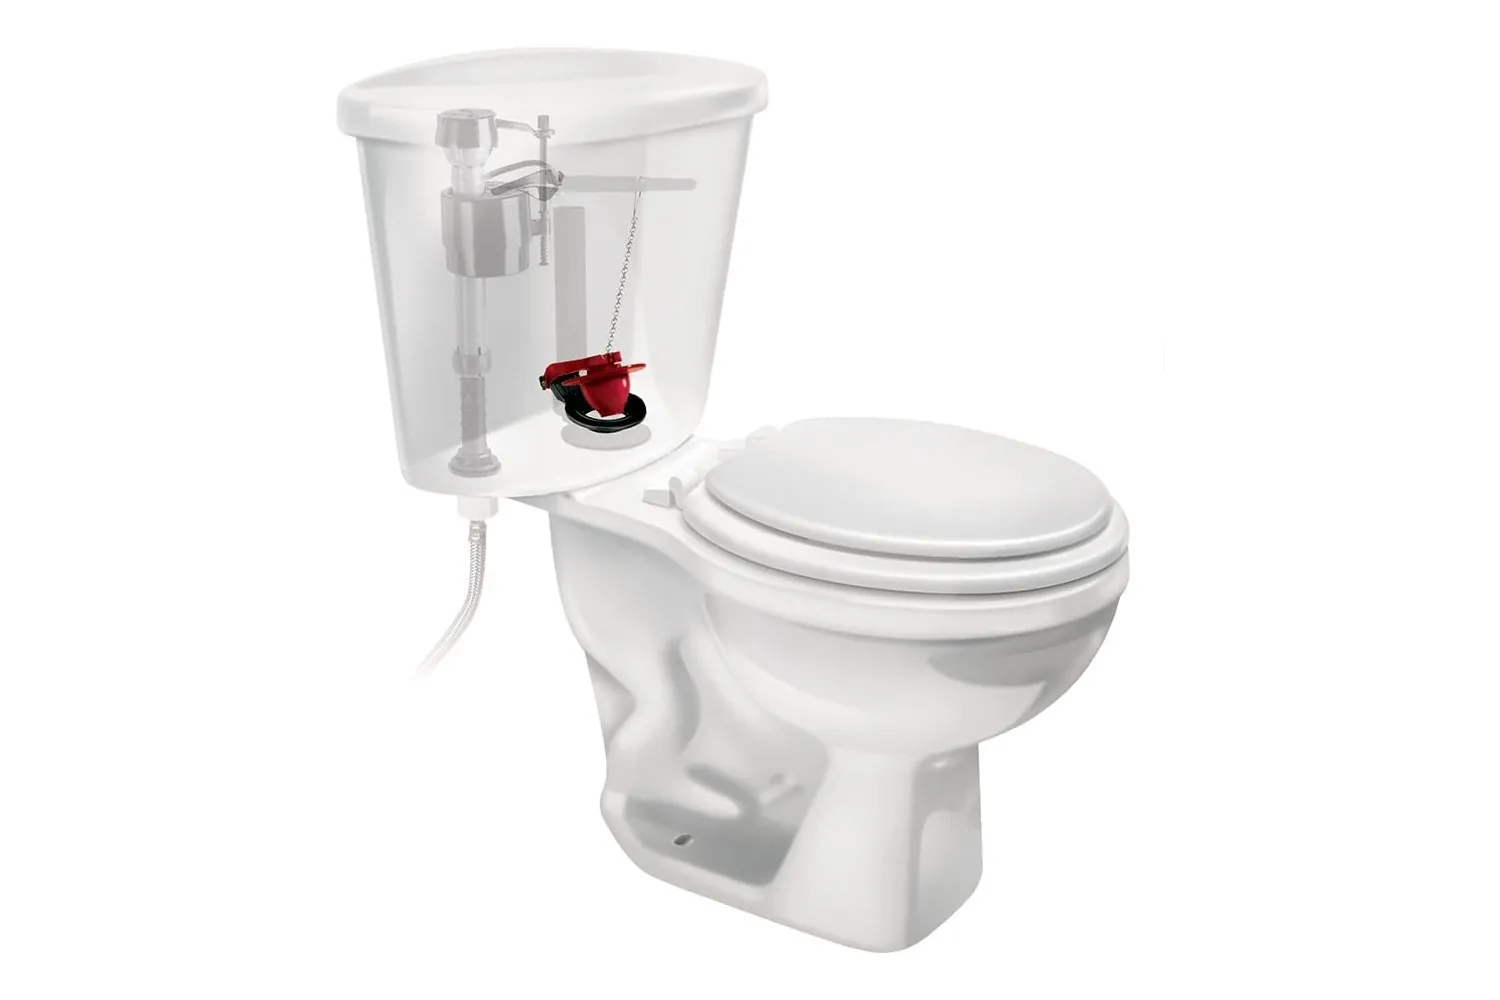
Selecting a reputable brand often makes the difference between a five-year lifespan and a ten-year lifespan. Stick to manufacturers that offer widely available replacement parts, as you’ll eventually need to replace the flapper or seal again.
| Brand | Reputation | Best Use Case |
|---|---|---|
| Fluidmaster | Industry Leader | Universal repairs and upgrades |
| Korky | High Quality | Replacement flappers and seals |
| Kohler | Proprietary Fit | Specific Kohler toilet models |
| Toto | Precision Engineering | High-end, efficiency-focused toilets |
Related guides
- 4 Best Dual Flush Toilet Seats: Our Top Picks for Your Home in 2026
- Best Toilet Seat With Price in 2026
- Best Self Cleaning Bidet Toilet Seats in 2026
Frequently Asked Questions
Can I fix a running toilet without replacing the valve?
Often, yes. Most running toilets are caused by a chain that’s too short, a flapper that’s misaligned, or debris caught under the seal. Before buying a new valve, clean the flush valve seat with a damp cloth and adjust the chain to ensure it has about half an inch of slack.
How often should flush valves be replaced?
A high-quality flush valve should last between five and ten years. However, the rubber flapper or seal attached to the valve often wears out faster, typically every three to five years, especially if you use in-tank chemical cleaners that contain chlorine or bleach, which can degrade rubber components over time.
Why does my toilet make a loud noise after flushing?
A loud noise, often a whistling or hammering sound, usually indicates that the fill valve is failing or the water pressure is too high. While the flush valve manages the water exiting the tank, the fill valve controls the water entering it. If the noise occurs while the tank is refilling, consider replacing your fill valve instead.
Does a larger flush valve improve performance?
A larger flush valve, such as a 3-inch or 4-inch model, allows for a faster release of water into the bowl, which creates a more powerful flush. While this improves performance, you can’t simply install a larger valve in a toilet designed for a smaller one; the tank’s drain hole size is fixed and must match the valve.
How do I identify my toilet model?
Most toilets have the model number stamped inside the tank on the back wall or on the underside of the lid. You can also look for the manufacturer’s name on the bowl or tank. Having this information is essential when purchasing brand-specific flush valves to ensure you get the correct fit for your specific bathroom fixture.
Conclusion
To ensure your home remains free of leaks and water waste, start by inspecting your current tank components to identify whether you need a 2-inch or 3-inch valve. Once you have confirmed your size, purchase a high-quality, chemical-resistant replacement kit and follow the installation steps provided here to restore your toilet’s performance and efficiency for years to come.