
Most homeowners find that the best smart water shut off valves are those that integrate directly into their home’s main water line to detect leaks and stop flow automatically. These systems typically use either a motorized ball valve that clamps onto an existing pipe or a unit that requires a plumber to cut the pipe and install a new valve. This guide covers the installation, maintenance, and selection criteria necessary for ensuring your home remains protected from catastrophic water damage.
Understanding Automatic Water Shut Off Systems

A smart water shut off valve is a device installed on your main water supply line. It connects to your home Wi-Fi network and works with sensors placed in areas prone to leaks, like near a water heater, dishwasher, or washing machine. When a sensor detects moisture, it sends a signal to the valve, which then closes the main water supply to prevent flooding.
These devices are designed for homeowners who want to mitigate the risk of water damage while they’re away or asleep. Many models also track water usage, which helps identify hidden leaks in toilets or irrigation systems. A common misconception is that these valves work perfectly without any other equipment; in reality, they rely heavily on the placement of secondary moisture sensors to be effective.
The mechanical operation is straightforward. The valve contains a motorized actuator that turns a ball valve 90 degrees to block water flow. If the power goes out, most units have a manual override handle. For those concerned about specific safety certifications, you can verify compliance with plumbing standards by checking the NSF International product certification database to ensure the valve material meets health and safety requirements for potable water.
Installing Your Shut Off Valve
- Locate your main water shut off valve, which is usually found in the basement, garage, or a utility closet.
- Ensure you have a clear space of at least 6 inches on the pipe to accommodate the motorized valve unit.
- If you choose a clamp-on model, clean the pipe surface thoroughly with a wire brush to ensure the sensors and clamps have a solid grip.
- For professional-grade valves that require cutting the pipe, shut off the main water supply and drain the remaining water from the lines before cutting.
- Secure the unit according to the manufacturer’s instructions, ensuring the motor housing isn’t touching the wall or other pipes.
- Connect the device to your home Wi-Fi using the manufacturer’s mobile app to calibrate the valve’s open and closed positions.
- Test the system by triggering a moisture sensor and verifying that the valve closes completely within 5 to 10 seconds.
The most important judgement call is choosing between a clamp-on unit and a full-flow valve. If you’re comfortable with basic plumbing, a clamp-on unit is simple to install, but it may restrict water pressure slightly. A full-flow valve requires a professional plumber to install, but it offers the best performance for high-demand homes. If you lack experience with pipe fittings, it’s safer to hire a licensed plumber to avoid leaks or voided warranties.
Key Numbers and Settings at a Glance
| Situation | What to use | How long | What to watch for |
|---|---|---|---|
| DIY Installation | Clamp-on valve | 30-60 minutes | Pipe diameter size |
| High-Flow Home | Full-flow valve | 2-4 hours | Professional installation |
| Small Apartment | Compact sensor | 5-10 minutes | Battery levels |
| Vacation Home | Cellular backup | 15-30 minutes | Signal strength |
| Old Copper Pipes | Professional unit | 2-3 hours | Oxidation levels |
Measure your pipe diameter with calipers before buying a clamp-on valve. If your pipe measures over 1.25 inches, the standard clamp-on model will fail to seat properly. You must switch to a full-flow unit to maintain adequate water pressure.
For high-flow homes, verify your main line pressure stays below 80 PSI. If your gauge reads higher, hire a licensed plumber to install a pressure-reducing valve. Failing to do this causes the valve to struggle against the line tension, leading to premature motor burnout.
Check battery levels on compact sensors regularly. If you see the low-power LED blink amber, replace the CR123A lithium cells. Consult your owner’s manual for specific maintenance guidance, as replacement frequency depends on your usage.
Test cellular signal strength by placing your phone next to the main water shutoff.
Inspect copper pipes for green or white oxidation before mounting a professional unit. If the surface is flaky, sand it down to bare metal with fine-grit sandpaper. Skipping this step prevents the sensor from reading flow rates accurately, which costs you in missed leak detections.
Getting the Best Results
Experienced users always perform a full system test every three months. This involves triggering each sensor individually to ensure the signal reaches the hub and the valve shuts off as expected. If you have a large home, ensure your Wi-Fi signal reaches the basement or utility room, as a weak connection is the primary reason these devices fail to close during an emergency.
Preparation is equally vital. Before installing, measure your pipe diameter accurately using a caliper. Most residential systems are designed for 3/4-inch or 1-inch pipes. If your pipe is a different size, you’ll need specialized adapters. Don’t force a valve onto a pipe that’s slightly too large, as this can cause the brass or plastic casing to crack under pressure over time.
Finally, keep the area around your shut off valve clear of boxes or cleaning supplies. You need quick, unobstructed access to the manual override handle in the event of a total power or internet failure. If you have a multi-story home, place sensors at the lowest point of every room containing water-using appliances to ensure early detection before water travels across the floor.
Common Problems and Quick Fixes
| What you notice | What it usually means | What to do first |
|---|---|---|
| Valve fails to close | Low battery or Wi-Fi drop | Check app connection status |
| False alarm triggers | High humidity or sensor splash | Move sensor away from drains |
| Valve sounds strained | Mineral buildup in pipe | Clean the valve actuator |
| App shows offline | Router signal interference | Restart the hub device |
If the valve fails to close, check the battery percentage in the app. If it reads below 20%, the motor lacks the torque to turn the ball valve. Replace the batteries immediately. If the battery is full, check for a red Wi-Fi icon. A signal drop prevents the “close” command from reaching the unit.
False alarms often stem from placement. If your sensor sits within six inches of a drain, steam or splashing water will trigger a false alert. Move the unit to a dry, flat surface at least two feet from any water source. If the alarm persists, wipe the metal contact pins with a dry cloth to remove debris.
A strained, grinding sound indicates calcium deposits inside the pipe. Shut off your main water supply and unscrew the actuator from the valve body. Soak the internal valve ball in white vinegar for thirty minutes to dissolve the buildup. Don’t use harsh chemical cleaners, as these degrade the rubber seals.
If the app shows the device as offline, the hub is likely struggling with signal congestion. Move the hub to a central location, ideally within 30 feet of the valve. If the hub is already nearby, unplug it for ten seconds and plug it back in. This forces the unit to renegotiate its IP address with your router. If your router uses a 5GHz band, switch the hub to a 2.4GHz network to improve wall penetration.
Legal and Safety Requirements
Always confirm that the valve you purchase meets local plumbing codes. In many jurisdictions, any device that interrupts the main water supply must be installed by a licensed plumber to ensure it doesn’t create a cross-connection or backflow hazard. If your municipality requires a permit for plumbing modifications, failing to obtain one can lead to insurance claim denials if a flood occurs later.
Check your local building department website for a list of approved backflow prevention devices. If your home uses a private well system, you must install a check valve upstream of the smart valve to prevent pressure surges from damaging the pump. Failing to add this component often leads to premature pump failure, which costs significantly more than the valve itself.
If you’re unsure about the electrical requirements, check the manufacturer’s installation manual. Most smart valves require a standard GFCI-protected outlet within 3 feet of the valve. Never use an extension cord in a damp utility area. If your outlet is further than 3 feet away, hire an electrician to install a hardwired junction box rather than relying on temporary power solutions.
If the installation requires cutting into a main line that feeds fire suppression systems, you must contact your local fire department or water authority. These systems are subject to strict regulations that prohibit unauthorized shut-off devices. Installing a valve here without a permit can trigger a code violation that forces you to remove the entire system at your own expense.
When working with copper, lead-free solder is a legal requirement in most states. If you choose to use press-fit fittings instead, ensure they’re certified for underground or behind-the-wall use. Using the wrong fitting type often voids your homeowner’s insurance policy in the event of a slow, undetected leak. Always keep a copy of the installation invoice and the valve’s certification document in your home maintenance file for future inspections.
Maintaining Your Smart Valve
Once installed, your system requires very little attention. Replace the batteries in your wireless moisture sensors every 12 to 18 months, depending on the manufacturer’s guidance for your specific model. Use a permanent marker to write the date of the next battery change directly on the back of each sensor so you don’t have to guess.
If you live in an area with hard water, mineral deposits can build up around the valve ball. Turn the valve off and on periodically to keep internal parts lubricated. Consult your owner’s manual for specific maintenance guidance, as the frequency depends on your usage.
Most users make the mistake of ignoring the valve during the dry season. This neglect allows sediment to harden, which can cause the motor to burn out when it finally triggers.
You can identify your water quality by checking the buildup on your showerheads or faucets. If you see white, chalky rings, your valve is at high risk of seizing.
If the valve fails to turn during your monthly test, don’t force it by hand. Disconnect the power supply first to prevent the motor from stripping its internal gears. If the valve remains stuck after a manual cleaning, the internal O-ring has likely degraded and requires a professional replacement to maintain a watertight seal. Always test the valve immediately after any plumbing work in your home to ensure no debris entered the line.
When to Use a Different Approach
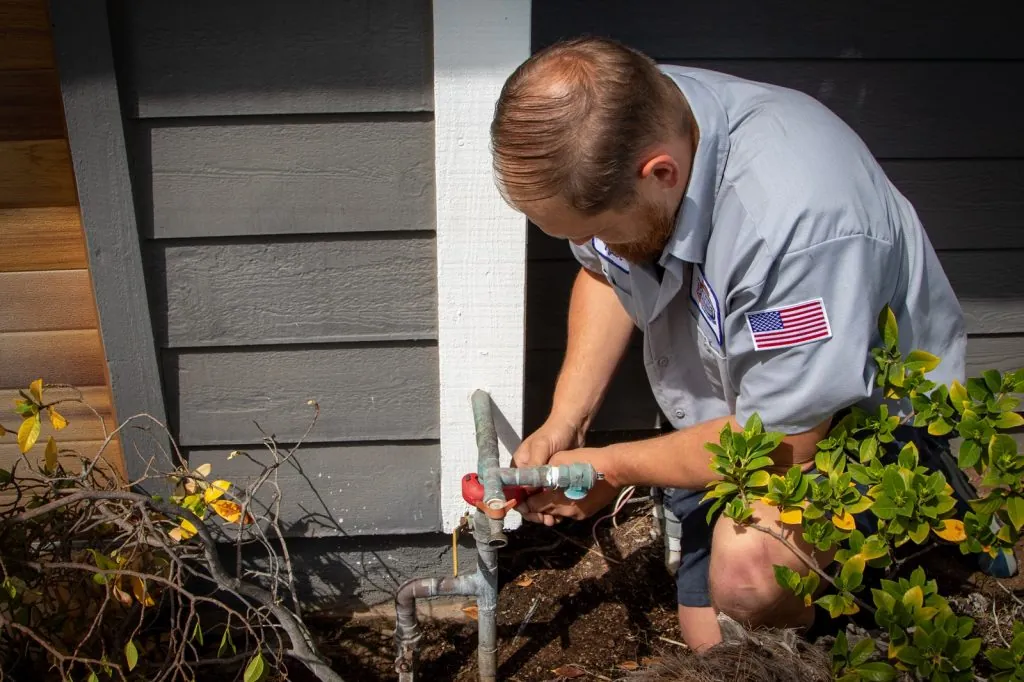
If you have a home with a well pump, a standard smart shut-off valve might not be enough. These systems often require a specialized controller that also shuts off the pump power to prevent it from burning out while the water is blocked. In this case, consult a well pump specialist before adding any valve to the line.
If your pump lacks a pressure-relief bypass, the motor will continue to build head pressure against the closed valve. This creates a dead-head condition that can rapidly destroy your pump’s internal seals. If you see your pump cycling on and off rapidly while the valve is closed, shut off the power immediately.
Additionally, if you have an older plumbing system with heavily corroded pipes, a clamp-on valve may cause the pipe to burst during installation. The force required to seal the clamp often exceeds the structural integrity of thin, rusted galvanized steel. If you can easily scrape away flakes of rust with a screwdriver, your pipes are too brittle for this installation.
Instead of a DIY clamp, hire a professional to replace the corroded section and install a high-quality, full-flow brass valve. This approach is more expensive upfront, but it prevents a catastrophic failure that a simple clamp-on device can’t handle.
If your home uses PEX piping, ensure the valve manufacturer explicitly lists PEX compatibility. Standard metal-to-metal clamps can crush the pipe wall, leading to slow leaks that rot your subfloor over time. Use a dedicated PEX-specific ball valve that integrates into the line using crimp rings. If the pipe is already rigid or brittle, avoid any valve that relies on compression fittings, as these require significant torque that can snap aged lines.
Related guides
Frequently asked questions
How long does a smart water shut off valve last?
Internal motors and electronics typically fail first due to high humidity. Keep your utility area well-ventilated to extend the device’s lifespan.
Can I install a smart water shut off valve myself?
You can install clamp-on smart water shut-off valves yourself without cutting pipes. These units bolt directly onto your existing valve. If you choose a model requiring pipe replacement, hire a professional if you lack plumbing experience.
Is it safe to leave a smart water valve unattended?
Yes, these devices are designed to be left unattended to provide protection while you’re away. Their safety relies on your home Wi-Fi and moisture sensor placement. Ensure you enable push notifications to receive alerts if the valve triggers.
What happens if the internet goes out during a leak?
Most smart water shut-off valves function during internet outages if the hub and sensors remain paired locally. The shut-off logic resides on the hub rather than in the cloud. You won’t receive phone notifications until your connection is restored.
How many sensors do I need for a typical house?
Aim for at least one sensor per water-using appliance, typically requiring 4 to 6 sensors for a standard home. Place them under water heaters, dishwashers, washing machines, and behind toilets. Avoid placing sensors in inaccessible areas to ensure you can easily perform battery maintenance.
Conclusion
Choosing the right protection for your home doesn’t have to be overwhelming. Once you’ve picked a model that fits your plumbing setup, reach out to a local professional to confirm your installation plan. You’ll sleep much better knowing you’ve taken a proactive step toward preventing a major mess before it happens.