
A transistor is a tiny electronic switch or amplifier made from semiconductor material that controls or boosts electrical current using three connection points called the base, collector and emitter. You can find them inside nearly every modern electronic device, as well as loose at electronics parts stores and online component suppliers.
The one thing that decides whether a transistor works in a circuit is matching its type and ratings to the job. Using an NPN where a PNP belongs, or picking a part rated for too little voltage or current, will stop the circuit or destroy the transistor.
The most common mistake people make before they start is assuming all transistors are interchangeable. They’re not — a small signal transistor for audio can’t handle the current a power transistor needs for a motor.
Finding transistors in devices
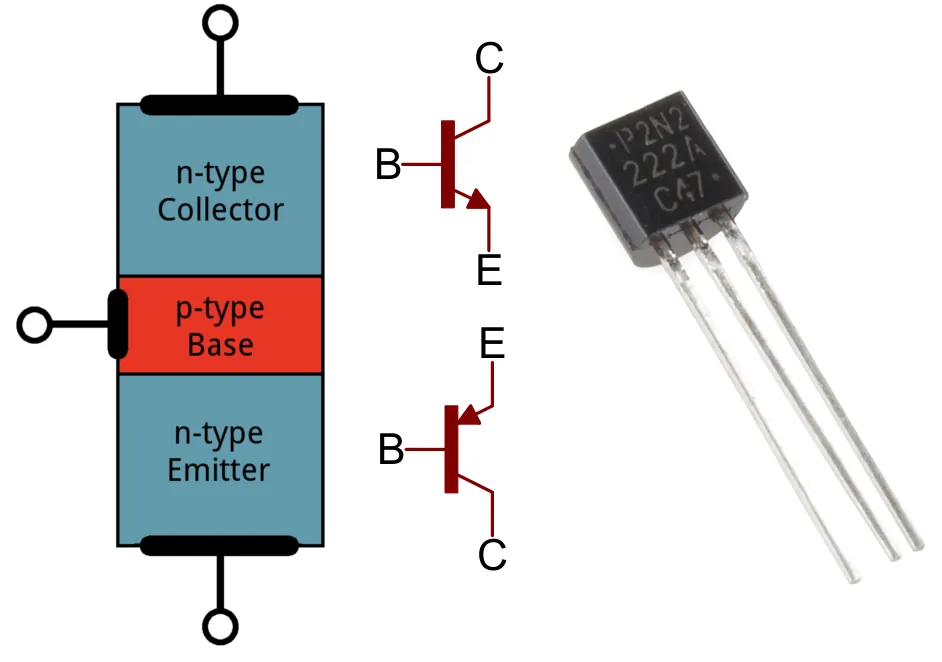
Look inside anything that processes or controls electricity. A transistor is soldered onto printed circuit boards, often in groups, and you’ll see them as small black plastic components with three metal legs or as flat packages bolted to metal heat sinks.
Old radios, computer motherboards, power supplies and appliance control boards are full of them. If you need new ones rather than salvaged parts, electronics component shops and online distributors sell them loose by the type number printed on the body.
Before you open anything, unplug it and let large capacitors discharge. These components store energy long after the power is cut. If you see a large, cylindrical component resembling a soda can, wait at least ten minutes before touching the board.
Desoldering parts requires a soldering iron and steady hands. If you have never done it, practice on a broken toy first. A common mistake is overheating the board, which lifts the copper pads and ruins the circuit. If the solder doesn’t melt within three seconds, stop and use more flux.
Never pry open a sealed power supply or a microwave. The capacitors inside these units can carry a lethal charge even when unplugged. If a device has a warning label about high voltage or internal components, leave it to a qualified repair technician. If you’re unsure about the safety of a specific board, test the voltage across the main capacitor with a multimeter before touching any metal leads.
How long it takes to find a transistor
The time depends on whether you’re hunting inside old equipment or ordering new parts.
| Situation | How long | What changes it | What to watch for |
|---|---|---|---|
| Salvaging from old equipment | 15–45 minutes | How easy the case opens and how crowded the board is | Static can damage parts; handle by the edges |
| Buying a common type | A few minutes online | Whether you know the exact part number | Counterfeit or wrong-type parts from unknown sellers |
| Ordering a rare or obsolete type | Several days to weeks | Stock and shipping speed | Minimum order quantities from some suppliers |
If you’re harvesting from vintage gear, assume the first 10 minutes are for documentation. Take a high-resolution photo of the board layout before desoldering; this prevents wiring errors during reassembly. If the board is coated in thick lacquer, add 20 minutes to your estimate for cleaning the leads.
When buying, check the datasheet for the “case style” or “package type” before hitting the checkout button. A common mistake is ordering the correct electrical specs in the wrong physical package, such as a surface-mount chip when you need a through-hole component. This error costs you an extra week of shipping and the frustration of a part that can’t be mounted.
If you’re sourcing obsolete parts, check the “last time buy” notices on manufacturer websites. If a part is marked as end-of-life, stop hunting through general distributors. Immediately pivot to specialized surplus houses that hold legacy inventory. You’ll pay a premium, but you save the weeks wasted waiting for stock that will never arrive.
How to tell a transistor is the right one
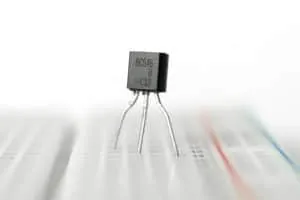
Read the part number printed on the transistor body and look up its datasheet. Check that it’s NPN or PNP as your circuit needs, and confirm the maximum collector current and voltage ratings are higher than what your circuit will actually use.
A multimeter with a transistor test function can check whether a salvaged part is still working. It can’t tell you the ratings. Only the datasheet can. When the signs disagree, the datasheet settles it. The manufacturer publishes the official limits, so use those numbers rather than guessing from how the part looks.
Look at the package style before you trust the part number. A TO-220 metal tab can carry several amps because it bolts to a heatsink. Putting a TO-92 into a spot meant for a TO-220 will burn the smaller part in seconds.
Check the gain range listed under hFE on the datasheet. Two transistors sharing one part number can have gains that differ by a factor of three. If your circuit relies on a precise gain to set its output current, pick a version with a tight suffix band.
Mistakes that ruin a transistor circuit

Putting the transistor in backwards is a common error. The three legs must go into the correct holes, or the circuit won’t work and the part can fail. Check the flat side or marking on the body against the diagram before you solder. If you’re unsure, look for the emitter pin, which is often marked with a small tab or a specific lead length on the datasheet.
Exceeding the voltage or current rating is equally dangerous. Too much current overheats the transistor and destroys it permanently. Pick a part rated at least 20 percent above your circuit’s actual draw. Pick a part rated significantly higher than your circuit’s actual draw, often twice the required current, to ensure reliable operation and manage heat.
Skipping the base resistor is a fatal mistake. Without it, too much current flows into the base and burns out the transistor or the pin driving it. Always include the resistor the circuit design calls for. If you’re experimenting without a schematic, use a 1k-ohm resistor as a default. This limits the current to a safe level for most small-signal transistors. If the device fails to switch, you can decrease the resistance, but never remove it entirely.
Related guides
- How to Find IP Address for Camera: Quick Router Method
- Foosball Resources: Where to Find Tactics and Gear in 2026
- Brand New Hot Tub Leaking: Find and Fix the Leak Fast in 2026
Frequently asked questions
Can I replace a transistor with any other transistor?
No. You must match the NPN or PNP type and the voltage and current ratings, or the circuit won’t work and the part may fail.
How long does it take to find a transistor?
Salvaging one takes about 15–45 minutes depending on the device; buying a common type online takes minutes, while rare types can take days or weeks to arrive.
Is it safe to take transistors out of old electronics?
Only after unplugging the device and discharging large capacitors, which can hold a charge. Never open sealed power supplies or microwaves — that work is for a qualified technician.
Where do I find the ratings for a transistor?
Look up the part number printed on the body in the manufacturer’s datasheet; it lists the official limits for voltage, current and power.
What happens if I use the wrong transistor?
The circuit may not work at all, or the transistor can overheat and fail, possibly damaging other parts on the board.
Conclusion
A transistor does one job: it switches or amplifies electrical current using three connections. You’ll find them built into almost every electronic device, or sold loose by electronics suppliers under the part number printed on the part. Match the type and ratings to your circuit, handle salvaged parts with care, and open only devices you’re qualified to work on.
