
Mica capacitors are stable, high-precision electronic components that use thin sheets of mica mineral as a dielectric to store electric charge. Because mica is naturally resistant to heat and electrical breakdown, these capacitors maintain very steady capacitance values even when temperatures fluctuate significantly. You’ll find them most often in high-frequency circuits, such as radio transmitters and precision filters, where stability is critical for keeping the signal clear and accurate.
The most important factor to understand is that these capacitors aren’t meant for high-capacity storage. They provide low capacitance values, typically ranging from a few picofarads to a few nanofarads. The most common mistake people make is trying to use them in high-power energy storage circuits, like power supplies. This causes the component to fail because it can’t handle the high current demands, which often leads to the capacitor overheating and cracking its casing.
How to install mica capacitors
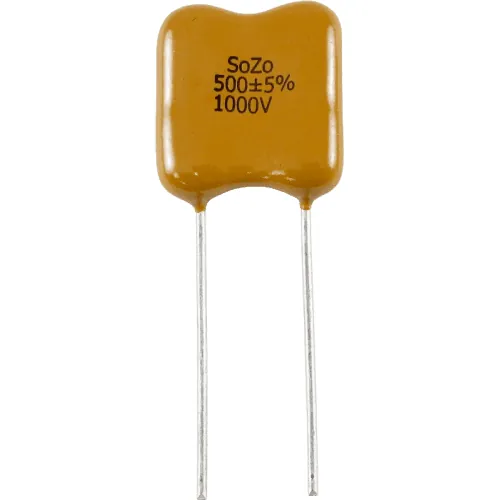
Working with these components requires a steady hand and knowledge of their physical limits. Unlike modern ceramic capacitors, mica versions are often larger and more sensitive to mechanical stress.
- Inspect the capacitor casing for any visible cracks or chips before you begin. If the protective wax or epoxy coating is damaged, the mica sheets inside can absorb moisture from the air, which ruins their electrical performance.
- Clean the soldering iron tip and set your temperature to a maximum of 650°F. High heat for more than 5 seconds can melt the internal seals, so keep your contact time brief.
- Shape the leads gently using needle-nose pliers while holding the wire between the component body and the bend. Never pull on the leads themselves, as this puts pressure on the internal connections and changes the capacitance value.
- Mount the capacitor as close to the circuit board as possible to minimize lead inductance. If you’re working on a high-frequency radio project, keep the leads under 10 millimeters long to maintain the intended frequency response.
- Secure the component with a drop of silicone adhesive if the board will face vibration. This prevents the leads from snapping over time.
Tip: If you’re unsure about the required voltage rating for your specific circuit, always choose a capacitor rated for at least twice the maximum voltage you expect to see.
Tip: Avoid touching the mica plates if you’re using open-frame capacitors, as oils from your skin can create leakage paths for electricity.
Typical Service Life Expectations
The lifespan of a mica capacitor depends heavily on the environment and the electrical stress applied to the part. While they’re known for longevity, they don’t last forever in harsh conditions.
| Situation | Typical Life | What changes it | What to watch for |
|---|---|---|---|
| Cool, dry room | 30+ years | Humidity levels | Discoloration of wax |
| High-heat radio gear | 10–15 years | Internal temperature | Cracked casing |
| Outdoor exposure | 2–5 years | Moisture ingress | Drift in capacitance |
If the device stops working and the capacitor looks discolored or has a burnt smell, it has likely reached the end of its life. When a circuit fails to hold a stable frequency after many years of use, it’s usually a sign that the dielectric has degraded and the part needs replacement.
Identifying When Failure Occurs
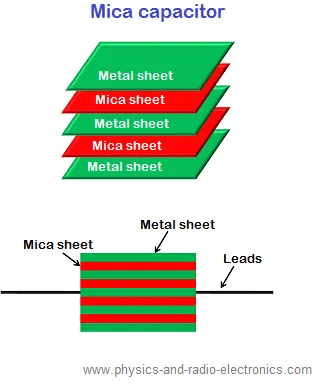
You can tell if a mica capacitor is failing by observing the stability of your circuit. If you’re building a radio or a frequency-sensitive device, you’ll notice the signal “drifting” or moving away from the target frequency as the device warms up. A healthy mica capacitor should stay rock-solid. You can verify this by measuring the capacitance with a digital multimeter before and after the device reaches its operating temperature.
If the value changes by more than 1% or 2%, the dielectric is likely compromised. A visual check is also helpful; look for small cracks in the edge of the wax or epoxy coating. Any sign of bulging or a dark, burnt spot on the surface means the internal mica layers have experienced an electrical arc and the part is permanently damaged.
Common Mistakes During Use
- Overheating during soldering: Excessive heat causes the internal wax to melt or the mica sheets to shift, which permanently alters the electrical properties of the component. Use a heat sink on the lead if you’re worried about the temperature traveling to the body.
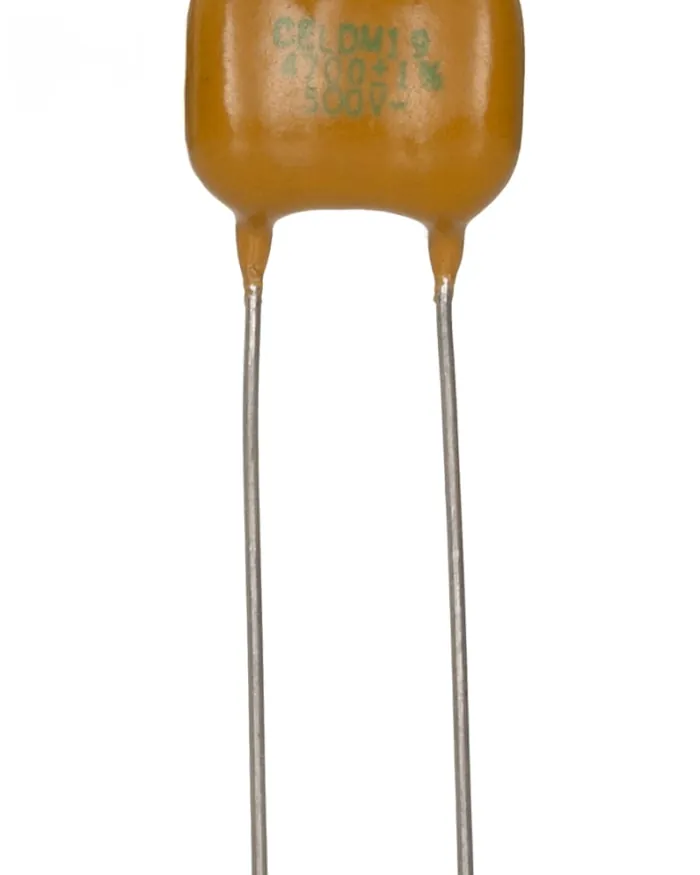
- Ignoring voltage ratings: Attempting to use a 50-volt capacitor in a 100-volt circuit will cause the internal dielectric to break down instantly. Always check the markings on the side of the capacitor to ensure they exceed your circuit’s maximum peak voltage by a wide margin.
- Mechanical stress on leads: Pushing or pulling on the wire leads can create small gaps between the mica sheets and the metal plates. This gap changes the capacitance value, making your circuit behave differently than the original design intended. Always support the lead at the base before you bend it to protect the internal structure.
Related guides
- How a Heat Recovery Boiler Works and Its Key Benefits
- Foosball Glossary: Key Terms and Definitions Explained in 2026
- Taylor K-2006 vs K-2006C: Key Differences and Best Pick in 2026
Frequently asked questions
Can I replace a ceramic capacitor with a mica one?
Yes, you can replace a ceramic capacitor with a mica one if the capacitance and voltage ratings match your circuit requirements. Mica capacitors provide much better stability in high-frequency applications, so they’re often an upgrade for oscillators or filters. However, they’re physically larger and more expensive, so ensure you have enough space on your circuit board before making the switch.
How long do mica capacitors last?
They can last for a significant duration when used within their specified voltage and temperature limits in a dry environment. The specific lifespan is determined by how much heat the component is exposed to during operation. If you notice the protective coating turning yellow or cracking, it’s a sign that the component is aging and may need to be replaced soon.
Is it safe to touch a mica capacitor?
Yes, it’s safe to touch a mica capacitor after the device is powered off and the capacitors have been discharged. You should always use a discharge tool to drain any stored energy from the circuit before touching any components. If the capacitor is an older, open-style version, try to avoid touching the mica plates directly to keep them free from skin oils.
What happens if I use the wrong voltage rating?
If you use a capacitor with a voltage rating lower than the circuit’s peak voltage, the dielectric will break down and cause a short circuit. This often results in a loud pop, smoke, or a burnt smell as the component fails under the electrical stress. Always check the voltage rating printed on the component body or the manufacturer’s datasheet to ensure it fits your design.
How do I measure a mica capacitor?
You can measure the capacitance using a digital multimeter with a “Capacitance” or “Farad” setting. Simply touch the probes to the two leads of the capacitor after removing it from the circuit to get an accurate reading. If the reading is significantly different from the value printed on the body, the internal structure is likely damaged and the capacitor should be discarded.
Why does my circuit drift in frequency?
Frequency drift is often caused by a failing capacitor that can’t maintain a stable value as the temperature changes. Mica capacitors are used specifically to stop this from happening, so if you’re already using one, it may be failing due to age or heat damage. Check the component for visible cracks or signs of burning to confirm if it’s the source of the problem.
Conclusion
The reliability of these components makes them a favorite for vintage equipment restoration and high-end audio projects. By keeping your heat low during installation and respecting the voltage limits, you can ensure your circuits remain stable for many years. Always verify your component values against a reliable meter before soldering them into your final build to ensure the best possible performance for your electronics.
