
You can usually finish overhead door remote programming by pressing the “Learn” button on your motor unit and then holding the button on your remote until the light blinks. This process connects your specific transmitter to the receiver inside the garage door opener. The steps below cover how to sync most common residential models, though you should always check your specific owner’s manual if your system uses a dip-switch setup or a secondary wall-mounted keypad.
How remote programming works
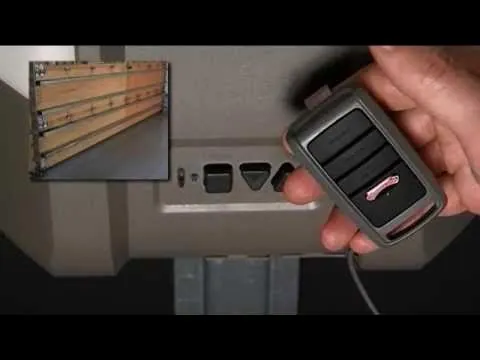
Most modern garage door openers use a rolling code technology. This means the remote and the motor unit share a secret, changing code every time you press the button. This feature prevents people from recording your signal and opening your door later. The motor unit has a memory bank that stores the unique ID of every remote you have synced.
When you put the motor into “Learn” mode, you’re telling it to listen for a new signal and save that ID to its memory. If you lose a remote, you should clear the memory of the motor unit entirely. This stops the lost remote from being able to open your door.
Most units require you to hold the “Learn” button for 6 to 10 seconds to wipe all saved codes. You can check the specific capacity of your motor’s memory in the Genie Company support documentation for your model.
Steps for overhead door remote programming
- Locate the “Learn” button on your motor unit. It’s usually found under the light cover or on the back panel near the antenna wire.
- Press and release the “Learn” button once. You’ll see an LED light turn on or start blinking, which means the unit is ready to pair.
- Within 30 seconds, press and hold the button you want to use on your remote control for 2 to 3 seconds.
- Watch the motor unit for a response. Some models will cause the main light to blink once, while others will make a clicking sound to confirm the remote is saved.
- Wait 10 seconds for the motor to exit the pairing mode automatically.
- Test your remote by pressing the button to ensure the door moves. If it fails, repeat the process but ensure you stay within 5 feet of the motor unit during the first attempt.
The decision to use an internal or external “Learn” button depends on your specific model. If your motor has an external button, you can reach it easily from a ladder. If it’s hidden under a plastic lens, don’t force the cover, as the tabs can be brittle. If you have an older system with switches, you must match the physical pattern of the switches inside the remote to the ones inside the motor.
Quick reference for system types
| System Type | Sync Method | Time Limit | Warning |
|---|---|---|---|
| Rolling Code | Press Learn button | 30 seconds | Don’t hold too long |
| Dip Switch | Match physical toggles | N/A | Turn off power first |
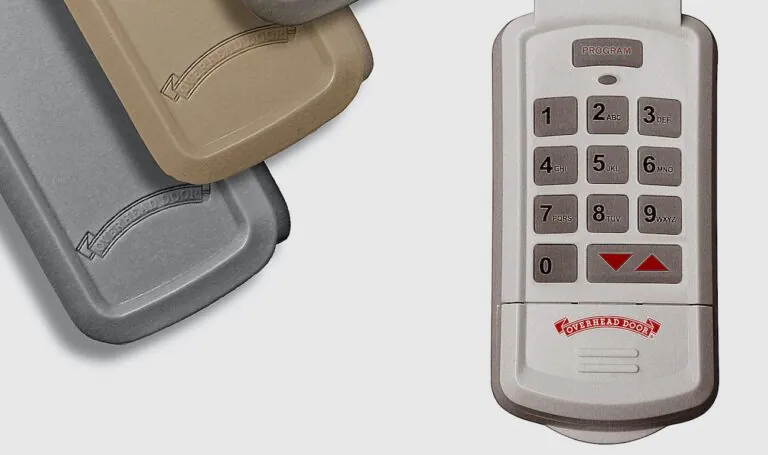
| Wall Console | Press Program button | 60 seconds | Check battery levels |
| External Receiver | Press Receiver button | 20 seconds | Ensure antenna is clear |
If you have a rolling code system, you must act within the 30-second window. If the light stops blinking before you press the button on the remote, the motor has timed out and you must restart the process.
Most users fail by holding the Learn button for several seconds. A quick, firm tap is all the motor needs to enter pairing mode. If you hold it for more than five seconds, you risk factory resetting the unit and erasing all existing remotes.
Dip switch systems are binary. If your new remote has extra switches, you must ensure they’re set to match the corresponding switches on the receiver. Failing to turn off the power here can cause a short circuit in the logic board.
Wall consoles require a stable voltage. If the console light flashes red, replace the batteries before attempting to program. A weak signal will often pair successfully but fail to trigger the motor once you step away.
External receivers are sensitive to interference. If the range is under ten feet, verify the antenna wire is hanging straight down. Metal obstructions between the antenna and the remote will cut your effective distance by half.
Achieving consistent results
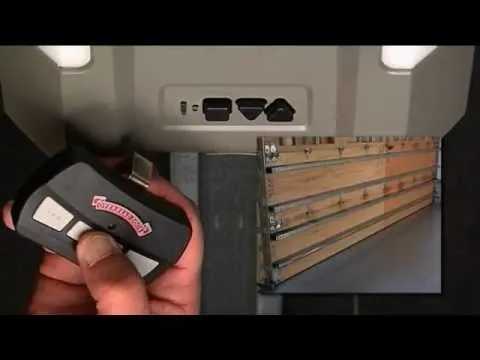
Success depends on the order of your actions and the state of your batteries. Experienced users always replace the remote battery before attempting to program a unit that has been sitting for a long time. Weak batteries often send a signal that’s strong enough to trigger the light but too unstable for the motor to record the code.
Prepare your workspace by placing a sturdy ladder on level ground. If you’re working on a high ceiling, have a second person watch the motor unit to tell you when the light blinks. This saves you from climbing up and down repeatedly.
Never attempt to program a remote while the door is moving, as this can confuse the logic board in some older models. If the motor doesn’t respond, ensure the antenna wire is hanging straight down and isn’t touching any metal parts of the garage frame.
Troubleshooting common issues
| What you notice | What it usually means | What to do first |
|---|---|---|
| Remote light is dim | Battery is dying | Replace the CR2032 battery |
| No response at all | Power is disconnected | Check the garage breaker |
| Only works up close | Antenna is blocked | Straighten the wire |
| Door reverses suddenly | Sensor misalignment | Clean the safety eyes |
When the door reverses before touching the floor, the safety eyes are likely misaligned. If the LED on the sensor is blinking instead of glowing solid, you must adjust the bracket until the beam connects. Don’t force the door closed, as the motor will continue to reverse for safety.
If the remote fails after these steps, the logic board might be faulty. This usually follows a lightning strike or a significant power surge. Check your home’s surge protector status before calling a technician. If the surge protector tripped, the board is likely fine, and you only need to reset the breaker.
If you suspect a board failure, consult a professional garage door technician. Opening the motor housing yourself risks exposure to high-voltage capacitors that hold a charge even when unplugged. Most modern boards are sealed units; if the internal relay clicks but the motor remains silent, the board requires a full replacement rather than a repair.
Safety and regulatory standards
Garage door openers must comply with specific safety standards to prevent entrapment. According to the United States Consumer Product Safety Commission, all residential openers manufactured after 1993 must include an external entrapment protection system, such as infrared sensors. If your opener doesn’t have these sensors, it’s non-compliant and poses a significant safety risk.
You should never attempt to bypass these sensors to make a door function. Most modern units feature a self-diagnostic light that flashes if the sensors are misaligned or obstructed. If the door reverses immediately upon closing, check that the sensors are mounted no higher than six inches from the floor. If they sit higher, a small child or pet could crawl underneath the beam without triggering a reversal.
If your system relies on older mechanical force-adjustment dials rather than digital sensors, it likely lacks the required automatic reversal technology. Attempting to “tune” these old units by increasing the force limit is a common mistake that often results in the door failing to stop when it hits an object.
If you’re unsure if your system meets current safety rules, check the CPSC garage door safety guidelines to verify your installation. If your unit is missing these features, the safest path is to replace the motor unit entirely rather than attempting repairs. A new opener provides the necessary safety logic that older, obsolete hardware simply can’t replicate.
Maintaining your remote performance
Once your remote is programmed, keep it in a cool, dry place. Extreme heat inside a car during summer can degrade the battery and the internal circuit board over time.
If you notice your remote range shrinking, replace the battery immediately. Do this even if the indicator light still glows, as a weak battery often fails to transmit the full signal strength required for the receiver.
Check your manual for the exact limit of your specific model. If the motor refuses to learn new codes, the memory is likely full. You must clear the existing codes before adding new ones.
To bring a remote back after it stops working, repeat the pairing process. If the unit still doesn’t respond after a fresh battery and a re-pair, inspect the antenna wire hanging from the motor. If it’s coiled or tucked against metal, straighten it out to clear the path for the signal. A simple obstruction can cost you thirty feet of reliable range.
Situations requiring a different approach
If your garage door opener is quite old, it may lack the memory capacity or the frequency range to support modern universal remotes. In this case, you should install an external universal receiver kit. This device plugs into your motor unit and provides a modern interface for new remotes.
If you have a commercial-grade motor, the programming process often requires a specific key or a specialized control panel. Don’t attempt to force a standard residential remote to work with a commercial system. Contact the manufacturer directly for the correct procedure.
Most homeowners make the mistake of assuming a “universal” remote works on all legacy systems. If your motor uses a DIP switch system, a standard rolling-code remote won’t sync unless it’s a universal model capable of being set to match your switch pattern. You must match the switch pattern exactly to the remote settings.
Check the back of your motor housing for a “Learn” button. If the button is missing or the casing is sealed, you’re dealing with an older fixed-code system. In these instances, attempting to pair a newer remote will only drain your battery.
Related guides
