
Broiling is the most effective oven alternative to grilling because it uses direct, intense heat from the top element to mimic the high-temperature searing of a flame. This method works well for thin cuts of meat, fish, and tender vegetables that require fast cooking. Because broiling is much faster than roasting, you must watch your food closely to prevent burning.
How to Use Oven Settings Instead of Grilling
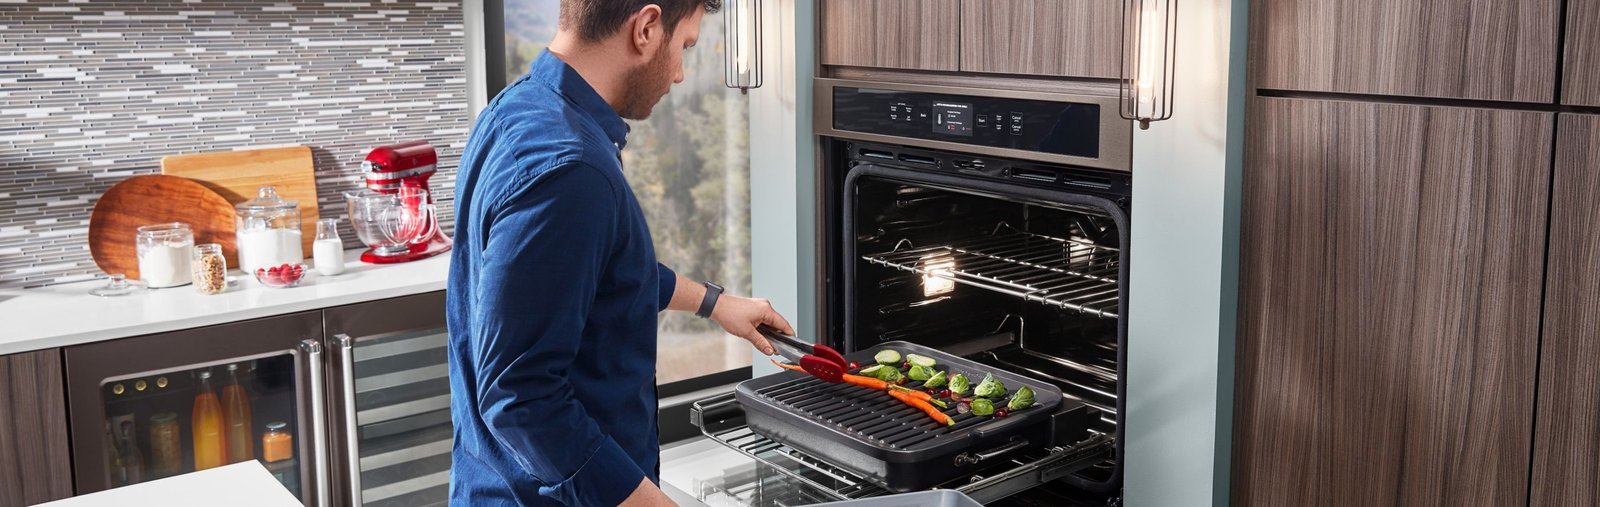
The broiler is a heating element located at the top of your oven that acts like an upside-down grill. When you turn your oven to the “broil” setting, the element gets glowing hot and radiates heat downward onto the food. This process is perfect for caramelizing the surface of foods while keeping the interior moist. It’s designed for thin foods that cook quickly, such as steaks, pork chops, chicken breasts, or peppers.
One common misconception is that you need a special broiler pan to use this feature. While a slotted broiler pan helps drain fat away from the food, you can achieve the same result by placing a wire rack inside a rimmed baking sheet. The most important rule involves distance; the closer your food is to the heating element, the faster it will brown. If your food is too close, the top will burn before the center reaches a safe temperature. This varies by model — check the label or your manual to see if you should keep the oven door slightly cracked or fully closed during operation.
Executing the Broiling Technique
- Move your oven rack to the highest or second-highest position, usually 3 to 6 inches away from the broiler element.
- Preheat your broiler for 5 to 10 minutes; if your oven has a “High” and “Low” setting, use “High” for searing meats and “Low” for thicker items.
- Place your food on a wire rack set over a rimmed baking sheet to allow air to circulate and fat to drip away.
- Brush the food lightly with a high-smoke-point oil, like avocado or grapeseed oil, to encourage browning.
- Slide the tray into the oven and keep the door slightly ajar if your manufacturer recommends it for venting.
- Cook for 4 to 8 minutes per side, depending on the thickness of the meat, and use a digital thermometer to check for doneness.
The judgement call here is the distance between the food and the element. If you see smoke appearing almost immediately, your food is likely too close to the heat source; simply move the rack down one level. If you’re cooking meat, you must ensure it reaches the safe internal temperature of 145°F for whole cuts of beef or pork, and 165°F for poultry, as specified in the safe minimum internal temperatures chart.
Essential Heat and Timing Guide
Use this table to manage your cooking times based on the food type and distance from the element. These times assume an electric oven with a standard broiler element.
| Situation | What to use | How long | What to watch for |
|---|---|---|---|
| Thin Steaks | High setting | 4-6 mins per side | Deep brown crust |
| Chicken Breasts | High setting | 8-10 mins per side | No pink in center |
| Fish Fillets | High setting | 3-5 mins total | Flaky, opaque flesh |
| Bell Peppers | High setting | 5-8 mins total | Charred, black skin |
| Thick Chops | Low setting | 6-8 mins per side | Even browning |
Position your oven rack based on the thickness of the protein. For thin items like fish or flank steak, place the rack in the top position, about three inches from the element. If you’re broiling thick chops or bone-in chicken, move the rack to the center position. This prevents the exterior from burning before the center reaches a safe internal temperature.
Many cooks make the mistake of leaving the oven door fully closed. This traps steam, which prevents the surface from developing a crisp, caramelized crust. Instead, leave the door cracked open about two inches. This allows moisture to escape and keeps the broiler element from cycling off due to excessive heat buildup.
If you’re unsure whether your food is finished, use an instant-read thermometer. Aim for 145°F for fish and 165°F for chicken. If the surface looks dark but the center is still cold, move the pan to a lower rack immediately. Don’t increase the heat, as this will only char the exterior further without cooking the middle. Always let your meat rest for at least five minutes after removing it from the oven to ensure the juices redistribute evenly.
Achieving Perfect Results
Successful broiling relies on preparation and timing. Experienced cooks always pat their food completely dry with a paper towel before adding oil or seasoning. Moisture is the enemy of a good sear; if the surface of your steak or vegetable is wet, it will steam instead of browning. By removing excess surface water, you allow the intense radiant heat to create that signature crust immediately.
Place the empty pan inside the oven while it warms up for at least ten minutes.
Order of operations is also vital. Always season your food right before it goes into the oven. If you salt meat too far in advance, the salt draws moisture to the surface, which interferes with the searing process. If you’re cooking a thick cut, such as a ribeye over one inch, salt it at least forty minutes early to allow the juices to reabsorb. For thinner cuts or vegetables, keep the salt until the final second to maintain a dry exterior.
Keep a close eye on the oven during the final two minutes of cooking. Broiling is an aggressive method, and the difference between a perfectly charred crust and a burnt meal can be as little as 30 seconds. Never leave the kitchen while the broiler is active, as the high heat can turn a small drip of fat into a flare-up very quickly.
Use this simple decision rule to manage your heat. If your food is thin, like asparagus or shrimp, place it on the highest rack, directly under the flame. If you’re cooking a dense protein like a thick pork chop, drop the rack one level lower. This prevents the exterior from carbonizing before the center reaches a safe, juicy temperature. If you detect the smell of smoke, open the oven door immediately to vent the heat, as the broiler element has likely ignited a stray drop of oil.
Troubleshooting Common Issues
| What you notice | What it usually means | What to do first |
|---|---|---|
| Excessive smoke | Fat dripping/burning | Move rack down |
| Burnt top, raw center | Too close to heat | Lower the rack |
| Steamed texture | Excess surface moisture | Pat food dry |
| Uneven browning | Poor airflow | Use a wire rack |
If you see thick, acrid smoke, your fat is likely hitting the heating element directly. Move your rack to the lowest position immediately. If that fails, place a heavy-duty foil tray beneath the food to catch drippings. Don’t use a sheet pan, as it blocks too much heat and prevents proper browning.
When your food is charred on the outside but cold in the middle, you’re suffering from “proximity shock.” The heating element is cycling too fast for the thermal mass of the item. This gives the core time to reach a safe internal temperature before the exterior sugars caramelize.
If your food feels rubbery or steamed, moisture is trapped in the cooking chamber. Always pat proteins dry with a paper towel until no surface sheen remains. If you skip this step, you lose the Maillard reaction, which is the chemical process that creates flavor.
Finally, uneven browning usually happens because the air can’t circulate underneath the food. This prevents the bottom from sitting in its own juices, which is the primary cause of soggy, uneven results.
Safety and Operational Rules
Safety is the most important part of using your oven’s high-heat settings. The primary rule is to never leave the broiler unattended. Because the heating element stays on constantly, the temperature can quickly exceed the smoke point of your fats. According to the National Fire Protection Association, unattended cooking is the leading cause of kitchen fires, so you must stay in the room until the timer goes off.
If your food catches fire, keep the oven door closed and turn off the power. Opening the door introduces oxygen, which can cause the flames to flare up and spread. A common mistake is reaching for water to extinguish a grease fire. Never do this; water causes the oil to splatter and creates a dangerous fireball. Keep a box of baking soda or a Class B fire extinguisher within arm’s reach of the range.
Furthermore, never use glass bakeware under the broiler. Standard glass dishes aren’t designed to withstand the direct, intense heat of an oven element and may shatter. Always use heavy-duty metal pans that are rated for high-heat use. If you’re using a non-stick pan, check the manufacturer’s temperature limit first. Many coatings begin to degrade or release toxic fumes above 500 degrees Fahrenheit.
If your broiler element is located at the top of the oven, ensure your rack is positioned at least four inches away from the heat source. If the food is too close, the exterior will char before the center is cooked. If you’re unsure about your specific oven’s capabilities, consult the user manual provided by the manufacturer before attempting to broil. If your manual is missing, look for the model number inside the door frame and search for the digital version online. When in doubt, perform a test run with an empty metal pan to gauge how your specific element cycles.
Maintenance and Care
Once your cooking is finished, allow the oven to cool completely before attempting to clean the interior. High-heat cooking often leads to baked-on grease, which can smoke the next time you use your oven. To keep your appliance working correctly, wipe the bottom of the oven and the racks with a damp cloth and mild soap after every use. If you see heavy carbon buildup on the broiler element itself, don’t scrub it with metal tools.
Avoid using harsh chemical oven cleaners on the heating element, as residue can cause dangerous fumes during future use. If you find that the broiler isn’t heating evenly, check that the element is securely plugged into the back wall of the oven. If the element remains cold or shows signs of visible damage like cracks or bubbling, it’s likely time for a replacement. Don’t attempt to repair the electrical components yourself, as this requires specific training and poses a risk of electric shock. Contact a qualified appliance technician to handle any internal repairs to the heating system.
When to Avoid Broiling
Broiling isn’t the right choice for every dish. Avoid this method for thick, dense roasts like whole chickens or beef cuts exceeding two inches in thickness. The intense, direct heat will char the exterior long before the thermal energy can penetrate to the center, leading to an uneven and potentially unsafe result. In these cases, use a standard roasting method at 350°F to ensure uniform heat distribution.
Avoid broiling foods with high sugar content, such as those glazed with barbecue sauce, honey, or fruit preserves. Sugar undergoes rapid carbonization under direct, high-heat radiant elements, leaving you with an acrid, bitter flavor profile. If you must use a glaze, apply it only during the final 60 seconds of cooking. Otherwise, choose a lower-heat method like baking or slow-roasting to preserve the integrity of the sauce.
A common mistake is using the broiler to compensate for a lack of time. This often results in a “burnt-on-the-outside, raw-on-the-inside” failure that ruins expensive proteins. If your cut of meat is marbled with significant fat, broiling can also trigger excessive smoke, setting off alarms and filling the kitchen with grease particles.
Use this simple decision rule: if the item is thinner than one inch and lacks high-sugar coatings, broil away. If the item is thick, dense, or heavily glazed, move it to the center rack of your oven and bake. Choosing the wrong method for the wrong food type is the most common reason for kitchen frustration. Match your cooking style to the physical thickness and chemical composition of your meal to guarantee professional results every time.
Frequently asked questions
Can I broil frozen meat?
No, you shouldn’t broil frozen meat because the exterior will burn before the interior reaches a safe temperature. You must thaw meat completely in the refrigerator before broiling. If you use a microwave to defrost, you must cook the meat immediately to prevent bacterial growth.
How long does it take to broil a steak?
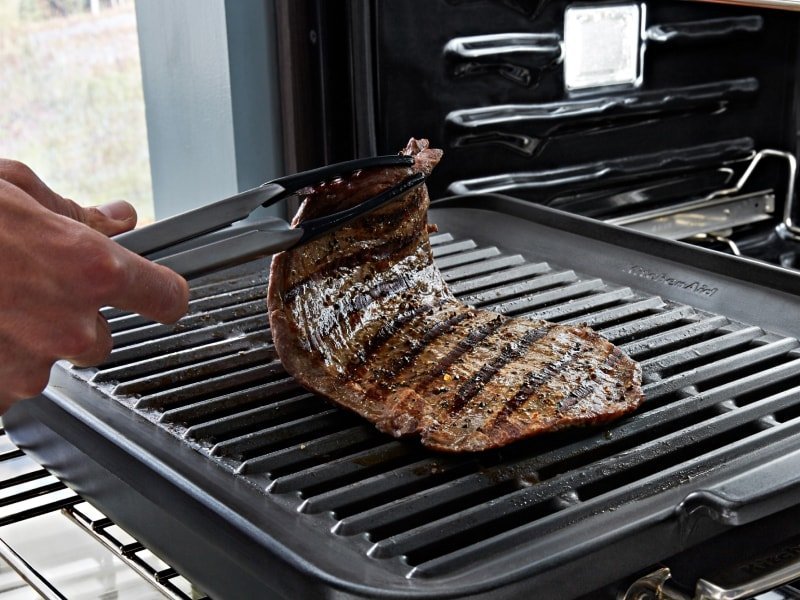
It typically takes 8 to 12 minutes to broil a one-inch-thick steak to medium-rare. You should cook it for 4 to 6 minutes per side until it reaches an internal temperature of 145°F. Always let the steak rest for 5 minutes after removing it from the oven.
Is it safe to leave the oven door open?
You must check your manufacturer’s manual because the requirement depends on your specific oven model. Many modern electric ovens require the door to be closed to prevent overheating. If you’re unsure, keeping the door closed is the safer default to prevent heat loss and accidental fires.
What happens if I use a regular baking sheet?
Using a flat baking sheet without a rack causes food to fry in its own fat rather than sear. A wire rack is essential for air circulation, which helps heat reach all sides of the food.
Can I broil vegetables?
Yes, you can broil vegetables like bell peppers, asparagus, and zucchini for a quick, charred flavor. They usually require only 5 to 8 minutes of cooking time on the high setting. Watch them closely, as vegetables burn very quickly once they start to brown.
Oven alternative, in short
Once you’ve got the hang of the high heat, experiment with different marinades to see how they caramelize under the flame. It’s a great way to add deep, smoky flavors to your weeknight meals. Don’t be afraid to try it with a simple steak tonight; you’ll love the results.
Related guides