
You can link a remote to a receiver by pressing the “Learn” button on the motor head and holding the transmitter button for three seconds. Programming a legacy garage door opener involves matching your remote’s frequency to the internal radio receiver. This works for units made after 1993 with a physical button; otherwise, you may need an external receiver kit.
Items needed to program your door

Before starting, ensure you have the necessary items to complete the process safely and efficiently. Having these ready prevents unnecessary trips up and down the ladder while the receiver is in its brief learning mode.
- A sturdy, non-conductive stepladder of appropriate height to reach your motor unit.
- The original manufacturer remote or a compatible universal replacement transmitter.
- A fresh battery installed in your remote to ensure a strong signal during pairing.
- A flat-head screwdriver if you need to remove the plastic light cover on the motor.
- A helper to press the remote button while you stand near the motor, if possible.
- The owner’s manual for your specific model to verify the location of the “Learn” button.
If you’re using a universal remote, you must follow the specific DIP switch settings or frequency codes provided by the manufacturer. Confirm if your specific legacy model requires a bridge or an external receiver before you climb the ladder. Using an incompatible frequency will prevent the remote from pairing, regardless of how many times you press the button.
Check the color of the “Learn” button on your motor unit before buying a replacement. A purple button typically indicates a 315 MHz frequency, while a yellow button signifies Security+ 2.0 technology. If you buy a remote that operates on 390 MHz for a yellow-button unit, the pairing process will fail every time.
Many users mistakenly assume all remotes of the same brand are interchangeable. If your motor is older than ten years, the internal receiver may not support rolling-code encryption. In these cases, you must install an external universal receiver kit to the motor’s terminals.
If you see two wires connected to the “wall button” terminals, you have enough space to piggyback the new receiver. If the terminals are already crowded, consult the manufacturer’s instructions for proper wiring or use a terminal block to manage multiple connections.
Steps to Program a Legacy Garage Door Opener
- Locate the “Learn” button on the garage door opener motor housing. It’s often hidden under a light lens cover or near the antenna wire.
- Press and immediately release the “Learn” button once. A small LED indicator light will turn on and remain solid for about 30 seconds.
- Aim your remote transmitter at the motor unit and press the button you wish to use for that door. Hold it down for three seconds.
- Watch the motor unit for a response. The indicator light will blink once or the motor’s light bulbs will flash, signaling that the code is accepted.
- Release the button on your remote once the signal is confirmed.
- Test the remote by pressing the button again to ensure the door opens or closes as expected.
Tip: If the light doesn’t flash, wait for the LED to turn off, then repeat the process from step two. Careful: Don’t hold the “Learn” button for more than 10 seconds, as this often clears all existing remotes from the memory. If you accidentally clear the memory, you’ll need to re-program every remote that was previously working.
Situations Affecting Setup
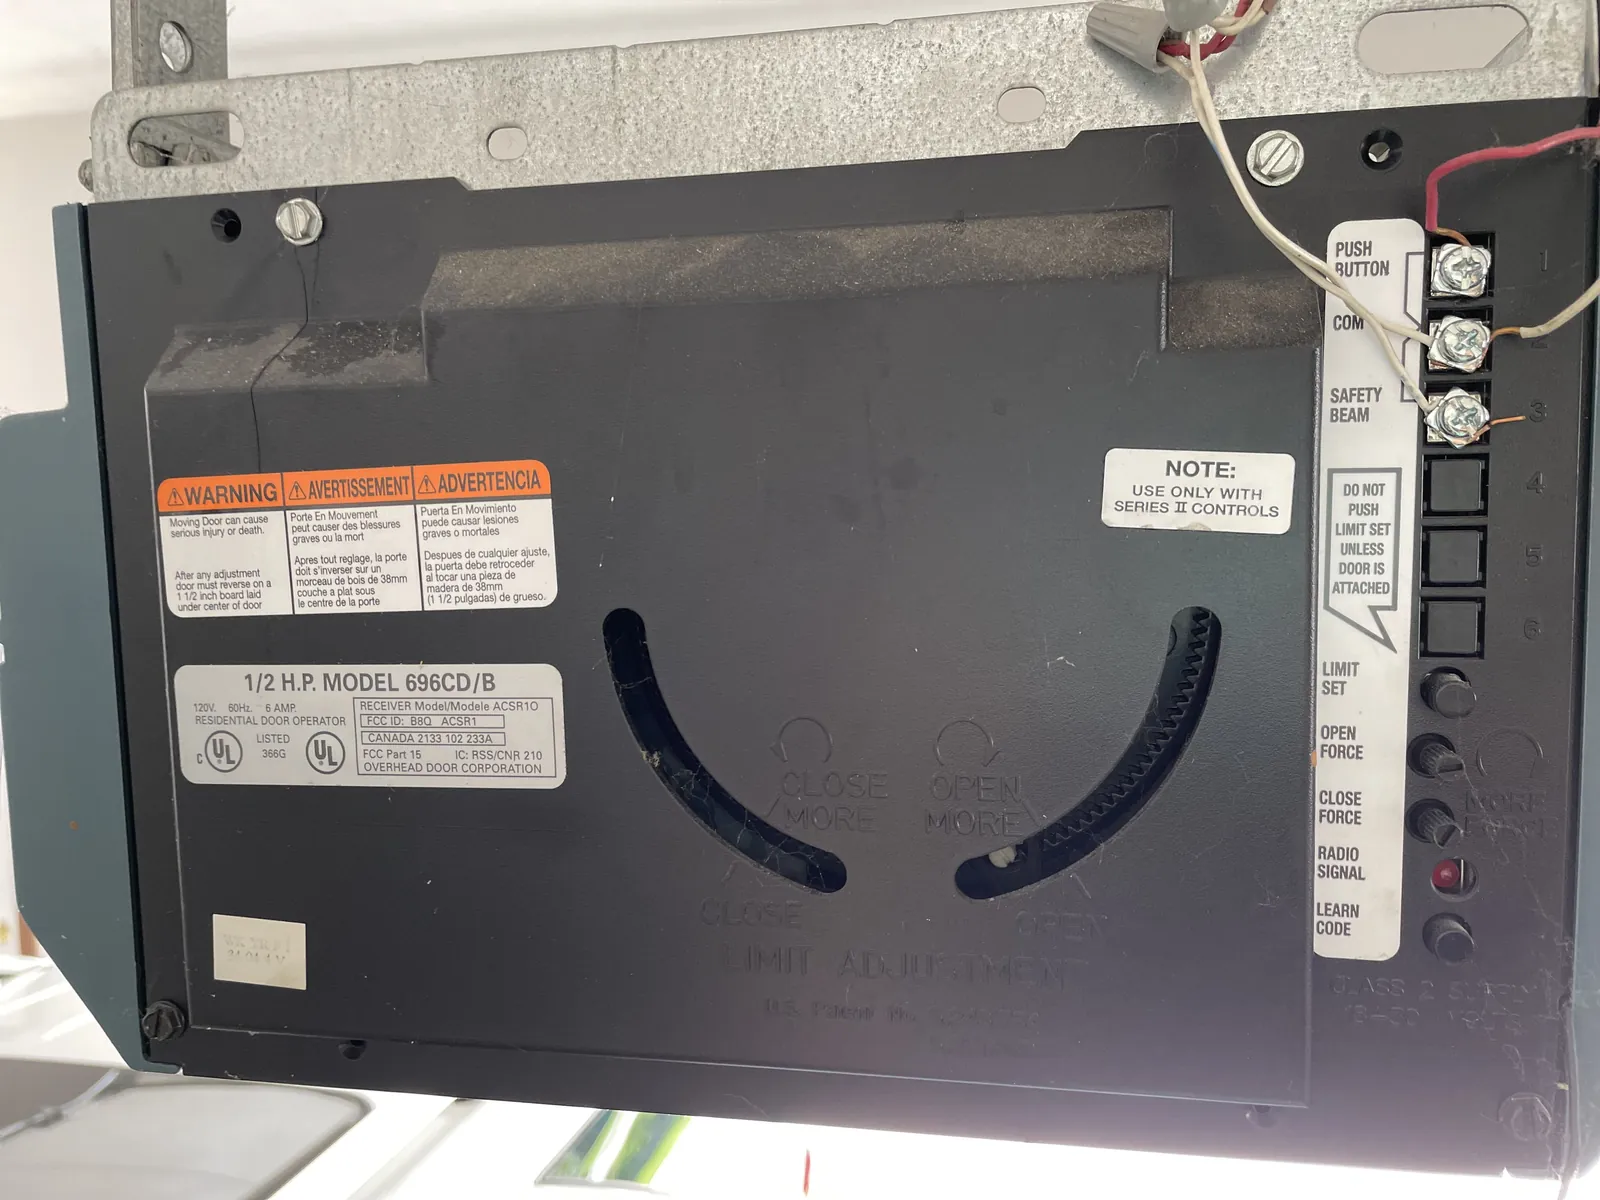
The time and effort required to sync your device depend on the age and type of your opener system. Newer legacy models are generally easier to sync than units from the early 1990s.
| Situation | Time Required | Complexity | What to watch |
|---|---|---|---|
| Standard Learn Button | 2 minutes | Low | LED light status |
| DIP Switch Models | 10 minutes | Medium | Switch alignment |
| External Receiver Kit | 30 minutes | High | Wiring connections |
| Multi-door Setup | 5 minutes | Low | Channel selection |
If your opener uses physical DIP switches, you must ensure the toggle positions on the remote match the motor unit exactly. A single mismatched switch prevents the signal from registering, forcing you to restart the entire sequence. If the opener fails to respond after three attempts, check for corrosion on the metal contacts.
External receiver kits are necessary for units lacking built-in radio compatibility. These require splicing into the wall-mounted button wires. If you see two distinct sets of wires, connect the receiver to the primary terminals that trigger the motor directly.
Always start by programming a single remote to verify the connection before syncing multiple transmitters. Attempting to add several devices at once often triggers memory resets in older logic boards. If your unit has a “rolling code” feature, you have exactly thirty seconds to press the remote button after hitting the learn switch. If the light doesn’t flash, the system has timed out, and you must begin again.
Verifying the Programming
A successful program shows the door responding immediately to your remote command without any hesitation or delay. If the motor clicks but the door doesn’t move, check that the safety sensors at the bottom of the door are aligned. These sensors are a critical safety feature required by the Consumer Product Safety Commission to prevent the door from closing on obstacles. If they’re blocked, the motor will ignore your remote command to prevent a safety incident.
Watch the small LED indicator on each sensor unit. A solid light confirms a clear, aligned path, while a blinking or off light indicates a break in the beam. If you see the latter, gently nudge the housing until the light stabilizes.
If you notice a stuttering movement, the remote signal might be weak. Ensure the antenna wire hanging from the motor unit isn’t touching any metal parts, as this can ground the signal and reduce your range. Keeping the antenna clear and straight is the simplest way to prevent intermittent connectivity.
If the range remains poor, replace the remote battery; a voltage drop often manifests as erratic, short-range behavior before the battery dies completely. If the door reverses immediately after touching the floor, consult your owner’s manual to properly adjust the down-limit settings.
Safety Standards and Maintenance
Compliance with safety standards is necessary to keep your home secure. If you’re using a system that doesn’t support rolling codes, consider upgrading to a modern receiver. Older systems without these security features are more vulnerable to signal cloning, which allows intruders to replicate your remote’s frequency in seconds.
After programming, always store your remote in a secure location and never leave it in an unlocked vehicle parked outside. A remote left in the driveway is an open invitation to anyone passing by.
If you find that your system is damaged or the motor housing has exposed wires, don’t attempt to repair it yourself. Contact a licensed garage door technician to inspect the unit. A professional can ensure the force settings and reverse mechanisms comply with current safety laws, protecting your family and your property.
Test your auto-reverse feature monthly by placing a 2×4 piece of lumber on the floor in the door’s path. If the door doesn’t reverse, consult a professional to adjust the force settings. If the door doesn’t reverse within two seconds of contact, the sensors are misaligned or the force settings are dangerously high. Adjusting these requires specific calibration tools; attempting it manually often leads to hardware failure.
Alternative Programming Methods

Using a Wall Console
Some legacy systems allow you to program remotes through the wall-mounted control panel. This eliminates the need for a ladder. You simply press the “Learn” button on the wall unit and follow the same sequence as you would on the motor head.
Programming via DIP Switches
If your remote has a series of small switches inside, you must match them exactly to the switches inside your motor housing. This is a manual, physical process that doesn’t require a “Learn” button.
Adding an External Receiver
If your motor is too old to have a “Learn” button, you can install an external radio receiver. This device wires directly into your existing motor ports and gives you a modern receiver that accepts current remote standards.
Related guides
- Chamberlain Garage Door Opener Troubleshooting: Easy Fixes
- LiftMaster vs Chamberlain: Which Garage Door Opener Is Best
- LiftMaster vs Overhead Door Garage Door Openers: The Verdict
Frequently asked questions
Can I program a remote without a learn button?
Yes, you can program a remote without a “Learn” button if your system uses physical DIP switches. You must open both the remote and the motor housing to match the pattern of the switches exactly. If your system is too old to have switches or a button, you must install an external receiver kit to bridge the signal between a new remote and your old motor unit.
How long does it take to clear the memory?
It takes about 10 seconds of holding the “Learn” button to clear all existing codes from the memory. Be careful when pressing this button, as this action is permanent and can’t be undone. Once you clear the memory, you’ll have to manually re-pair every remote and wireless keypad that was previously connected to the system.
Is it safe to use a universal remote?
Yes, it’s safe to use a universal remote as long as it’s compatible with the frequency of your garage door motor. Ensure you follow the specific manufacturer instructions for your universal remote, as the pairing process varies significantly between brands. Always test the safety reversal feature after programming any new device to ensure the door still stops if it detects an obstruction.
Why won’t my garage door opener accept the code?
The most common reason a motor refuses a new code is that it’s already at its maximum memory capacity. If you have reached this limit, you must clear the memory entirely and re-program only the remotes you currently use. Check your owner’s manual to find the specific storage limit for your model.
What happens if the LED light doesn’t turn on?
If the LED light is off, the motor unit likely lacks power or has a faulty control board. Check your home circuit breaker to ensure the outlet is functional. If the outlet works but the motor remains unresponsive, the internal logic board may require professional replacement by a qualified technician.
Conclusion
If your remote still won’t connect, check the batteries or look for loose wires near the motor. Should you decide to upgrade your security, consider installing a modern smart hub that works with your phone. You’ll find that these newer systems make coming home much easier and give you peace of mind.

1 thought on “How to Program a Legacy Garage Door Opener: Step-by-Step Guide”