
Motor windings are the coils of copper or aluminum wire wrapped around the core of an electric motor to create a magnetic field when electricity flows through them. These windings serve as the vital link that converts electrical energy into the mechanical motion you use to power tools, appliances, or industrial machines. Without these precise loops of wire, the motor can’t generate the force needed to turn its shaft.
Choosing the right type of winding depends on the motor’s design and your specific power needs. If you’re running a high-load machine, you’ll need heavy-gauge windings that handle high current without melting. If you’re working with small household fans, thinner wire is standard. The most common mistake people make is ignoring the insulation class, which tells you how much heat the winding can withstand before it fails.
Installing and maintaining motor windings
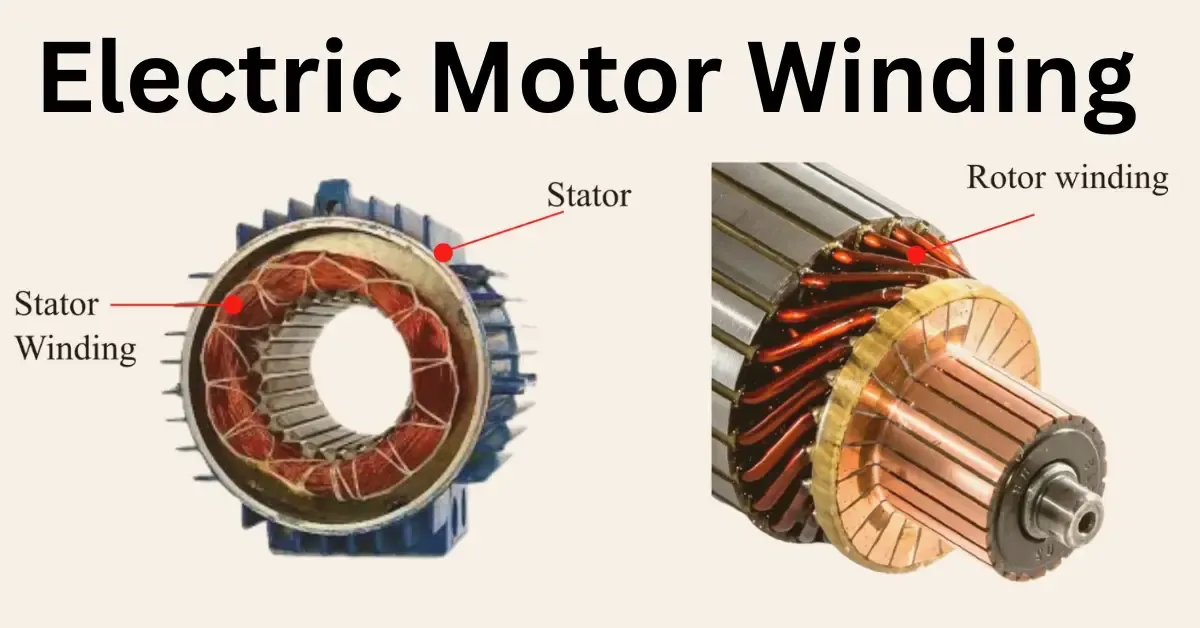
Clean the stator slots using a non-conductive, pressurized air source to remove dust and metallic debris. Any residual iron filings act as grinding paste, eventually sawing through the insulation.
Insert the insulating paper, known as slot liners, to prevent the copper wire from touching the metal frame. Ensure these liners extend at least 5mm beyond the slot edges to prevent phase-to-ground arcing.
Wind the copper wire into the slots according to the manufacturer’s specific turn count and coil pattern. If your coil feels loose, you have used the wrong gauge; stop immediately, as loose wires vibrate until the enamel coating wears away.
Apply a high-temperature resin varnish to the completed coils to secure them against vibration and moisture. Use a vacuum pressure impregnation process if you need the motor to survive high-humidity environments.
Bake the motor in a temperature-controlled oven at the manufacturer’s recommended heat setting to cure the varnish completely. If the center of the coil remains tacky, the varnish will liquefy during operation, causing the windings to shift and fail.
Never force wires into the slot with metal tools. Even a microscopic scratch in the wire insulation creates a path for a short circuit. Use only nylon or hardwood wedges to seat the coils.
If you lack specialized winding equipment or a curing oven, consult a certified motor repair shop. Attempting to cure varnish in a standard kitchen oven ruins the motor and creates a significant fire hazard from the off-gassing chemicals.
How long winding work takes
The time required to wind a motor depends on the size of the unit and the complexity of the internal coil configuration.
| Situation | How long | What changes it | What to watch for |
|---|---|---|---|
| Small hobby motor | 2-4 hours | Wire diameter | Insulation cracks |
| Household appliance | 6-10 hours | Coil complexity | Varnish buildup |
| Industrial motor | 2-5 days | Rotor dimensions | Core alignment |
Budget additional time if you’re stripping old, baked-on varnish by hand rather than using a thermal oven. This manual removal often hides microscopic burrs in the slots that will shred new insulation.
If the process takes significantly longer than these estimates, it often points to hidden damage in the stator core or a lack of specialized winding jigs. If you find the wire tension is inconsistent, stop immediately. Attempting to force the coil into place with a screwdriver costs you the entire winding, as even a minor nick in the enamel leads to a short circuit within weeks of operation. Use a plastic drift tool to seat the coils instead.
Checking the health of coils
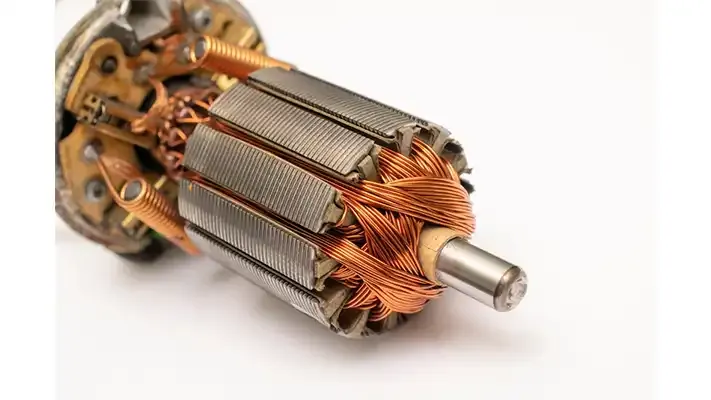
You can identify the condition of your windings by checking for physical signs of wear. Look for dark, brittle, or charred insulation, which indicates the motor has overheated. A strong, acrid smell coming from the motor vents is another common sign that the insulation has failed.
If the motor is still running but makes a loud humming sound or vibrates excessively, the windings may have developed a partial short. At this point, the motor should be tested by a technician using a megohmmeter to measure insulation resistance.
Most people make the mistake of relying solely on a basic multimeter to check for continuity. This is a trap because a standard meter uses a low-voltage battery that can’t detect insulation breakdown under actual operating loads. Using one to test high-voltage coils provides a false sense of security that often leads to catastrophic motor failure during peak demand.
If the motor housing is significantly hotter than its normal operating temperature, the insulation may be degrading and the motor should be inspected. If the motor runs cool but smells faintly of ozone, schedule a professional megger test immediately to prevent a total short circuit.
Mistakes that ruin motor coils
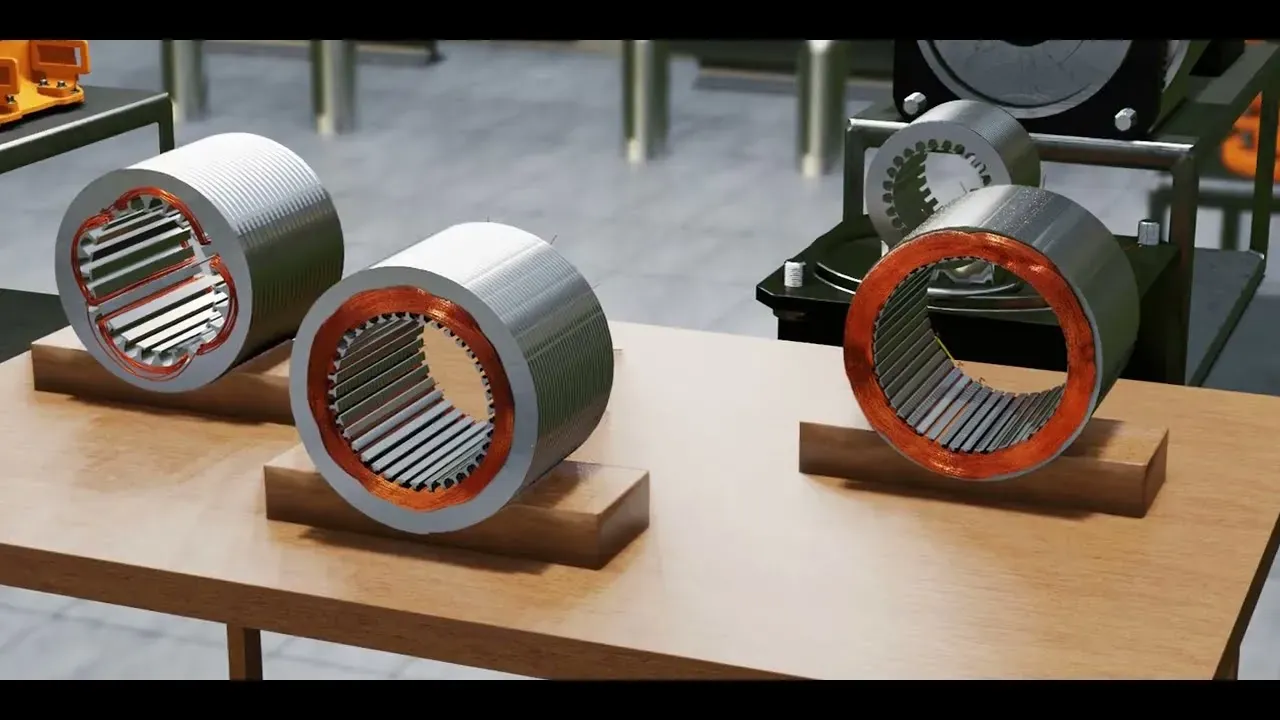
Using the wrong wire gauge for the motor’s power rating causes excessive heat buildup that melts insulation. Always match the replacement wire to the original manufacturer’s specifications. If you can’t find the exact gauge, don’t substitute a different size; source the correct wire to preserve the motor’s slot fill and magnetic design. A thinner wire increases resistance, which forces the motor to run hotter and shortens its lifespan.
Exceeding the maximum temperature during the varnish curing process makes the insulation brittle and prone to cracking. Keep your oven calibrated and use an independent probe to verify the internal air temperature. If the varnish manufacturer specifies a range, aim for the lower bound. Curing too fast creates internal bubbles that trap moisture and lead to premature shorts.
Leaving gaps in the winding pattern creates hotspots where current density exceeds what the insulation can handle. Take your time to ensure each turn is tight and uniform. If you notice a cross-over or a loose loop, stop and rewind that section immediately. A single overlap point creates a pressure concentration that will eventually puncture the enamel coating, leading to a complete motor failure under load.
Related guides
- Cuisinart Grinder Not Working: Simple Fixes for Motor Issues
- Momcozy M5 Motor Not Working: Simple Fixes and Troubleshooting
Frequently asked questions
Can I repair motor windings myself?
No, you shouldn’t attempt to rewind a motor yourself unless you have the specialized winding mandrels, insulation materials, and vacuum pressure impregnation equipment required for the job. Most modern motors require precise tensioning and professional-grade varnishes to survive the heat of operation. Attempting this without the correct tools will likely result in a short circuit the moment you apply power, potentially damaging the motor beyond repair.
How do I know if the windings are burned?
You can identify burned windings by the presence of a sharp, pungent, burnt-plastic smell and visible darkening or blistering of the wire insulation. If you see charred sections or if the wire appears brittle, the insulation has broken down and the motor will soon fail. Don’t continue to operate a motor showing these signs, as a shorted winding can cause the motor casing to become electrically live.
What causes motor windings to fail?
The most common cause of failure is heat, which breaks down the insulation coating on the wire over time. This happens when a motor is overloaded, blocked by debris, or operated in an environment that prevents proper airflow. Once the insulation fails, electricity arcs between the wires, creating a short circuit that prevents the motor from creating the magnetic field needed to turn.
Is it safe to run a motor with damaged windings?
No, it isn’t safe to run a motor with damaged windings because the insulation failure can cause the metal housing of the motor to become energized. This creates a significant shock hazard for anyone touching the equipment. Additionally, a shorted motor draws excessive current, which can overheat the power cables and potentially trigger an electrical fire in your home or workshop.
How much does it cost to rewind a motor?
The cost of a professional rewind varies by the horsepower of the motor, typically ranging from 40% to 60% of the price of a new unit. For very small motors, the labor cost often exceeds the value of the device, making replacement a more logical choice. You should request a quote from a local motor repair shop to compare the specific cost against buying a new, modern replacement.
Why do motor windings use copper?
Copper is used because it provides the highest electrical conductivity of any non-precious metal, allowing the motor to run efficiently with minimal energy loss as heat. While aluminum is sometimes used to save costs in large motors, it requires a larger wire diameter to carry the same current. Copper remains the standard because it allows for compact, high-performance motor designs that fit into smaller spaces.
Conclusion
Taking care of your equipment ensures these internal coils stay in great shape for years. If you notice a burning smell or a sudden loss of power, don’t ignore it. It’s a good idea to have a professional inspect the wiring before a small issue turns into a costly repair.
