
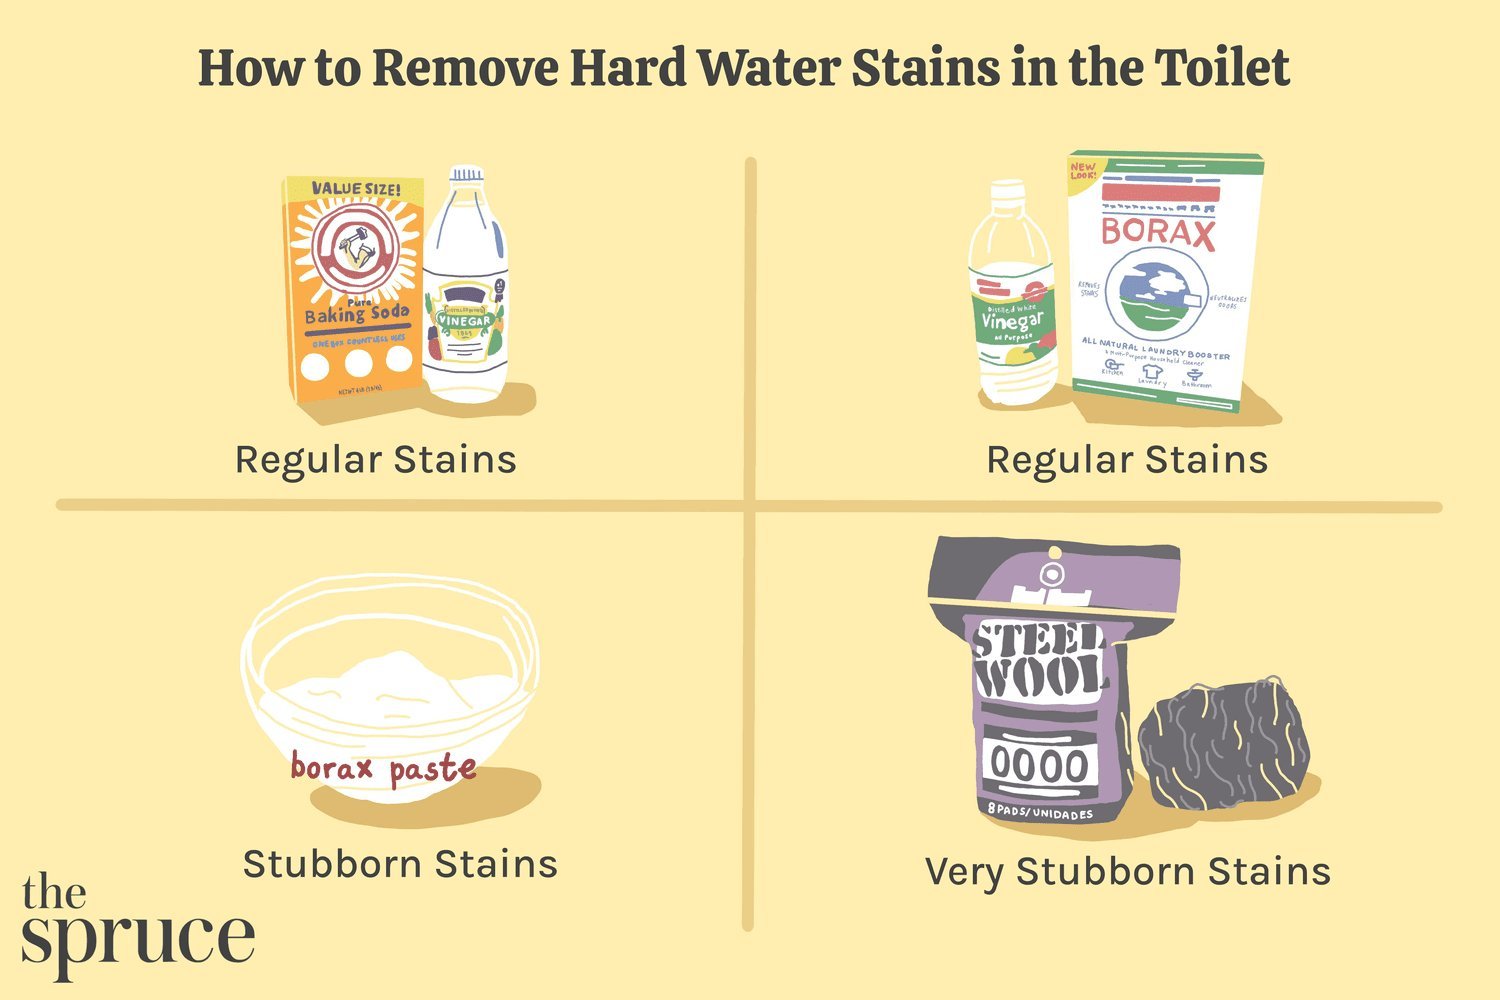
Learning how to clean toilet seat stains is simple: apply a paste of baking soda and water, let it sit for 15 minutes, and scrub. This method cleans without damaging finishes, though results depend on the seat material, the age of the discoloration, and whether the stain has penetrated porous plastic.
Who needs to clean toilet seat stains
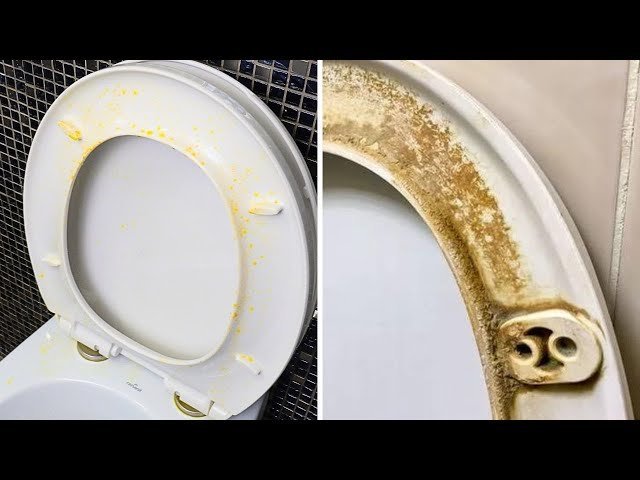
This page serves homeowners and renters who notice persistent yellowing or dark spots on their toilet seats. You’re likely someone who has tried standard bathroom cleaners and found they don’t lift these specific marks. We assume you have a standard plastic, resin, or enameled wood seat. If you have a seat made of specialized, high-end stone or a dark-colored wood finish, this guide may not apply, as those materials react differently to acidic or abrasive cleaners.
We also distinguish between “surface grime” and “material degradation.” If your seat is decades old and the plastic has turned yellow throughout, no amount of scrubbing will restore it to white, as the material itself has chemically aged. This guide is best for those dealing with localized stains caused by mineral deposits, hard water, or cleaning neglect. If you’re looking for a way to fix a cracked seat or a broken hinge, this page isn’t for you. We focus strictly on the aesthetic restoration of discolored surfaces. The advice here assumes you have access to basic kitchen staples and a soft-bristled brush.
Variables that change the result
The effectiveness of your cleaning efforts hinges on three main factors: material porosity, water hardness, and the duration of the buildup.
The most critical factor is the material. Plastic seats that are scratched or worn have a higher surface area, allowing stains to settle deeper. If your seat has visible cracks or deep scratches, you’ll find it nearly impossible to remove stains completely because the bacteria and minerals are trapped below the surface. You can check your seat’s material by looking at the underside for a manufacturer stamp.
Water hardness determines how quickly mineral stains return. If your home has hard water, calcium and magnesium deposits will bond to the seat more aggressively. You can verify your water hardness by checking your annual municipal water quality report or using a home testing kit. If your local water is classified as “hard,” you’ll need to clean the seat more often to prevent permanent etching.
Most people make the mistake of using harsh, acidic cleaners like pure bleach or heavy-duty industrial degreasers on plastic seats. While these might work once, they often eat into the protective top layer of the plastic. Once that layer is gone, the plastic becomes porous, meaning it will stain faster and more permanently the next time.
Finally, the dwell time of your cleaning agent is often underestimated. You can’t simply wipe and rinse. The chemical reaction between the cleaner and the mineral stain requires time to break the bond. If you rinse too early, you have wasted your effort.
Step by step
- Mix 2 tablespoons of baking soda with 1 tablespoon of water in a small bowl to create a thick, spreadable paste.
- Apply the paste directly onto the stained areas using a soft cloth or an old toothbrush, ensuring the entire discolored spot is covered.
- Allow the paste to sit undisturbed for 15 to 20 minutes; the baking soda needs this time to lift the mineral deposits from the seat’s surface.
- Scrub the area gently in a circular motion using the soft-bristled brush, applying light pressure to avoid scratching the finish.
- Wipe away the paste with a damp cloth to check if the stain has lifted; if the mark remains, reapply the paste and wait an additional 10 minutes.
- Rinse the seat thoroughly with clean water to remove all residue, as leftover baking soda can attract dust and grime later.
- Dry the seat completely with a microfiber towel, as leaving water on the surface can encourage new mineral buildup.
The judgement call here is the transition from manual scrubbing to accepting the limits of the material. If you have scrubbed for 10 minutes and the mark hasn’t changed, the stain is likely embedded in the plastic’s molecular structure due to age or heat exposure. Continuing to scrub at this point will only ruin the finish. If you have a seat with metal hinges, avoid getting water or cleaning paste inside the bolt holes, as this can lead to rust or hardware loosening over time.
How to clean toilet seat stains by situation
Different stains require different approaches based on the source of the discoloration.
| Situation | Action to take | Effort level | Watch for |
|---|---|---|---|
| Light yellowing | Baking soda paste | Low | Surface scratching |
| Hard water crust | White vinegar spray | Medium | Odor buildup |
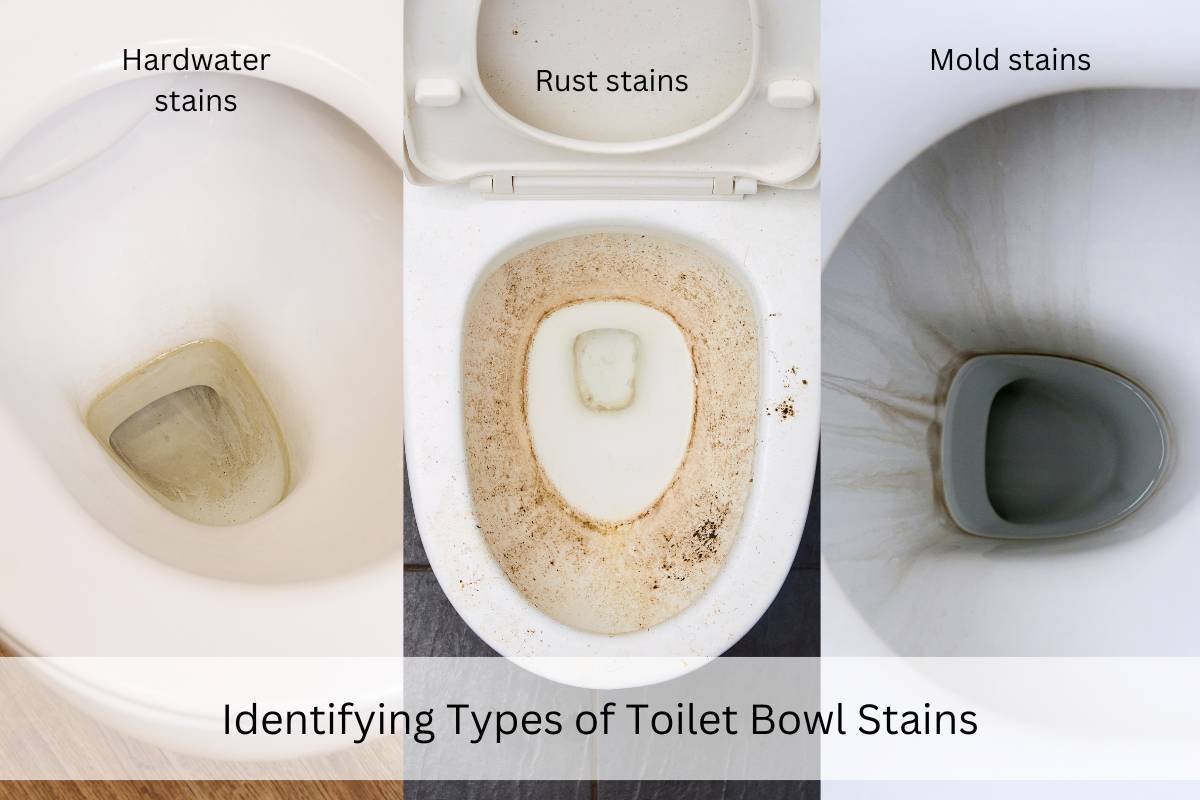
| Dark mildew spots | Hydrogen peroxide soak | Medium | Fabric bleaching |
| Heavy mineral buildup | Citric acid solution | High | Material etching |
| General daily grime | Mild dish soap | Low | Slippery residue |
If the stain persists after one application, check the material porosity. Porous surfaces like unsealed stone absorb cleaners, which can cause permanent structural damage if left too long. For these, switch to a pH-neutral cleaner immediately.
A common mistake is mixing vinegar with bleach to tackle mildew. This creates toxic chlorine gas. If you’re unsure what a previous cleaner contained, rinse the area with plain water for at least three minutes before applying a new chemical.
Use this rule: If the stain is organic, like mold, use an oxidizer. If the stain is mineral, like lime, use an acid. Never use an acid on marble or limestone, as it will permanently etch the finish.
What separates a good result from a poor one
Preparation and technique
Experienced cleaners always remove the toilet seat from the bowl before attempting deep cleaning. This allows you to reach the underside and the hinges, where most stains and odors hide. If you leave the seat attached, you’re only cleaning the top, which leaves the main source of the problem untouched. Always use a soft cloth or a non-scratch sponge. Using a scouring pad or steel wool is a common error that creates thousands of tiny grooves in the plastic. These grooves become magnets for future stains, ensuring that your toilet seat will look dirty again within a few days, regardless of how well you clean it.
Consistent maintenance
A good result is defined by the absence of abrasive damage rather than just the removal of the stain. If you clean the seat but leave the surface dull and matte, you have effectively ruined the protective coating. Check the seat’s surface under bright light after it has dried. If it looks uniform and smooth, you have succeeded.
What goes wrong, and what to do
| What you notice | What it usually means | What to do first | How to stop it happening again |
|---|---|---|---|
| Dull, cloudy finish | Acidic cleaner damage | Apply plastic polish | Use mild soaps only |
| Persistent brown ring | Mineral buildup | Use white vinegar | Dry seat after cleaning |
| Sticky residue | Leftover soap | Rinse with water | Use less cleaner |
| Persistent odor | Deep bacteria growth | Replace the seat | Sanitize weekly |
| Small surface cracks | Material fatigue | Replace the seat | Avoid harsh scrubbers |
Rules for safe cleaning
You must follow the safety guidelines provided by your toilet seat manufacturer regarding chemical compatibility. Most manufacturers, such as Kohler or Toto, explicitly warn against using abrasive cleaners, bleach, or acidic toilet bowl cleaners on the seat itself. These chemicals can cause the plastic to become brittle or change color permanently. You can find the specific maintenance instructions for your model on the manufacturer’s official website under the “Care and Cleaning” section.
If you’re using a commercial bathroom cleaner, always check the label for the “safe for plastic” designation. If the product is intended for porcelain bowls, it often contains high levels of hydrochloric acid, which is too harsh for plastic seats. If you have a seat with a “soft-close” mechanism, be extra careful not to force the lid or get cleaning fluids inside the hinge dampers, as this can destroy the internal mechanism that controls the closing speed.
The cost of maintenance
The cost of cleaning your toilet seat is primarily measured in time rather than money. Most of the materials you need—baking soda, white vinegar, and dish soap—are inexpensive in total. However, the time required to properly deep-clean a seat is about 30 to 45 minutes if you include removing, cleaning, and reinstalling the hardware. The cost increases significantly if you use specialized plastic cleaners or restorative kits, which are a cheap part per bottle.
The biggest cost is the potential for early replacement. A high-quality slow-close toilet seat can be a significant investment. If you ruin the finish by using the wrong cleaner, you’re forced to spend that amount much sooner than necessary. By spending 15 minutes on a gentle, natural cleaning method, you’re effectively protecting your investment. If your seat is already heavily stained and the surface is rough to the touch, no amount of cleaning will fix the underlying material. In that case, the “cost” of cleaning is just a waste of time, and you should compare the price of a new seat against the time you would spend trying to restore a damaged one.
Keeping it right afterwards
To keep your seat in good condition, wipe it down with a damp cloth after each use to prevent moisture and minerals from settling. You don’t need to use chemicals every day; water and a soft towel are sufficient to remove daily debris. If you notice water spots or light mineral rings forming, spray the seat with a mixture of half water and half white vinegar regularly. Wipe it dry immediately after spraying.
The sign that it needs a deeper clean is when the seat feels “tacky” or when you can see a dull ring forming where the lid meets the bowl. If you see these signs, repeat the baking soda paste method immediately. Avoid using scented aerosol sprays near the seat, as the chemicals in these sprays can sometimes react with the plastic and lead to yellowing over time. If your bathroom is poorly ventilated, consider running an exhaust fan during and after showers. Humidity trapped in the bathroom can accelerate the growth of mildew on the seat, which is much harder to remove than simple mineral deposits.
When this is the wrong approach
This guide isn’t suitable if your toilet seat has deep, structural cracks or if the plastic has become yellowed and brittle due to extreme age or exposure to UV light. In these cases, the chemical structure of the plastic has changed, and no cleaning method will restore it. You should replace the seat to ensure hygiene, as cracks harbor bacteria that are impossible to sanitize.
If your seat is made of wood with a painted finish that has started to chip or peel, don’t use baking soda or vinegar, as these will seep into the wood and cause it to swell or rot. For painted wood seats, use only a damp cloth and a very mild, pH-neutral soap. If the paint is failing, the seat is no longer safe to clean and should be replaced. If you suspect the discoloration is caused by a leak from the tank or the wall, stop cleaning the seat and address the plumbing issue first, as continuous moisture will cause the stain to return within days.
Frequently asked questions
Can I use bleach to clean toilet seat stains?
No, you shouldn’t use bleach on plastic toilet seats. Bleach is a harsh chemical that can cause the plastic to yellow, become brittle, or lose its protective finish, making it more likely to stain in the future. Always check the manufacturer’s manual for approved cleaning agents.
How long should I let the cleaner sit?
About 15 to 20 minutes is the ideal time for a baking soda paste to break down surface stains. If you leave it on for too long, the paste may dry out and become difficult to remove, while rinsing too early won’t allow the cleaner to work effectively.
Is it safe to use vinegar on my seat?
Yes, diluted white vinegar is safe for most plastic toilet seats when used as a weekly cleaner. Mix it with equal parts water and wipe it off immediately after use. Don’t let vinegar sit on the seat for hours, as its acidity can eventually dull the plastic finish.
What happens if I scrub too hard?
Scrubbing too hard creates microscopic scratches in the surface of the seat. These scratches trap dirt, bacteria, and mineral deposits, which makes the seat look dirty faster and harder to clean over time. Always use a soft-bristled brush or a microfiber cloth to maintain the finish.
Does it matter if I have a wooden seat?
Yes, wooden seats require different care than plastic ones. You must avoid soaking them in water or using acidic cleaners like vinegar, which can damage the paint or the wood grain. Use only a damp cloth and mild soap, then dry the seat immediately to prevent warping.
Why do my stains keep coming back?
The stains usually return because the surface of the seat has become porous or because your water has high mineral content. If the seat is old, the protective layer is likely worn away. If the water is hard, you must dry the seat after every cleaning to stop new deposits.
What to do next
Start by wiping the seat with a damp cloth to identify which marks are surface grime and which are embedded stains. If the marks remain, apply the baking soda paste as described in the steps above to see if they lift.
If the surface remains discolored or feels rough after cleaning, it’s time to stop and consider purchasing a new seat to maintain proper bathroom hygiene. A rough surface acts as a harbor for bacteria that standard cleaners can’t reach.
Check the underside of the mounting bolts for rust or mineral buildup. If they’re corroded, replace the hardware immediately to prevent the seat from shifting during use. A loose seat causes hairline fractures in the plastic, which eventually lead to permanent, unsanitary cracks that are impossible to disinfect.
Related guides