
You can fill a gap behind slide in range units by installing a custom stainless steel backguard or a specialized filler strip to prevent debris and heat damage. These solutions typically require 30 to 60 minutes of labor and are inexpensive relative to the alternative depending on the materials you select. This method is ideal for homeowners who need to bridge the space between their appliance and the wall to keep the kitchen clean and safe.
Essential Tools and Materials
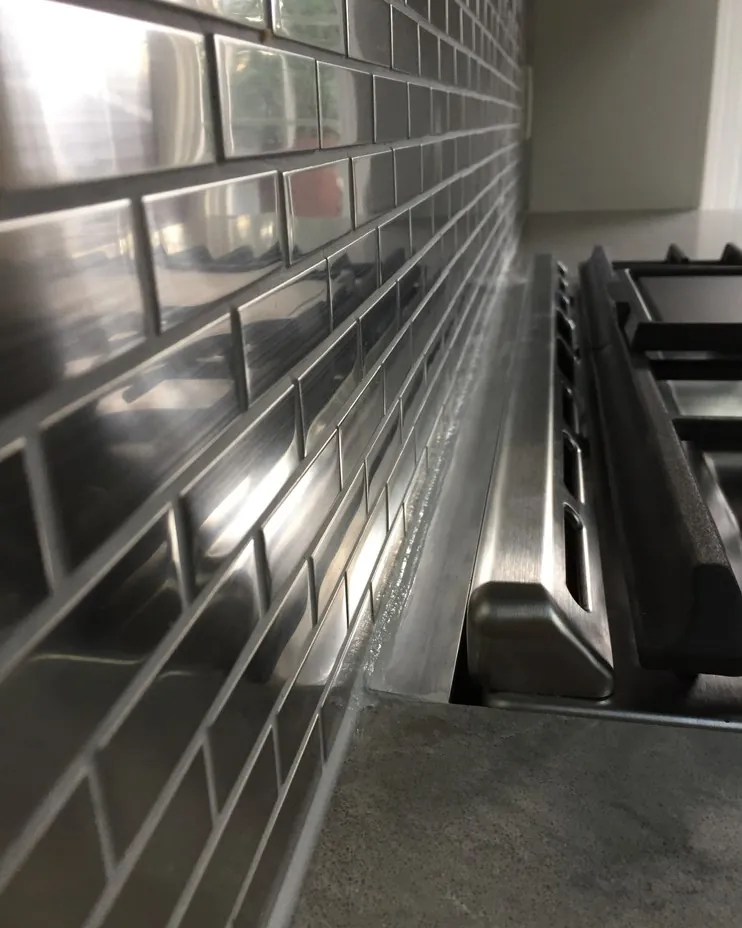
You’ll need a few specific items to ensure your stove fits tightly against the wall. Having these ready before you start saves you time and prevents unnecessary trips to the hardware store.
Use a steel measuring tape to verify the exact depth and width of the open space. If your measurement varies by more than an eighth of an inch from one side to the other, your floor is likely unlevel. In that case, buy shims to stabilize the range before installing any filler strips.
Choose a stainless steel backguard that matches your range’s width. These panels often come with mounting hardware included. If your gap exceeds three inches, a standard backguard won’t suffice; you must order a custom-depth extension kit from the manufacturer.
Apply heat-resistant silicone sealant to secure the strip and prevent crumbs from falling behind the unit. Use a clear, high-temperature formula rated for at least 400 degrees Fahrenheit. If you use standard bathroom caulk, the heat from the oven will cause it to yellow and peel within months.
Adjustable filler strips bridge the gap between the unit and the countertop. If you have a slide-in range, check the manual for the required clearance. Some units need a specific air gap for ventilation, and closing it entirely can void your warranty or cause the control board to overheat.
Keep a level handy to ensure the gap is filled evenly without creating a slope. Finally, use a screwdriver set with both Phillips and flat-head drivers to remove existing trim or attach new mounting brackets. Verify your local building codes, as some jurisdictions require non-combustible materials for any gap filler behind a gas range.
Installing Your Slide-in Range Gap Filler
Follow these steps to close the space behind your appliance safely and effectively.
Turn off the power or gas supply to the range before moving it to avoid any risk of injury or leaks. If you smell gas after moving the unit, stop immediately and leave the area.
Pull the range forward carefully to gain access to the wall area behind it. Use a furniture dolly if the unit is heavy to avoid scratching your floor finish.
Measure the gap precisely at three points—the left, center, and right. Always buy a filler strip based on the widest measurement to ensure full coverage. If the gap is wider than three inches, a standard strip will fail; you must install a custom-cut metal bridge instead.
Clean the wall and the back of the stove using a degreaser. Adhesive strips will peel within weeks if any cooking residue remains on the surface.
Attach the backguard or filler strip to the wall or the back of the stove. If you’re using silicone, apply a thin, consistent bead to prevent moisture from seeping behind the cabinets.
Slide the range back into position slowly. Watch the edges to ensure the filler doesn’t catch on the countertop.
Check for level by placing your tool on the stovetop. Adjust the leveling legs at the bottom of the unit until the bubble is centered.
If you have a gas range, ensure the filler doesn’t block the vent. Blocking this vent traps heat, which can damage your backsplash or melt control knobs. Never use wood or plastic near the rear vent, as these materials pose a significant fire risk.
Situations That Change the Job
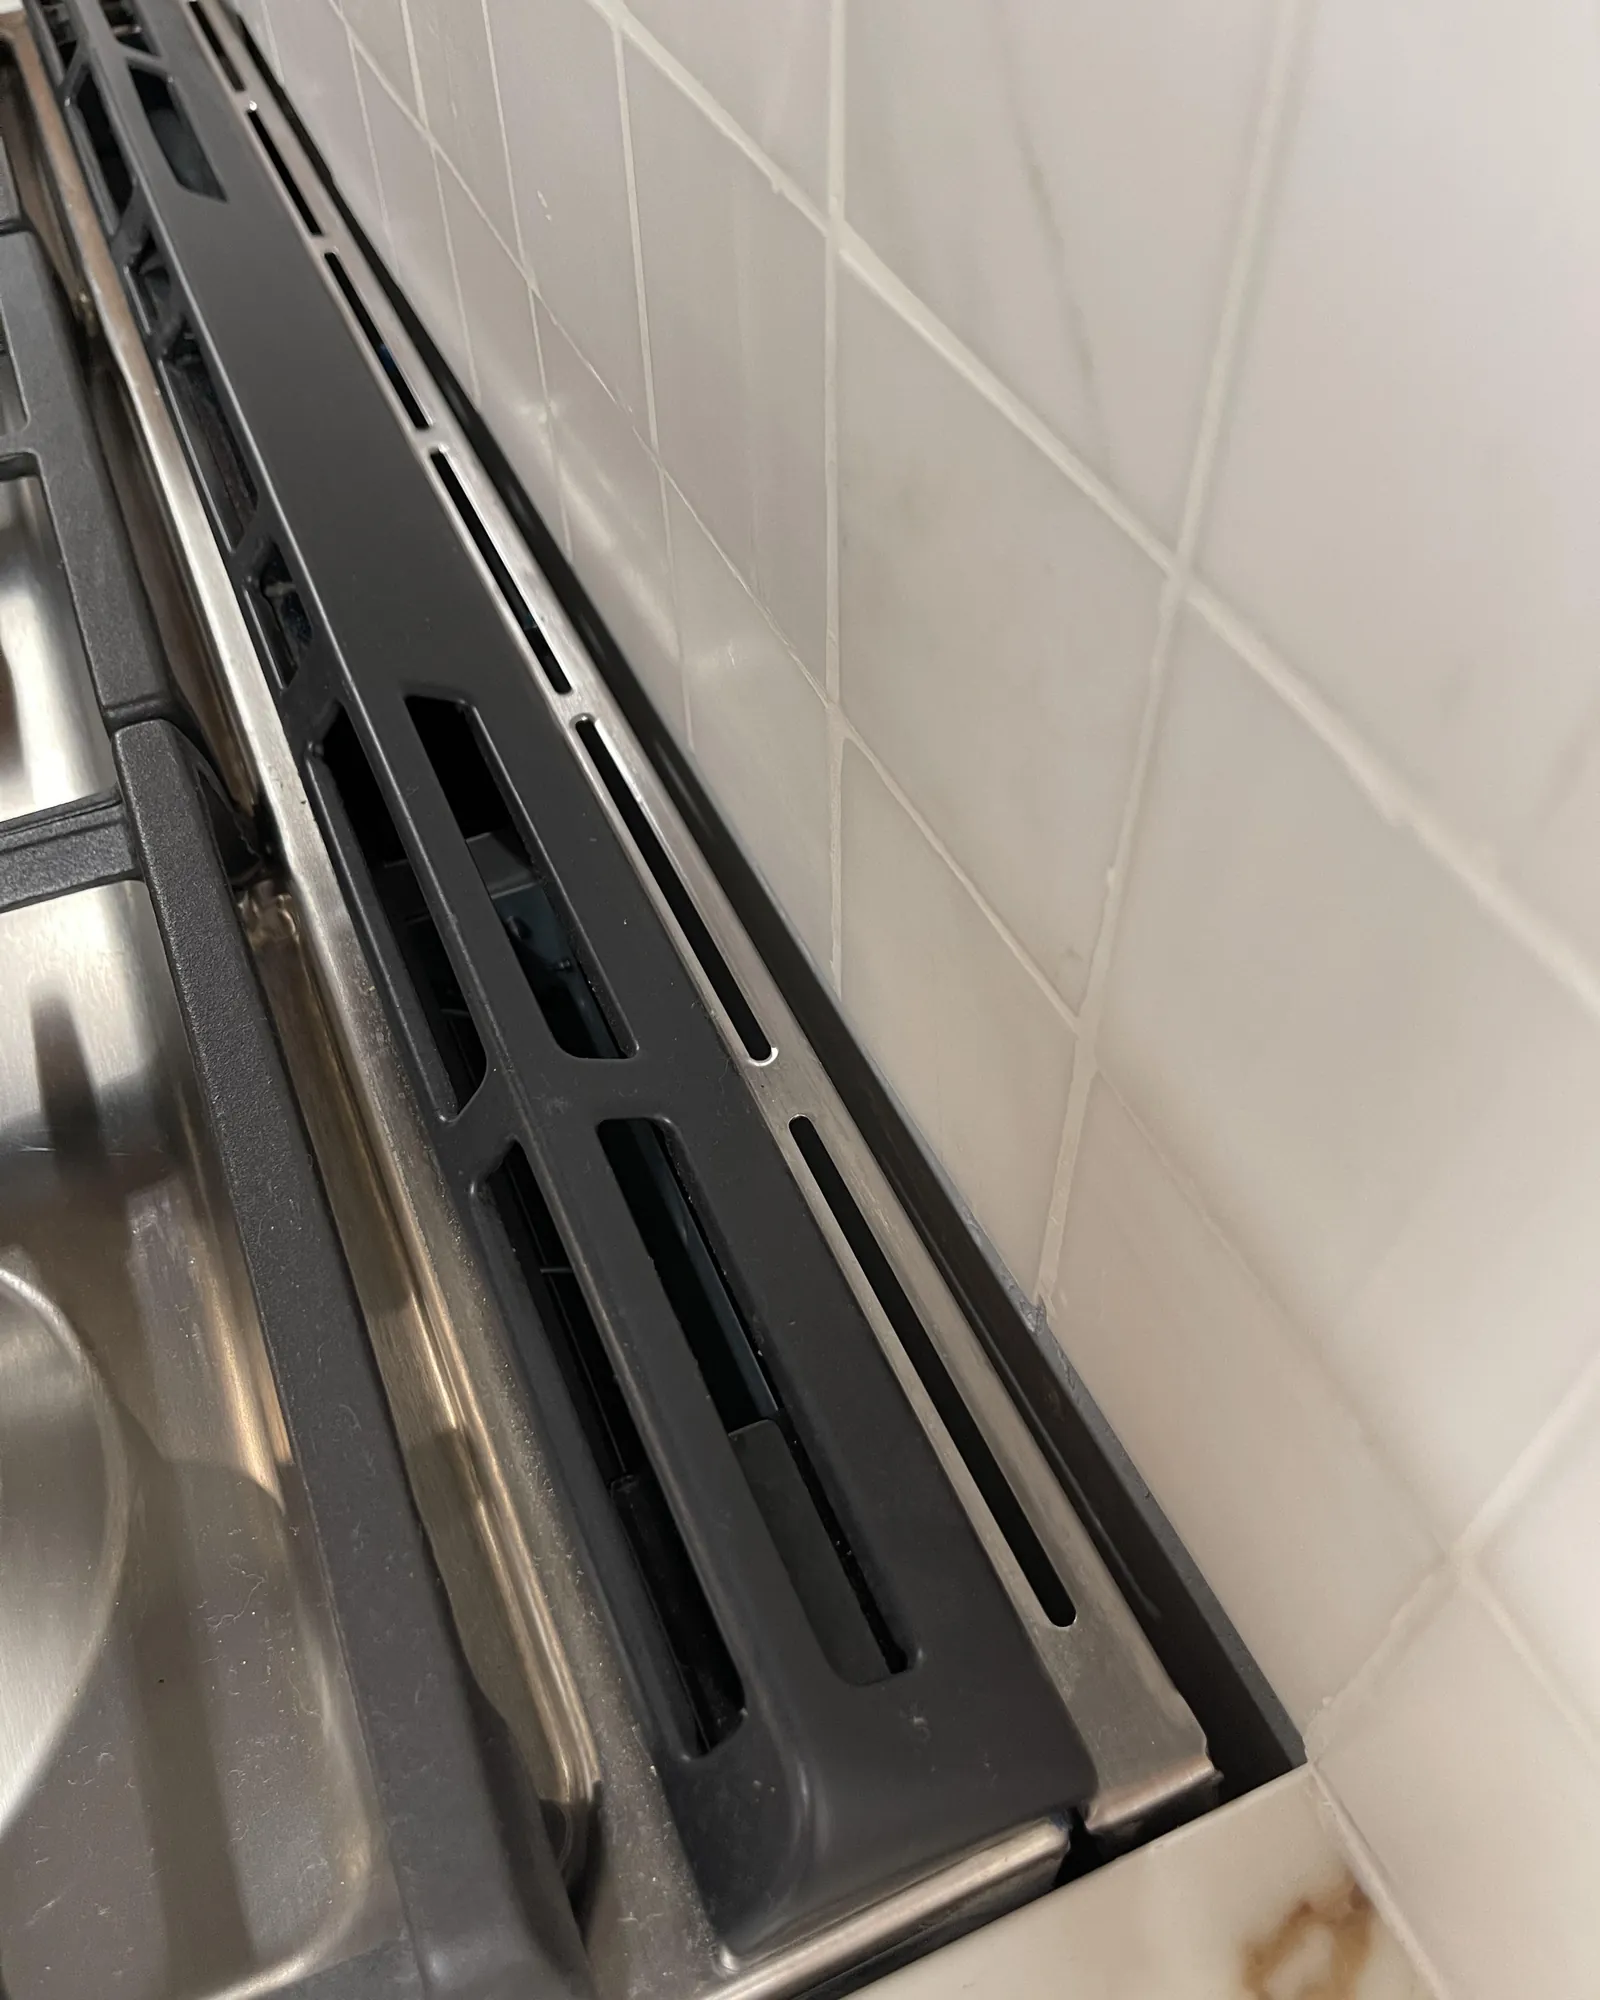
The complexity of your installation depends on whether you’re working with a freestanding unit or a built-in model.
| Situation | Estimated Time | Primary Difference | Watch For |
|---|---|---|---|
| Freestanding range | 30 minutes | Easy access to rear | Leveling the legs |
| Slide-in range | 60 minutes | Tight cabinet fit | Countertop overlap |
| Gas connection | 45 minutes | Requires gas line care | Potential leaks |
| Electric connection | 30 minutes | Heavy cord management | Plug strain |
If you’re installing a slide-in model, check your cabinet width first. If the opening is less than 30 inches, you must trim the side cabinets or the unit won’t seat flush.
Most installers fail by skipping the soapy water test on gas fittings. If you see bubbles forming after you turn the valve, shut off the gas supply immediately and contact a professional. A tiny leak costs you safety and efficiency.
When working with electric cords, ensure the cable has enough slack to pull the unit out for future cleaning. If the cord is taut, the vibration of the range will eventually loosen the terminal screws.
Start with a smaller, adjustable filler strip to test the fit. This prevents you from ruining expensive, custom-cut backguards if your measurements are off by even a fraction of an inch.
Verifying a Quality Installation
A good installation results in a flush, clean line where the stove meets the wall or countertop. You shouldn’t see any exposed gaps where food or moisture could collect, and the stove should sit perfectly level without rocking. If the stove wobbles, it means the leveling legs are uneven or the floor is sloped, which can put unnecessary stress on the gas or power connections over time.
Place a two-foot level across the cooktop surface in both directions to verify stability. If the bubble drifts, adjust the rear legs first to ensure the unit is flush against the backsplash before fine-tuning the front.
You can prevent most quality issues by verifying the gap width before buying your materials. If you notice the filler strip bowing, it’s likely because the wall isn’t perfectly flat, which happens in older homes with uneven plaster. To fix this, use a flexible silicone caulk to bridge the tiny remaining gaps. This keeps the installation looking professional while providing a waterproof seal that’s easy to wipe down during regular cleaning.
Standards and Ongoing Maintenance
The National Fire Protection Association sets the standard for safe clearance distances between cooking appliances and combustible materials. Once you have installed your filler, ensure it doesn’t cover any required ventilation ports identified in your stove’s user manual. You should wipe down the gap area weekly with a damp cloth to remove grease buildup, as accumulated fats can become a fire hazard if left for too long.
If your installation involves moving gas pipes or heavy electrical lines, don’t attempt this yourself. Always hire a licensed plumber or electrician to handle connections that carry a risk of fire or carbon monoxide exposure. Checking these connections annually ensures that your appliance remains safe and compliant with local building codes for the life of your kitchen.
Custom Metal Backguards
These are heavy-duty options that offer a high-end look and maximum heat protection. They require drilling into the wall or the stove frame. This adds roughly 30 minutes to your labor time but provides the most durable solution for high-heat cooking environments.
Adhesive Magnetic Strips
These are very thin strips that stick to the metal frame of the stove. They’re quick to install and cost very little. However, they aren’t suitable for large gaps, as they only cover spaces of less than 1/4 inch.
Flexible Silicone Seals
These strips are designed to bridge the gap between the countertop and the stove. They’re simple to trim with scissors and press into place. They’re best for small, uneven gaps but may need replacing every 12 months if they begin to yellow or peel from heat exposure.
Frequently asked questions
How wide of a gap can I fill?
You can safely fill gaps up to 2 inches using standard filler strips or custom backguards. If your gap is larger than 2 inches, you may need a specialized kit from the manufacturer or a custom-fabricated metal piece to ensure the unit remains stable and safe. Always measure the widest part of the gap to ensure the material you buy provides full coverage.
Is it safe to cover the gap behind my stove?
Yes, it’s safe as long as you don’t block the ventilation ports on the back of the appliance. Many ranges require these vents to exhaust heat and moisture; blocking them can cause the control panel to overheat or the unit to fail. Always check your manual for the required air clearance before installing any permanent filler.
Can I use wood to fill the gap?
No, you should never use wood or other flammable materials to fill a gap behind a range. Wood can easily ignite if it comes into contact with the hot rear vent of the stove or if a pot boils over. Always use non-combustible materials like stainless steel, heat-resistant silicone, or aluminum.
How long does it take to fix the gap?
Most installations take between 30 and 60 minutes for a standard range. If you need to move a heavy stove or adjust a complicated gas line, allow for an extra 30 minutes to ensure you have enough time to test the connections and level the unit properly.
What happens if I leave the gap open?
Leaving the gap open allows food, grease, and small items to fall behind the range, which creates a cleaning challenge and a potential fire hazard. Over time, the buildup of grease and dust can become difficult to remove and may attract pests, making a clean seal a smart choice for any kitchen.
Does the filler need to be heat-resistant?
Yes, any material placed near the back of a range must be rated for high heat. Standard plastics, rubbers, or adhesives will melt or degrade quickly when exposed to the heat cycles of a stove. Look for materials labeled as heat-resistant or specifically designed for appliance use to ensure they last.
Conclusion
Keeping your stove properly sealed is a simple way to maintain a cleaner kitchen and protect your home from the risks associated with grease buildup and heat damage. By choosing the right material for your specific gap size and ensuring your vents remain clear, you create a safer cooking environment that lasts for years.
