
Universal, Fluidmaster, and Korky are the leading manufacturers for those searching for the best toilet repair kits to fix leaking or running systems. These kits typically include a new flapper, a fill valve, and the necessary hardware to seal the tank. While they all aim to stop water waste, they differ in how they connect to your specific tank model and the ease of adjustment during installation.
Top rated toilet repair kits

You can identify the right kit by looking at your current fill valve height and the flush valve diameter. The table below outlines the primary options available for standard residential toilets.
| Kit type | Best for | Common example |
|---|---|---|
| Universal fill valve | Most standard toilets | Fluidmaster 400A |
| Flush valve kit | Replacing leaking seals | Korky 3-inch tower |
| Complete rebuild kit | Full system updates | Universal complete kit |
| Dual flush converter | Saving water usage | Dual flush retrofit |
Measure the distance from the bottom of the tank to the top of the overflow pipe. If the overflow pipe is taller than the fill valve’s minimum height, you must ensure the fill valve is adjusted to sit below the top of the overflow pipe. You must choose an adjustable model that can be dialed down to match your existing height.
Check the flush valve diameter before you buy. Most older toilets use a 2-inch opening, while modern high-efficiency models often require a 3-inch opening. If you try to force a 3-inch seal into a 2-inch valve, it will buckle and leak immediately. Look for the stamp on the bottom of the tank to confirm the model number if you’re unsure.
Avoid the mistake of buying a universal rebuild kit just because it includes the most parts. These kits often contain generic gaskets that fail within six months. If your tank is leaking at the bolts, buy high-grade rubber washers separately rather than relying on the thin plastic ones included in budget bundles.
If your toilet runs intermittently, replace the fill valve first. If the water level drops steadily over several hours, the flush valve seal is the culprit. Replacing the wrong part costs you two trips to the hardware store and an extra hour of labor.
Universal fill valve kits
A universal fill valve replaces the component that controls how water enters your tank after a flush. It suits almost any gravity-fed toilet, as the height is adjustable to fit tanks between 9 and 14 inches tall. These kits are perfect if you hear constant hissing or if the tank takes too long to refill after use.
- Adjustable height settings allow the valve to fit both compact and tall tank designs.
- Built-in refill tubes ensure the bowl maintains the correct water level for a proper siphon.
- Standard 7/8-inch shanks fit the majority of toilet supply lines found in North American homes.
If your toilet leaks at the base of the tank, a new fill valve won’t fix it because that issue stems from a damaged tank-to-bowl gasket. Always check your Environmental Protection Agency water sense guidance to confirm if your leak is caused by a simple flapper issue or a larger mechanical failure.
For example, installing a Fluidmaster 400A requires you to set the height to match your old valve, which you can measure by placing the new unit next to the old one before tightening the locknut.
Flush valve replacement kits
Flush valve kits replace the mechanism that releases water from the tank into the bowl. These kits are ideal for toilets that continue to run even after the tank has filled, often indicating a warped or mineral-encrusted flapper seat. They’re generally more complex to install than a simple fill valve because you must remove the tank from the bowl.
Tower-style designs provide a consistent flush force compared to traditional chain-and-flapper setups. Silicone seals offer better resistance to water chemicals that often degrade standard rubber parts. Integrated overflow tubes prevent water from spilling over the top if the fill valve fails.
If you have a 3-inch flush valve, you can’t use a 2-inch standard kit. Measure the diameter of the opening at the bottom of your tank before purchasing. A 2-inch valve is the industry standard for older toilets, while 3-inch valves are common in high-efficiency models. If you’re unsure, check the manufacturer’s stamp inside the tank wall.
A mistake many people make is overtightening the large plastic nut at the base of the tank. This pressure can crack the porcelain, which is a terminal failure requiring a full toilet replacement. Tighten the nut by hand until it’s snug, then use a wrench to turn it no more than a quarter-turn further.
If your tank wobbles when you touch it, the mounting bolts are likely rusted or compromised. In this case, buy a tank-to-bowl gasket kit alongside your flush valve. Replacing the bolts and the rubber seal at the same time prevents leaks that often appear forty-eight hours after the initial repair.
If you aren’t comfortable lifting the heavy tank, hire a professional plumber to perform this specific task. The cost of labor is significantly lower than the price of replacing a cracked porcelain bowl.
If you choose to proceed alone, clear a workspace on the floor with a thick towel to protect the tank from impact while you work. If the tank bolts don’t turn easily, apply a penetrating oil and wait thirty minutes before applying force to avoid snapping the hardware inside the porcelain housing.
Complete rebuild kits
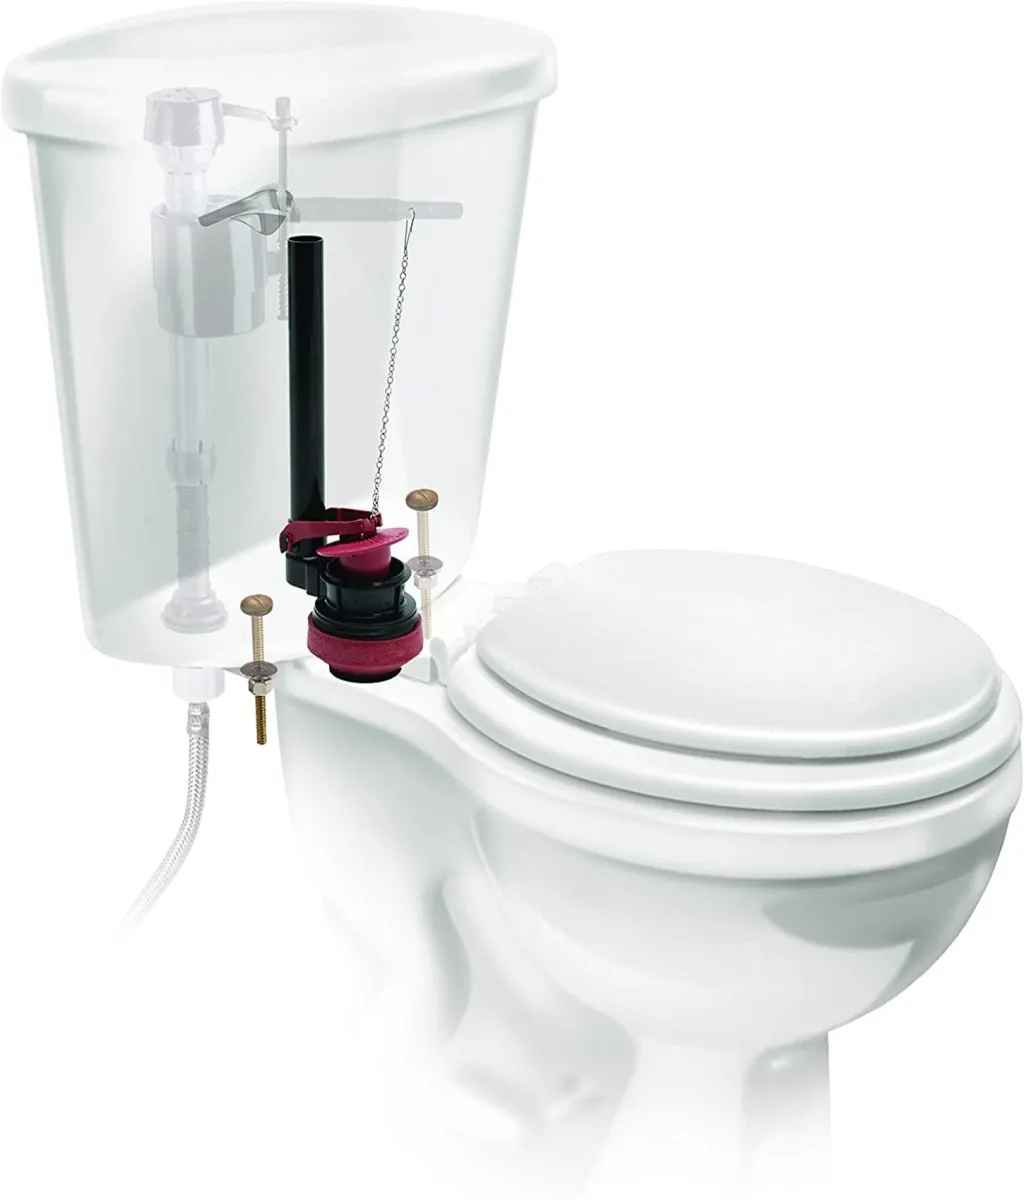
Complete rebuild kits contain everything needed to refresh the entire internal system of the tank. They suit users who want to replace old, rusted bolts and gaskets alongside the valves to ensure a long-lasting seal. These kits are the most cost-effective way to handle a full renovation of a toilet that has been running for over a decade.
- Includes high-quality brass or stainless steel tank-to-bowl bolts to prevent future corrosion.
- Provides a new rubber tank-to-bowl gasket that forms a watertight seal between the two pieces.
- Bundles the fill valve and flapper, ensuring all parts are compatible with each other.
You must ensure your toilet is a standard two-piece model, as these kits won’t work with one-piece units or wall-mounted systems. If you find your tank wobbles even after tightening, don’t force the bolts further; you likely need a thicker gasket or a stabilizer shim. This is a significant mechanical project, and if you lack the proper tools, such as a basin wrench, you should have a professional assist you to avoid water damage.
Dual flush converter kits
Dual flush converters change a single-handle toilet into a two-button system, allowing you to use less water for liquid waste. These kits are best for those who want to lower their monthly water bill without replacing the entire fixture. They work by replacing the standard flapper with a specialized dual-action valve that controls the amount of water released.
Button options allow for a partial flush for liquids and a full flush for solids. Installation typically requires no special plumbing tools beyond a pair of pliers. Universal compatibility means they fit most 2-inch flush valve openings in standard toilets.
Confirm your toilet uses a 2-inch flush valve before purchasing. You can check this by measuring the diameter of the circular opening at the bottom of the tank. If your measurement is 3 inches, a standard universal kit won’t seal, leading to constant running and wasted water.
If your toilet has a side-mounted handle rather than a top-mounted one, the button assembly might be difficult to align with the existing hole. Many users attempt to force a side-mount fit by drilling the porcelain, which often results in a hairline crack that ruins the tank. If you have a side-handle model, look specifically for kits that include a replacement lever or a side-mount button adapter.
If you notice the flush isn’t strong enough to clear the bowl, ensure the cable tension is adjusted according to the manufacturer’s manual. A cable that’s too slack prevents the valve from opening fully, while one that’s too tight keeps the valve cracked open, causing a ghost flush.
This kit isn’t suitable for older toilets with very low water pressure, as they often require the full tank volume to clear the trapway. If your toilet model was manufactured before 1994, it likely uses 3.5 gallons per flush. These older designs rely on the weight of the entire tank to create the necessary siphon; reducing that volume will cause frequent clogs.
Other repair components
Tank levers: These metal or plastic arms lift the flapper to initiate the flush. Replace them if the handle feels loose, requires jiggling, or fails to lift the flapper completely. If your lever is plastic, it may eventually break from daily use; upgrade to a brass arm to ensure a more reliable pull.
Wax rings: These create the airtight seal between the toilet base and the floor drain. Replace the ring immediately if you notice water pooling at the base or a persistent sewer odor in the bathroom. If the toilet rocks when you sit on it, the flange is likely loose, which will crush the wax unevenly and cause a leak. In this case, install a shim kit before setting the new ring to ensure a level, watertight foundation.
Supply lines: These braided hoses connect the wall valve to the toilet tank. Replace them if you see rust, fraying, or any signs of dampness on the exterior mesh. The frequency of replacement depends on your specific usage, so consult the owner’s manual for the manufacturer’s official maintenance recommendations.
Fill valves: These regulate the water level inside the tank. If your toilet runs constantly or takes more than two minutes to refill, the internal diaphragm is likely worn. Swap the entire unit rather than repairing the seal to save time and ensure consistent water pressure.
Choosing the right kit
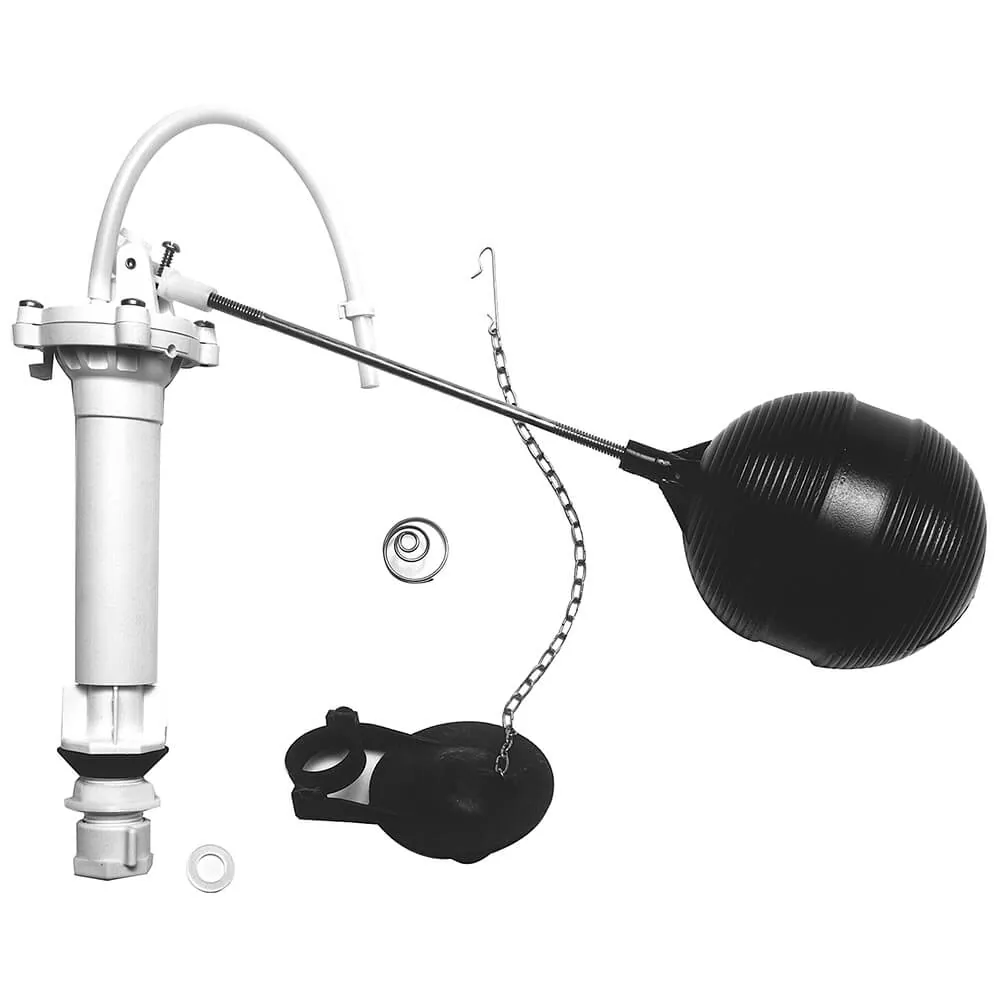
Deciding which kit is yours depends on where the leak occurs and the condition of your current components. If you hear water running inside the tank, start by replacing the flapper or the fill valve. These components eventually fail due to mineral buildup and wear.
If you see water on the floor under the tank, you need a full rebuild kit to replace the tank-to-bowl gasket and bolts. Don’t attempt to reuse the existing bolts, as the rubber seals will have hardened and lost their ability to create a watertight compression. Using old hardware often leads to a persistent, slow drip that eventually rots your subfloor.
If you want to reduce water consumption, choose a dual flush converter. First, measure your flush valve opening. If it isn’t a standard 2-inch size, these converters won’t seat properly, leading to a constant, audible leak. You can verify this by measuring the diameter of the hole at the bottom of the tank.
Most of these repairs are standalone, but if your tank is cracked, no kit will fix it. A hairline fracture in the porcelain is structural and will inevitably widen under the pressure of a full tank. If you spot a crack, replace the entire toilet immediately to avoid a catastrophic flood.
Before purchasing any parts, check the manufacturer’s stamp inside the tank. In that case, the cost of a new toilet is lower than the price of repeated, failed repair attempts.
Related guides
- Foosball Table Replacement Parts Rods: How to Fix Them in 2026
- How to Lower Chlorine in Hot Tub Naturally: The Fast Fix in 2026
- Why Does Polaris 65 Go in Circles: Fix Flow and Tires in 2026
Frequently asked questions
How long do toilet repair kits last?
High-quality repair kits generally last for a long duration, though water quality significantly impacts their longevity. Hard water causes mineral buildup on valves and seals, which shortens their functional life. You should check your local water report to estimate how often you might need to perform maintenance.
Is it safe to repair a toilet myself?
It’s safe for most people to perform minor repairs, provided they turn off the water supply valve behind the toilet first. Always verify that the water flow has stopped by flushing the tank before you begin. If you need to remove the tank, consider calling a licensed plumber.
How do I know if my flush valve is 2 or 3 inches?
You can determine the size by measuring the diameter of the opening at the bottom of the tank after removing the old flapper. A 2-inch opening is standard for older toilets, while 3-inch valves are common in newer models. Confirm this measurement before purchasing to ensure you select the correct kit.
What happens if the water doesn’t stop filling?
If the water continues to fill and overflows, the fill valve is likely set too high or is damaged. Adjust the float cup downwards to lower the water level in the tank. If the valve still runs, the diaphragm is likely worn out and requires a full replacement.
Does it matter which brand I choose?
You can choose any brand as long as the kit is compatible with your specific toilet model. Major manufacturers produce universal parts that work across many different brands of porcelain fixtures. Focus on compatibility specifications, such as valve height and flush valve diameter, rather than the brand name itself.
Why does my toilet make a loud noise when filling?
A loud noise is usually caused by a failing fill valve or a partially closed supply valve at the wall. Ensure the supply valve is fully open to provide maximum water pressure. If the noise persists, replacing the entire fill valve assembly is the most reliable way to restore quiet operation.
Conclusion
Start by turning off the water supply valve located behind the toilet and flushing the tank to drain it completely. Once empty, remove the old components and install the new parts following the guide included in your kit. Ensure the toilet fills silently and stops at the marked fill line.