
You press the overhead door learn button to pair a new remote or keypad with your garage door motor. This small, often colored button sits on the back or side panel of the motor housing and enters programming mode when held for a few seconds. This guide explains how to identify your specific unit and sync your devices safely without needing professional help.
Locating the overhead door learn button
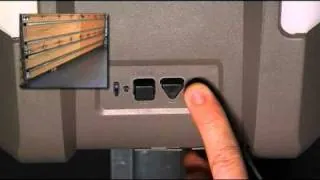
The motor housing contains the brain of your garage door system, and the interface is usually located under a light cover or on the rear panel. Most residential openers use a radio frequency to talk to remotes, and this button acts as the gatekeeper for those signals. It’s designed to prevent neighbors or random signals from accidentally opening your door by requiring physical access to the motor to add a new device.
People often mistake the “wall station” button for the learn button. The wall station is the wired button inside your garage, while the learn button is strictly for wireless pairing. If you see a button labeled “Program” or “Learn” near a flashing LED light, that’s your target. You should always consult the Genie Company support manuals to verify your specific model’s layout, as older units may hide the button behind a plastic lens.
Steps to program a new remote
Before you start, ensure your ladder is stable and placed on level ground. If you’re working on a high ceiling, have a second person hold the ladder to prevent falls.
- Locate the learn button on the motor unit.
- Press and release the button quickly; you’ll see an LED light turn on or start blinking.
- Within 30 seconds of pressing the button, press the button on your new remote that you want to use.
- Watch the motor unit for a confirmation signal, such as the light blinking or a click sound.
- If the light doesn’t flash, repeat the process from step one.
- Test the remote from a distance of 10 feet to ensure it works before closing the garage door.
If the motor doesn’t respond after three attempts, check that your remote battery is fresh. If you’re pairing a keypad, you must enter your PIN after pressing the learn button rather than a remote button.
Essential settings and status
This table covers the common states you’ll see when interacting with your garage system.
| Situation | What to use | How long | What to watch for |
|---|---|---|---|
| Adding a remote | Learn button | 2-3 seconds | LED light turns solid |
| Clearing memory | Learn button | 10-15 seconds | Light blinks rapidly |
| Keypad setup | Learn button | 2-3 seconds | Light flashes once |
| Syncing wall switch | Wired terminals | N/A | Solid connection |
If you hold the button for too long, you might accidentally erase all existing remotes. Most modern units trigger a total memory wipe if the button remains depressed for more than 20 seconds. If your remotes suddenly stop working, don’t hold the button again until you have checked the power supply to the motor.
A common mistake is assuming a blinking light means the system is ready to pair. If the light blinks slowly, the system is likely in a diagnostic mode or indicating a sensor obstruction.
Only proceed with programming when the LED is inactive or shows the specific solid color defined by your manual. If your unit uses a multi-function wall console, verify the lock mode is disabled before attempting to sync; otherwise, the system will ignore all wireless signals regardless of the learn button status.
Mastering the pairing process
Experienced installers know that timing is the most important part of the process. When you press the learn button, the motor is waiting for a signal. If you wait longer than 30 seconds, the motor times out and exits the pairing mode. You must start over if you miss this window, as the motor won’t accept any input once the light stops blinking.
Another detail is the distance of your remote during the first sync. Keep the remote within 5 feet of the motor during the initial setup. Once the motor acknowledges the remote, you can test it from further away. If you’re clearing the memory, be aware that this action is permanent. You’ll have to re-pair every single remote and vehicle transmitter you own if you perform a full reset.
Troubleshooting common issues
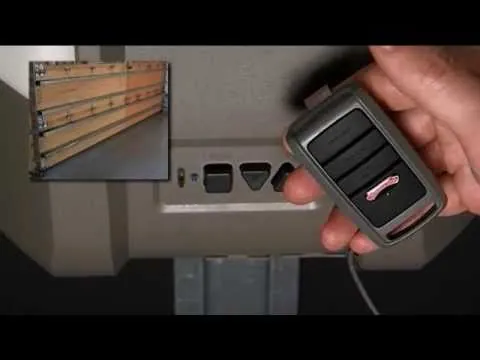
If your remote fails to trigger the door, look at these common signs to find the fix.
| What you notice | What it usually means | What to do first |
|---|---|---|
| Light doesn’t glow | No power to motor | Check the GFCI outlet |
| Remote light flashes | Weak battery | Replace the battery with the type specified in your manual |
| Door moves, then stops | Safety sensors blocked | Clear items near door track |
| No response at all | Memory full | Perform a hard reset |
If the motor light flashes but the door doesn’t move, the issue is likely with the safety sensors near the floor. These sensors must have a clear line of sight to work.
Check the alignment of the sensor lenses. If the green LED on the receiving sensor is flickering, the beam is weak. You must adjust the bracket until the light remains solid.
Many users mistakenly assume the motor is broken when the door reverses immediately upon closing. This usually means the downward force sensitivity is set too high. Adjust the force dial on the motor housing by a quarter turn counter-clockwise.
If you have replaced the battery and the remote still fails, check for interference. LED bulbs installed in the opener housing often emit radio frequencies that block the remote signal. Remove the bulbs to test if the remote regains its range.
Safety and compliance rules
The Consumer Product Safety Commission mandates that all residential garage door openers manufactured after 1993 must have an auto-reverse feature. If your door doesn’t stop and reverse when it hits an object, the motor is unsafe and must be repaired or replaced. Never attempt to bypass these sensors, as they’re the primary protection against crushing injuries.
Test your sensors monthly by placing a roll of paper towels in the door’s path. If the door fails to reverse immediately upon contact, adjust the force sensitivity settings or clear obstructions from the photo-eye lenses. A common mistake is ignoring a blinking sensor light, which often indicates a simple alignment issue that leaves your family vulnerable.
If your motor is older than 1993, it lacks these modern safety standards. In such cases, the only responsible choice is to replace the entire motor unit. Don’t attempt to retrofit these systems. Always ensure that any replacement remote is compatible with your motor’s specific frequency. Mixing brands often leads to signal interference, which can cause the door to open unexpectedly.
Maintaining your garage system
After you successfully sync your remote, keep the original manual in a safe place. Many people tape it to the side of the motor housing. If you notice the range of your remote getting shorter, it’s almost always a sign that the battery is dying. You should replace remote batteries based on usage and consult your owner’s manual for the recommended service interval to ensure consistent performance.
If the range remains poor after a battery swap, check the antenna wire hanging from the motor. If it’s coiled or tucked against the metal housing, straighten it out to allow a clear signal path.
If you go on vacation, disable the remotes by unplugging the motor unit or using the “lock” feature on your wall station. This prevents anyone with a remote from accessing the garage while you’re away.
If the door sounds sluggish or makes grinding noises, the issue is likely mechanical, such as worn rollers, tracks, or internal motor gears. Inspect your rollers and tracks for debris before trying to reprogram the motor.
When to seek a professional
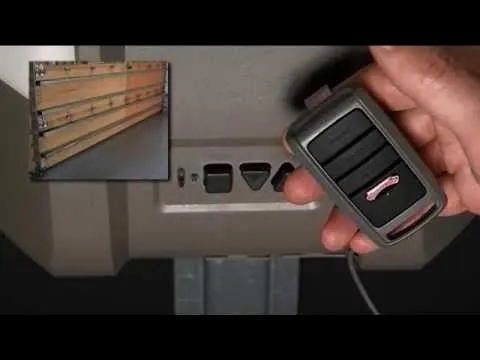
Not every issue with an overhead door is a simple button press. If you hear a loud bang, it’s likely a broken torsion spring. These springs are under extreme tension and can cause severe injury if handled without proper tools and training. If you suspect a spring issue, stop using the door immediately and call a licensed garage door technician.
Never attempt to adjust the bottom bracket or the cables connected to these springs. These components hold the entire weight of the door, and releasing them prematurely can cause the door to collapse instantly.
Similarly, if the motor makes a buzzing sound but the chain doesn’t move, the internal gears may be stripped. Replacing these gears requires disassembling the motor housing, which carries a risk of electrical shock. If you aren’t comfortable working with high-voltage electronics, hire a professional to perform the internal repairs to keep your warranty intact. Amateur repairs often void manufacturer coverage, leaving you to pay for a full motor replacement later.
Related guides
Frequently asked questions
Can I program a universal remote to my garage?
Yes, most universal remotes work with standard garage door openers. You must check the back of your motor for the specific frequency, typically 315MHz or 390MHz, to ensure the remote is compatible. Follow the steps provided by the remote manufacturer, as they often require a specific sequence of button presses to enter “learning” mode.
Why won’t my garage door learn the new remote?
It usually means the remote isn’t on the same frequency as the motor. Check your motor’s manual to confirm the required frequency and compare it to your remote’s packaging. If the frequencies match, ensure you’re holding the learn button for the correct amount of time, as some models require a longer press than others.
How long does the learn mode stay active?
It stays active for 30 seconds after you press the button. If you don’t pair a device within this window, the motor automatically exits programming mode to prevent unauthorized access. You’ll see the indicator light turn off or stop blinking when the window has closed, requiring you to press the button again.
Is it safe to reset the motor memory?
Yes, it’s safe to reset the memory if you have lost a remote or want to ensure only your current devices work. Resetting doesn’t damage the motor; it simply wipes the digital list of authorized signals. You’ll just need to spend a few minutes re-pairing your remaining remotes and keypads afterward.
What happens if the power goes out while programming?
Nothing harmful happens, but the programming process will be interrupted. The motor will lose its current progress, and you’ll need to restart the entire sequence once the power returns. Your existing remotes will remain stored in the memory, as those settings are saved in non-volatile storage that doesn’t require electricity.
How often should I check my safety sensors?
You should check your sensors once a month to ensure they’re working correctly. Place a small object, like a box, in the path of the door and try to close it; the door should immediately stop and reverse. If it continues to close, your sensors are misaligned or faulty and need immediate attention.
Conclusion
Once your remote is working, it’s a good idea to test the safety sensors near the floor to ensure everything is running smoothly. If the door doesn’t reverse when you block the beam, you’ll want to adjust them right away. Keeping your system well-maintained will help it last for many years.
