
You can complete overhead door opener programming by pressing the “Learn” button on the motor unit and then holding the remote button for three seconds until the light blinks. This process usually takes about five minutes for a single remote. It’s best suited for homeowners who need to sync a new transmitter or reset a unit after a power surge. Always check your specific manual to confirm the button locations, as these vary by manufacturer and model year.
Tools Required for Opener Setup
To get your garage system working, you’ll need a few items ready. Having these nearby saves you from making extra trips up and down the ladder while the motor is in its short learning mode.
A sturdy, stable ladder that reaches the motor unit safely. Ensure the ladder height allows you to look directly at the motor’s back panel without overreaching. If you have to stand on the top rung, the ladder is too short and poses a fall risk.
The remote control transmitter you intend to program. Before you climb, test the remote by pressing a button to see if the LED light glows. If the light is dim or flickering, replace the batteries immediately. Low power is the most common cause of pairing failure, leading many to mistakenly believe the motor unit is defective.
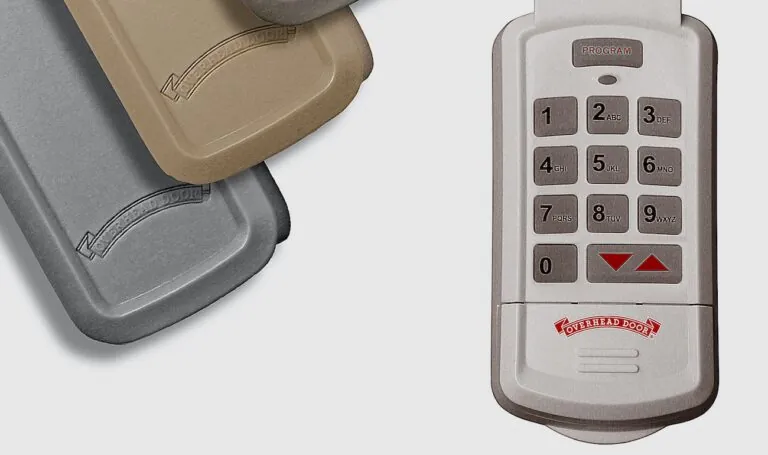
The wall-mounted control panel, which is often used to enter pairing mode. Most modern systems require you to hold the “Learn” button on the motor itself, but some older wall consoles feature a hidden “Program” button that allows you to sync remotes without touching the ceiling unit.
A flat-head screwdriver, if your model requires removing a light cover to reach the button. Check for a small plastic tab near the light lens. If you see one, the button is hidden inside.
Your owner’s manual, which contains specific button sequences for your exact brand. If you have lost the physical copy, search for the model number printed on the motor housing.
You can use a universal remote as a substitute for a lost original, but it must be compatible with your motor’s frequency. Don’t attempt to use a remote from a different brand unless it’s clearly labeled as a universal model with matching dip-switch or rolling-code technology.
If your motor has a purple learn button, it operates on a 315 MHz frequency; a yellow button typically indicates a Security+ 2.0 system. Always match your remote to the color of the learn button to avoid a failed sync.
Steps for Overhead Door Opener Programming
Follow these steps to connect your transmitter to the motor unit. If you have an older model with physical switches, set them to match the pattern inside your wall unit instead of using the “Learn” button.
- Position your ladder securely under the garage door opener motor.
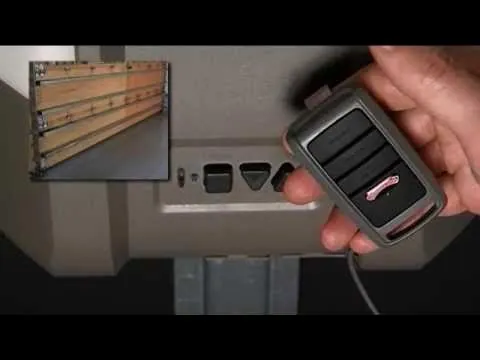
- Locate the “Learn” button on the motor unit, which is typically a small, colored button near the antenna wire.
- Press and release this button once; a small LED light will glow steadily for 30 seconds to indicate it’s ready.
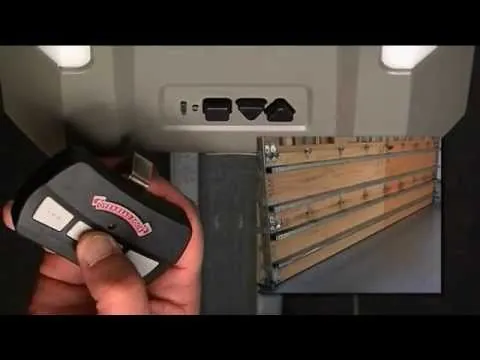
- Press and hold the button on your handheld remote for three seconds until the opener lights blink or you hear two clicks.
- Test the remote by pressing the button again to ensure the door responds to the command.
- Repeat these steps for any additional remotes or keypads you need to sync to the system.
Tip: If the light doesn’t blink, move the remote closer to the motor unit during the pairing phase. Careful: Don’t stand on the top step of the ladder, as this increases the risk of falling if the motor vibrates during operation. If you can’t reach the button safely, hire a professional door technician to assist with the installation.
Adjusting for Different Situations
The time and effort required to sync your door depend on the type of security technology your opener uses. Modern rolling-code systems are more secure but require a specific timing window to pair successfully.
| Situation | Time Needed | Complexity | What to Watch |
|---|---|---|---|
| Single Remote | 5 minutes | Simple | Battery charge |
| Multiple Remotes | 10 minutes | Moderate | Sequence order |
| External Keypad | 10 minutes | Moderate | Access code entry |
| Universal Remote | 15 minutes | High | Frequency settings |
It’s safer to start by programming one remote to confirm the motor is responding before you try to sync multiple devices. Overloading the memory with too many failed attempts can sometimes force the unit to lock out new inputs for several minutes.
If your opener uses a rolling-code system, you must press the “Learn” button on the motor head and complete the remote pairing within 30 seconds. If you exceed this window, the receiver resets, and you must restart the process from the beginning.
Most users mistakenly attempt to program remotes while standing at the end of the driveway. You should remain on a ladder within three feet of the motor unit to ensure the signal is received without interference.
If you’re syncing a universal remote, check the dip switch settings on the back of the device first. If the switches don’t match the position of the original remote, the opener will ignore the signal entirely. Always verify your switch pattern before climbing the ladder to save yourself from multiple trips.
How to Verify Success
A successful setup results in the motor unit light flashing or clicking once to confirm the new code is stored. If the door doesn’t move when you press the button, the pairing was likely unsuccessful. This usually happens because the remote wasn’t held long enough or the “Learn” mode timed out before the signal was received. To prevent this, ensure your remote is within reach before you trigger the motor’s learning cycle.
Rules and Maintenance Standards
Garage door systems must comply with the safety requirements set by the Consumer Product Safety Commission, which mandates automatic reversal features to prevent entrapment. After programming, always verify that your photo-eye sensors are clean and aligned, as these are the primary safety mechanism for your door.
Place a 2×4 board laid flat on the ground in the path of the door. If the door fails to reverse immediately upon contact, the force settings are too high and pose a crush hazard. Adjust the sensitivity dial on the motor housing until the door retreats instantly.
Record the date of your maintenance in a logbook or on a sticker near the motor. Most modern systems remain paired indefinitely unless the memory is cleared, but you should test the safety reversal monthly to ensure the motor recognizes obstructions properly.
If you hear grinding sounds or see frayed cables, stop using the remote immediately. These signs indicate a tension spring failure, which can cause the door to drop rapidly. Call a certified technician before attempting any manual operation.
Alternative Methods for Pairing
Using the Wall Console
Many modern wall-mounted control panels allow you to enter “Learn” mode directly from the wall. This avoids the need for a ladder. You must navigate the menu on the console to select “Program Remote” and follow the screen prompts. This is faster but requires the console to be physically connected to the motor unit.
Using Dip Switches
If your opener is older than 20 years, it likely uses physical switches inside the remote and the motor. You must match the position of these switches exactly. If even one switch is different, the remote won’t work. This method is reliable but requires good lighting to see the switch positions clearly.
Smartphone App Integration
Some newer openers connect to a home Wi-Fi network. You can program new remotes through the manufacturer’s smartphone application. This requires an active internet connection and the initial setup of the hub. It’s the most convenient method but relies heavily on your home’s network stability and signal strength.
Frequently asked questions
Can I program a remote without the learn button?
No, you can’t program most modern openers without using the “Learn” button or an equivalent pairing sequence on the wall console. If your unit is very old, you might have to match physical dip switches inside the casing instead. Check the back of your motor unit for a “Learn” button; if it’s missing, you likely have an older model that requires a different manual process.
How long does the learn mode stay active?
The “Learn” mode stays active for exactly 30 seconds on most standard residential models. If you don’t press the remote button within this time, the LED light on the motor will turn off, and you must press the “Learn” button again to start over.
Is it safe to program the opener myself?
Yes, it’s safe to program the opener yourself, provided you use a stable ladder and keep your hands away from moving parts. You should never attempt to adjust the spring tension or the cables yourself, as these are under extreme pressure and can cause serious injury. If you have trouble with the door movement itself, contact a professional technician.
What happens if I press the learn button too long?
If you press and hold the “Learn” button for more than 10 seconds, the motor unit will clear its memory of all previously programmed remotes. You’ll then need to re-program every remote, keypad, and vehicle button you use for that garage door.
How many remotes can I pair to one motor?
Most standard residential openers can store between 8 and 20 individual remote codes at one time. If you try to add more, the motor will typically overwrite the oldest stored code to make room for the new one. Check your specific model’s manual to find the exact storage limit for your unit.
Why won’t my remote sync with the opener?
The most common reason a remote fails to sync is a dead battery or an incompatible frequency. Ensure the battery is fresh and that the remote is designed for the specific brand and year of your motor. If the light on the motor doesn’t blink when you press the “Learn” button, the motor itself may have a power issue.
Conclusion
Proper maintenance of your door and opener ensures that your system remains reliable and safe for daily use. Regular checks of the safety sensors and the remote batteries will prevent most common issues, allowing you to enter and exit your garage without interruption. Always keep your manual in a safe place so you can refer to it if you need to clear the memory or add new devices in the future.
