
When your garage door refuses to open or close, you’re likely dealing with common chamberlain garage door opener issues that often stem from sensor misalignment or power interruptions. Most of these malfunctions occur because the safety sensors are blocked or the power cord has been jarred loose from the outlet. If your door reverses immediately after touching the floor, it’s almost always a force setting or limit issue that you can adjust using the buttons on the motor unit.
Troubleshooting your Chamberlain garage door opener
The most common reason for a malfunctioning door is a simple obstruction of the safety sensors. These sensors rely on an infrared beam that must remain unbroken for the door to operate; if the beam is misaligned or blocked by a box or tool, the unit won’t signal the door to close as a safety precaution.
You can verify this by checking if the LED lights on the sensors are solid; if they’re flickering or off, the beam isn’t reaching the receiver.
Another frequent cause involves the logic board or the travel limits. Over time, the door’s memory of how far it should travel can drift, causing the motor to think the door has hit an obstacle when it has simply reached the floor. This is common after a power outage or a sudden surge in the electrical line. If your unit is older, the internal gears may also be worn down, which you can often hear through grinding noises during operation.
Finally, check the remote control batteries and the wall-mounted panel. If the wall control’s lock mode is accidentally enabled, the remotes will be ignored by the system, making it appear as if the opener is broken when it’s simply in a restricted state. Always look for a blinking light on your wall station to confirm if the lock feature is currently active.
Align the safety sensors
If your door won’t close and the light on the opener flashes, you need to align the sensors. Start by ensuring both sensors are mounted securely to the door tracks or the wall, no higher than 6 inches above the floor. If the green light is off on one of the sensors, loosen the wingnut and adjust the angle until the light turns solid.
Most people make the mistake of tightening the wingnut while the sensor is still angled incorrectly. This creates a false sense of security that causes the door to reverse mid-cycle. If the light flickers when you tap the sensor, the bracket is loose; tighten the mounting screws into the wall stud rather than the metal track to stop the vibration.
Once the lights are steady, test the door by pressing the remote. If the door still refuses to close, check for any debris like cobwebs or dust covering the lens. You should never force a door to move if the sensors aren’t working, as this overrides the safety system designed to prevent accidents. If you can’t get the lights to stay solid after following these troubleshooting steps, consult the manufacturer manuals to confirm your specific model’s wiring requirements.
Adjust the travel limits
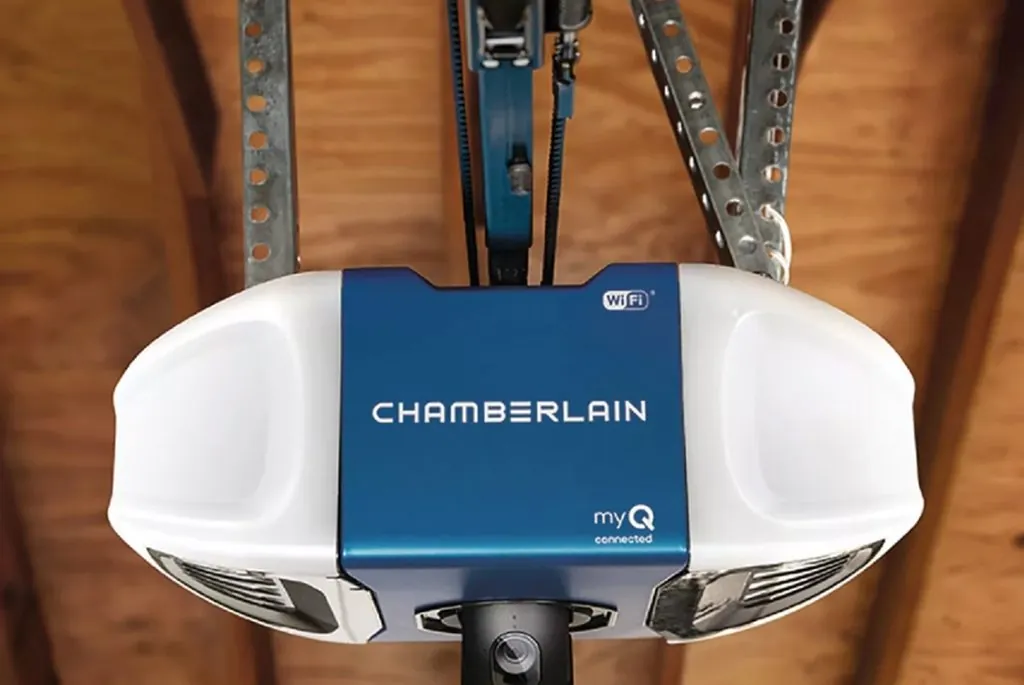
When the door stops short or reverses before hitting the ground, you must reset the travel limits. Locate the adjustment buttons on the side or back of your motor unit, usually labeled with arrows. Press and hold the adjustment button until the up arrow button begins to flash, then use the arrow buttons to move the door to your desired open position.
After setting the open limit, press the adjustment button again to confirm. Repeat this process for the closed position, ensuring the door rests firmly against the floor without putting excessive pressure on the header. A common mistake is forcing the door too far into the floor, which causes the safety sensors to trigger a reversal. If the door continues to reverse, the force setting might be too low; increase the force setting using the adjustment buttons on the motor unit.
If the door hits the floor and reverses despite these adjustments, check the tracks for debris or bent metal. If the track is clear and the door still fails to close, you likely have a mechanical issue with the tension springs that requires professional repair. Never attempt to adjust springs yourself, as they hold enough force to cause severe injury.
Clear the logic board memory
If your remotes have stopped working entirely, resetting the logic board is a reliable fix. Locate the learn button on the motor unit and hold it down until the LED light turns off, which usually takes about 6 to 10 seconds. This action clears all previously programmed remotes and keypads from the system.
Don’t confuse a simple signal loss with a mechanical failure. If your motor hums but the door stays stationary, you’re likely dealing with a stripped drive gear rather than a memory issue. Resetting the board won’t resolve physical damage.
After clearing the memory, you must reprogram your devices one by one. Press the learn button again until the indicator light glows, then press the button on your remote control until the opener lights blink or you hear two clicks.
If you have a rolling-code system, wait at least five seconds between programming each remote. Rushing this sequence often causes the logic board to reject the second device. If you don’t have your original manual, check the model number on the motor casing to find the correct programming sequence for your specific unit. Always verify the frequency compatibility of replacement remotes before attempting to pair them, as mismatched frequencies will never sync with your board.
Common mistakes to avoid
Never apply oil or heavy grease to the garage door tracks. These lubricants attract dust and grit, creating a thick sludge that increases friction and forces the motor to work harder. If your tracks are noisy, clean them with a damp cloth and use a dry silicone spray instead.
Don’t pull the emergency release cord while the door is under tension unless you’re prepared for the door to drop. If the door is in the closed position, the springs are at their maximum load. Pulling the cord here can cause the door to slam shut, potentially damaging the floor or injuring anyone standing nearby.
Many people replace sensors when the issue is just a loose wire. Before buying replacements, check the connections at the motor unit. If the status light on the sensor is flickering, a simple crimp or wire nut replacement usually solves the problem.
If the door feels heavy or falls quickly when you pull the release, the springs are failing. Don’t attempt to adjust these yourself. High-tension springs can snap with enough force to cause severe injury.
Keep the door running smoothly
To stop these issues from returning, inspect your door balance and hardware twice every year. If you find the door is difficult to lift by hand, you need to adjust the spring tension. If the door is noisy, check the rollers for flat spots or worn bearings.
Most homeowners make the mistake of greasing the tracks to silence a squeak. Avoid this at all costs. Oil traps grit and dust, creating a thick paste that forces the motor to work harder and eventually burns out the gears. Wipe the tracks with a dry cloth instead.
If the door hangs unevenly, check the cables for fraying. If you see even one strand of wire broken, stop using the door immediately and call a professional. High-tension cables can snap with enough force to cause severe injury.
If you encounter grinding noises, check the mounting bolts on the horizontal tracks. Vibration often loosens these fasteners over time. Tighten every bolt until snug, but don’t overtighten, as stripping the wood or metal frame makes the door impossible to align. If the door reverses before hitting the floor, clean the sensor lenses with a microfiber cloth to remove spiderwebs or dust buildup.
Related guides
- Chamberlain Garage Door Opener Troubleshooting: Easy Fixes
- LiftMaster vs Chamberlain: Which Garage Door Opener Is Best
- LiftMaster vs Overhead Door Garage Door Openers: The Verdict
Frequently asked questions
How long do garage door opener sensors last?
Sensors typically last 10 to 15 years, depending on local weather and usage frequency. Humidity can accelerate internal wiring corrosion, leading to sensor failure. You must replace the entire sensor pair if they stop working to ensure your safety system remains compliant with manufacturer standards.
Why does my garage door open by itself?
Your door may open on its own due to a short circuit in the wall button or a neighbor’s remote interference. Clear the motor’s memory to remove all paired remotes. If the issue persists, disconnect the wall button wires to determine if the switch itself is faulty and requires replacement.
Is it safe to use a garage door with a broken sensor?
No, it’s never safe to operate your door without functioning safety sensors. These devices provide the primary protection against the door closing on people, pets, or vehicles. If your sensors are broken, keep the door closed and use the manual emergency release until you replace the units.
How do I know if my garage door springs are bad?
Test your springs by pulling the emergency release cord and lifting the door to the halfway point. If the door doesn’t stay in place, the springs are failing. Never attempt to adjust or replace torsion springs yourself, as they’re under high tension and can cause severe injury.
What happens if I pull the red emergency cord?
Pulling the red cord disconnects the door from the motor trolley, allowing for manual operation during power outages or motor failure. Be careful, as the door may be heavy if the springs aren’t balanced. Reconnect the opener by moving the door until the trolley clicks into place.
Conclusion
Regular maintenance is the best way to avoid unexpected repairs. By keeping the tracks clean and testing your safety sensors based on your usage and the owner’s manual, you ensure the system works reliably. If you encounter a problem you can’t solve with these steps, consult a professional to avoid damaging the motor or risking your personal safety.
