
The most common reason for a nordictrack s22i resistance not working is a software glitch or a loose connection between the console and the magnetic resistance motor. In most cases, a simple power cycle of the bike clears the error, though you may occasionally need to recalibrate the software settings through the console menu. You should check the console screen for any specific error codes and consult the official NordicTrack support documentation to see if your model requires a specific firmware update to fix motor communication issues.
Why your resistance stopped working
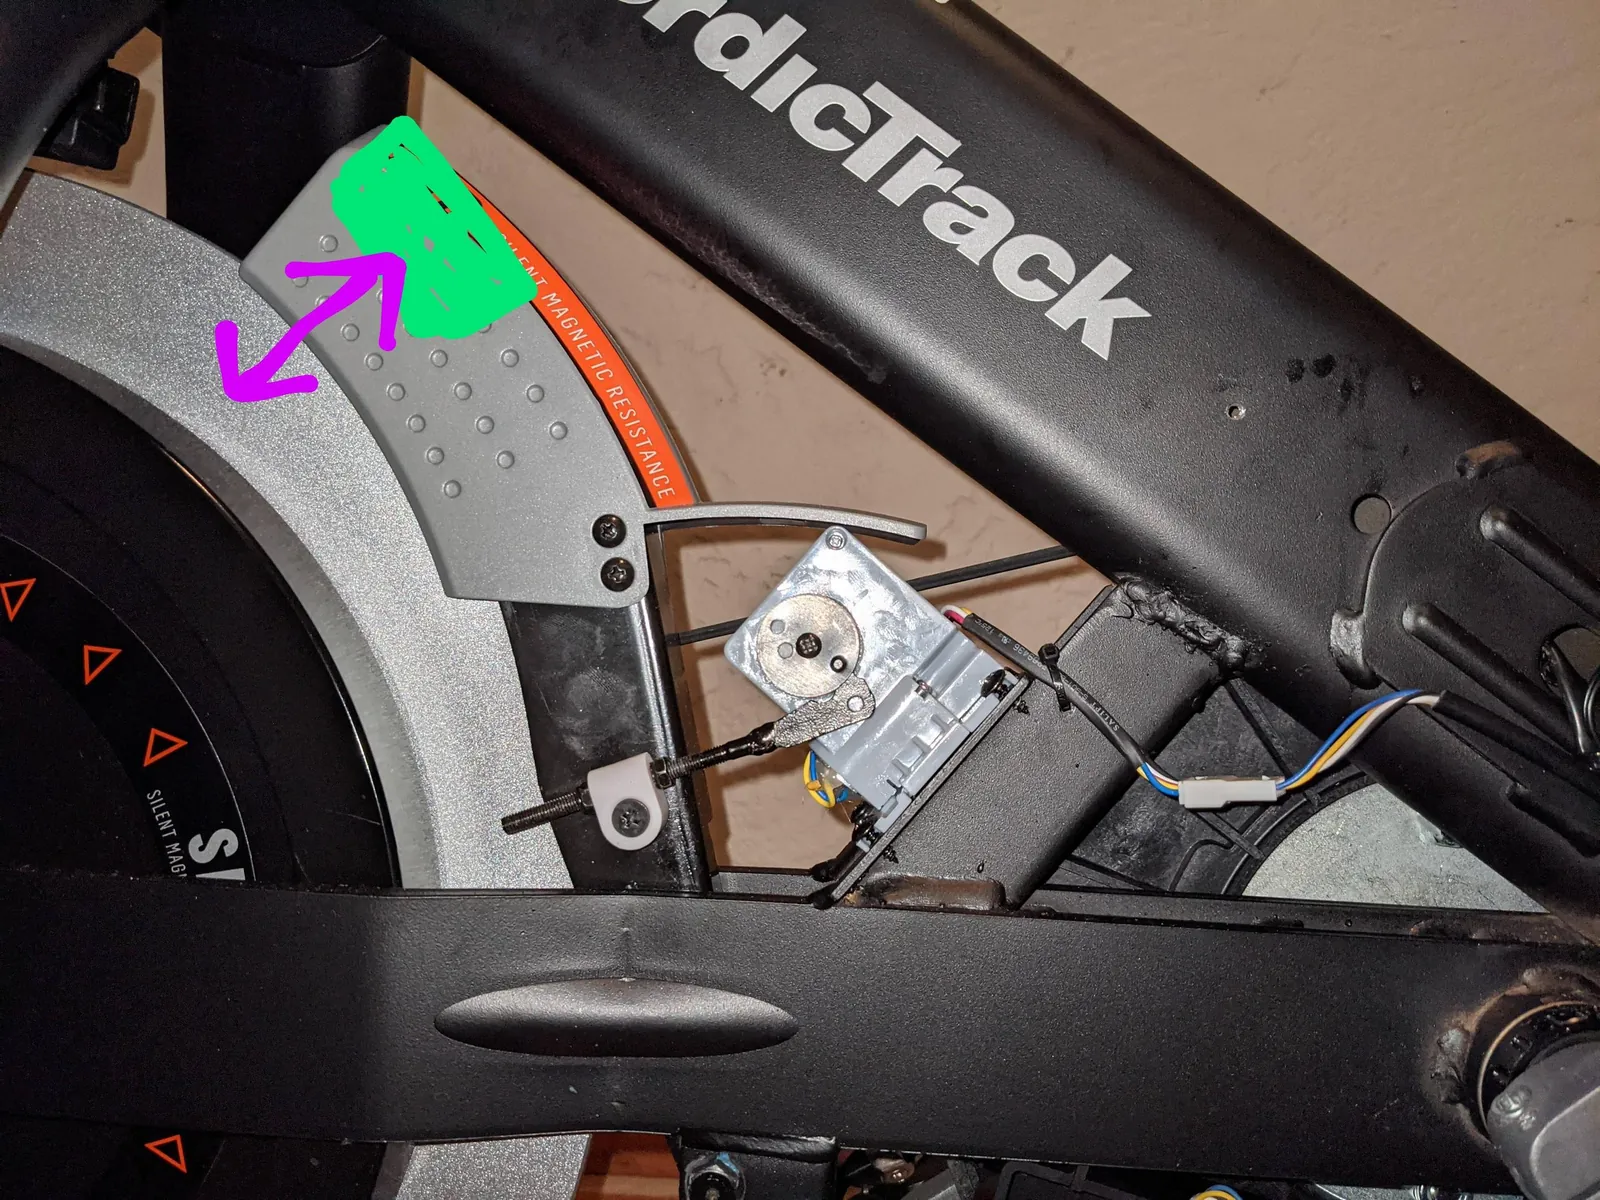
The following table ranks the typical causes of resistance issues from most to least frequent.
| Cause | How common | How to confirm it | Fix it yourself? |
|---|---|---|---|
| Software glitch | Very common | Bike restarts normally | Yes |
| Loose cable | Common | Check console connection | Yes |
| Motor calibration | Common | Resistance feels uneven | Yes |
| Sensor obstruction | Occasional | Visual inspection | Yes with care |
| Motor failure | Rare | Burning smell or noise | No |
| Control board fault | Rare | No motor response | No |
Most users assume a hardware breakdown when the resistance fails to engage. If you hear a grinding noise during the calibration sequence, stop immediately. This indicates a physical obstruction in the magnetic housing rather than a software error. Forcing the motor to push past this blockage often strips the plastic gears, turning a simple debris removal into a full motor replacement.
If the resistance feels inconsistent across different levels, check the tension cable before adjusting the motor. If the cable is taut but the resistance remains stuck at the lowest level, inspect the control board for a blinking red LED.
A steady light confirms the board is receiving power, meaning the issue lies within the motor assembly itself. If the light is absent or flickering, replace the power adapter first. Many users mistake a failing power supply for a dead control board, costing them a significant amount in unnecessary parts.
Safety: Inside a mains-powered machine, the parts behind the outer cover can hold a dangerous electrical charge even after it has been unplugged — that’s why they sit behind a cover. Opening the housing, or testing or replacing anything behind it, is a job for a qualified technician, never a home repair.
Resolving Software Glitches
The primary cause for resistance failure is often a temporary hang in the internal computer system that controls the bike. When the software stops sending signals to the magnetic motor, the resistance levels won’t change regardless of your screen inputs. A full power cycle is the first step to restore communication between the console and the drive system.
To perform a proper reset, unplug the power adapter from the wall outlet and leave it disconnected for at least 60 seconds. This allows the internal capacitors to discharge fully and forces the console to reload its operating system from scratch. Once you plug the power back in, the console will reboot, and you should attempt to adjust the resistance manually. If the motor engages, the issue was likely just a temporary communication error.
If the problem persists after a reboot, check the console settings menu for a “Calibration” or “Maintenance” option. This tool allows the software to re-index the magnetic motor’s position. If the bike doesn’t reach the minimum or maximum resistance during this test, the software isn’t the culprit. This is the point where you must stop and contact manufacturer support, as attempting to bypass software locks can void your warranty or cause further damage to the internal electronics.
Checking Physical Connections
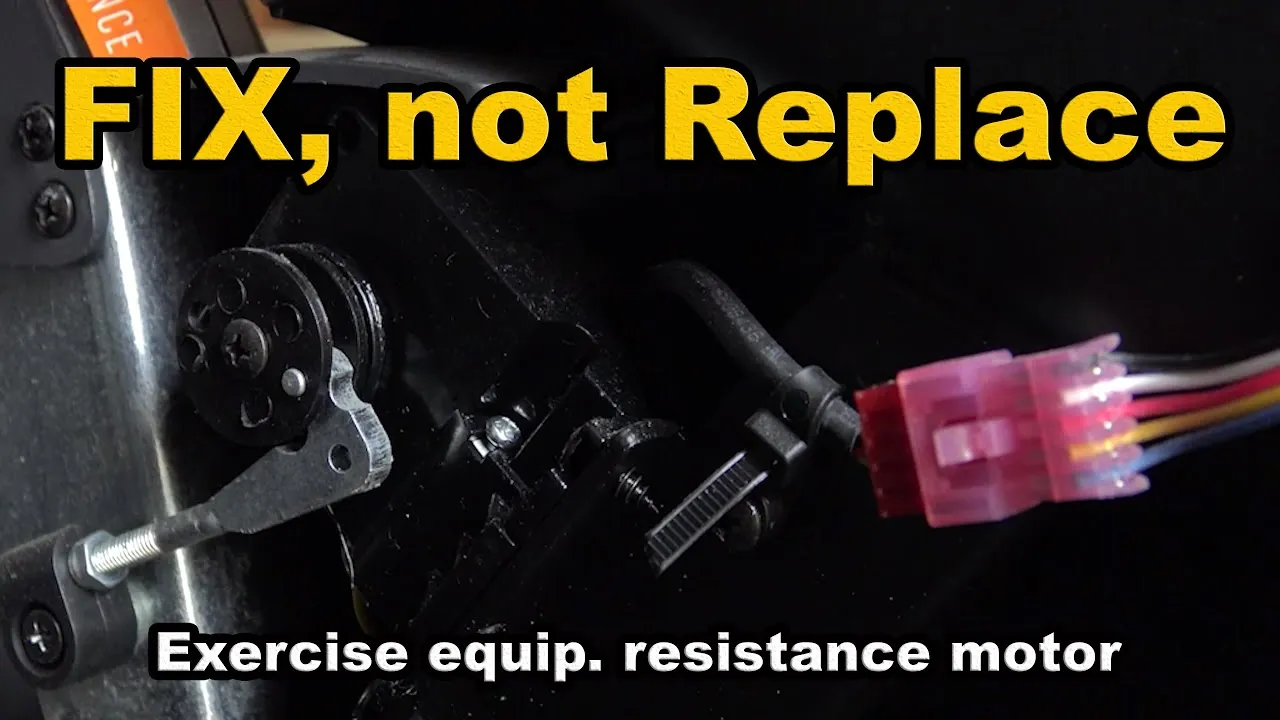
A loose cable between the console and the frame is a frequent cause of intermittent resistance control. Because the bike moves during intense workouts, vibrations can slowly work connectors loose over time. You can verify this by checking the visible cable running from the back of the console into the frame of the bike.
Ensure that the connector is pushed firmly into its port. You should hear a distinct click when the plastic tabs lock into place. If the connector slides out with minimal effort, the locking mechanism is likely compromised and requires a replacement cable rather than a temporary fix.
If you see any bent pins or frayed wires, don’t attempt to force the connection. This often triggers a short circuit that can fry the console’s motherboard. If the cable appears intact but the resistance still fails to respond, test the connection by gently wiggling the wire while the bike is powered on. If the resistance flickers, the internal wiring has a break.
Because the frame housing is complex and contains high-tension components, never attempt to remove the side panels yourself. Doing so risks serious injury or damage to the internal drive belt and magnets. If you can’t resolve the issue through the external port, contact a certified technician. Attempting to bypass these safety warnings often voids your warranty, leaving you responsible for the full cost of a replacement frame.
Motor Calibration Errors
Calibration issues occur when the bike loses track of the physical position of the magnetic resistance plates. If the software registers level 10 while the magnets remain physically stuck at level 1, the resistance will feel unresponsive or ghost-pedal during sprints. This misalignment typically follows a sudden power loss or a forced stop during a high-resistance climb.
Run the built-in calibration sequence through the settings menu on your touchscreen. Keep the bike clear of any obstructions during this process, as the pedals and magnets will move independently. If the bike emits a repetitive clicking sound but the resistance fails to shift, the internal gear housing is likely stripped. This mechanical failure requires a professional service technician to replace the motor assembly.
To determine if your issue is software-based or mechanical, perform a manual spin test. If the resistance changes when you manually nudge the motor linkage, the software simply needs a reset. If the motor hums but the linkage refuses to budge, the gear teeth have sheared. Never force the resistance lever if you hear grinding, as this can snap the plastic drive belt. Replacing the belt costs roughly twice as much as a standard gear adjustment.
Other Rare Causes
Debris in the magnets: Small metallic objects or loose hardware falling into the frame can physically block the magnetic plates. Check this by shining a high-lumen flashlight through the ventilation slots while moving the resistance lever. If you see an obstruction, use a magnetic pickup tool to retrieve it rather than shaking the unit, which risks damaging internal wiring.
Failed resistance sensor: If the console displays a “No Signal” error, the sensor tracking the motor position has likely failed. This component is calibrated to the frame’s specific tension; don’t attempt to bypass it, as the motor will continue to spin until it burns out the drive belt.
Power supply failure: An adapter that provides enough voltage to light the console but lacks the amperage to drive the high-draw resistance motor is a common culprit. If the screen dims when you increase resistance, your adapter is failing. Replace it with a unit matching the exact voltage and amperage specifications printed on the original power adapter.
Console board damage: If the screen functions but sends no commands to the frame, the internal control board may be faulty. If the unit makes a clicking sound but the resistance level never changes, the board is likely sending power but failing to register the feedback loop. This requires a factory-authorized replacement.
What a Fix Usually Involves
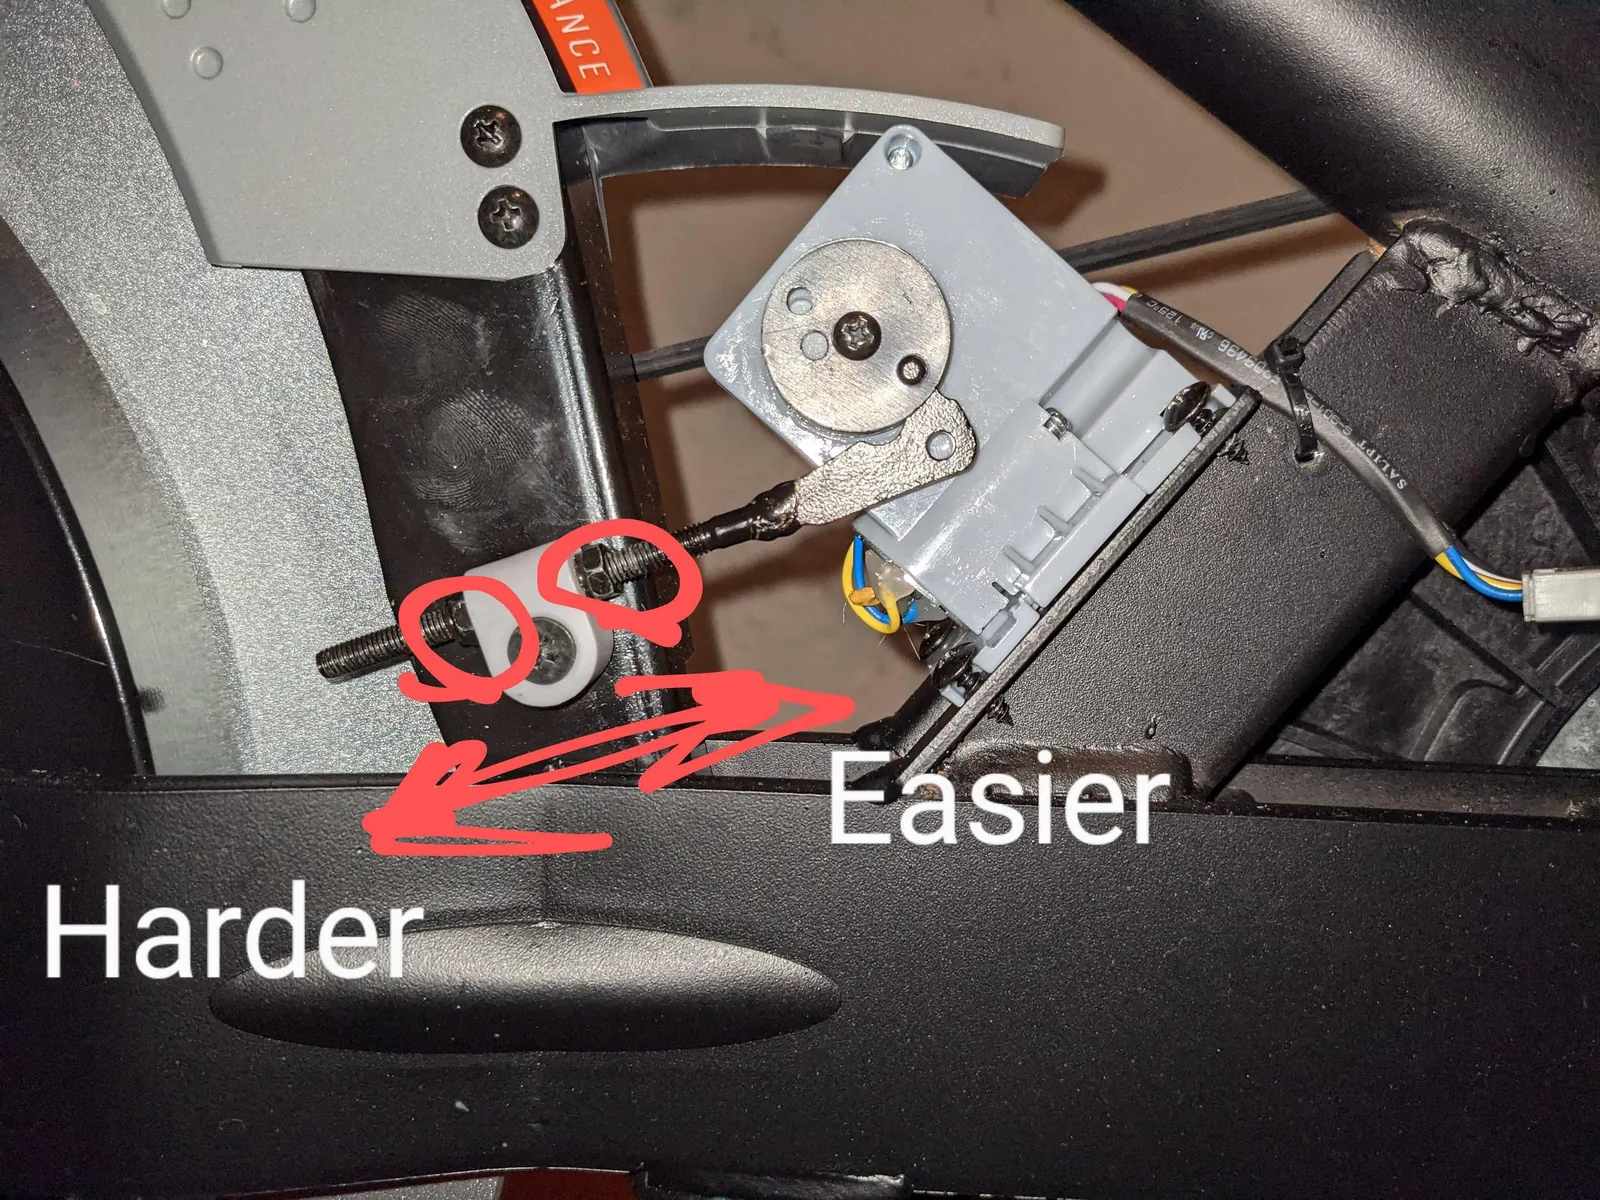
Fixing these issues typically requires a mix of patience and basic diagnostic steps. Most software-related fixes cost nothing but your time, as they involve navigating menus or unplugging the unit for a few minutes.
If a part like a motor or a cable needs replacement, the cost is usually comparable to a standard home appliance repair. You should always check your warranty status on the manufacturer website before paying for any parts, as many structural and motor components are covered for several years.
The most common mistake owners make is attempting to lubricate internal gears with standard household oil. This attracts dust and creates a grinding paste that destroys plastic teeth within weeks. Use only the manufacturer-approved silicone grease.
If you can’t fix the issue through software resets, you’ll likely need to schedule a service visit. A professional technician will bring the necessary tools to open the frame safely and replace faulty parts without damaging the surrounding electronics. You can get a real quote by providing your serial number to the official support team, who can then identify the exact parts needed for your specific unit.
Frequently asked questions
How long should I leave the bike unplugged?
You should leave the bike unplugged for at least 60 seconds to ensure the internal memory clears completely. This duration allows the internal capacitors on the control board to discharge so that the console initiates a fresh startup sequence when you plug it back in.
Is it safe to open the side panels?
No, it isn’t safe to open the side panels because they protect you from high-tension drive belts and electrical components. Opening these panels can lead to injury and will void your manufacturer warranty.
Why does my screen say no signal?
A “no signal” error means the console isn’t receiving data from the internal cadence or resistance sensors. You should check that the main data cable is firmly connected at the back of the console before contacting customer support for a potential sensor replacement.
Can I manually move the resistance magnets?
No, you should never try to move the magnets by hand because they’re controlled by a high-torque motor. Forcing the magnets can strip the gears and cause permanent damage that requires a full motor assembly replacement.
Does it matter if I use a surge protector?
Yes, it matters because power spikes can corrupt the delicate firmware that controls the resistance motor. Always plug your bike into a high-quality surge protector to prevent electrical damage to the console and motor boards.
What happens if the calibration fails?
If the calibration fails, the software can’t determine the correct position of the magnets and will disable resistance to prevent further damage. You should note any error codes displayed on the screen and provide them to the support team to determine if a motor replacement is necessary.
Conclusion
The best way to ensure your bike remains functional is to perform the software calibration after any major firmware update or if you notice the resistance feeling inconsistent. If these steps don’t restore full control, contact the manufacturer to arrange for a certified technician to inspect the internal motor assembly.
