
You can sync a new remote to your system by pressing the learn button on the motor unit and then holding the button on your remote until the light flashes. Locating the colored learn button on the back or side of the motor housing is the first step in programming an overhead garage door opener. This process typically takes about three minutes and requires only your remote control and a sturdy ladder. It’s a simple task that most homeowners can finish without professional help.
Items needed to program your garage door
To successfully connect your remote, you must have the following items ready. Having these tools nearby saves you from climbing up and down the ladder multiple times during the process.
- A sturdy step ladder that reaches the motor housing safely.
- Your handheld remote control with fresh batteries installed.
- The wall-mounted control panel if you need to clear old codes.
- A flat-head screwdriver if the learn button is behind a plastic cover.
- The owner’s manual for your specific model to identify the button color.
Verify the color of the “Learn” button on your motor unit before beginning. If the button is purple, your system operates on a 315 MHz frequency; if it’s red or orange, it likely uses 390 MHz. Mismatched frequencies are the most common cause of failed sync attempts. If you try to pair a 315 MHz remote with a 390 MHz motor, the system will simply ignore your signal.
Check the back of the motor housing for the model number and date of manufacture. If your unit was built before 1993, it lacks the rolling-code technology required for modern remotes and won’t sync with standard universal devices. In these older cases, you must purchase a dedicated external receiver kit to bridge the gap.
Always keep a second person on the ground to steady the ladder while you work near the ceiling. A shaky ladder forces you to rush the button-pressing sequence, often causing the motor to time out before the connection is finalized.
Steps to Sync Your Remote
Follow these steps carefully to ensure your remote connects to the motor unit. If you move too slowly between steps, the motor may exit pairing mode, and you’ll need to start again from the beginning.
- Place your ladder securely under the garage door opener motor.
- Remove the light cover from the motor unit if necessary to reach the learn button.
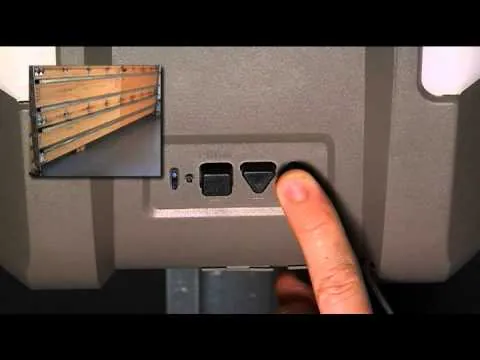
- Press and release the colored learn button on the motor unit; the indicator light will glow steadily for 30 seconds.
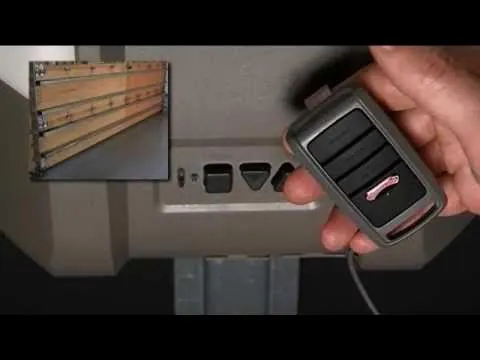
- Press and hold the button on your remote control that you want to use for the door.
- Release the remote button when the motor light blinks or you hear two clicks, which confirms the signal was received.
- Wait for the motor light to stop blinking before you test the remote.
- Press the remote button again to verify the door opens or closes as expected.
Tip: If the door doesn’t move, ensure you’re standing within 10 feet of the motor during the initial pairing. Careful: Never stand directly under the garage door while testing, as a malfunction could cause the door to move unexpectedly. If you can’t get the remote to connect after three tries, contact a certified technician to inspect the internal receiver board.
Situations Affecting Programming
The time and effort required to program a remote depend on the age and type of your opener system. Some older units require you to set physical switches inside the remote, while newer models use digital pairing buttons.
| Situation | Estimated Time | Complexity | What to Watch |
|---|---|---|---|
| Modern Digital Remote | 2-3 minutes | Low | Motor indicator lights |
| Older Dip-Switch Remote | 10-15 minutes | Medium | Matching switch positions |
| Universal Replacement | 5-8 minutes | Medium | Frequency compatibility |
| Multi-Door Syncing | 10 minutes | High | Correct button assignment |
If your opener uses dip switches, you must mirror the exact pattern found on the motor head. A single flipped switch prevents the signal from connecting and forces a total restart. Check the switch bank twice before climbing down the ladder.
When syncing a universal remote, verify the frequency on the back of your motor.
Always start by programming a single remote to ensure the system is working before you attempt to sync additional devices. Trying to program multiple remotes at once often leads to errors that force you to reset the entire memory of the unit. If the motor light fails to blink during pairing, stop immediately. Attempting to force the connection will likely erase the codes for your existing, functional remotes.
Confirming a Successful Connection
A successful connection is confirmed when the motor unit light flashes once or the opener makes a distinct clicking sound immediately after you press the remote button. If the light stays solid or doesn’t react at all, the signal wasn’t captured by the receiver.
This failure often happens because the remote was held too far from the motor or the batteries are weak. Test the connection by standing within five feet of the unit. If the remote works at this distance but fails from the driveway, you have a signal interference issue rather than a pairing error.
Always replace the remote batteries if the light remains dim during your attempt. A common mistake is assuming the remote is broken when the logic board is simply in a lockout state. If the unit fails to respond after three attempts, unplug the opener for sixty seconds to reset the internal memory before trying again.
Safety Rules and Maintenance
Always follow the safety standards provided by the Consumer Product Safety Commission regarding the automatic reversal feature of your garage door. After programming, place a two-by-four piece of lumber flat on the floor in the door’s path. If the door fails to reverse immediately upon contact, adjust the force sensitivity settings or the downward travel limit screws on the motor housing.
Keep your remotes stored in a secure location and clear the memory of the opener if you ever lose a remote. Most residential openers will function for several years before the receiver requires a reset or professional service. If you notice the door moves intermittently, check the antenna wire on the motor to ensure it’s hanging down and not obstructed.
Many owners mistake a slow-moving door for a motor failure, but this usually indicates a lack of lubrication on the tracks. Apply a silicone-based spray to the rollers and hinges as needed based on your usage, and always consult your owner’s manual for specific maintenance guidance. Don’t use grease, as it attracts dust and grit that will grind down your bearings over time.
Alternative Programming Methods
Using the Wall Console
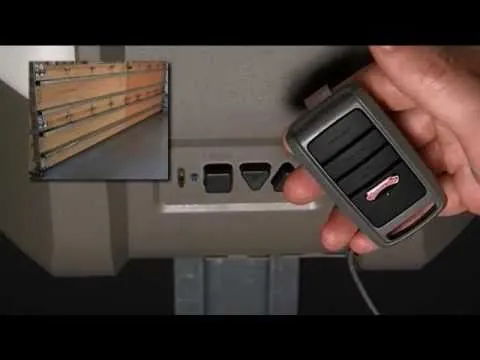
Many modern wall-mounted control panels have a dedicated program button. This allows you to sync remotes from the wall instead of using a ladder to reach the motor. This saves time and keeps you on the floor, though you must ensure the wall console is powered and properly wired to the motor unit.
Keypad Entry Programming
If you’re adding an outdoor keypad, the process involves entering a PIN on the keypad while the motor is in learn mode. This is a separate process from syncing a handheld remote. You’ll need to check your manual to see if your motor supports multiple entry devices at the same time.
Clearing Previous Codes
If you bought a used home, clear the memory by holding the learn button for 10-15 seconds until the light goes out. This erases all old remotes from the system. Once cleared, you can start the pairing process for each new remote you own, ensuring that only your devices have access to the garage.
Related guides
Frequently asked questions
Can I program a garage door remote without a ladder?
No, you can’t program most overhead door openers without a ladder because you must physically press the learn button on the motor unit itself. Some newer smart-enabled models allow for app-based pairing, but the initial setup almost always requires physical access to the motor housing for security reasons.
How long does it take to program a remote?
It takes about 3 minutes to program a single remote once you have the ladder in place. If you’re matching dip switches on an older model, allow for 15 minutes to carefully align the switches inside the remote to match the settings on the motor.
Is it safe to program a garage door opener myself?
Yes, it’s safe to program the remote yourself as long as you follow the manufacturer instructions and keep your hands away from moving parts. If you notice the door springs look rusted or the cables are frayed, don’t attempt any work on the door and call a professional, as these parts are under high tension.
What happens if I lose my garage door remote?
You should immediately clear the memory of the opener by holding the learn button for 15 seconds to prevent the lost remote from being used. After clearing the memory, you must re-program all your remaining remotes, as the system will no longer recognize any of them until they’re re-synced.
Why won’t my remote sync with the motor?
The most common reason a remote won’t sync is that the remote frequency doesn’t match the opener receiver. Check the label on your motor to confirm the frequency, or ensure the batteries in your remote are fully charged and inserted in the correct direction.
How many remotes can I connect to one opener?
If you reach the limit, the motor will usually overwrite the oldest remote in its memory, so you may need to re-program your older remotes if you add too many new ones.
Conclusion
Proper maintenance of your garage door system ensures that your remote remains responsive and the door operates smoothly for years. Always keep your manual in a safe place so you can reference the specific button sequences for your model whenever you need to add a new device or replace a lost remote.
