
Connecting to a Mitsubishi PLC requires identifying the specific communication interface supported by your controller and matching it with the correct programming software and physical cable. Whether you’re working with the legacy FX series or the modern iQ-R platform, the process involves configuring your computer’s communication settings to align with the PLC’s internal port protocol. This guide outlines the essential hardware, software, and configuration steps needed to establish a stable bridge between your workstation and your industrial controller.
Key Takeaways
- Always verify your PLC model number to determine if you need a serial, USB, or Ethernet cable connection.
- The primary software suite for these controllers is GX Works3 or the legacy GX Works2.
- Communication drivers must be correctly assigned in the Connection Destination window of your software.
- Firewalls and antivirus software often block the specialized ports used for PLC communication.
- Standardizing your IP address scheme is required when connecting via Ethernet/IP protocols.
How Do I Connect to a Mitsubishi PLC?
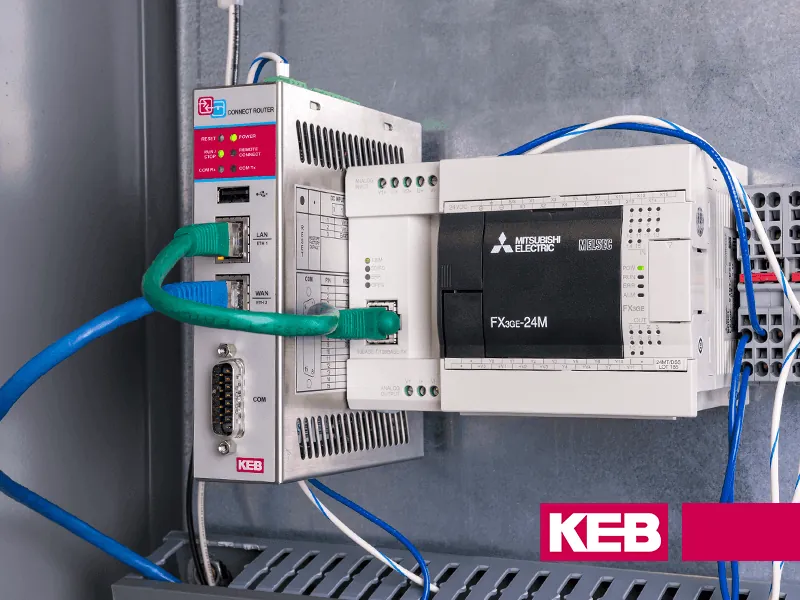
To establish a connection, you must first confirm the physical port available on your CPU module. Modern Mitsubishi PLCs primarily use Ethernet ports, while older compact units like the FX series often utilize Mini-DIN serial ports or proprietary USB mini-B connectors. You must have the Mitsubishi Electric factory automation software installed on your Windows-based workstation. Once the cable is plugged in, navigate to the “Connection Destination” setting in your project navigation tree to define the path.
Communication Interface Options
| Interface Type | Typical Cable | Common PLC Series |
|---|---|---|
| USB | Mini-B or Micro-USB | FX3U, FX5U |
| Ethernet | RJ45 Cat6 | iQ-R, iQ-F, L-Series |
| RS-422/RS-232 | SC-09 Adapter | FX0N, FX2N |
Essential Hardware and Software Requirements
Before attempting a connection, gather your physical components and verify software licensing. You’ll need the appropriate programming cable, which is often a proprietary Mitsubishi part rather than a standard off-the-shelf cable. Using an incorrect cable can result in communication errors or, in rare cases, damage to the communication port. Ensure your operating system is compatible with the version of GX Works you’re running; older versions of GX Developer may require a virtual machine to operate on Windows 10 or 11.
- GX Works3 for modern iQ series.
- GX Works2 for Q and FX series.
- SC-09 serial interface converter.
- Shielded Cat6 Ethernet cabling.
- High-speed USB 2.0 interface cables.
Configuring Your Network Settings
When connecting via Ethernet, your computer must exist on the same subnet as the PLC. If the PLC has a static IP address of 192.168.3.10 and a subnet mask of 255.255.255.0, your computer must be set to an address like 192.168.3.11.
You can adjust this in your computer’s “Network and Sharing Center” under the IPv4 properties of your Ethernet adapter. Failure to match these subnets is the most common reason for a “Connection Time Out” error message during the handshake process.
Step-by-Step Connection Procedure
- Connect your cable to the PLC and the PC port.
- Open GX Works and select “Connection Destination.”
- Double-click “Connection 1” to open the configuration menu.
- Select the specific interface (e.g., “Ethernet Board” or “USB”).
- Click “Communication Test” to verify the link.
- Save your settings to the project file.
Troubleshooting Common Connection Issues
If the “Communication Test” fails, you must systematically isolate the variable. Start by checking the physical link lights on the PLC; if no LEDs are illuminated on the Ethernet port, the cable is likely damaged or improperly seated.
Next, check the Windows Device Manager to ensure the USB serial driver is installed and not showing a yellow warning icon. If you’re using a virtual machine, ensure the USB device is “passed through” to the guest operating system rather than being held by the host.
Warning: Never attempt to hot-swap serial cables while the PLC is powered, as the voltage spikes can permanently fry the communication chip inside the CPU module.
Managing Driver and Software Versions
Mitsubishi software is notoriously sensitive to version mismatches. If you’re trying to connect to a legacy FX2N using a version of GX Works3 designed for iQ-R, the software may not recognize the hardware or may refuse to upload the program.
It’s often necessary to keep a legacy installation of GX Works2 or GX Developer available for older hardware. Always check the “Help” menu in your software for release notes regarding supported hardware versions to ensure your firmware is compatible with your current programming environment.
Security and Firewall Considerations
When using Ethernet connectivity, your local network security can interfere with the data packets sent between your PC and the PLC. Industrial protocols often use specific TCP/IP ports that standard Windows firewalls may flag as suspicious.
You should create an exception rule in your firewall settings for the Mitsubishi communication executable, typically named Easysocket.exe. If you’re working in a corporate IT environment, contact your network administrator to ensure that industrial automation traffic isn’t being throttled or blocked by managed switches or intrusion detection systems.
Identifying Your PLC Communication Port
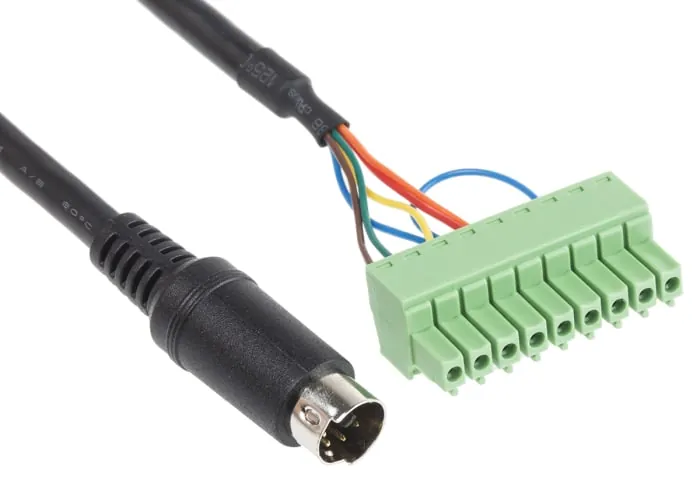
Not all Mitsubishi controllers share the same pinout. For example, the FX series uses an 8-pin Mini-DIN connector for RS-422 communication, which requires a specific level-shifting adapter. Conversely, the iQ-R series uses standard Ethernet RJ45 jacks. Refer to the hardware manual for your specific CPU module to determine the pinout. If you’re building your own cable, follow the manufacturer’s wiring diagram precisely, as incorrect wiring can cause a short circuit across the internal 24V power supply pins.
Managing Multiple Connection Paths
In larger systems, you may encounter a PLC connected via a gateway or a remote I/O station. In these cases, you aren’t connecting directly to the PLC, but rather through a network bridge.
You must configure the “Other Station” settings in your software to specify the network number and station number. This routing information tells the software how to traverse the industrial bus to reach the target CPU. Always document these network parameters in your project folder, as they’re rarely stored within the PLC program itself.
Pro Tip: Use a static IP address for your programming laptop to avoid conflicts with DHCP servers that may assign different addresses to your machine during a long-term troubleshooting session.
Related guides
- VNC Connect Raspberry Pi Not Working: 5 Fixes for Remote Access
- Hisense Roku TV Not Connecting to WiFi: Simple Fixes That Work
Frequently Asked Questions
Why does my software say “Connection Time Out”?
This error usually indicates a mismatch in IP settings or a blocked communication port. Verify that your computer is on the same subnet as the PLC and that your firewall isn’t blocking the connection. If using a serial cable, ensure the COM port number selected in the software matches the one assigned by your computer in the Device Manager.
Do I need a special cable for FX PLCs?
Yes, most compact FX series PLCs require a proprietary SC-09 adapter or a dedicated USB-to-Mini-DIN cable. Standard off-the-shelf serial cables won’t work because the PLC uses a specific RS-422 signaling standard rather than standard RS-232. Always use the manufacturer-recommended cable to ensure proper voltage levels and signal integrity, which prevents intermittent drops during data transfer.
Can I connect to a PLC over Wi-Fi?
While technically possible using a wireless bridge or an industrial wireless access point, it’s strongly discouraged for programming tasks. Wi-Fi latency and packet loss can cause the connection to drop mid-upload, potentially corrupting the PLC’s memory. Always use a hardwired Ethernet or USB connection when modifying code to ensure the reliability and safety of the industrial control process.
How do I find the IP address of a PLC?
If the IP address is unknown, you can often use the “Find CPU” or “Online Connection” scan feature within GX Works. This tool broadcasts a discovery packet across your network and lists all reachable Mitsubishi devices along with their current IP addresses. If the PLC is password-protected or the network is isolated, you may need to reset the CPU to factory defaults via the hardware switch.
What is the default password for Mitsubishi PLCs?
Many older Mitsubishi PLCs don’t have a default password, but modern units often require a security key to be defined during the initial project setup. If the PLC was programmed by a third party, they may have set a password that prevents uploading. If you don’t have the password, you may be unable to retrieve the source code from the controller.
Conclusion
After you have confirmed your cable requirements and verified your network settings, the next step is to launch your programming software and initiate a “Communication Test” to ensure a successful handshake. Once the connection is stable, you should immediately perform a read operation to back up the existing program before making any modifications to the controller’s logic or internal configuration.
