
Loading paper into printer trays takes about two minutes and stops paper jams before they happen. Slide the paper guides open, place a neat stack of 50 to 100 sheets flat against the tray base, and push the guides gently against the edges. This standard method suits anyone using a home or office inkjet or laser unit.
What to prepare before loading paper into your printer
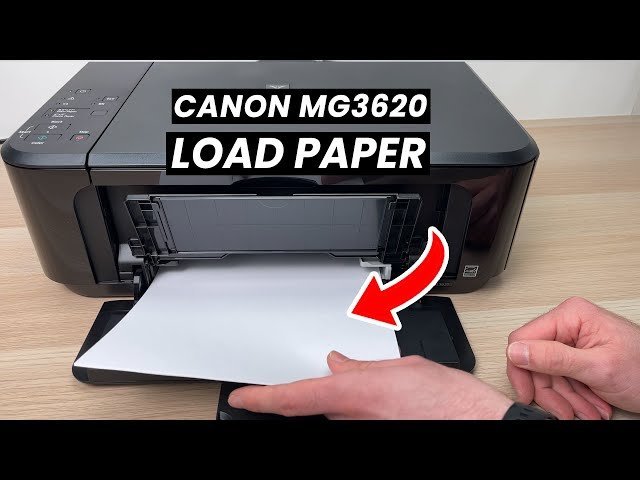 Photo: www.youtube.com on Google
- A stack of standard copy paper (20 lb to 24 lb plain bond paper works best for general use).
- Access to your printer’s input tray (front slide-out cassette or top rear feeder slot).
- A flat, dry surface like a desk to square up sheets before loading.
- The printer’s model manual (useful if your tray latches differ from standard builds).
You can substitute multipurpose office paper for brand-name copy sheets, but using wrinkled or damp paper will instantly cause misfeeds and roller jams. If your tray mechanism is broken or jammed with plastic fragments, don’t force it; contact a certified repair shop to avoid breaking internal gears.
Step-by-step
- Pull open the main paper cassette from the front of the machine, or flip open the rear feed door on top-loading models.
- Squeeze the release latch on the width and length guides, then slide them out to the edges of the tray.
- Take a stack of 50 to 100 fresh sheets and tap the bottom edge against a flat table to align the corners.
- Flex the paper stack gently into a curve to let air between sheets, which stops static electricity from sticking them together. Careful: Don’t fan the paper vigorously like a deck of cards, as this creates excess static charges that pull double sheets into the feed roller.
- Place the aligned stack flat into the tray, print side down for most slide-out cassettes or print side up for top rear slots. Tip: Look inside the tray for a small embossed icon of paper with folded corners; lines on the icon show which way the print face goes.
- Push the stack forward until it rests lightly against the front stop, making sure it stays below the maximum fill line stamped on the plastic walls.
- Slide the width and length guides inward until they touch the paper stack snugly without bending or buckling the edges. Careful: If the guide pushes so tight that the center of the paper bows upward, loosen it by one notch to prevent feeding jams.
- Push the tray back into the printer housing firmly until it clicks into place, then pull out the output tray extension.
If your tray has damaged internal lift springs or loose motor gears, stop there and let a certified hardware technician replace the tray assembly.
Feed trays and paper types
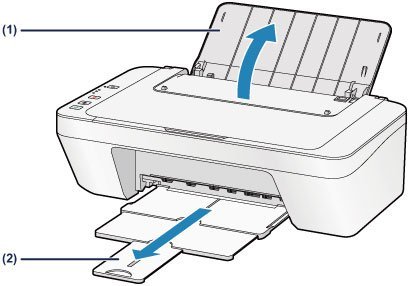 Photo: ij.manual.canon on Google
Different paper weights change how the machine pulls sheets through the path.
| Feed Situation | Extra Time or Cost | What Is Different | What to Watch For |
|---|---|---|---|
| Standard 20 lb Copy Sheets | 1 to 2 minutes | Full stacks feed automatically | Guide tightness against sheet edges |
| Heavy Cardstock (60–80 lb) | 2 to 3 minutes | Must load 5–10 sheets only | Roller slip or sheet hesitation |
| Standard #10 Envelopes | 2 to 4 minutes | Feed flap-side down or left | Wrinkling along edge creases |
| Glossy Photo Paper | 1 to 2 minutes | Feed glossy side down in tray | Fingerprint smudges on coating |
It’s safer to load small stacks of 20 sheets first than to fill the tray completely and cause a pickup jam.
How to tell you did it right
A correct setup feeds one single sheet smoothly into the print carriage without loud grinding or scraping sounds. The sheet exits straight, with clean margins and no skewed text. A poor setup produces crooked prints, dog-eared page corners, or accordion folds inside the roller path.
Skewed feeding happens when the width guide sits loose, letting the stack twist sideways during pickup. You can prevent this by keeping guides flush, never exceeding the fill line, and avoiding damp paper. The trade-off is simple: tight guides prevent crooked prints, but over-tightening them pinches the stack and causes instant feed failures.
Safe paper handling and storage
Store your paper flat in a cool room inside its original moisture-proof wrapper until you need it. High humidity makes fibers expand, causing multiple sheets to drag into the feed path at once. According to HP’s paper loading guidelines, paper stacks must always rest below the tray’s maximum capacity line to prevent multi-sheet pick errors.
Close your printer’s tray doors after loading to keep household dust off the pickup wheels. A properly loaded paper cassette stays ready for weeks in low-humidity rooms. This simple guide isn’t for industrial presses or wide-format plotting machines; call a commercial print technician if you run large production equipment.
Other ways to load
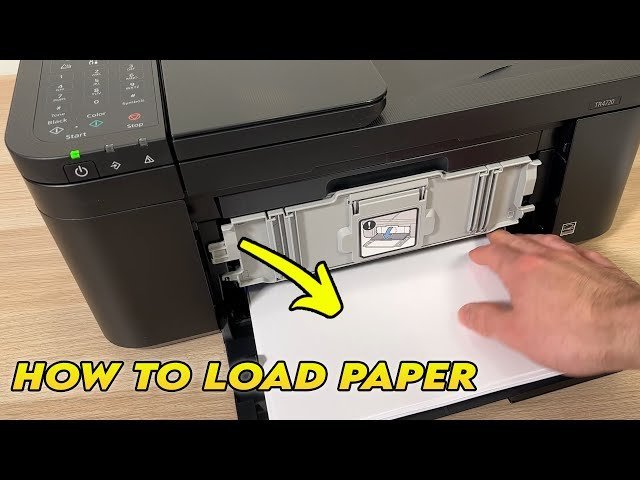 Photo: www.youtube.com on Google
Rear manual feed slot
Use the single-sheet bypass slot on the back for heavy cardstock or envelopes. It provides a straight paper path that stops stiff media from bending. This takes more time per page, but it prevents the tight roller curves that warp thick stock.
Multi-purpose foldout tray
Open the front fold-down flap found on many business printers. This tray holds 20 to 50 odd-sized sheets like postcards or labels without removing your main standard paper cassette. It saves setup time when switching media, though it leaves paper open to dust.
Bulk high-capacity lower feeder
Attach an optional 500-sheet lower drawer beneath the main printer housing. This suits high-volume print runs where loading small stacks wastes time during the day. It costs more money for the hardware add-on, but it cuts refill work down to once a week.
Frequently asked questions
Can I load two different paper sizes at once?
No. Mixing paper sizes in the same tray causes crooked feeds and severe paper jams. The guides can only secure one size at a time, so smaller sheets will wander sideways while larger sheets get pinched.
Why does my printer feed multiple sheets together?
Static electricity and indoor humidity cause individual sheets to cling to each other. Flex your paper stack gently before loading to introduce air pockets, and store extra paper reams off damp floors.
How full can I fill the paper tray?
Load the tray only up to the fill mark stamped inside the plastic wall, which is usually 150 to 250 sheets. Overfilling pushes the stack against pickup rollers too tightly, stopping them from grabbing individual sheets cleanly.
What happens if the paper guides are too loose?
The paper twists as the rollers grab it, printing your document crookedly across the page. This varies by model — check the label inside your cassette to find the exact alignment lines.
Is it safe to leave paper in the tray?
Yes, it’s completely safe to leave plain paper inside a closed cassette tray for weeks. If your printer uses an open top tray, remove the paper when not printing to stop room dust from dirtying internal rollers.
Which side of glossy photo paper faces up?
Check your tray style first: for a top feeder, place the glossy side facing you; for a front-loading drawer, face the glossy side down.
With everything in place, close the tray until it clicks and send a quick test page from your computer. You’ll hear the machine pull a clean sheet smoothly. Once that single page prints without trouble, you’re ready to print your big documents with confidence. Happy printing!