
Properly installing or renovating your garage entry requires precise structural planning, as the framing garage door jamb serves as the critical interface between the heavy, moving door system and the building’s load-bearing walls. Whether you’re building a new structure or replacing rotted wood, achieving a plumb, level, and square opening is essential for the longevity of your garage door hardware. Neglecting the structural integrity of these vertical members often leads to premature motor burnout, uneven gaps, or complete track misalignment.
Key Takeaways
- Ensure your jamb materials are pressure-treated lumber to prevent moisture-related rot.
- Verify the rough opening is exactly 3 inches wider than the door width.
- Always use galvanized fasteners to prevent chemical corrosion from treated wood.
- Check the plumb of your king studs on both sides before installing the head jamb.
- Use high-quality exterior-grade sealant to bridge the gap between the jamb and concrete.
Necessary Tools and Materials
To complete this task, you need a collection of specialized construction equipment and high-quality materials. Investing in the right gear ensures that the structural support remains rigid under the weight of the door.
| Category | Required Items | Specification/Purpose |
|---|---|---|
| Measuring | Tape measure, 4-foot level | Accuracy for plumb and square |
| Fastening | Framing nailer, 16d nails | For securing studs to framing |
| Cutting | Circular saw, miter saw | Cutting headers and jamb legs |
| Materials | Pressure-treated 2×6 or 2×8 | Resistance to ground contact moisture |
| Protection | Galvanized flashing, sealant | Preventing water ingress at floor |
- DeWalt 20V Max framing nailer
- Stabila spirit levels
- Simpson Strong-Tie hurricane ties
- Rust-Oleum exterior wood preservative
- DAP silicone-based exterior caulk
Framing the Garage Door Jamb Opening
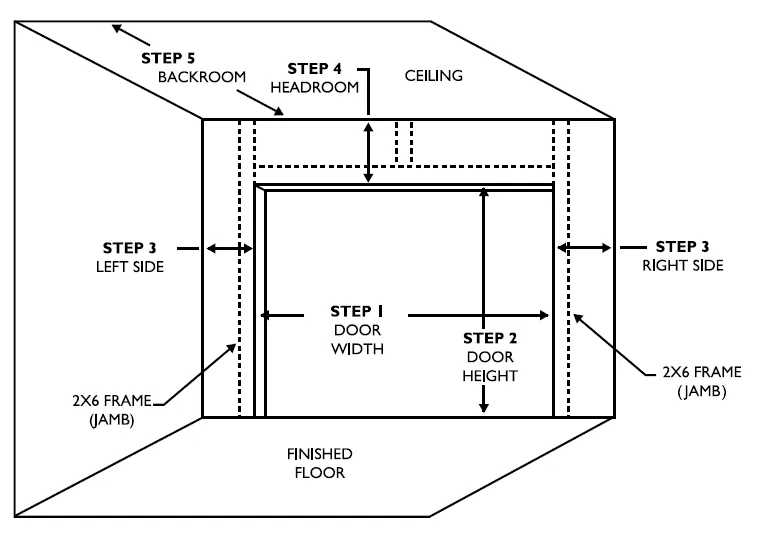
The rough opening is the framed space that exists before the finish door jambs are installed. For a standard residential garage, the rough opening should be exactly three inches wider than the door itself to accommodate the vertical tracks and the jamb assembly. For example, a 16-foot door requires a 16-foot, 3-inch opening.
The height of the rough opening should be exactly 1.5 inches higher than the door height to allow for the header and the floor clearance. According to the International Residential Code standards for structural framing, all load-bearing members must be sized to support the tributary load of the roof and ceiling above the garage door.
How to Install Jamb Legs
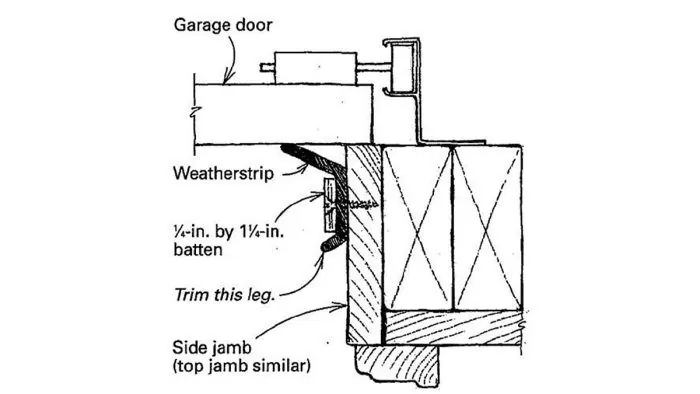
Installing the jamb legs requires patience and constant verification with your level. Start by securing the king studs to the side wall framing using 16d nails spaced every 12 inches. Once the king studs are plumb, attach the jack studs (or trimmers) to the king studs.
The jack studs provide the actual surface for the garage door tracks. Ensure these are perfectly flush with the interior edge of the opening. Use galvanized nails to prevent future rust streaks on the wood surface.
Should You Use Pressure-Treated Wood?
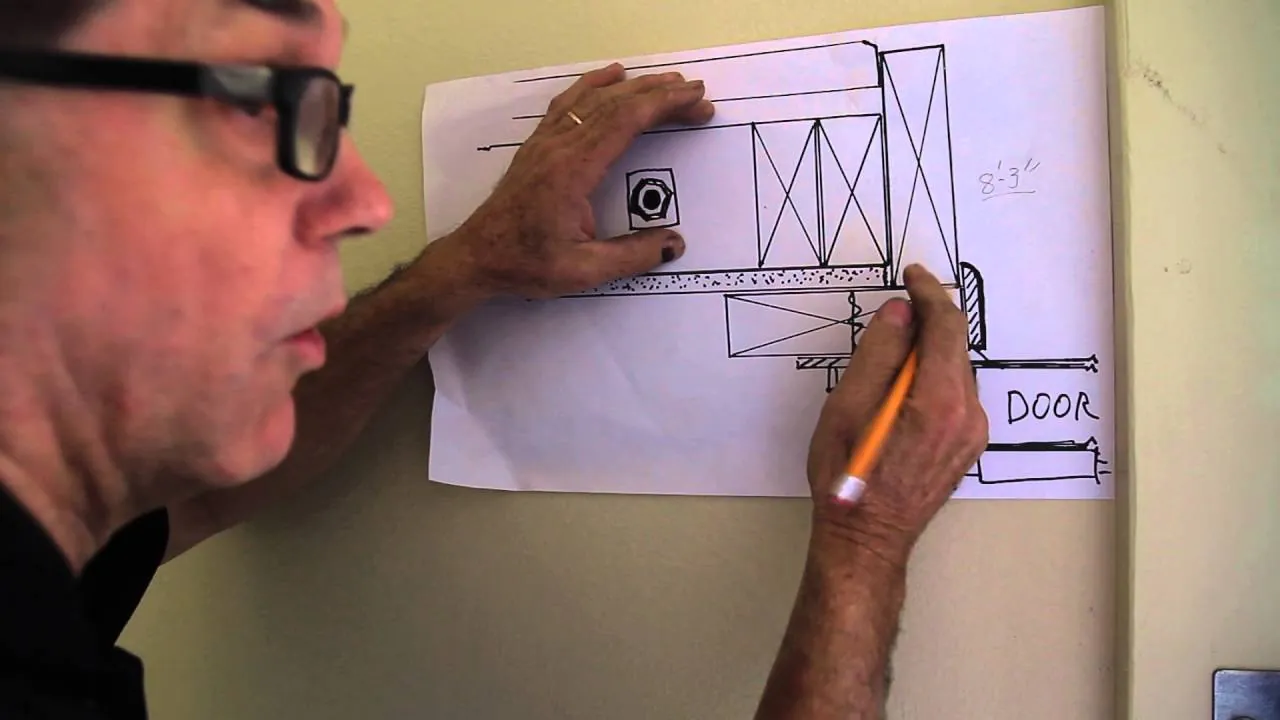
Yes, using pressure-treated lumber is mandatory for the bottom 12 to 24 inches of the jamb legs that come into contact with the concrete floor. Concrete is porous and naturally wicks moisture from the ground, which will quickly rot standard kiln-dried pine.
If you prefer the look of cedar or smooth pine for the upper sections, you can install a “transition joint” where the treated bottom section meets the untreated upper section. Always ensure the joint is tight to prevent water from wicking upward into the untreated wood.
Aligning the Header Properly
The header is the horizontal beam that spans the top of the garage door opening. It must be perfectly level to ensure the door closes evenly against the floor. If your header is sagging, the center of the door won’t seal properly, leading to air leaks and potential security issues.
Use engineered lumber or a built-up beam consisting of two 2×12 boards with a half-inch piece of plywood sandwiched between them. Secure the header to the jack studs using structural framing screws or heavy-duty nails.
Managing the Concrete Interface
The base of your jamb legs will sit directly on the garage slab. This is a common failure point for garage framing. Before setting the wood, install a layer of self-adhesive membrane flashing on the bottom of the jamb leg. This creates a moisture barrier that prevents the wood from absorbing water from the concrete.
After the jambs are anchored, apply a bead of high-quality exterior polyurethane sealant around the perimeter where the wood meets the concrete. Don’t use standard silicone, as it may not adhere well to masonry.
How to Square the Opening
A square opening is vital for the operation of the door rollers. Measure diagonally from the top left corner to the bottom right corner, then from the top right corner to the bottom left corner. These two measurements must be identical. If they’re off by more than a quarter-inch, your door will likely bind or roll unevenly. If the opening is out of square, use shims behind the jamb legs to adjust the position until the diagonal measurements match.
Preventing Future Water Damage
Water is the primary enemy of garage door framing. Beyond using treated wood and sealants, consider installing high-quality drip caps over the header. A drip cap is a piece of bent metal flashing that sits above the exterior trim, diverting water away from the face of the jamb. Ensure that the exterior siding overlaps the flashing so that water flows over the top of the system rather than behind it.
Troubleshooting Common Framing Issues
| Symptom | Probable Cause | Solution |
|---|---|---|
| Door binds at top | Header isn’t level | Re-shim or re-cut the header |
| Gaps at the floor | Uneven concrete slab | Use a thicker rubber bottom seal |
| Track is loose | Studs aren’t plumb | Add blocking behind the track |
| Wood is soft/spongy | Lack of moisture barrier | Replace section with treated wood |
Warning: Never attempt to remove or modify the header of a garage door opening without temporary shoring. The header is a load-bearing member, and removing it without support can cause the roof or ceiling joists to collapse, resulting in severe structural damage or physical injury.
Related guides
- Garage Door Cable Came Off Drum: How to Fix It Safely
- Chamberlain Garage Door Opener Troubleshooting: Easy Fixes
- LiftMaster vs Chamberlain: Which Garage Door Opener Is Best
Frequently Asked Questions
What size lumber is standard for jambs?
Most residential garage door jambs are framed using 2×6 or 2×8 pressure-treated lumber. The 2×6 is common for standard 2×4 wall construction, while 2×8 is often used for 2×6 wall construction to allow for thicker insulation and structural rigidity. Always verify your local building codes, as some regions require specific species or grades of wood for exterior openings.
How much clearance does a track need?
You generally need at least 5 inches of side clearance on each side of the door opening to accommodate the vertical tracks and the mounting hardware. If your framing is too tight, you may need to use low-headroom track hardware, which allows the door to operate with significantly less space above and to the sides of the opening.
Can I install jambs over existing siding?
It’s highly recommended to remove existing siding before installing new jambs. Installing over siding creates a gap that’s difficult to seal, allowing water, pests, and air to enter your garage. By removing the siding, you can attach the jamb directly to the structural studs, ensuring a tight, weather-resistant fit that will last for decades.
How do I fix a rotted jamb base?
If the rot is localized to the bottom few inches, you can perform a “Dutchman” repair. Cut out the rotted section, install a new piece of pressure-treated lumber, and secure it with structural wood glue and galvanized fasteners. If the rot extends more than 12 inches up the leg, it’s safer and more effective to replace the entire jamb leg.
Do I need a permit for framing?
In many municipalities, modifying a garage door opening is considered a structural change that requires a building permit. Always contact your local building department before beginning the work. They will provide the specific framing requirements, such as header sizing and fastener schedules, that are necessary to pass a final inspection and maintain your home’s insurance coverage.
How do I attach the track?
The garage door track is typically attached to the jamb using lag screws. Ensure you’re drilling pilot holes into the center of the solid wood jamb to prevent splitting. Use a level to ensure the track is perfectly vertical. If the track is mounted at an angle, the door will bind during operation, which puts excessive strain on the lifting cables and motor.
Pro Tip: When fastening the jamb to the king studs, use long structural screws rather than standard nails. Screws offer superior holding power and allow for minor adjustments during the leveling process, making it much easier to achieve a perfectly plumb installation without having to pull nails and start over.
Conclusion
Completing this project requires careful attention to the plumb and level of your framing members, as these are the foundation for your garage door’s operation. Once your jambs are securely fastened and sealed, you’re ready to begin the mechanical portion of the door installation. Always double-check your measurements before cutting any expensive lumber to ensure a professional result that will provide years of reliable service.
