
A toilet fill valve controls the water entering the tank, while a flush valve releases that water into the bowl to trigger a flush, and knowing the difference between a toilet fill valve vs flush valve helps you fix leaks quickly. If your toilet runs constantly, you usually need to replace the fill valve. If water leaks from the tank into the bowl silently, the flush valve or its seal is the likely culprit.
Comparing toilet fill and flush valves
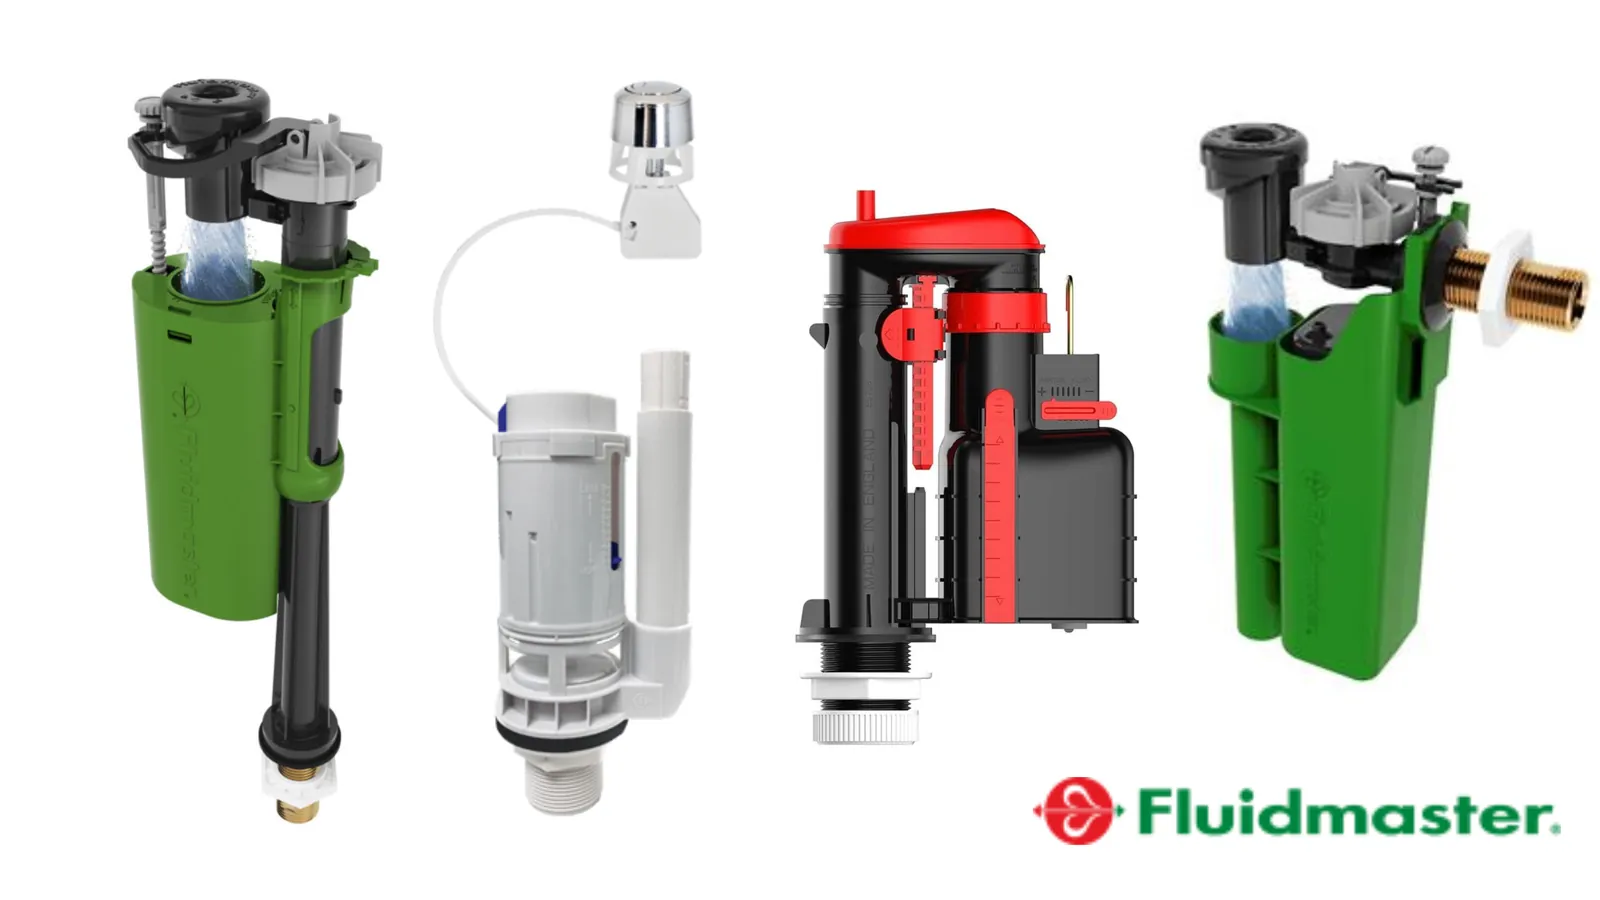
These two components work together to manage water levels and flushing. While they’re both inside the tank, they have different jobs and different lifespans.
| Method | How long | Effort | Cost | Best for |
|---|---|---|---|---|
| Replacing fill valve | 20-30 mins | Low | Low | Stopping constant running |
| Replacing flush valve | 45-60 mins | Medium | Medium | Fixing leaks into bowl |
| Replacing flapper seal | 5-10 mins | Very Low | Low | Stopping ghost flushing |
Most modern fill valves use a float cup that slides up and down a tube. When the water reaches the set level, the float shuts off the water supply. If your toilet makes a hissing sound, the fill valve is failing to shut off completely.
You can diagnose the culprit by dropping six drops of food coloring into the tank. Don’t flush. If color appears in the bowl after twenty minutes, your flapper seal is warped and leaking water. If the bowl remains clear, the issue is likely the fill valve overfilling the overflow tube.
Many homeowners replace the entire flush valve when only the flapper is failing. This mistake costs you an extra forty minutes of labor and unnecessary plumbing work. Always check the flapper chain tension first. If the chain is too tight, it prevents a perfect seal; if it’s too loose, it gets caught under the rubber.
Replacing the fill valve
The fill valve is the tall, vertical pillar inside your tank. It connects to the water supply line coming from the wall.
Turn off the water supply valve behind the toilet and flush to drain the tank. Place a small bucket under the supply line connection to catch the half-cup of water typically trapped in the pipe.
Unscrew the supply line and the mounting nut holding the fill valve to the tank. Lift the old unit out and insert the new one, ensuring the rubber gasket sits perfectly flush against the bottom. If the gasket is pinched or crooked, the tank will leak onto your floor within hours.
Tighten the mounting nut by hand, then add an extra quarter-turn with pliers. Don’t overtighten, as the plastic threads on modern valves strip easily.
This method works well when the tank takes forever to refill or makes a whistling sound. However, if the tank is already full and water is rising above the overflow pipe, you must adjust the float height downward. If the water level remains high even after adjustment, your fill valve has failed internally and requires total replacement.
If you see water trickling into the bowl but the tank level remains low, the issue isn’t the fill valve. That’s a sign of a failing flapper. Replace the flapper first, as it’s a cheaper, faster fix that solves the vast majority of silent toilet leaks.
Replacing the flush valve
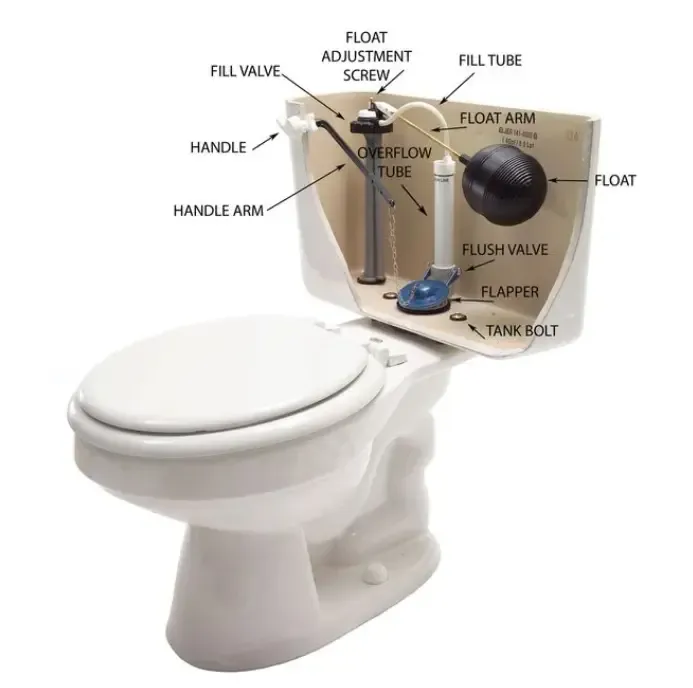
The flush valve sits in the center of the tank and includes the large opening that releases water into the bowl. It’s the heart of the flushing mechanism.
Shut off the water and empty the tank completely using a sponge to remove the last bit of water. If you skip the sponge, you’ll have a puddle on your floor the moment you lift the tank.
Disconnect the chain from the flush lever and remove the tank from the bowl by unscrewing the bolts underneath. Unscrew the large spud nut holding the flush valve to the tank floor. If the nut is seized by mineral deposits, apply a penetrating oil and wait ten minutes before forcing it.
Install the new flush valve with a fresh rubber gasket to ensure a watertight seal. Reconnect the tank to the bowl, tighten the bolts evenly, and reattach the water supply line.
This repair is necessary if the tank loses water even when the supply is turned off. It’s more difficult than a fill valve replacement because you must remove the entire tank. If you have a two-piece toilet, be careful not to overtighten the bolts, as the porcelain can crack under pressure.
Use a hand-tightening method followed by only a quarter-turn with a wrench. If the tank wobbles after installation, your bolts are too loose; if the tank cracks, you’ll need a full replacement. Always replace the tank-to-bowl gasket whenever you detach the tank to prevent leaks.
Troubleshooting the flapper and seal
The flapper is the rubber piece at the bottom of the flush valve that lifts when you push the handle. It’s the most common point of failure for leaks.
Clean the flush valve seat with a damp cloth to remove mineral buildup. Even a thin layer of scale creates a gap that allows water to trickle constantly.
Inspect the flapper for warping or hardening that prevents a tight seal. If the rubber feels brittle or leaves a black residue on your fingers, it has lost its flexibility and must be replaced.
Adjust the chain length so it has enough slack to allow the flapper to seat fully without being pulled open, but not so much that it gets caught under the seal. Too much slack risks the chain getting caught under the seal, while too little prevents the flapper from seating flat.
If you replace the flapper and the toilet still runs, the issue might be the flush valve seat itself. Run your fingertip along the rim. If you feel deep gouges or jagged plastic, the seat is compromised.
A rough or pitted seat won’t hold a seal. You can buy a repair kit that glues a new seat directly over the old one if the damage is minor. If the seat is cracked through, you must replace the entire flush valve assembly.
Which component needs your attention
When you’re in a hurry, focus on the flapper first, as it’s the cheapest and fastest part to replace. If the water level in your tank drops steadily while the toilet isn’t in use, the flapper is almost certainly your culprit. A warped or mineral-crusted seal prevents a tight closure, leading to constant, silent refilling.
If you’re doing this for the first time, start with the fill valve because it doesn’t require removing the tank from the bowl. You can identify a failing fill valve by a high-pitched whistling sound or a toilet that takes longer than two minutes to refill after a flush.
If you want the best possible result whatever it takes, replace both the fill valve and the flush valve at the same time to reset your toilet’s internal system. This prevents the frustration of fixing one leak only to discover the other component fails a week later.
The main trade-off is between complexity and certainty. A fill valve is easy to swap but does nothing for bowl leaks. A flush valve replacement is a harder job but solves the most persistent water loss issues. If you have a very old toilet, the bolts connecting the tank to the bowl might be rusted; in that case, apply a penetrating oil spray and wait thirty minutes to loosen them before you start.
Standard maintenance for toilet valves
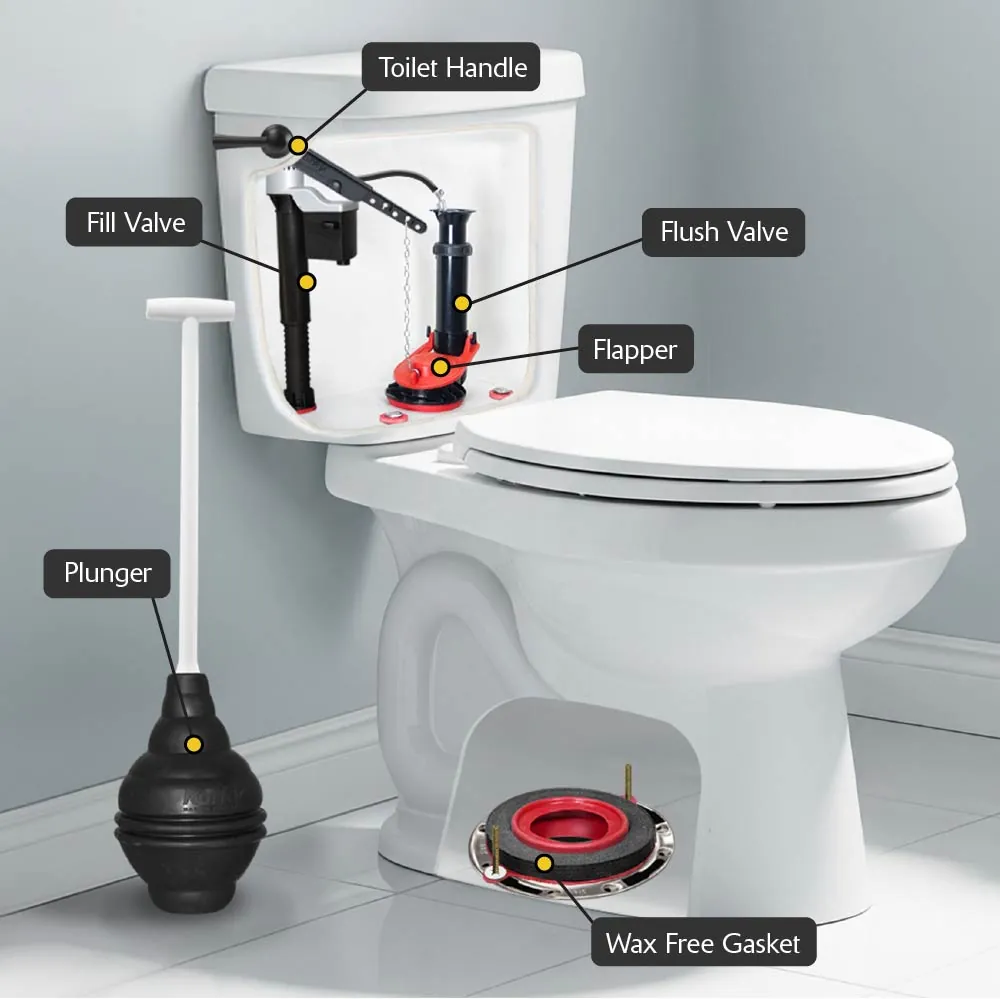
Regardless of the part you replace, you must ensure the water level is set correctly. The water should sit about one inch below the top of the overflow pipe. If the water level is too high, it will constantly drain into the bowl, wasting water and causing the fill valve to cycle repeatedly. Always check that the refill tube is clipped to the side of the overflow pipe, not submerged in the water.
You should test your work by adding a few drops of food coloring to the tank water. If the color appears in the bowl after 15 minutes, you still have a leak at the flush valve. If you encounter a situation where the water supply valve behind the toilet is stuck or leaking, stop immediately and call a licensed plumber to avoid flooding your bathroom.
Related guides
- Toilet Bowl vs Water Closet: The Key Differences Explained in 2026
- Taylor K-2006 vs K-2006C: Key Differences and Best Pick in 2026
- Marcite vs Diamond Brite: Key Differences and Cost Guide in 2026
Frequently Asked Questions
Can I fix a running toilet without tools?
No, you almost always need at least a pair of pliers to loosen the supply line nut or the mounting nut. You might be able to adjust the float height on some fill valves by hand, but replacing the internal parts requires standard tools. If you don’t have the right tools, it’s safer to ask a professional for help to avoid causing a major water leak.
How long do these valves usually last?
Most toilet fill and flush valves have a limited lifespan depending on your water quality. If you have hard water, mineral deposits will build up faster and shorten that lifespan. You can tell it’s time to replace them when you hear constant hissing or see the water level in the bowl drop slowly throughout the day.
Is it safe to do this work myself?
Yes, replacing these valves is a common home repair that doesn’t require a plumbing license. The main risk is a water leak if the gaskets aren’t seated properly or the nuts aren’t tightened enough. Always keep a bucket and towels nearby while you work, and ensure the water supply is completely turned off before you begin.
What happens if I use the wrong size valve?
If you use the wrong size, the valve won’t fit inside the tank or the water level will be incorrect. Universal fill valves are common, but flush valves are often specific to the brand and model of your toilet. Always bring the old part to the hardware store to match the size and connection type before buying a replacement.
Why does my toilet make a loud noise when flushing?
The noise usually comes from a failing fill valve that’s vibrating or struggling to shut off the water flow. This can happen if the internal diaphragm is worn out or if there’s a blockage in the valve. Replacing the fill valve is the most effective way to eliminate this sound and return your toilet to quiet operation.
Conclusion
Getting the right parts for your specific model is the most important step for a successful repair. Take a photo of the inside of your tank before you head to the store so you can verify the mounting style. Once you have the correct equipment, these repairs are straightforward and will save you money on your monthly water bill.