
Stainless steel models with a mesh basket design are the best kitchen sink strainers and baskets for most homes because they resist rust and catch small food particles effectively. These units feature a simple lift-and-twist mechanism that allows you to seal the sink for soaking or open it for draining. This guide explains how to choose the right fit for your plumbing and how to maintain a clean, clog-free drain system.
Selecting the best kitchen sink strainers
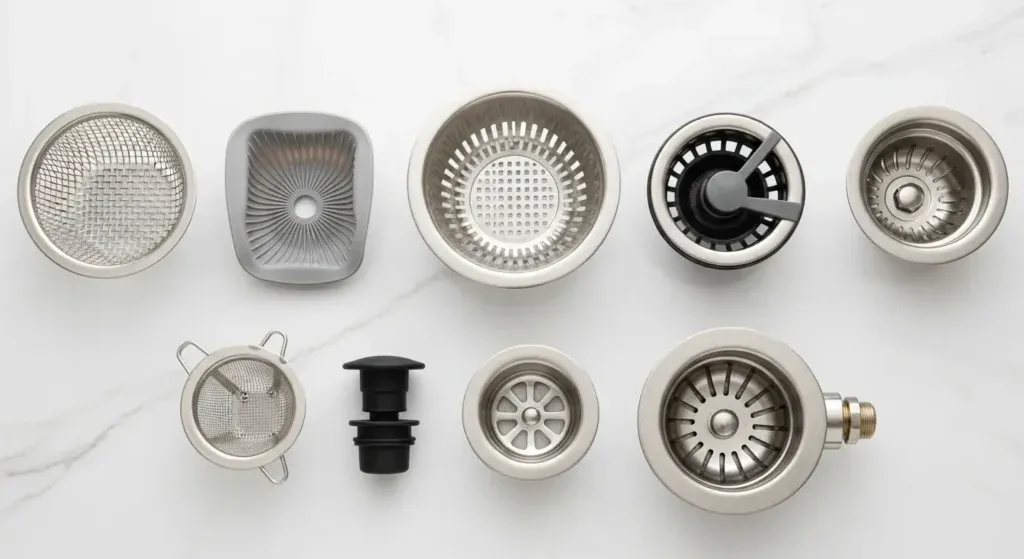
Sink strainers serve as the primary defense for your pipes against food waste and debris. They consist of two parts: a metal cup that sits inside the drain opening and a removable basket that catches solid waste. Choosing the right type depends on your sink material and the size of your drain hole. Most standard American sinks use a 3.5-inch drain opening, which is the industry standard for garbage disposals and deep-basket strainers.
If you have a stainless steel sink, a matching stainless steel strainer is the best choice to prevent galvanic corrosion, which happens when two different metals sit together in water. If you have a ceramic or composite sink, you can use either plastic or coated metal strainers, but stainless steel remains the most durable option.
The biggest mistake people make is buying a generic replacement without measuring their current drain diameter. This error often leads to leaks because the rubber gasket doesn’t seat properly against the sink basin.
How to install your new strainer
- Remove the old strainer by loosening the large nut underneath the sink using a pair of pliers or a dedicated basin wrench.
- Clean the drain opening thoroughly with a mild detergent to remove old putty or silicone residue, ensuring the surface is dry.
- Apply a thin, even ring of plumber’s putty around the underside of the new strainer flange to create a watertight seal.
- Insert the strainer into the sink opening from above and press down firmly to squeeze out the excess putty.
- From underneath the sink, slide the rubber gasket and friction washer onto the threaded tailpiece, then tighten the locknut by hand before finishing with your wrench.
- Connect the tailpiece to your P-trap, ensuring all slip-joint washers are seated correctly to prevent drips.
If you’re unsure about plumbing work, the Environmental Protection Agency provides guidance on identifying and repairing leaks in home fixtures. If you find that your drainpipes are corroded or the sink basin is cracked, you should contact a licensed plumber rather than attempting a DIY fix, as improper installation can lead to significant water damage under your cabinets.
Essential features and size guide
The following table helps you identify the best configuration for your specific sink setup.
| Situation | What to use | How long | What to watch for |
|---|---|---|---|
| Standard 3.5″ drain | Deep basket strainer | 10-15 mins | Ensure rubber gasket sits flat |
| Garbage disposal | Disposal flange | 20-30 mins | Check for vibrations after install |
| Shallow bar sink | Small mesh strainer | 5-10 mins | Watch for rust on cheap steel |
| Ceramic sink | Silicone-based seal | 15-20 mins | Don’t overtighten the nut |
| Older homes | Brass-bodied strainer | 20-25 mins | Check for existing pipe decay |
If you’re working with a standard 3.5-inch drain, verify your sink’s thickness before purchasing. Most strainers accommodate up to 3/4-inch thickness, but fireclay or farmhouse sinks often require an extended-length flange to reach the nut. If your sink material is thicker than 1 inch, you must source a specialized deep-well kit to avoid a failed seal.
When installing a disposal flange, apply a generous bead of plumber’s putty under the rim before tightening the mounting ring. If you notice a persistent leak from the bottom of the flange, you likely used too little putty or failed to clear the excess from the drain throat. A common mistake is using silicone instead of putty here; silicone makes future disposal replacement nearly impossible without damaging the sink.
For ceramic or porcelain basins, treat the nut with extreme caution. These materials crack under uneven pressure. If you feel resistance while tightening, stop immediately and check for debris in the threads. Use a plastic-jaw wrench to prevent scratching the finish.
If you encounter an older home with cast iron pipes, inspect the tailpiece for internal corrosion before mounting any new hardware. If the metal flakes away when touched, the pipe can’t support the weight of a heavy brass strainer. In this case, you must replace the section of pipe first, or the weight of the new fixture will cause the aged metal to snap, leading to a major flood behind your cabinetry.
Getting the best performance
Experienced users prioritize the seal quality over the aesthetic design of the basket. When you prepare food, the best practice is to clear the basket after every use rather than letting food sit.
If you allow organic matter to remain in the basket, it can attract pests or lead to unpleasant odors in your kitchen. Always check that the rubber seal at the bottom of your basket is free of cracks; a worn seal is the most common cause of a sink that refuses to hold water.
When you’re working with a new installation, the order of operations matters. Always install the strainer to the sink basin before you attach the drainpipes. This allows you to inspect the seal from underneath for any gaps.
If you see water weeping from the seam, stop immediately, disassemble the unit, and reapply the putty. You can’t force a seal to stop leaking by tightening the nut further; doing so often cracks the sink or strips the threads on the strainer body.
Common drainage issues

| What you notice | What it usually means | What to do first |
|---|---|---|
| Slow draining | Debris caught in mesh | Remove and clean basket |
| Leaking under sink | Failed putty seal | Re-seat the flange |
| Water not holding | Worn rubber gasket | Replace the rubber seal |
| Foul odor | Food trapped in pipe | Flush with hot water |
If your sink drains slowly despite a clean basket, check the P-trap beneath the basin. A partial blockage often hides in the U-bend where hair and grease accumulate over time. Place a bucket underneath, unscrew the slip nuts by hand, and clear the debris manually. If the trap is clear but the water still backs up, the clog likely sits deeper in the branch line.
When you spot moisture under the sink, distinguish between a plumbing leak and a condensation issue. A true leak leaves a constant drip or a damp ring on the cabinet floor, while condensation typically appears as a light mist on the pipe exterior during humid weather. If you find a leak, tighten the slip nuts a quarter-turn with pliers. Over-tightening often cracks the plastic threads, which forces a complete pipe replacement.
Water failing to hold in the basin usually stems from a misaligned stopper rather than a worn gasket. Before buying parts, check the pivot rod connection behind the tailpiece. If the rod is bent or loose, the stopper won’t drop flush against the drain seat. Adjust the nut on the lift rod to ensure the stopper sits level.
Foul odors often signal a dry trap rather than rotting food. If a sink sits unused for weeks, the water barrier evaporates, allowing sewer gas to enter your home. Run the faucet for thirty seconds to refill the trap. If the smell persists, check the vent pipe on your roof for bird nests or debris that might be restricting airflow.
Regulatory and safety standards
When installing or replacing plumbing components, you must ensure your materials comply with local plumbing codes. In the United States, the Uniform Plumbing Code sets the standards for materials used in drainage systems to prevent contamination and leaks.
Always consult your local building department if you’re modifying the drain pipes themselves, as major changes may require a permit or a professional inspection. A common mistake is assuming that internal sink components are exempt from these rules because they’re hidden. However, using non-rated PVC or improper sealant can cause slow leaks that rot cabinetry before they’re detected.
Apply the following rule to determine your path: if you’re replacing a fixture like-for-like, you generally don’t need a permit. If you’re relocating a drain or altering the pipe diameter to accommodate a new sink style, you must file for a permit.
Check the packaging for an NSF or IAPMO certification mark. These organizations verify that the material won’t leach chemicals into your water supply. If a part lacks these stamps, don’t install it.
You’re better off paying a premium for certified brass or high-density polypropylene than risking a code violation that forces you to tear out your finished wall or vanity later. When in doubt, call your local inspector before you turn the first wrench. They will clarify exactly which pipe materials are approved for your specific municipality.
Maintaining your sink components
To keep your sink strainer working, wipe it down with a soft cloth and mild dish soap once a week. This removes the buildup of mineral deposits and food acids that eventually pit the metal. Avoid using harsh chemical drain cleaners, as these can corrode the finish and degrade the rubber gaskets over time. If your sink doesn’t drain, use a plastic snake or a standard sink plunger before resorting to liquid chemicals.
If you notice your basket is no longer holding water, inspect the rubber seal underneath. If the rubber feels hard, brittle, or shows visible cracks, it’s time for a replacement. Most manufacturers sell these gaskets separately for an inexpensive price, so you don’t need to replace the entire metal assembly.
When installing a new gasket, apply a thin layer of plumbers’ grease to the rubber. This simple step creates a tighter seal and prevents the material from drying out prematurely. If you find that the basket still leaks after replacing the seal, the issue may be a warped strainer body.
Drop a straight edge, such as a metal ruler, across the drain rim. If you see light passing through the gap, the metal is bent and requires a full replacement of the drain flange.
Many homeowners mistakenly tighten the locking nut underneath the sink to stop a leak, but this often cracks the plastic or strips the threads. If the leak persists after a gasket change, check the putty seal between the sink basin and the drain flange. If the putty has turned gray or crumbly, the entire assembly must be removed and resealed with fresh plumber’s putty. Never use silicone caulk for this specific connection, as it makes future repairs nearly impossible.
When to skip the standard strainer
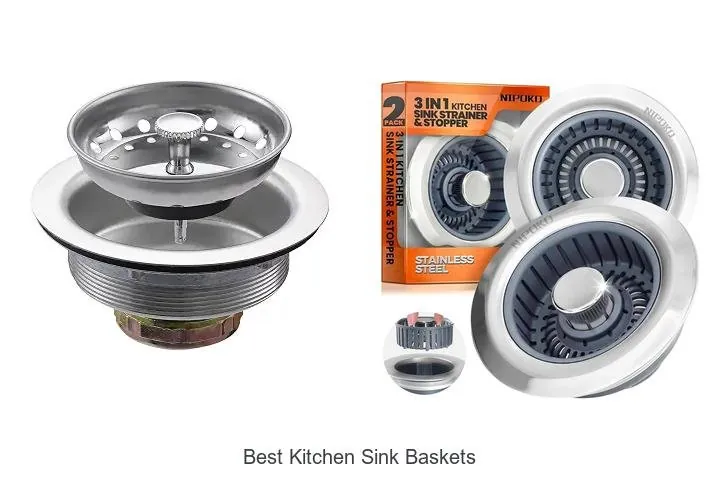
If you have a high-end farmhouse sink or an integrated stone basin, a standard stainless steel strainer might not look right or fit the depth of the material. Standard strainers are designed for thin-gauge stainless steel, typically 16 to 18 gauge. When you install one into a thick fireclay or stone basin, the threaded tailpiece often fails to reach the drain pipe below.
In these cases, look for specialty decorative strainers that match the finish of your faucet. These units feature extended ferrules designed to bridge the gap in thicker materials. If your sink deck exceeds one inch in thickness, measure the depth of the drain hole before purchasing. A standard strainer will leave you with insufficient threads to secure the locking nut, leading to a slow, persistent leak under the cabinet.
If you have a garbage disposal, you must use a specific disposal flange instead of a standard basket strainer. The flange acts as the mounting bracket for the disposal unit itself. Using a basket strainer in a sink with a disposal will prevent the disposal from functioning and can cause back-pressure in your plumbing lines.
Most homeowners mistake the disposal flange for a decorative choice, but it’s a structural requirement. If you attempt to force a standard strainer into a disposal-ready drain, the disposal will lack the necessary seal to prevent water from leaking into the motor housing.
This error usually manifests as a burning smell or a tripped circuit breaker within the first week of use. If you’re unsure, check the underside of your sink. If you see a three-bolt mounting assembly, you’re required to use a disposal flange, regardless of the sink’s aesthetic design or material thickness.
Related guides
- Does Iron Float in Water? Why Solid Blocks Always Sink in 2026
- 7 Best Sealant for Drop In Sink Options for Every Connection in 2026
Frequently asked questions
How do I know if my sink drain is 3.5 inches?
You can measure the diameter of the drain hole at the bottom of the sink using a ruler or tape measure. If the opening measures approximately 3.5 inches across, it’s a standard size that accepts most universal strainers. If the opening is significantly smaller, such as 2 inches, you likely have a bar sink or a secondary prep sink that requires a specialized smaller drain assembly.
Is it safe to use chemical drain cleaners?
You should avoid harsh chemical drain cleaners because they damage strainer finishes and degrade rubber gaskets. These chemicals can also warp plastic plumbing components under your sink. It’s safer to use a mechanical tool like a drain snake or plunger to clear blockages without exposing pipes to corrosive substances.
How long does a sink strainer last?
A high-quality stainless steel strainer can last for 10 to 15 years if you maintain the rubber seals. The lifespan depends on metal quality and frequency of use. You’ll know it needs attention when the finish pits, the metal corrodes, or the seal fails to hold water in the basin.
Can I install a strainer without a plumber?
Yes, you can install a basic sink strainer yourself using pliers or a basin wrench and plumber’s putty. The process involves removing the old unit, cleaning the surface, and ensuring a tight seal. If you’re uncomfortable working under the sink or see corroded pipes, hire a professional to avoid leaks.
What happens if I don’t use plumber’s putty?
If you skip the plumber’s putty, the connection between your sink and the strainer flange won’t be watertight, and water will leak into your cabinet. Putty is essential because it fills the small gaps between the metal strainer and the sink surface, creating a flexible barrier that prevents drips. Without it, even a perfectly tightened nut won’t stop water from finding a path through the drain hole.
How often should I clean the basket?
You should empty and rinse the basket after every use to prevent food particles from decomposing and causing odors. A quick scrub with a soft brush once a week will keep the mesh or holes clear and prevent mineral buildup. If you notice a persistent smell, remove the basket and clean both the inside of the drain cup and the underside of the basket with warm soapy water to remove accumulated grease.
Conclusion
Keeping your drain clear doesn’t have to be a chore. Once you’ve installed your new hardware, try rinsing the mesh basket after every meal to prevent buildup. You’ll find that a little daily attention keeps everything running smoothly, so you won’t have to worry about stubborn clogs or unpleasant kitchen odors again.