
The ideal setting for a hot tub is 104°F, and the Softub temperature sensor ensures efficient control by keeping the heater within a safe range so the water stays warm without wasting power. Reading the unit’s display, checking the sensor line, and handling cases where the water feels cold while the screen says it is hot are all part of maintaining that range. The exact steps to reset the system and the official limits on heating times follow from these basics.
Steps to check efficient hot tub temperature sensor control

A temperature sensor in a Softub is a small probe that measures water heat and sends that number to the control panel. It tells the heater when to turn on or off so you don’t have to guess if the water is ready.
Most people think this part fails often, but usually the issue is just air bubbles stuck near the probe. Dirty water blocking the reading causes the same false alarm.
The device works by detecting changes in electrical resistance as the water warms up or cools down. Inside the probe sits a thermistor whose resistance drops predictably with every degree of added heat.
The control board translates that changing resistance into the temperature shown on your display. When mineral scale coats the thermistor, it insulates the component from the surrounding water.
That thin layer of calcium delays the reading by several minutes. The tub then overshoots your set point before the board realizes the water is already hot enough.
If the sensor reads too low, the heater runs longer than needed, which costs more money and wears out parts faster. If it reads too high, the water never gets warm enough for a relaxing soak.
You can tell which problem you have by comparing the digital display against a standard floating pool thermometer. A display reading five degrees above the floating thermometer means the sensor is stuck high.
Wipe the probe with white vinegar on a soft cloth to dissolve any buildup. Don’t use sandpaper or a wire brush because scratching the epoxy seal ruins the waterproof barrier permanently.
You should check the manufacturer’s manual for the specific model you own, because different units place the sensor in slightly different spots. Never try to touch the wire with bare hands while the unit is plugged in, as electricity can travel through wet skin.
Steps to check and fix readings
Follow these steps to make sure your sensor is giving the right number before you call for help.
- Turn off the main breaker for the spa at your home’s electrical panel to stop all power flow.
- Wait five minutes for any stored energy in the capacitors to drain completely from the system.
- Open the side access panel to find the white plastic tube that runs along the back of the cabinet.
- Look inside the clear section of the tube to see if there are large air bubbles trapped near the metal tip.
- Gently tap the tube with your finger to move the bubble away from the sensor area if one is present.
- Close the panel tightly and turn the breaker back on to restore power to the unit.
- Set the desired temperature on the control pad and wait 30 minutes to see if the reading stabilizes.
- Compare the digital number on the screen with a trusted floating thermometer placed in the center of the water.
If the numbers still differ by more than 3 degrees, the sensor may need replacement, which requires a licensed electrician to swap safely. Don’t attempt to cut or splice wires yourself, as this voids your warranty and creates a shock hazard.
Key numbers and settings at a glance
These figures help you spot problems quickly without needing special tools or deep technical knowledge.
| Situation | What to use | How long | What to watch for |
|---|---|---|---|
| Water feels cold but screen says hot | A separate floating thermometer | 20 minutes | Check for air bubbles in the sensor tube |
| Heater runs non-stop | Multimeter (by pro only) | Until fixed | Listen for clicking sounds from the relay |
| Error code E-1 or similar | Owner’s manual | Immediate check | Verify the sensor plug is fully seated |
| Water freezes in winter | Insulated cover + heater | Continuous | Ensure the cover fits tightly over the rim |
| Temperature drops fast after fill | Fresh water + new filter | 4 hours | Watch for leaks around the pump seal |
| Sensor reads lower than actual | Clean water + no foam | 1 hour | Remove soap scum from the probe area |
| Unit won’t heat above 90°F | Thermostat reset | 15 minutes | Check if the high-limit switch has tripped |
| Water smells like chemicals | pH test strips | Daily | Balance pH between 7.2 and 7.8 first |
Details that make the difference
Experienced owners know that clean water is the first step to accurate readings. Soap scum and oils from lotions coat the sensor tip, making it think the water is cooler than it really is. They clean the area gently with a soft cloth and mild vinegar solution once a month to keep the probe clear.
A critical factor is the placement of the floating thermometer used for checking; it must sit in the middle of the jet stream, not tucked against the side wall where water moves slower. If the reading fluctuates by more than two degrees while the heater runs, move the float immediately. A stationary float near the return pipe reads stagnant heat, not the actual bath temperature.
People who ignore the air bubble issue often waste hours calling support when a simple tap fixes the problem. Tap the glass firmly three times to dislodge trapped pockets.
The order matters: always power down before touching any internal parts, then wait the full five minutes for safety. If you skip the wait time, you risk a shock that could hurt you badly. Capacitors hold charge long after the switch flips, so counting to thirty seconds is never enough.
Leave the factory seals alone unless they’re cracked, as breaking them lets moisture into the electronics. If the seal looks intact but the display flickers, don’t pry it open; the fault lies in the battery contact, not the casing. Forcing a good seal costs you the warranty and invites corrosion that no amount of cleaning can reverse.
Common problems and quick fixes
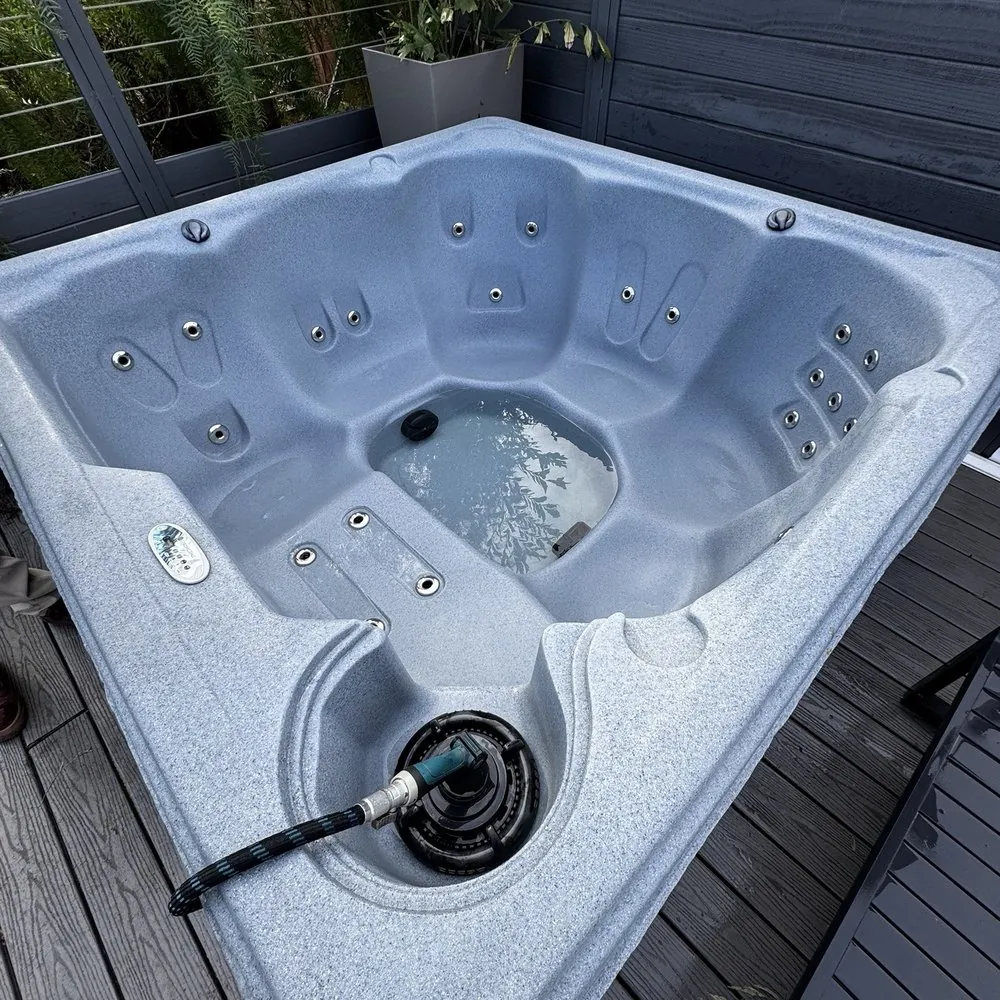
When things go wrong, match what you see to the likely cause and try these simple steps first.
| What you notice | What it usually means | What to do first |
|---|---|---|
| Screen shows “Lo” or “Hi” | Sensor wire is loose or broken | Power off and reseat the connector firmly |
| Water is cold despite high setting | Air bubble blocking the probe | Tap the sensor tube to move the bubble |
| Heater clicks on and off fast | Dirty filter restricting water flow | Clean or replace the cartridge filter now |
| No heat after a storm surge | High-limit switch has tripped | Reset the breaker and wait 10 minutes |
| Reading jumps up and down | Foam covering the sensor tip | Drain some water and add defoamer |
| Unit beeps constantly | Low water level exposing the sensor | Fill the tub until water covers the jets |
Rules that apply to heating
Safety rules exist to prevent fires, shocks, and damage to your home’s wiring. The National Electrical Code (NEC) requires all hot tubs to have a Ground Fault Circuit Interrupter (GFCI) installed on their dedicated circuit. This device cuts power instantly if it detects even a tiny leak of electricity into the water.
In many places, local building codes also require a licensed professional to install or repair the heater and sensor assembly. You can’t legally bypass these switches or remove the cover plates to access live wires without proper training. Always follow the warnings printed on the unit’s label regarding maximum operating temperatures and pressure limits. If your unit is older than ten years, check with your insurance provider about coverage for electrical repairs.
The GFCI must be rated for wet locations and trip within one-tenth of a second to stop a lethal shock before muscles lock up. A standard household breaker won’t suffice because it only trips during massive overloads, leaving you vulnerable to smaller, deadly currents.
If your heater sits in a garage or unheated space, the thermostat must include a freeze protection setting that activates the pump at 40 degrees Fahrenheit. Without this, water inside the pipes can expand and crack the copper lines when temperatures drop overnight.
Many owners mistakenly assume that turning off the main breaker is enough protection while working on the control panel. This is dangerous because residual voltage can remain trapped in capacitors for minutes after the power is cut. Always have a qualified technician verify zero voltage at the terminals before touching any wire.
If you find corrosion on the heating element connections, clean them thoroughly with a wire brush and apply dielectric grease, or replace the assembly if the metal is severely degraded. Corrosion increases resistance, which generates excess heat that can melt insulation and start a fire even when the unit appears to be running normally.
Keeping the system working well
Once your sensor is reading correctly, regular care keeps it that way for years. Check the water chemistry every week to ensure the pH stays between 7.2 and 7.8, as extreme levels corrode the metal probe. Run the circulation pump for at least two hours each day to keep fresh water moving past the sensor. If you live in a cold climate, keep the insulated cover on tight whenever the tub isn’t in use to reduce heat loss.
Inspect the clear tube regularly for cracks or cloudiness that might hide air pockets, as the frequency depends on use and the owner’s manual is the authority. A cloudy tube often means mineral buildup rather than a crack; if the view is hazy but the plastic feels solid, flush it with vinegar instead of replacing the part.
When you change the water, rinse the sensor area with a hose to wash away any settled debris. Don’t use harsh acids or bleach directly on the probe, as these chemicals eat away the protective coating.
If the temperature reading drifts by more than two degrees after cleaning, the issue is likely an air lock, not a broken sensor. Tap the tube gently while the pump runs to dislodge trapped bubbles before assuming the unit needs replacement. Many owners make the mistake of scrubbing the probe with a stiff brush, which scratches the surface and causes future readings to fluctuate wildly. Instead, wipe the metal gently with a soft cloth dampened in warm water.
When winter arrives, ensure the freeze protection mode is active so the pump cycles automatically to prevent freezing; don’t drain the sensor line unless specifically instructed by the manufacturer for long-term storage. Ice expands inside the narrow tubing and can snap the connection permanently. If you notice the heater cycling on and off rapidly despite stable settings, check the sensor first before calling a technician. This simple inspection often saves hundreds of dollars in unnecessary service calls.
When to choose a different path

Some situations call for professional help instead of DIY fixes. If the error code returns immediately after you reset the breaker, the sensor board itself may be damaged beyond repair. When the water temperature fluctuates wildly even after cleaning the probe, the internal thermostat could be failing.
If you hear buzzing or smell burning plastic coming from the control box, shut the power off right away and call an electrician. These signs mean the problem is deeper than a simple bubble or loose wire. Trying to fix complex electrical faults yourself can lead to serious injury or destroy the entire control system.
For units under warranty, opening the panel to touch the sensor often voids your coverage, so contact the maker first. A common mistake is assuming a tripped GFCI outlet solves a ground fault inside the unit; if the breaker trips again within ten seconds of resetting, stop immediately. Continuing to force power into a shorted circuit melts wiring insulation in minutes, creating a fire hazard that insurance may deny.
If the unit is older than eight years and requires a part no longer stocked by the manufacturer, replacement is usually cheaper than repair. Conversely, if the issue is isolated to a single accessible component like a drain valve, a quick swap saves hundreds. Check the serial number against the manufacturer’s recall list before buying any parts, as some models have known defects that require a free factory upgrade rather than a standard repair.
Frequently asked questions
Can I replace the sensor myself?
Replacing the sensor involves working with high-voltage lines and may void your warranty; consult your manual to see if DIY replacement is permitted, otherwise hire a licensed electrician. Working with high-voltage lines inside the cabinet carries a real risk of shock. Most manufacturers require a certified technician to perform this swap to keep your warranty valid. If you try it and get it wrong, you could burn out the main control board. Call the service team listed in your owner’s manual for help.
Why does my water feel colder than the screen says?
This usually happens because air bubbles are trapped around the sensor tip, blocking it from feeling the true water temperature. The screen shows the air temperature inside the tube, not the water outside it. Tap the clear plastic tube gently to move the bubble away from the metal probe. Wait twenty minutes for the reading to settle and compare it again with a floating thermometer.
How long does it take to heat up?
It takes about 2 to 4 hours to raise the water temperature by 10 degrees in standard conditions. This time depends on how cold the incoming water is and how much insulation your tub has. If you fill the tub with ice-cold water in winter, it may take closer to 6 hours to reach 104°F. Check your model’s manual for its specific heating rate per gallon.
Is it safe to leave the heater on all night?
Yes, it’s safe to leave the heater on all night as long as your GFCI breaker is working properly. The system is designed to cycle on and off automatically to maintain the set temperature without overheating. Modern units have multiple safety switches that cut power if the water gets too hot. Just make sure the cover is closed tightly to save energy and keep debris out.
What happens if the sensor breaks?
If the sensor breaks, the heater may run continuously, which can overheat the water or trip your home’s circuit breaker. In some cases, the control panel will show an error code and stop heating entirely to prevent damage. The unit won’t shut off automatically if the sensor fails silently, so you must monitor the temperature closely. Replace the faulty part immediately to avoid wasting electricity or damaging the pump.
How often should I check the sensor line?
Check the sensor line every time you clean the filter, which is usually once a week. Look for air bubbles, kinks, or dirt buildup that could block the water flow around the probe. If you notice the temperature reading acting strange, inspect the line right away before the heater runs too long. Regular checks prevent small issues from turning into expensive repairs later on.
Can saltwater damage the temperature sensor?
Saltwater systems use a special corrosion-resistant sensor, so normal salt levels won’t damage it if maintained correctly. However, if the salt concentration gets too high, it can eat away at the metal parts over time. Test your water weekly and keep the salt level within the range recommended by your manufacturer. If you switch from fresh to salt water, you may need to upgrade the sensor to a compatible model.
Remember that accurate temperature control starts with clean water and a clear sensor line. Small habits like tapping the tube and checking for bubbles save you from costly repairs and wasted energy.
Conclusion
Keeping your soak comfortable doesn’t have to be a guessing game. If the water still feels off after you’ve checked everything, don’t wait for the heater to strain itself. Reach out to your local dealer so they can test the wiring and get you back to relaxing.