
The water vapor transmission rate is the measurement of how much moisture passes through a material, such as plastic film or building insulation, over a specific area and time. Engineers define this value as the mass of water vapor that moves through a unit area of a flat material per unit of time under specified conditions of temperature and humidity. It’s a critical metric for packaging and construction.
Understanding material permeability

The main factor that dictates whether a material performs well is its molecular structure. Dense, non-porous materials like metal foils generally show very low transmission rates, while porous materials like paper allow moisture to move through easily. You must consider the environmental conditions where the material will live, as high humidity on one side of a barrier increases the pressure driving the water vapor through the structure.
A common mistake is assuming that a thick material is always a better barrier than a thin one. If you choose a thick but porous foam, it might still let more moisture through than a very thin sheet of specialized plastic. Always check the manufacturer’s technical data sheet for the specific material you’re using, as even small changes in density or production methods can change the performance significantly.
How to calculate the water vapor transmission rate
Testing laboratories use standardized equipment to calculate this value, ensuring that results are consistent across different industries. The most common method involves placing a material over a container holding a desiccant or water, then measuring weight changes over time.
- Prepare a sample of the material by cutting it to fit the test cell, ensuring no gaps exist at the edges.
- Seal the sample into the test chamber using a high-quality gasket or sealant to prevent leaks.
- Place a desiccant inside the chamber if you’re measuring the rate of moisture moving in, or water if you’re measuring movement out.
- Weigh the test cell precisely using a balance accurate to 0.001 grams to establish your starting weight.
- Store the cell in a climate-controlled room at 23 degrees Celsius and 50% relative humidity, as defined by the ASTM International standard E96.
- Re-weigh the cell every 24 hours until you get a consistent change in weight over three consecutive readings.
Tip: If you don’t have a temperature-controlled room, don’t rely on your results for critical safety or structural projects, as temperature shifts will invalidate the data.
Expected timing for testing
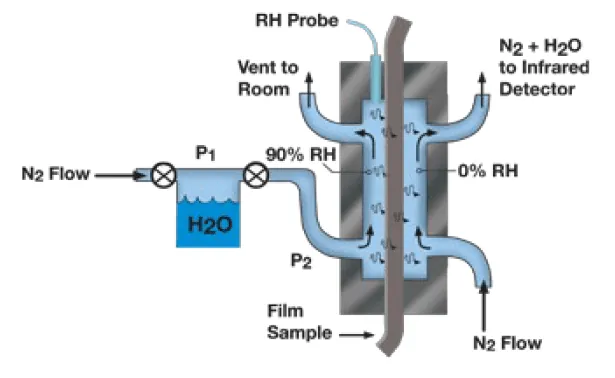
The time required to reach a stable measurement depends on the thickness and the material’s inherent resistance to moisture.
| Material Type | Typical Test Time | What changes it | What to watch for |
|---|---|---|---|
| Plastic Film | 24–48 hours | Thickness of film | Edge leaks |
| Building Paper | 48–72 hours | Fiber density | Material swelling |
| Thick Insulation | 7–14 days | Moisture absorption | Saturation levels |
If your readings fluctuate after the maximum time listed, you’re likely dealing with a compromised seal rather than a slow material. Most operators make the mistake of extending the test indefinitely, which wastes time and risks sensor drift.
Apply this rule: if the moisture level rises by more than 5% in a single hour after the suggested window, stop the test. Inspect your adhesive perimeter for micro-gaps. Air leaks often mimic high transmission rates, leading to false failures. If the reading remains steady within a 1% margin, your data is reliable. Use these ranges as your hard stop to ensure efficiency.
Confirming stable results
You know the test is finished when the rate of weight change remains constant over three days. A steady state means the material is saturated, and moisture is moving through at a predictable, linear speed.
If the daily variance exceeds 0.05 grams, the material is likely reacting to fluctuations in your room’s ambient conditions. You must maintain a stable environment, as these factors directly control the vapor pressure difference across the barrier.
If you’re testing in a space without climate control, record the temperature at each weighing. A shift of more than 3 degrees Fahrenheit will invalidate your results by altering the saturation pressure. If your readings jump, check for drafts or proximity to heat sources. These variables create artificial spikes that mask the true permeability of your sample.
Errors that compromise results
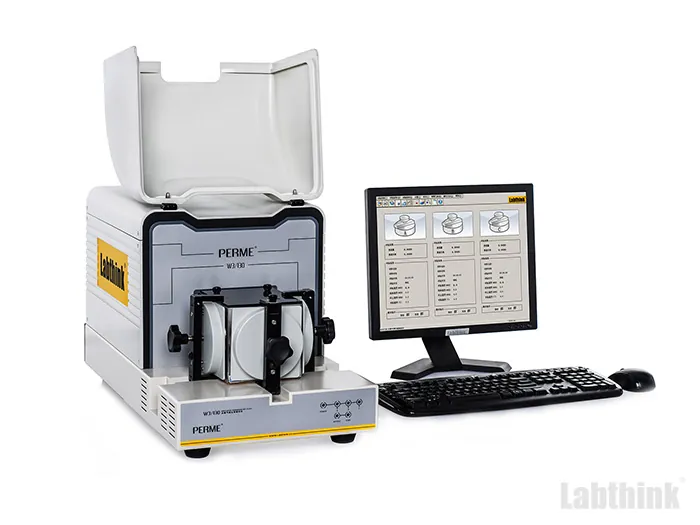
Improper sealing allows moisture to bypass the specimen, creating a false reading of high permeability. If you notice a sudden spike in transmission rates within the first hour, your seal is likely failing. Use a dedicated clamping fixture or specialized vacuum grease to ensure the only path for moisture is through the material itself.
Ignoring sample conditioning leads to skewed data during the initial phase. If the material holds residual moisture, your early measurements will reflect drying rather than transmission. Store samples in a desiccator for 48 hours before testing to ensure you’re measuring the material’s true barrier properties.
Inconsistent ambient conditions introduce thermal drift into your sensors. Place a calibrated data logger within six inches of the test chamber to track environmental shifts.
Related guides
- Best Smart Water Bottles in 2026
- Are Salt Water Pools Warmer? The Truth Explained in 2026
- 5 Best Water Softeners for Well Water: Our Top Picks in 2026
Frequently asked questions
Can I measure this at home?
No, you can’t get an accurate measurement at home because you need a climate-controlled chamber to keep temperature and humidity constant. Even a small change in your home’s air quality will change the transmission rate by a large margin. Professional labs use specialized environmental chambers that keep conditions locked to a specific set point for the entire duration of the testing process.
Is it safe to use materials with high rates?
It depends on your application, as a high rate is safe for breathable clothing but dangerous for moisture-sensitive electronics. If you’re protecting metal parts or circuit boards, you need a very low rate to prevent corrosion. If you’re building a wall, you might want a specific rate to allow the structure to dry out if moisture gets trapped inside.
What happens if the rate is too high?
If the transmission rate is too high for your specific use, the material will fail to protect the contents from humidity. In packaging, this leads to spoiled food or rusted parts. In buildings, it leads to mold growth and wood rot inside the walls. You should always select a material with a lower transmission rate if you notice damage or condensation forming on the protected side.
How often should I test the same material?
You should test at least three separate samples of the same material to ensure your data is reliable. If the three samples give you very different results, there’s a flaw in your testing method or the material itself is inconsistent. Always use the average of these three tests as your final value for the material’s performance.
Does the thickness of the material matter?
Yes, the thickness is a primary factor in the final rate, and you must state it whenever you report your results. If you double the thickness of a uniform material, you generally cut the transmission rate in half. However, this rule only applies to solid, non-porous materials; for composite materials or foams, the relationship is much more complex and requires direct measurement.
What is the unit of measurement?
The most common unit is grams per square meter per day, often written as g/m²/day. This unit tells you exactly how many grams of water pass through a square meter of your material in a 24-hour period. When you read technical sheets, always confirm the specific temperature and humidity used, because the rate will change if the test conditions are different from your own.
Conclusion
Testing is a precise process that requires patience and strict control over your environment. If you follow the standard procedures and keep your conditions steady, you’ll get the accurate data you need to make informed decisions about your materials.
