
Most issues with these openers come from misaligned sensors or worn-out gears, which makes resolving common liftmaster problems a task that usually involves checking the safety eyes first. When the door refuses to close or reverses immediately, the light on the sensor is the primary indicator of the health of the system. You can verify the status by looking directly at the small LED indicator on each sensor unit.
Common reasons for LiftMaster problems and failure
| Cause | How common | How to confirm it | Fix it yourself? |
|---|---|---|---|
| Blocked safety sensors | Very frequent | LED light is off | Yes |
| Misaligned travel limits | Frequent | Door stops mid-way | Yes |
| Worn drive gear | Common | Grinding noise heard | Yes with care |
| Broken torsion spring | Occasional | Door feels very heavy | No |
| Logic board failure | Rare | No power to motor | No |
| Remote battery dead | Very frequent | No response from clicker | Yes |
Safety sensors rely on a clear line of sight. If your door reverses immediately upon closing, check for cobwebs or displaced debris blocking the infrared beam. A flickering LED on the sensor unit confirms a misalignment rather than a total power failure.
Travel limits dictate exactly how far the door descends. If the door hits the floor and bounces back up, the motor thinks it has hit an obstacle. Adjust the down-limit screw on the back of the motor housing by a quarter-turn at a time until the door seals flush without reversing.
Grinding noises often signal a stripped drive gear. If the motor hums but the chain remains stationary, the nylon gear inside the casing has likely sheared. This repair requires disassembling the motor housing, so verify the gear teeth are worn before ordering a replacement kit.
Torsion springs carry the full weight of the door. If the door refuses to lift more than a few inches, the spring has snapped. Never attempt to adjust these yourself, as the tension can cause severe injury. If the door feels light but drifts downward, the spring is merely losing its tension and requires a professional adjustment.
Logic board failures are often misdiagnosed. Before assuming the board is dead, test the outlet with a standard lamp to ensure the circuit breaker hasn’t tripped. If the motor remains silent despite having confirmed power, the internal motherboard has likely suffered a surge.
Misaligned safety sensors
The safety sensors are small electronic eyes located near the floor on each side of your garage door tracks. These sensors send an invisible beam of light across the opening; if anything breaks that beam, the system won’t allow the door to close. This is a critical safety feature designed to prevent the door from hitting people or objects.
To confirm this is the issue, check the LED indicator lights on both sensors. If the amber or green light is blinking or completely off, the sensors are either blocked or out of alignment. Clear any objects like boxes or garden tools that might be sitting in the path of the beam. If the area is clear, loosen the wing nut on the sensor bracket and gently adjust it until the light turns solid.
This fix takes about 5 to 10 minutes. If the lights remain off after cleaning and alignment, check the wiring for cuts or loose connections. Always ensure the power is disconnected before touching any wires. If you find frayed cables, don’t attempt a repair yourself, as this can lead to electrical hazards.
Incorrect travel limit settings
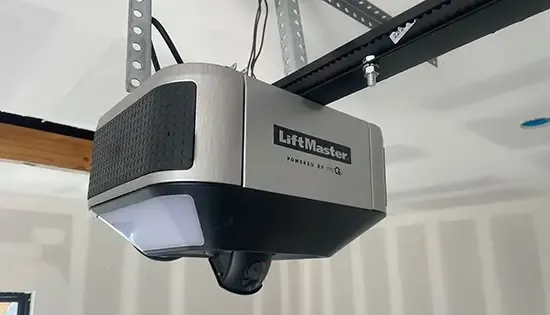
The travel limits tell the motor exactly how far to move the door before it should stop. If these settings shift over time, the door may hit the floor and reverse, or it may stop several inches above the ground. You can tell this is the cause if the door moves smoothly but stops at the wrong height every time.
To adjust the limits, locate the adjustment screws or buttons on the side or back of the motor unit. If your model uses screws, turn the “down” limit screw one full turn counter-clockwise to allow the door to travel further, or clockwise to stop it earlier. After each adjustment, run the door through a full cycle to see if it reaches the desired position.
If the door hits the floor and immediately reverses, the down-limit is set too high. The motor senses excessive resistance and triggers a safety reversal to prevent crushing. In this case, turn the down-limit screw clockwise in quarter-turn increments until the door rests firmly against the threshold without triggering the safety sensor.
Avoid the common mistake of adjusting both the up and down limits simultaneously. If you change both at once, you’ll lose your baseline and struggle to isolate which direction is causing the malfunction. Always reset one limit, test the door, and verify the travel before touching the other.
If your motor uses digital buttons rather than screws, the process relies on a timed sequence. Hold the “down” button until the door reaches the floor, then press the “set” or “enter” button to lock the position. If the door continues to stop short after three attempts, check the photo-eye sensors for alignment.
A misaligned sensor will override your manual limit settings, forcing the door to stop early as a safety precaution. If the sensors are clear and the door still stops, the internal logic board may have lost its memory, requiring a full factory reset.
Worn drive gear assembly
The drive gear is a nylon component inside the motor housing that transfers power from the motor to the chain or belt. Over many years of regular use, the teeth on this gear can wear down or strip, causing the motor to hum loudly while the door remains stationary. If you hear a grinding noise but the chain doesn’t move, this is likely the cause.
To confirm this, remove the plastic cover from the motor unit and inspect the white nylon gear. If you see plastic shavings inside the casing or the teeth look rounded, the gear needs replacement. This is a task for those comfortable with basic mechanical repairs, as it involves removing the motor cover and the chain drive assembly.
Check the gear teeth for a “hooked” profile. If the teeth lean like a wave rather than standing straight, they’re failing. You should also check the gear shaft for lateral play. If the gear wobbles more than a sixteenth of an inch on its axis, the internal bearings are likely compromised, meaning a simple gear swap will fail within weeks. In that case, replace the entire gear-and-sprocket assembly.
Most DIYers make the mistake of failing to lubricate the new gear immediately upon installation.
Always verify your motor’s manufacture date before ordering parts. Manufacturers often switch gear sizes mid-production run for the same model number.
If you aren’t comfortable working with high-tension chains or internal motor components, contact a professional. Attempting to replace the gear without securing the door in the closed position can cause the door to fall unexpectedly. Always use a C-clamp on the track above the top roller to lock the door in place before touching the drive mechanism.
Rare motor and electrical issues
Logic board failure occurs when the motor unit loses all power or stops responding to remote signals entirely. If the unit remains unresponsive after a hard power cycle, the internal circuit board has likely fried. This requires a professional technician to replace the board, as the integrated components aren’t user-serviceable.
A broken torsion spring leaves the door feeling extremely heavy or prevents it from lifting at all. This is a dangerous, high-tension repair that demands a certified garage door specialist. Never attempt to adjust the spring yourself; the stored energy can cause severe injury or property damage if the cable snaps.
Remote interference often manifests when the opener works only when you’re within five feet of the unit. Before replacing the logic board, remove all LED light bulbs from the garage ceiling. Many inexpensive LED bulbs emit radio frequency noise that masks the opener’s signal. If the range returns to normal once the lights are off, replace the bulbs with “garage door opener compatible” LEDs.
Wall control shorts cause the door to open or close randomly on its own. This usually points to a damaged wire behind the wall-mounted push button rather than a faulty motor. Inspect the wire for staples that have pierced the casing or signs of rodent damage.
If the door stops acting erratically after you disconnect the wall button, the wire is the culprit. Replacing a shorted wire is an inexpensive fix that prevents the door from triggering unexpectedly while you’re away from home.
Requirements for a successful repair
Fixing these issues usually demands a few basic hand tools like a screwdriver, a ladder, and a clean cloth. Most repairs are similar in difficulty to changing a light fixture or assembling basic home furniture. The time required depends on your experience, but most sensor or limit adjustments take less than 15 minutes.
Before starting, verify that your garage door is in the closed position. Working on a door under tension is dangerous and can lead to injury. If the door is stuck halfway, don’t attempt to force it down manually.
If you need a new part, the cost is small compared to replacing the entire motor unit. Check the model number on your opener to ensure you buy the right gear or sensor kit. You can find the exact part numbers by visiting the manufacturer’s official support website and entering your model’s serial number.
Many DIYers make the mistake of overtightening bolts on plastic components. This often cracks the housing and forces a total replacement of the assembly. If the bolt meets resistance, stop turning immediately.
If you struggle with these mechanical steps, a professional service call is the safest route to avoid damaging the motor or door. If the door fails to move after resetting the limit switches, contact a technician immediately to inspect the springs, which require specialized tools and professional expertise to handle safely.
Related guides
