
If your Kirby vacuum isn’t picking up like it used to, the problem might be a worn-out or broken belt. Knowing how to put the belt on a Kirby vacuum can save you time and money.
You don’t have to wait for a repair technician or buy a new vacuum. In this guide, you’ll find simple steps that anyone can follow, even if you’ve never done it before. By the end, your vacuum will be ready to tackle dirt and dust just like new.
Keep reading to learn how easy it is to get your Kirby working perfectly again.
Tools Needed
Getting the belt on a Kirby vacuum is easier with the right tools. Having these tools ready saves time and avoids frustration. It also helps you work safely and efficiently.
Flathead Screwdriver
A flathead screwdriver helps remove screws holding the vacuum parts. It fits under small screw heads and pries open covers carefully. Choose one with a comfortable handle for better grip.
Needle-nose Pliers
Needle-nose pliers reach tight spaces and grip small pieces firmly. They help stretch and place the belt around the vacuum parts. Their thin tips give good control during the process.
Replacement Belt
The new belt must match your Kirby vacuum model. Using the right size belt ensures proper fit and vacuum function. Keep the belt clean and free from damage before installing.
Clean Cloth
A clean cloth removes dust and dirt from vacuum parts. This helps the belt sit properly and last longer. Wiping surfaces also prevents slipping or belt damage.
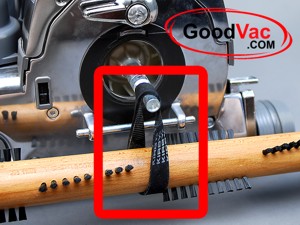
Credit: www.goodvac.com
Locate The Belt Compartment
Locating the belt compartment on your Kirby vacuum is the first step to replacing the belt. Knowing its exact position helps you avoid confusion and saves time. This section guides you through finding the belt compartment easily.
Check The Bottom Of The Vacuum
Turn your Kirby vacuum upside down. Look for a large plastic or metal plate near the brush roll. This plate often covers the belt compartment. It may have clips or screws holding it in place.
Identify The Brush Roll Area
The belt wraps around the brush roll. The brush roll is a long cylinder with bristles. It spins to clean carpets. The belt compartment is close to this brush roll.
Look For A Removable Cover
Find a cover that can be taken off. It may have a latch or screws. Removing this cover gives access to the belt inside. Use a screwdriver if needed.
Remove The Vacuum Base Plate
Removing the vacuum base plate is the first step to replace the belt on your Kirby vacuum. This part covers the brush roll and belt area. Taking it off gives you clear access to the belt. Handle the base plate carefully to avoid damage.
Release Screws
Locate the screws holding the base plate in place. Use a screwdriver to unscrew them. Keep the screws safe for reassembly. Some models have four or more screws. Make sure all screws are fully loosened before moving on.
Lift Base Plate Carefully
After removing the screws, gently lift the base plate. It may feel stuck at first. Wiggle it slightly to loosen it. Avoid using too much force to prevent breaking clips. Set the base plate down on a clean surface.
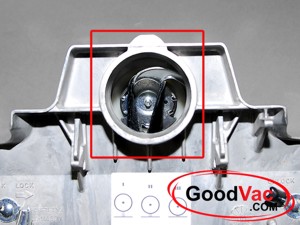
Credit: www.goodvac.com
Take Out The Old Belt
Start by unplugging the Kirby vacuum for safety. Next, open the vacuum base and carefully remove the old belt from the brush roll. This step prepares the vacuum for a new belt installation.
Prepare Your Workspace
Start by unplugging the Kirby vacuum from the power outlet. Safety first. Find a clean, flat surface to work on. This helps keep small parts from getting lost. Gather a screwdriver if needed to open the vacuum’s base plate.
Turn the vacuum upside down. Locate the screws that hold the base plate in place. Use the screwdriver to remove them carefully. Set the screws aside in a safe spot. Lift off the base plate gently to expose the belt and brush roll.
Notice the old belt wrapped around the brush roll and motor shaft. Grip the belt firmly and slide it off the brush roll. It might be tight or stretched. Pull it slowly to avoid breaking it. Remove the belt from the motor shaft as well.
Dispose of the old belt properly. Check the brush roll for any debris or hair. Clean it before installing the new belt. This ensures better performance and longer belt life.
Position The New Belt
Positioning the new belt on your Kirby vacuum is a key step. It ensures the brush roll spins correctly. A properly placed belt keeps the vacuum working well.
Take your time. Make sure the belt fits tightly and sits in the right places. This will help your vacuum clean better and last longer.
Fit Around Motor Shaft
First, slide the new belt over the motor shaft. The motor shaft is a small metal rod inside the vacuum. This part turns the belt and brush roll.
Make sure the belt fits snugly but not too tight. It should move smoothly without slipping off. A loose belt won’t spin the brush roll well.
Loop Over Brush Roll
Next, stretch the belt over the brush roll. The brush roll is the long cylinder with bristles. It picks up dirt and dust from the floor.
Pull the belt carefully so it loops fully around the brush roll. Check that it sits in the groove on the roll. This keeps the belt from sliding off during use.
Reattach The Base Plate
Reattaching the base plate on your Kirby vacuum is a key step to finish putting on the belt. The base plate holds the brush roll and belt in place. A secure base plate helps your vacuum work correctly and last longer.
Take your time to align and secure the base plate carefully. This ensures smooth operation and prevents damage to the vacuum parts.
Align Plate Correctly
Place the base plate back onto the vacuum. Make sure the edges fit evenly around the vacuum body. Check that the brush roll fits inside the plate’s opening. The plate should sit flat without gaps. Proper alignment prevents belt slippage and uneven wear.
Secure Screws Tightly
Use a screwdriver to tighten the screws that hold the base plate. Tighten each screw firmly but do not over-tighten. Over-tightening can crack the base plate or strip the screw holes. Make sure all screws are secure to keep the plate stable during use.
Test The Vacuum
Testing the vacuum after putting on the belt is important. It ensures the vacuum works properly. You can find out if the belt fits well and if the vacuum cleans as expected. Follow these steps to test your Kirby vacuum carefully.
Check Brush Roll Rotation
Turn on the vacuum and watch the brush roll. It should spin smoothly without stopping. A spinning brush roll means the belt is on correctly. If it does not move, the belt might be loose or broken. Fix the belt and test again.
Listen For Unusual Sounds
Pay attention to the sounds the vacuum makes. Listen for grinding or squeaking noises. Strange sounds can mean the belt is not set right or is damaged. A quiet, steady sound means the vacuum is working well. Stop and check the belt if you hear odd noises.

Credit: www.youtube.com
Troubleshooting Tips
Troubleshooting your Kirby vacuum belt can solve many common problems. Knowing what to check saves time and effort. Small issues often cause big problems. Keep your vacuum working smoothly with these simple tips.
Belt Slipping
A slipping belt stops the brush roll from turning properly. Check if the belt is loose or stretched. Replace the belt if it looks worn out. Make sure the belt fits tightly around the motor shaft and brush roll. Clean any dirt or debris from the belt and pulleys. A clean belt grips better and works well.
Brush Roll Not Spinning
If the brush roll does not spin, the belt might be broken or off track. Turn off and unplug the vacuum before fixing. Remove the brush roll cover and inspect the belt. Put the belt back on the motor shaft and brush roll correctly. Clean the brush roll and its bearings to remove hair or dust. This helps the brush roll spin freely.
Vacuum Not Picking Up Properly
Bad vacuum suction can mean a belt problem. A worn or broken belt reduces power. Replace the belt if it looks damaged. Check for blockages in the hose or nozzle. Clean the filters and empty the dust bag. Clear airways help the vacuum pick up dirt better.
Maintenance Tips For Belt Longevity
Maintaining the belt on your Kirby vacuum extends its life and keeps it working well. Small habits can prevent damage and save money. Follow simple steps to care for the belt every time you clean.
Regular Cleaning
Clean the brush roll and belt area often. Remove hair, dust, and debris wrapped around the brush. Dirt buildup can strain the belt and cause it to wear out faster. Use scissors or a cloth to clear the parts carefully.
Avoid Overstretching
Do not pull the belt too hard when installing it. Stretching weakens the belt and causes cracks. Fit it gently but firmly around the pulleys and brush roll. A proper fit ensures smooth spinning without extra stress.
Replace Belt Periodically
Change the belt every few months, even if it looks fine. Belts lose strength over time and may snap unexpectedly. Follow the vacuum’s manual for recommended replacement times. A fresh belt keeps your vacuum running at full power.
Frequently Asked Questions
How Do I Remove The Old Belt From A Kirby Vacuum?
Turn off and unplug the vacuum first. Then, open the bottom plate and gently pull the old belt off the brush roll and motor shaft.
What Type Of Belt Fits A Kirby Vacuum Cleaner?
Use a belt designed specifically for your Kirby model. Check the model number to find the correct size and type online or in the manual.
How Do I Put The New Belt On The Brush Roll?
Place the belt around the brush roll’s end first. Then, stretch it carefully onto the motor shaft without twisting the belt.
Can I Reuse An Old Kirby Vacuum Belt?
Old belts usually stretch and wear out. It’s best to replace the belt with a new one for proper vacuum performance.
How Tight Should The Kirby Vacuum Belt Be?
The belt should be snug but not too tight. It must allow the brush roll to spin freely without slipping.
How Often Should I Change The Belt On My Kirby Vacuum?
Change the belt every 6 to 12 months or when it shows signs of wear, like cracking or slipping.
What If The Brush Roll Does Not Turn After Belt Replacement?
Check if the belt is installed correctly and not twisted. Also, ensure the brush roll spins freely and the vacuum is powered on.
Conclusion
Putting the belt on a Kirby vacuum is not hard. Follow the steps carefully and take your time. Check the belt fits snugly and moves smoothly. A good belt helps your vacuum clean well and last longer. Keep the vacuum unplugged while you work for safety.
Regularly changing the belt keeps the vacuum in top shape. Now, you can easily replace the belt yourself. Save time and money by doing it right at home. Your Kirby vacuum will thank you with better cleaning power. Simple and quick—just the way it should be.