
Learning how to clean toilet seat hinges involves removing the seat, soaking the hardware in a mild vinegar solution, and scrubbing away grime with a soft brush. This restores movement and removes buildup that causes odors. Since hardware materials vary, check the manufacturer’s documentation to avoid harsh chemicals that could strip chrome or damage plastic. Knowing your specific material helps you choose the right tools.
Who should clean toilet seat hinges
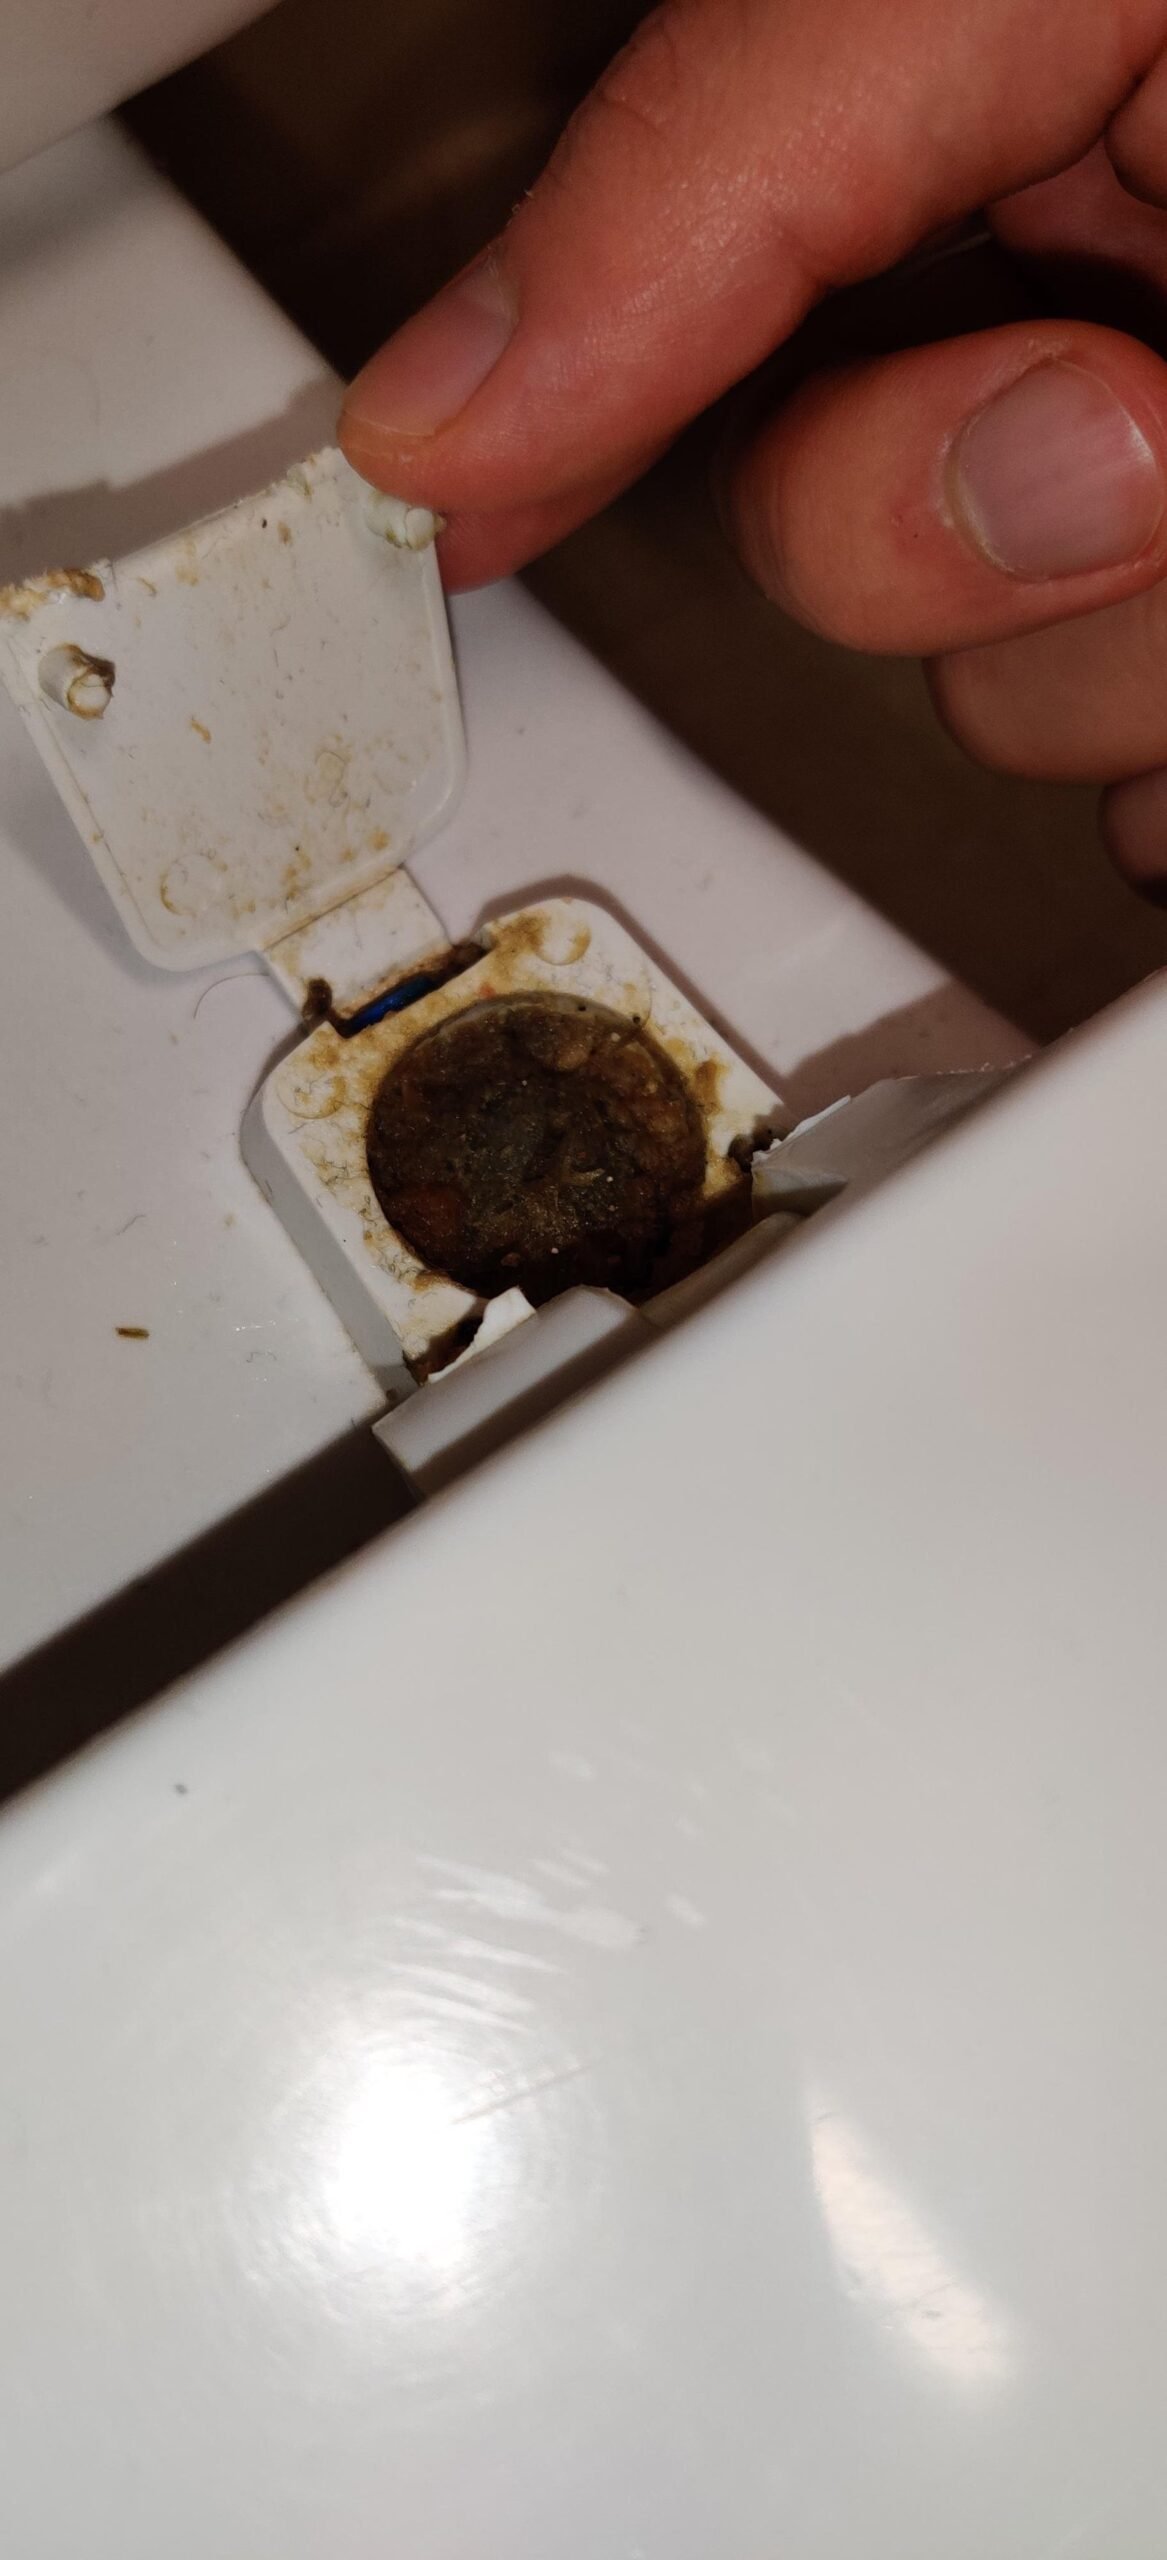
This guide serves homeowners and renters who notice stubborn buildup, discoloration, or stiffness around their toilet seat attachment points. It’s designed for those who have a standard screwdriver or wrench and want to resolve the issue without buying expensive specialty cleaners.
The content assumes your toilet seat uses standard bolt-and-nut hardware, which is common in most residential bathrooms. If you have a high-end integrated bidet system or a proprietary quick-release hinge that requires a specific key, this page isn’t for you. In those cases, the manufacturer’s manual is your only safe source of truth to avoid breaking delicate locking mechanisms.
We assume you’re comfortable using basic hand tools and that your seat isn’t already damaged or cracked. If you’re a tenant, check your lease agreement regarding maintenance, as some high-end fixtures require professional service to maintain warranty coverage. This page provides the best value to someone who wants to perform a deep clean rather than a quick surface wipe. If you just need a daily maintenance routine, you should look for information on general bathroom cleaning supplies instead of hardware removal techniques.
Factors affecting your cleaning process
The material of your hinges dictates the cleaning agents you can safely use. Chrome-plated brass, stainless steel, and plastic all react differently to acidic cleaners. If you’re unsure, test a small, hidden area first to ensure the finish doesn’t dull or peel.
The age of the hardware is the second major factor. Older bolts can rust or fuse to the ceramic, making removal difficult. If you find the nuts are stuck, don’t force them with extreme pressure, as this can crack the porcelain base of the toilet. Use a penetrating oil designed for metal to loosen the connection over several hours.
The amount of buildup present determines your time commitment. Heavy calcification from hard water takes longer to break down than simple dust or soap scum. You can verify your water hardness levels by checking your local municipal water report, which often identifies mineral content.
People often make the mistake of using abrasive scouring pads on metal hinges. This creates microscopic scratches that trap dirt faster in the future, making the hinges look worse after only a few weeks. If you notice scratches, you have already removed the protective layer of the finish.
Finally, the design of the hinge cover matters. Some toilets have plastic caps that snap off easily, while others require a flat-head screwdriver to pry them open. If you can’t see the bolt head, look for a small notch on the side of the plastic cover to insert your tool.
How to clean toilet seat hinges: Step by step
- Close the toilet lid and locate the plastic covers at the base of the hinges. Use a flat-head screwdriver to gently pry these covers off.
- Hold the nut on the underside of the toilet bowl while using a screwdriver to turn the bolt counter-clockwise from the top. If the nut is inaccessible, you may need a socket wrench.
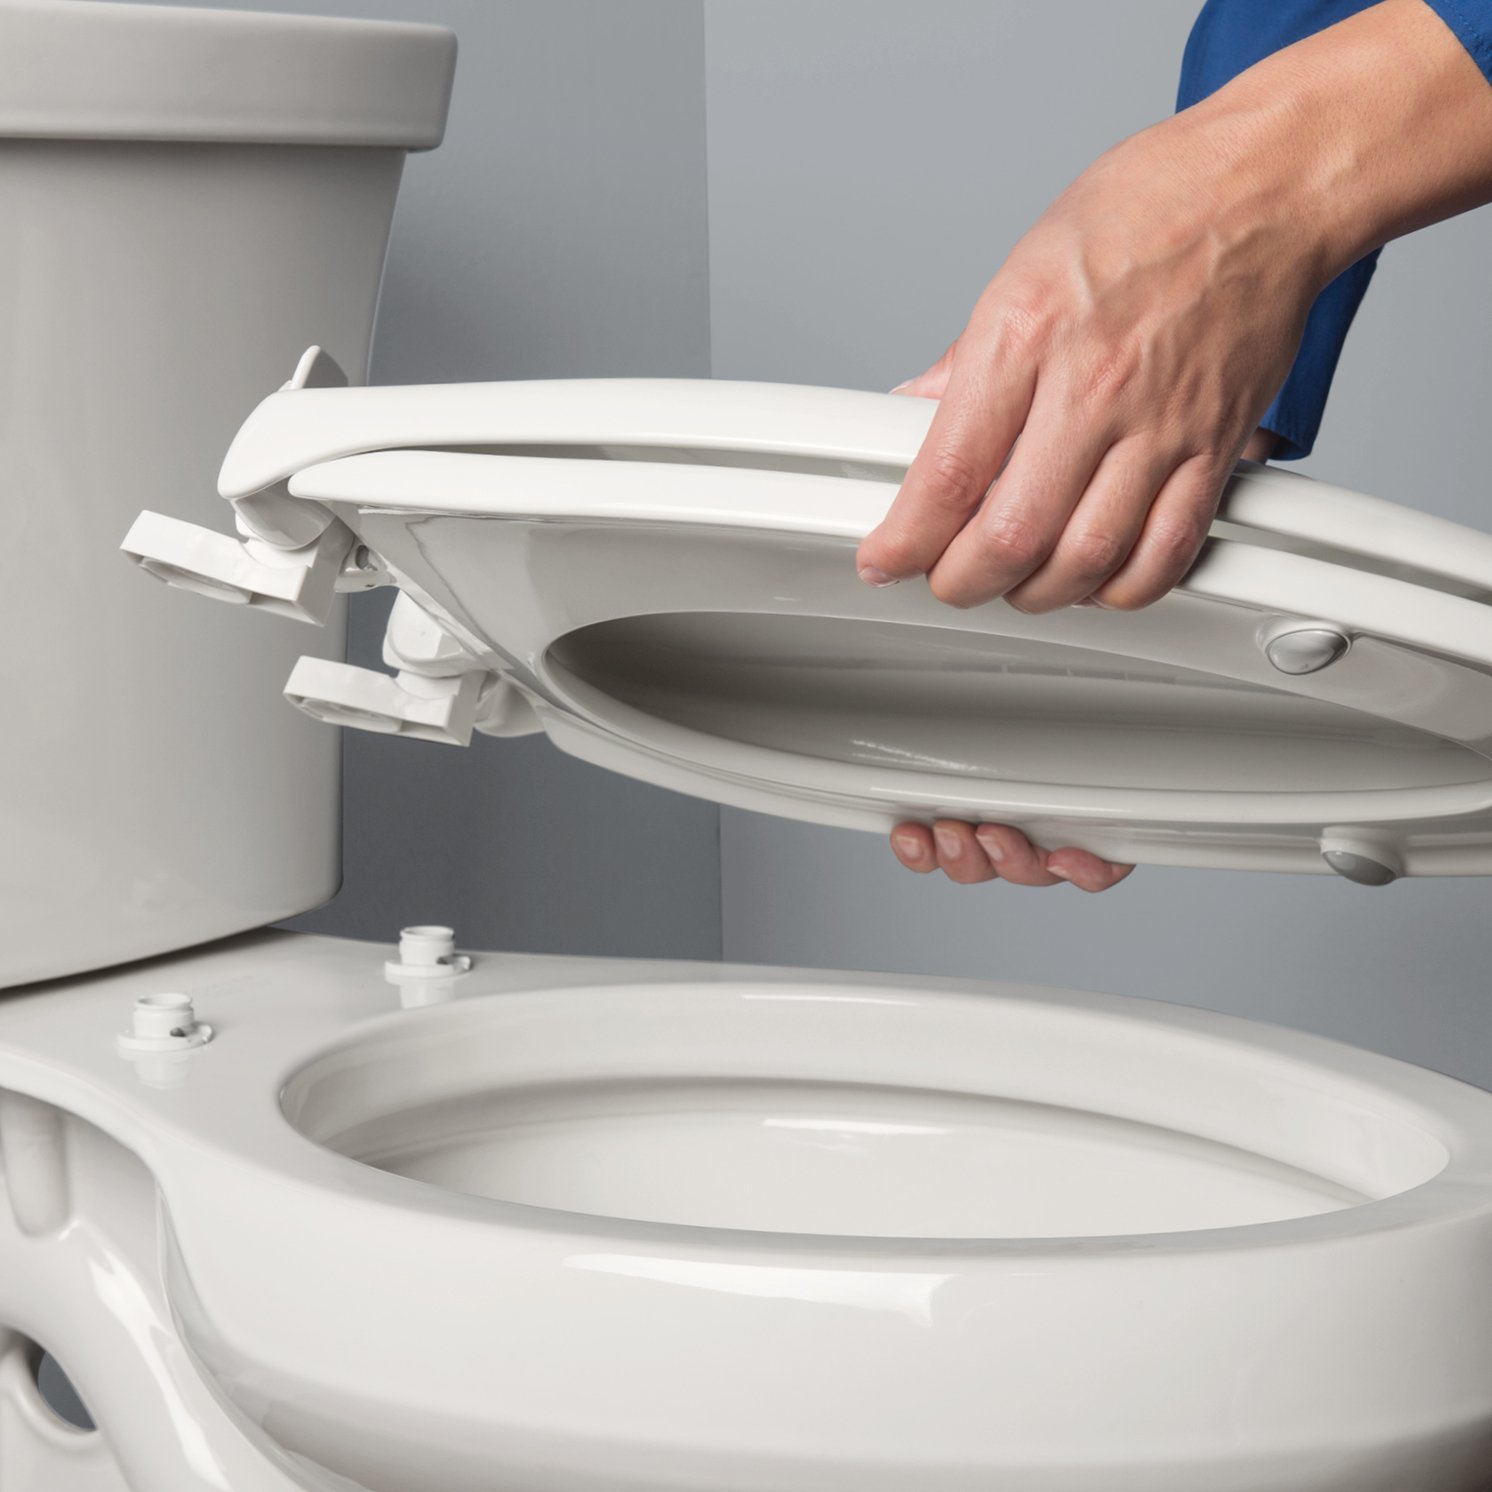
- Lift the toilet seat and hinges away from the bowl. Place the hardware in a container filled with one cup of white vinegar and one cup of warm water.
- Let the parts soak for thirty minutes. This acidity helps dissolve mineral deposits, as noted in the EPA guide to safer cleaning products.
- Remove the parts from the soak and scrub the hinges with a soft-bristled toothbrush to reach into small crevices.
- Rinse the hinges thoroughly under clean water to remove all vinegar residue, as lingering acid can eventually corrode metal finishes.
- Dry the hardware completely with a clean microfiber cloth. Never leave metal parts damp, as this encourages rust formation.
- Reattach the seat to the toilet, aligning the bolts carefully before tightening the nuts by hand.
- Tighten the bolts with your tool until the seat is firm, but avoid over-tightening, as this puts stress on the ceramic bowl.
- Snap the hinge covers back into their original position.
The main judgment call is the tension. A properly tightened seat shouldn’t wiggle when you sit, but it shouldn’t be so tight that the plastic base of the hinge starts to deform or crack.
Cleaning methods for different situations
You must adjust your approach based on the condition of your toilet seat hinges.
| Situation | Action | Effort level | Watch for |
|---|---|---|---|
| Light dust | Wipe with damp cloth | Low | Surface scratches |
| Mineral buildup | Soak in vinegar solution | Medium | Metal discoloration |
| Heavy rust | Apply penetrating oil | High | Ceramic cracks |
| Stuck bolts | Use socket wrench | High | Stripped screw heads |
| Plastic corrosion | Replace hinge set | Medium | Proper model fit |
If you encounter mineral buildup, leave the vinegar-soaked cloth on the hinges for at least twenty minutes. Less time will fail to break the calcium bond. If the vinegar fails, you’re dealing with hard-water scale that requires a specialized acidic descaler.
For stuck bolts, the most common mistake is applying force before using penetrating oil. This often shears the bolt head, turning a ten-minute job into a multi-hour extraction nightmare. Always spray the oil and wait ten minutes before turning your wrench.
If your hinges are plastic, check for hairline fractures before cleaning. If you see white stress lines in the material, don’t scrub them. Scrubbing will accelerate the failure, and the seat will eventually shift during use. In that case, replace the set immediately to prevent potential injury.
What separates a good result from a poor one
Attention to detail
Experienced cleaners prioritize the hidden underside of the hinge. Most people only clean the top, which leaves grime to accumulate against the porcelain. This trapped dirt acts as a sponge, holding moisture against the bolts and speeding up the oxidation process. Use a cotton swab to clear the gap where the hinge meets the bowl. If you see dark rings around the bolt hole, that’s a sign that moisture has been trapped for a long time.
Choosing the right tools
The difference between a clean hinge and a damaged one often comes down to the choice of brush. A soft toothbrush is the most effective tool because it reaches into the hinge mechanism without scratching the protective plating. Avoid steel wool or stiff-bristled wire brushes, as these will ruin the finish on chrome or colored plastic. If you find yourself needing a metal tool to scrape off debris, you’re likely using too much force. Stop and let the vinegar soak longer to soften the material naturally.
What goes wrong, and what to do
| What you notice | What it usually means | What to do first | How to stop it |
|---|---|---|---|
| Wobbly seat | Loose mounting bolts | Tighten the nuts | Check monthly |
| Gritty sound | Dirt in hinge | Clean and lubricate | Rinse after cleaning |
| Rust spots | Damaged finish | Use mild polish | Keep dry |
| Stuck cover | Mineral buildup | Use a knife tip | Wipe daily |
| Stripped head | Too much force | Use pliers | Use proper size |
Most users ignore a wobbly seat until the plastic housing cracks. If tightening the bolts fails, the internal anchor is likely stripped. Replace the mounting hardware immediately to prevent permanent damage to the porcelain.
Gritty sounds indicate abrasive debris trapped in the hinge mechanism. If you ignore this, the friction will eventually grind through the hinge coating. Use a silicone-based lubricant rather than oil, which attracts more dust.
Rust spots often appear after using harsh chemical cleaners that strip protective finishes. If you see orange streaks, stop using bleach-based products. Switch to a mild, non-abrasive polish.
A stuck cover usually signals hard water deposits. If you force it, you risk snapping the plastic hinge pins. Use a plastic scraper or a soft cloth soaked in vinegar to gently loosen the buildup.
Finally, a stripped screw head is almost always caused by using a drill instead of a hand screwdriver. If the head is already damaged, use locking pliers to back it out. Always match your driver bit size exactly to the screw slot.
Rules that apply
Hardware maintenance is governed by the material specifications provided by the manufacturer. Most toilet manufacturers, such as Kohler or Toto, include specific care instructions in their owner’s manuals. You can find these by searching your model number on the official company website.
Using bleach or harsh industrial cleaners is generally discouraged by these brands, as they can void the warranty on the hinge finish. A common mistake is using acidic bowl cleaners on the seat itself. This often leads to micro-cracks in the plastic or finish degradation that harbors bacteria over time.
If you live in an apartment, check your local building codes or tenancy agreements. Some rental properties require the use of specific, non-abrasive cleaning agents to prevent surface damage to the ceramic fixtures.
If your seat is made of natural wood, avoid soaking it entirely. If it’s high-gloss plastic, use only mild dish soap and a microfiber cloth. If you see yellowing, it’s likely due to permanent UV damage or age, which can’t be reversed by changing cleaners.
What it costs you
The cost of cleaning hinges is primarily measured in time and effort. Most tasks require about thirty minutes of active work, plus the time spent soaking the parts. If your hardware is severely rusted or damaged, you may need to purchase a replacement hinge kit. These kits typically range from an affordable price to a more premium cost depending on the material and brand. You can check the current price for your specific model by looking up the part number on the manufacturer’s official support page. If you choose to hire a professional plumber to handle deep cleaning or replacement, expect to pay a service call fee, which varies significantly by region. Always compare the cost of a new hinge kit against the cost of professional labor before deciding which path to take.
Keeping it right afterwards
To maintain your clean hinges, make it a habit to wipe the base of the seat every time you clean the toilet bowl. A quick wipe with a damp cloth prevents the accumulation of soap scum and mineral deposits. If you notice the seat starts to creak or move, check the bolts immediately. A loose bolt is the first sign that the hardware needs tightening. You don’t need a strict schedule; simply checking the stability of the seat during your weekly bathroom cleaning is sufficient. If you use a spray cleaner for the bowl, ensure you wipe the hinges dry afterward to prevent moisture from sitting in the seams.
When this is the wrong approach
If your toilet seat hinges are cracked or the metal is deeply pitted with rust, cleaning won’t restore them. In these cases, the structural integrity of the hinge is compromised, and you should replace the entire hardware set. Attempting to glue cracked plastic or sand down deep rust is rarely successful and often leads to the seat failing while in use. If you encounter a bolt that’s completely seized and won’t move with basic hand tools, stop immediately. Applying excessive force to a seized bolt can cause the ceramic bolt hole to chip or crack, which is a major repair that often requires replacing the entire toilet bowl. If you can’t remove the hardware with gentle pressure, contact a licensed plumber to avoid expensive damage to your bathroom fixtures.
Frequently asked questions
Can I use bleach to clean the hinges?
No, you shouldn’t use bleach on metal hinges. Bleach can cause rapid corrosion and pitting on chrome and stainless steel finishes. It’s better to use a mild vinegar solution or a neutral dish soap to safely lift away grime without damaging the protective coating on your hardware.
How long should I soak the hinges?
About thirty minutes is usually enough to break down mineral deposits. If the hinges are heavily crusted with lime, you can soak them for up to one hour. Don’t leave them in the vinegar for more than a few hours, as prolonged exposure to acid can eventually dull the metal finish.
Is it safe to remove the seat myself?
Yes, most toilet seats are designed for easy removal by homeowners. You only need a standard screwdriver or a small wrench to loosen the nuts under the bowl. If your seat has a proprietary quick-release button, press that instead of unscrewing the base, as it’s designed for regular removal.
What happens if I lose a bolt?
If you lose a bolt, you must replace it with the exact size and material specified by the manufacturer. You can find the correct part number on the manufacturer’s website by entering your toilet model number. Using a generic hardware store bolt may cause the seat to sit unevenly or damage the porcelain.
Does it matter if the hinges are plastic?
Yes, plastic hinges require different care than metal ones. While they don’t rust, they can become brittle if exposed to harsh chemicals. Use only mild soap and water on plastic hinges to keep them flexible and prevent small stress cracks from forming over time.
Why do the hinges get dirty so fast?
The hinges get dirty because they’re located in a high-moisture area that catches dust and water droplets. When water evaporates, it leaves behind minerals that act like glue for dust and bacteria. Wiping the area dry after each cleaning will significantly slow down the rate of buildup.
What to do next
Start by checking your toilet seat for a quick-release button that allows you to remove the seat without tools. If you find one, press it to clean the area thoroughly; if not, proceed with the steps to unscrew the base.
Many homeowners make the mistake of using excessive force when a bolt is rusted or seized. If you feel the porcelain creak or shift while turning your wrench, stop immediately. Applying more pressure at this stage often results in a hairline fracture in the bowl, which necessitates a full toilet replacement.
If the bolt refuses to turn, apply a penetrating oil like WD-40 and let it sit for at least twenty minutes. If it remains stuck after that, call a professional. You’re better off paying a service fee than risking a cracked bowl. Once the hardware is removed, ensure the hinges look clear and move smoothly before installing the replacement.
Related guides