
An electronic garage door lock adds a layer of security by engaging a deadbolt automatically when the door closes. Most systems rely on a solenoid or motor that activates based on the door’s position, effectively securing the track or the door panel itself. This guide explains how these devices function, the steps for installation, and the key safety factors you must consider before upgrading your current garage setup.
Choosing an electronic garage door lock
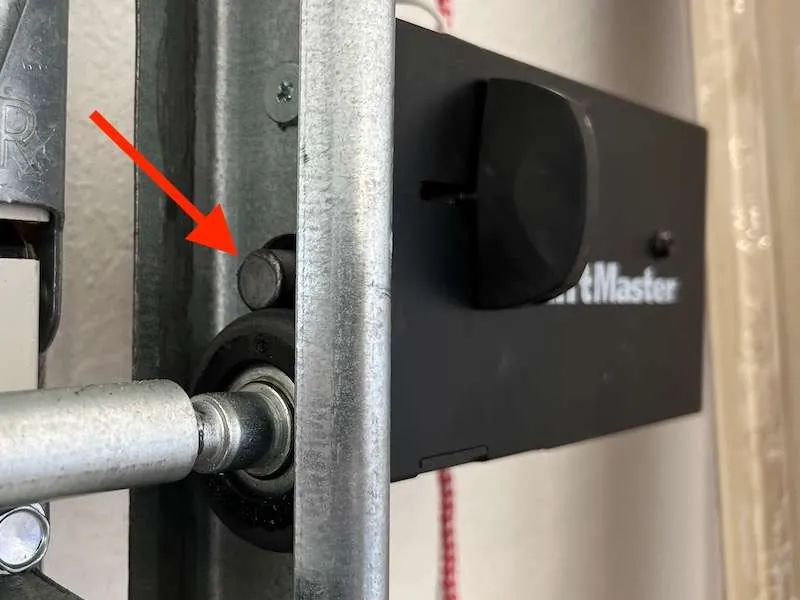
These devices are designed to provide physical reinforcement to the standard electric opener. While a traditional opener holds the door down using the drive rail, an electronic deadbolt provides a secondary, mechanical barrier that resists forced entry from the outside. They’re primarily for homeowners who want to improve the security of an attached garage or protect high-value items stored inside.
A common misconception is that these locks are universal. In reality, they’re often proprietary to the specific brand of garage door opener you own. The lock communicates directly with the motor head; when the motor senses the door is fully closed, it sends a signal to the lock to engage. If you’re unsure if your opener supports an add-on lock, check the manufacturer’s terminal labels for a specific port labeled “lock” or “auxiliary.”
Installing a smart deadbolt system
Installing a lock requires basic tools and access to the interior of your garage. You’ll need a screwdriver, a power drill, and potentially a wire stripper if you’re routing new cables.
- Disconnect the power to your garage door opener by unplugging it from the ceiling outlet.
- Mount the locking bracket to the vertical door track, usually 3 to 5 feet above the floor, ensuring it aligns with the pre-drilled holes in the door panel.
- Attach the lock mechanism to the bracket using the provided carriage bolts and nuts.
- Run the low-voltage wire from the lock unit back to the opener’s motor head along the existing rail.
- Connect the wires to the designated “lock” terminals on the motor head, observing polarity if the manual specifies it.
- Plug the opener back in and perform a test cycle to ensure the bolt engages and retracts without hitting the door track.
The most important judgement call is the alignment of the bolt. If the bolt hits the track or the hole is slightly off-center, the motor will struggle, potentially burning out the lock’s internal gears or triggering an error code on the opener. If you’re uncomfortable working with electrical wiring or drilling into metal tracks, contact a certified garage door technician to handle the installation.
Key numbers and settings at a glance
These figures provide a baseline for most modern residential systems. Always verify these against your specific model’s manual, as proprietary systems may vary in voltage requirements.
| Situation | What to use | How long | What to watch for |
|---|---|---|---|
| Standard installation | Manufacturer lock kit | 45-60 minutes | Bolt alignment |
| Low-clearance track | Side-mount lock | 60-90 minutes | Track interference |
| Battery backup mode | Integrated power pack | 24-48 hours | Charge indicators |
| Routine inspection | Silicone-based spray | Every 6 months | Smooth movement |
If you have a heavy wooden door, you must use a heavy-duty bolt model; for standard steel doors, a lighter solenoid-style unit is usually sufficient.
Test your bolt alignment by manually sliding the deadbolt before tightening the mounting screws. If you feel resistance or friction, shift the housing by even a millimeter to prevent motor burnout. Most units fail prematurely because users force the bolt into a misaligned strike plate.
If you hear a high-pitched whine during operation, your battery voltage has likely dropped. Contact a technician to test the power levels and replace the cells immediately to avoid a lockout.
Getting the best performance
Experience tells us that the preparation phase is where most people fail. Before you tighten any bolts, cycle the door manually to see where the panel sits naturally in the track. If the door shakes or vibrates when it reaches the bottom, the lock will struggle to line up with the hole, leading to premature wear on the motor or the bolt itself.
A simple test is to slide the door down until it’s six inches from the floor. If it drifts open or closed on its own, your track isn’t level. Adjust the wall brackets until the door stays perfectly still in that position.
Another detail involves the cable management. Beginners often leave the wire loose or dangling near moving parts. Always use the provided plastic clips to secure the wire tightly against the rail. If the wire gets caught in the chain or belt drive, it can be ripped out or cause the door to reverse unexpectedly.
Experienced installers always perform a “dry run” by hand before connecting the power to ensure there’s zero resistance. If you feel even a slight catch, stop and realign the vertical tracks immediately.
Common problems and quick fixes
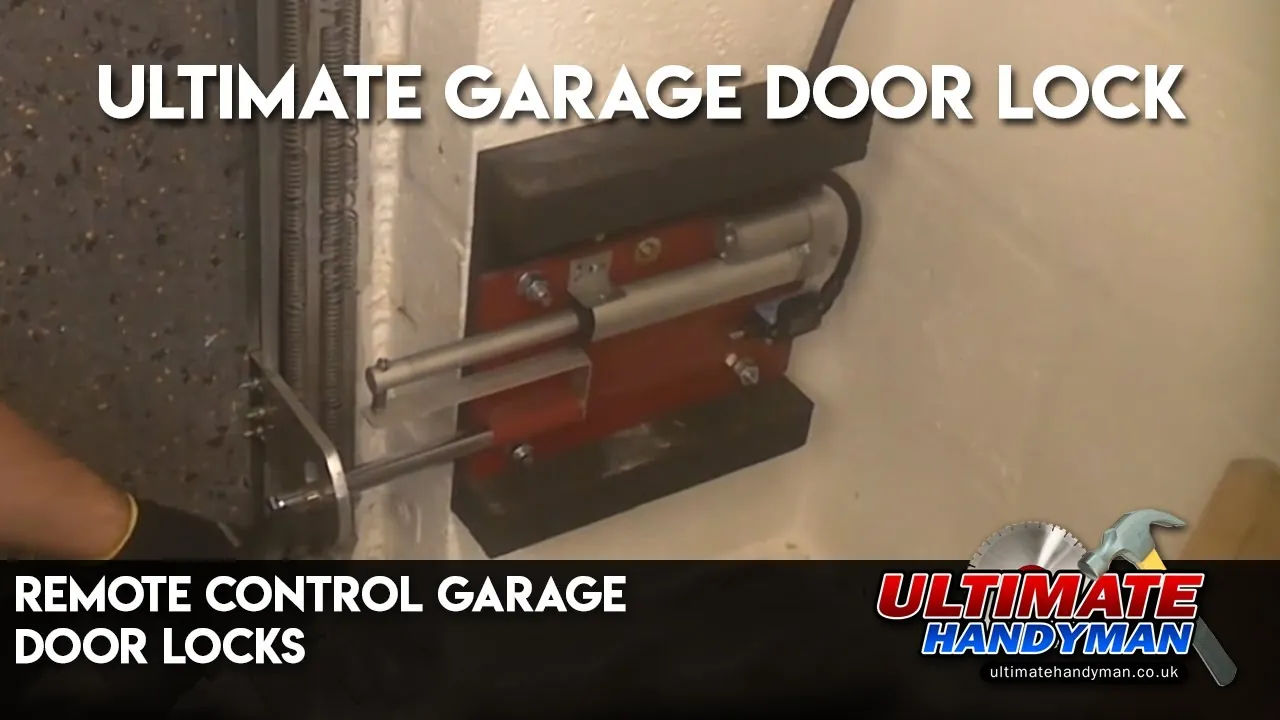
Most issues arise from poor alignment rather than electrical failure. If the lock doesn’t engage, check these points before assuming the unit is broken.
| What you notice | What it usually means | What to do first |
|---|---|---|
| Grinding noise | Misaligned bolt hole | Adjust bracket position |
| Lock fails to engage | Loose wire connection | Check terminals on motor |
| “Lock Error” on screen | Obstruction in track | Clear debris from hole |
| Bolt sticks | Lack of lubrication | Apply silicone spray |
If the bolt grinds despite a clear path, shift the strike plate by 1/8 inch. A gap this small often prevents the sensor from confirming a secure state.
Avoid using petroleum-based oils on the internal mechanism. These attract dust and grit, which will seize the motor within six months. Stick to dry silicone spray to keep the bolt moving smoothly.
Safety and regulatory rules
Safety is governed by specific standards to prevent injury. In the United States, the Consumer Product Safety Commission monitors compliance for residential garage door systems. These rules mandate that any automatic lock must not interfere with the manual release of the door. You must ensure that the red emergency release cord remains fully functional and accessible at all times.
If you modify the track to fit a lock, you must not drill through any structural reinforcement members. Doing so weakens the door’s integrity and voids your safety certification. If you’re unsure about the structural impact, consult the door manufacturer’s installation manual.
Most homeowners make the mistake of mounting locks too high or too close to the cable path. This creates a snag hazard that prevents the door from reversing when it hits an obstruction.
Maintaining your locking system
Once installed, your lock requires very little attention. Every six months, inspect the bolt for any signs of bending or metal fatigue. Use a small amount of silicone-based lubricant on the bolt pin to ensure it slides freely in and out of the track hole. Never use thick grease or oil, as these attract dust and debris that can cause the mechanism to jam.
If you notice the bolt is slow to retract, check your battery levels if you use a backup power system. In cold climates, metal tracks can contract slightly, which may change the alignment of the hole. If you find the bolt is rubbing against the edge of the hole, loosen the bracket screws slightly, shift the bracket by a few millimeters, and retighten them.
Many users mistakenly force the door shut when the bolt drags, which permanently bends the internal spring. If the bolt fails to retract fully after you adjust the bracket, the internal actuator is likely failing. Replace the unit immediately to avoid being locked out. If the bolt moves smoothly while the door is open but sticks when closed, the strike plate is misaligned.
When to use a different approach
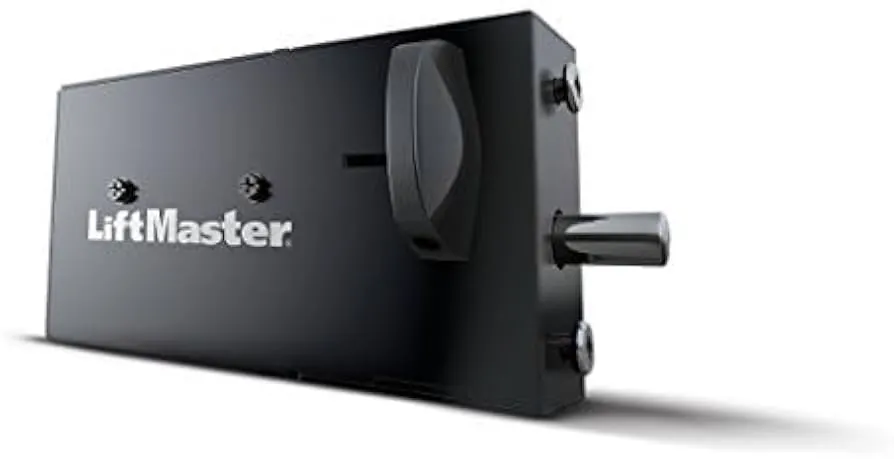
This type of lock isn’t the right choice for very old or warped garage doors. If your door is physically bent or doesn’t sit flush against the floor, the electronic bolt will likely bind or fail to engage entirely. In these cases, focus on repairing the door hinges and rollers first.
Additionally, if you have an older opener that lacks a dedicated lock port, don’t attempt to splice the lock into the safety sensor wires. This will likely fry the circuit board of your opener, requiring a full system replacement instead of a simple security upgrade.
Related guides
Frequently Asked Questions
Can I install an electronic lock on any opener?
No, most electronic locks are designed to work only with specific brands and models of openers. You should check the compatibility list provided by the manufacturer of the lock. If your opener doesn’t have a specific port for an auxiliary lock, you can’t connect it safely.
Is it safe to use this if the power goes out?
Yes, most electronic locks are designed to be “fail-safe” or they run on the opener’s battery backup. If the power fails, the lock will either stay in its last position or retract automatically depending on the model. Check your specific manual to see how your unit behaves during a power outage.
How often should I test the lock?
You should test the lock every time you perform your monthly garage door safety check. Ensure the bolt engages fully when the door is closed and retracts completely before the door starts to open. If you hear any unusual clicking or grinding, check the alignment of the bolt and the track hole.
What happens if the door hits the lock?
If the door hits the lock, the opener’s force-sensing system should detect the resistance and reverse the door. This is a safety feature required by law. If the door doesn’t reverse, you must adjust the force settings on your opener immediately or call a professional to inspect the system.
Do I need a permit for this upgrade?
No, installing a residential garage door lock is considered a minor home improvement and doesn’t require a building permit in most jurisdictions. However, always follow the manufacturer’s instructions to ensure you remain compliant with local safety codes and don’t void your home insurance policy or the opener’s warranty.
Conclusion
Upgrading your home’s security doesn’t have to be a complicated project. Once you’ve finished the setup, take a moment to test the sensors to ensure everything works smoothly. You’ll feel much better knowing your belongings are protected, so don’t hesitate to reach out to a professional if you’re ever feeling unsure.
