
The most reliable way to find the best toilet seat hinges and replacement hardware is to choose high-quality stainless steel or brass components that match your specific mounting hole spacing. You’ll find that these materials resist rust and provide a stable fit, which stops the seat from sliding or wobbling during regular use. This guide explains the installation process, the specific measurements you must check, and how to maintain your hardware for years of trouble-free performance.
Understanding Toilet Seat Mounting Components
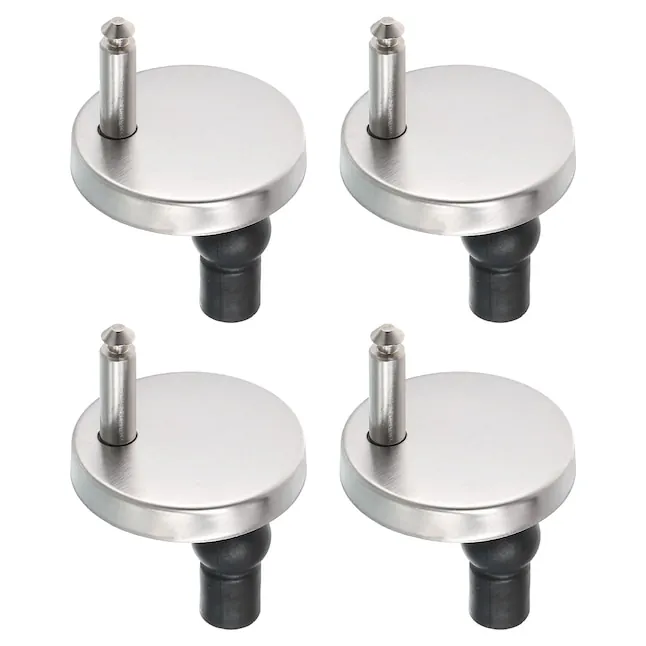
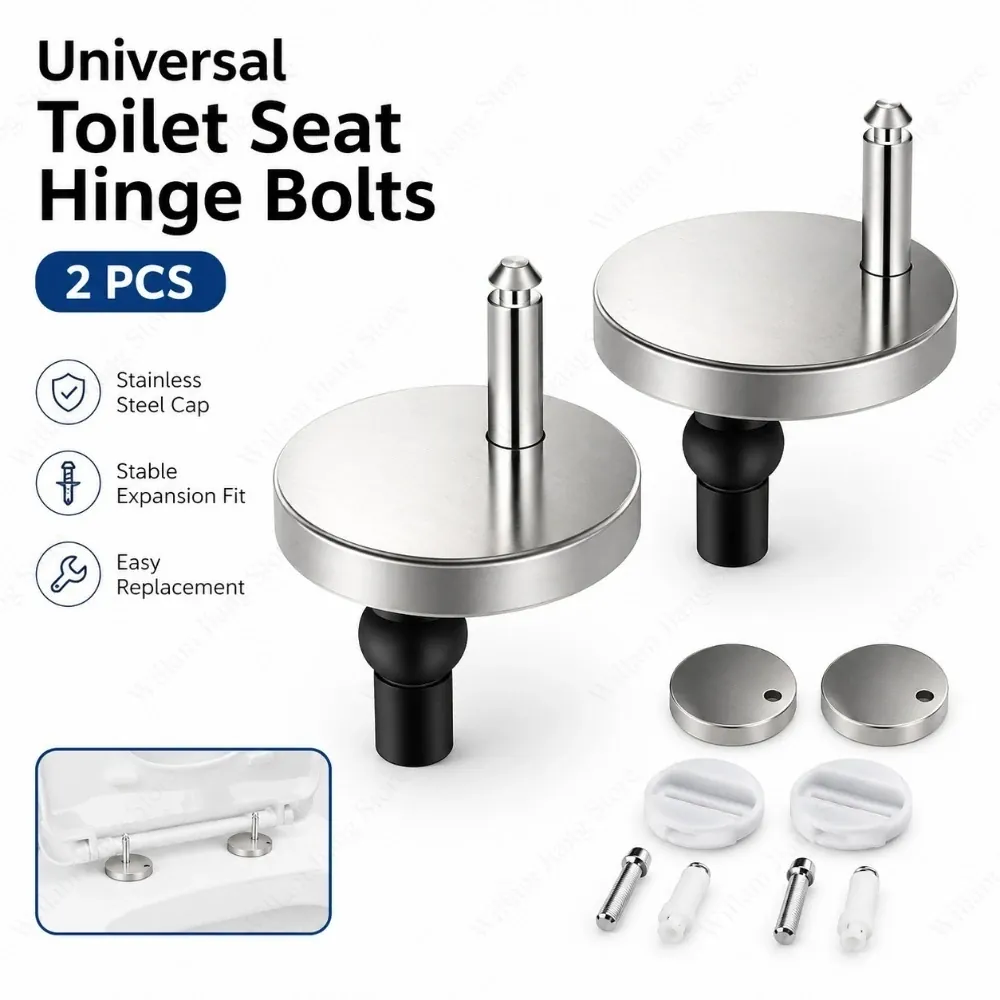
Toilet seat hardware consists of the hinge assembly, the mounting bolts, and the nuts that secure the seat to the porcelain bowl. Most modern seats use a top-fixing or bottom-fixing system. Top-fixing hinges allow you to install the seat from above, which is essential if you can’t reach behind the toilet bowl to tighten the nuts. Bottom-fixing hinges require access to the underside of the bowl to tighten the wing nuts.
A common misconception is that all hinges are universal. While many standard seats use similar bolt spacing, the diameter of the holes and the thickness of the porcelain vary significantly between manufacturers. If you buy a set without checking the hole distance, you’ll find the bolts don’t align with your bowl. Always measure the distance between the center of the two holes on your toilet before you purchase a replacement kit.
The mechanism relies on a pressure-fit or a threaded bolt system. If your seat is loose, it’s usually because the nut has vibrated or shifted over time. Using stainless steel hardware is a smart choice for most households because it avoids the corrosion common with cheaper, plated-metal alternatives. If you have a high-traffic bathroom, choose heavy-duty nylon or stainless steel hinges to handle the daily movement of the seat.
Installing Your Replacement Seat Hardware
- Remove the old seat by unscrewing the nuts from underneath the bowl or popping the covers off the top-fixing hinges.
- Clean the mounting area on the porcelain with a mild soap to ensure the new gaskets seal properly against the surface.
- Measure the distance between your two mounting holes; most standard US toilets require a 5.5-inch spacing, but verify your specific fixture dimensions.
- Insert the new bolts or expansion anchors into the mounting holes, ensuring they sit flush against the porcelain.
- Place the hinge plates over the bolts and hand-tighten the nuts or screws until the base of the hinge is firm but not overtightened.
- Attach the seat to the hinges and perform a stability test to ensure it doesn’t shift when you apply weight.
The judgement call that separates a good result from a bad one is the final tightening step. If you overtighten the bolts on a porcelain bowl, you risk cracking the ceramic, which is an expensive and permanent error. If you find the seat still moves after tightening, ensure the rubber gaskets are correctly positioned between the hinge and the bowl to provide the necessary grip.
Hardware Specifications and Compatibility
| Situation | What to use | How long | What to watch for |
|---|---|---|---|
| Standard bowl | Stainless steel bolts | 10-15 minutes | Check for rust buildup |
| Tight space | Top-fixing anchors | 20 minutes | Ensure expansion is tight |
| Wobbly seat | Nylon washers | 5 minutes | Don’t overtighten bolts |
| Heavy use | Brass hinges | 15 minutes | Monitor for loose screws |
| Old fixtures | Universal adapter kit | 30 minutes | Check hole alignment |
Stainless steel is the industry standard, but always verify the grade. Use 304-grade steel for standard bathrooms; if your bathroom lacks ventilation or sits near a coastal area, upgrade to 316-grade to prevent pitting.
Top-fixing anchors are your primary solution when you can’t reach the underside of the bowl. Before tightening, pull the anchor upward to ensure the rubber sleeve has fully expanded against the porcelain. If the seat still shifts, the hole diameter likely exceeds 16 millimeters, requiring a wider rubber grommet to maintain friction.
Nylon washers serve as a critical buffer between hard plastic seats and ceramic bowls. Most users make the mistake of cranking bolts until the seat stops moving, which often cracks the ceramic. If you feel resistance, stop immediately. If the seat remains loose, replace the washers rather than applying more torque.
Brass hinges provide the necessary structural integrity for high-traffic environments. Because brass is softer than steel, these hinges will eventually develop play. Tighten the mounting screws every six months to prevent the metal from shearing against the porcelain.
Universal adapter kits allow for installation on non-standard hole spacing, typically ranging from 120 to 180 millimeters. If your existing holes are uneven, prioritize centering the seat over the bowl rather than aligning it with the bolt holes. You can safely offset the mounting plate by up to 5 millimeters without compromising the stability of the seat.
Achieving a Stable and Secure Fit
Experienced installers always prioritize the quality of the gasket material included with the hardware. These small rubber or plastic rings are the primary defense against water seepage into the bolt holes. If you leave these out, moisture can enter the hardware, leading to premature corrosion and the breakdown of the metal components. Always ensure the gaskets are clean and free of debris before you tighten the bolts down.
When working with top-fixing hardware, the order of assembly is critical. Most kits feature an expansion nut that grips the underside of the hole as you turn the screw from above. If you don’t hold the base of the hinge steady during the first few turns, the nut may spin freely without grabbing the porcelain. Once the nut begins to bite, you can tighten the screw until you feel firm resistance.
Beginners often make the mistake of using pliers to force bolts into place when they don’t align perfectly. This often strips the threads or creates stress fractures in the porcelain. If the hardware doesn’t drop into the holes easily, stop and re-check your measurements or the hinge alignment. You should never force a fit that feels tight or misaligned, as plumbing fixture installation standards require precise alignment to prevent long-term damage to the toilet structure.
Troubleshooting Common Hardware Issues
| What you notice | What it usually means | What to do first |
|---|---|---|
| Seat shifts sideways | Loose mounting nuts | Tighten from underneath |
| Hinge covers pop off | Broken plastic clips | Replace the hinge cap |
| Rust stains on bowl | Corroded metal bolts | Replace with stainless steel |
| Seat won’t stay up | Weak hinge tension | Adjust the tension screw |
When your seat shifts, check the underside of the mounting bolts before buying a replacement. A simple turn with a deep-well socket wrench often resolves the issue in seconds. If the seat continues to slide after tightening, the rubber washers have likely compressed and lost their grip. Replace these gaskets immediately to prevent the metal hardware from scratching your porcelain.
If hinge covers pop off, don’t force them back with glue. Adhesive residue creates an uneven surface that prevents the clips from snapping into place properly. Instead, inspect the plastic tabs for hairline fractures. If a tab is missing, the cap will never sit flush. Order a manufacturer-specific replacement part rather than a universal kit, as hinge dimensions vary by as little as two millimeters.
Rust stains indicate that your current hardware is likely zinc-plated steel rather than grade 304 stainless. Zinc plating wears thin within two years in humid bathroom environments. When you swap these for stainless steel bolts, apply a small amount of plumber’s silicone grease to the threads. This prevents future corrosion and makes the hardware significantly easier to remove during your next deep clean.
If the seat falls while you’re cleaning, the tension screw is likely backed out too far. Locate the adjustment screw under the hinge cap. Turn it clockwise in quarter-turn increments until the seat holds a 45-degree angle without drifting. If the seat still slams shut, the internal spring mechanism has lost its tension. In this case, the entire hinge assembly requires a full replacement to restore functionality.
Rules for Safe Installation
You must follow the manufacturer’s torque limits if your seat includes soft-close features. These hinges contain internal hydraulic dampeners that are sensitive to excessive pressure. If you over-tighten the mounting screws, you can prevent the dampener from functioning, which leads to the seat slamming shut. Always refer to the manual included with your specific seat model for the recommended tightening sequence.
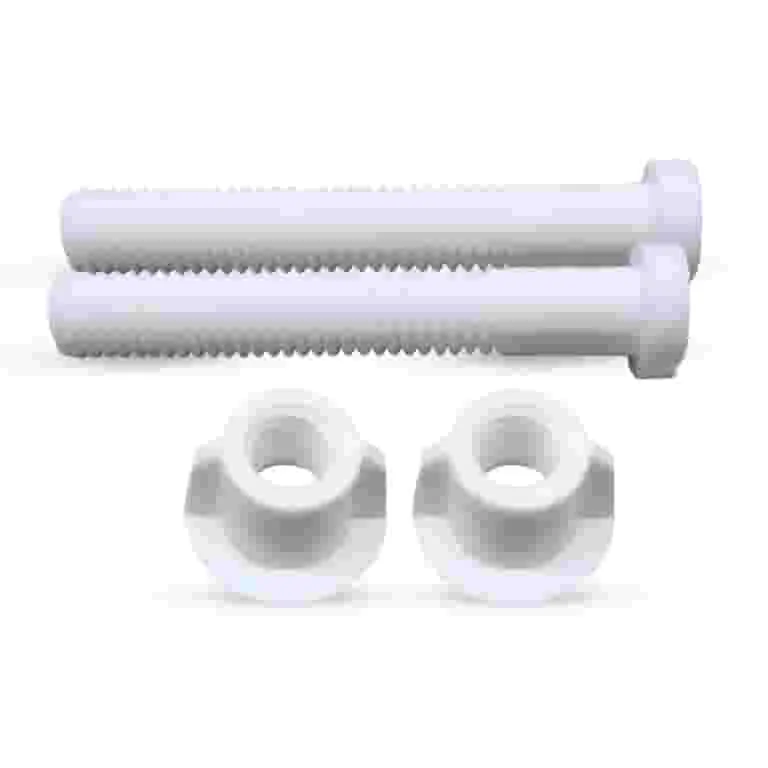
Use a hand screwdriver rather than a power drill to avoid stripping the plastic bolts or cracking the hinge housing. If the seat feels loose after reaching the specified torque, check the rubber washer placement. A washer seated unevenly will cause the bolt to tilt, creating a leverage point that snaps the hinge during normal use.
If your toilet bowl is damaged or has deep cracks near the mounting holes, stop the installation immediately. A cracked bowl is a significant safety risk because it can shatter under weight. In such cases, you should consult a professional plumber to assess the integrity of the porcelain before you attempt to attach a new seat. Never attempt to use epoxy or glue to fix a cracked mounting area, as these materials can’t support the weight of a user.
Check the mounting holes for hairline fractures by running a flashlight beam across the surface at a low angle. If the light catches a jagged line, the porcelain has failed. While a clean, straight line might indicate a manufacturing seam, any line that radiates outward from the bolt hole is a structural failure.
If you’re installing onto a bowl with hidden mounting holes, verify that the expansion bolts are fully seated before tightening. If the bolt spins without gripping, stop. Forcing a spin-tightening bolt will expand the anchor prematurely, causing the ceramic to burst from internal pressure. If the anchor fails to grab, use a replacement kit designed for your specific bowl depth.
Caring for Your Hardware
Once the installation is complete, perform a check of the hardware every 6 months. A simple wiggle test will reveal if the nuts have loosened due to daily use. If you notice any movement, tighten the bolts by a quarter turn. Overtightening is a common mistake that strips threads or cracks mounting plates, so stop the moment you feel firm resistance.
Avoid using harsh chemical cleaners on the hinges, as these can strip protective coatings and accelerate rust. Instead, wipe the hinges with a damp cloth and mild dish soap to keep them looking new. If you live in a coastal area with high salt content in the air, increase this cleaning frequency to once every 3 months. Salt acts as a catalyst for oxidation, and a quick wipe-down prevents permanent pitting on the surface.
If you have hard water, you may notice mineral buildup around the base of the hinges. This buildup can act as a grinding agent that wears down the plastic or metal finish over time. Gently scrape away the buildup with a soft plastic tool or a toothbrush, then rinse with water. Never use a metal blade or steel wool for this task, as these will leave microscopic scratches that invite corrosion.
If the hinge makes a creaking sound during operation, apply a single drop of silicone-based lubricant to the pivot point. Don’t use petroleum-based oils like WD-40, which attract dust and eventually gum up the mechanism. If the hinge remains stiff after lubrication, check for a misaligned mounting screw.
You can tell if the alignment is off by looking for uneven gaps between the hinge leaves. If the gap is wider at the top than the bottom, loosen the mounting screws slightly, adjust the position until the gaps are uniform, and retighten. Maintaining a clean hinge assembly is the best way to ensure the hardware lasts for years without needing a full replacement.
When to Consider a Full Seat Replacement
This approach works for most standard hardware issues, but it isn’t the right choice if the seat itself is cracked or warped. If the plastic of the seat is splitting, replacing the hinges won’t solve the instability. You should buy a completely new seat and lid assembly in this situation. Similarly, if your hinges are proprietary and the manufacturer no longer makes parts, it’s often more cost-effective to buy a new seat than to hunt for obsolete hardware.
Inspect the underside of the rim for hairline fractures before purchasing replacement parts. If you see a spiderweb pattern near the mounting bolts, the structural integrity is compromised beyond repair. Applying heavy-duty epoxy to these cracks is a common mistake that rarely lasts more than a few weeks. You’ll likely spend more on adhesives and labor than the cost of a basic replacement unit.
Check the mounting holes for signs of ovalization or stretching. If the holes have widened by more than a quarter-inch, the seat will shift under weight regardless of how tightly you secure the bolts. This constant movement eventually damages the porcelain of the bowl itself, which is a far more expensive repair.
If your current seat features a soft-close mechanism that has failed, compare the cost of a replacement damper kit against a new seat. If the kit exceeds forty percent of the price of a new unit, replace the entire assembly. You gain a fresh finish and a full warranty for a marginal increase in cost. Always prioritize a full replacement if the seat surface shows deep, permanent staining that standard abrasive cleaners can’t remove.
Frequently asked questions
Can I use universal hinges on any toilet?
No, you can’t use universal hinges on every toilet because hole spacing and bolt diameters vary by model. Most standard US toilets use a 5.5-inch hole spacing, but you must measure your specific bowl to ensure compatibility. If your toilet has non-standard holes or a decorative shroud that blocks access, you’ll need a specialized kit from the manufacturer. Always check your bowl’s dimensions before buying a replacement set.
How do I stop my toilet seat from sliding?
You can stop your toilet seat from sliding by tightening the mounting nuts and ensuring the rubber gaskets are correctly positioned. If the seat still slides, the holes in the bowl may be larger than the bolts, which requires a set of mounting spacers to fill the gap. Always verify that the hinges are centered on the bowl before you finish tightening the hardware, as even a small shift can cause instability.
Is it safe to tighten toilet seat bolts with pliers?
No, it isn’t safe to use pliers to tighten toilet seat bolts because you can easily overtighten them and crack the porcelain. You should use a screwdriver or a socket wrench to apply even, controlled pressure. If the bolts are made of plastic, pliers can strip the threads or snap the bolt head off entirely. Hand-tightening followed by a final quarter-turn with a tool is usually sufficient to secure the seat.
How long do toilet seat hinges last?
Toilet seat hinges typically last 5 to 10 years, depending on material quality and frequency of use. Stainless steel or high-quality plastic hinges generally outlast plated metal or cheap plastic alternatives. If hinges become loose or show signs of rust, it’s time to replace the hardware.
What happens if I overtighten the mounting bolts?
If you overtighten the mounting bolts, you risk cracking the porcelain toilet bowl, which is a permanent and expensive repair. The porcelain is brittle and can’t withstand the high pressure of a metal bolt tightened with heavy tools. If you hear a creaking sound or feel the bolt stop abruptly, stop tightening immediately. It’s always better to have a slightly loose seat that you can tighten later than a cracked bowl.
Conclusion
Upgrading your bathroom hardware is a simple project that makes a big difference in your daily comfort. Once you’ve secured your new parts, you won’t have to deal with that annoying shifting seat anymore. Take a quick look at your current setup today, and you’ll be ready to enjoy a sturdier, quieter experience tomorrow.