
You can program overhead door openers by pressing the “Learn” button on the motor head unit and then holding the button on your remote for three seconds. This simple process usually takes less than five minutes to complete for most modern wall-mounted or ceiling-mounted garage motors. If you have an older model with physical switches, you’ll need to match the code inside the remote to the code inside the motor unit to establish a secure connection.
Prepare to program your overhead door
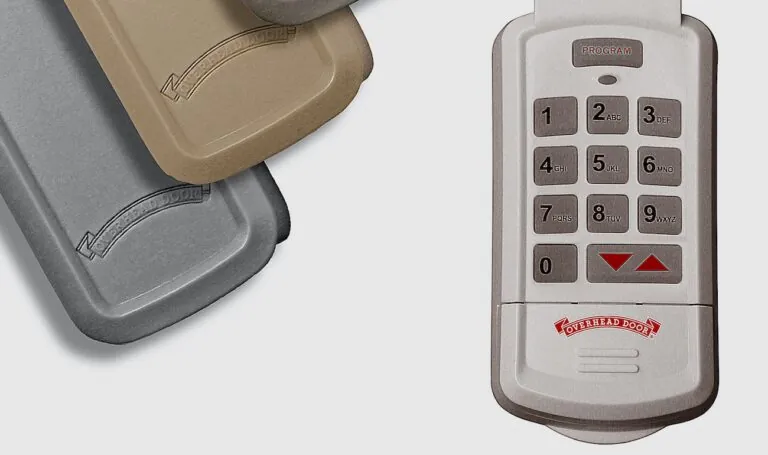
To complete this task successfully, you need to have a few specific items ready before you begin the process. Having these at hand prevents unnecessary trips up and down your ladder while the unit is in its active learning mode.
A sturdy, stable ladder that reaches your motor unit safely. Ensure the ladder is rated for at least 250 pounds to provide a stable platform for the physical pressure you’ll apply to the motor housing.
Your handheld garage door remote control. If you have multiple remotes, bring all of them to the ladder. You must program every remote during a single session, as the motor unit often wipes the memory of previous devices when it enters learning mode.
A flat-head screwdriver or a small paperclip for units requiring a manual reset. Use the paperclip for recessed “Learn” buttons, as a screwdriver may be too thick to trigger the internal switch without damaging the plastic casing.
The owner’s manual for your specific garage door opener model. Keep this open to the wiring diagram page. If the motor flashes a specific sequence of lights, the manual acts as your decoder ring to identify if the issue is a failed sensor or a simple frequency mismatch.
Fresh batteries installed in your remote control. Weak batteries are the leading cause of failed programming attempts. If the LED on your remote glows dim or flickers when pressed, replace the batteries before starting.
A flashlight if your garage lighting is dim near the ceiling. You need to see the exact color of the “Learn” button, as some models use different button colors to indicate incompatible security protocols.
If you lose your remote, you can buy a universal replacement that works with most major brands. Verify its compatibility with your motor’s frequency first. Check the specific frequency requirements for your system by consulting your manufacturer’s support resources for guidance on your hardware.
If you aren’t comfortable working on a ladder, hire a professional technician to perform the setup. A fall from a standard garage ceiling height of eight feet can result in severe injury. If you feel unsteady or the ladder wobbles on your garage floor, stop immediately and call for assistance.
Steps to Sync Your Remote
Follow these steps to link your remote to your garage motor unit. These instructions assume you’re using a standard rolling-code system found in most homes built after 1996.
- Locate the “Learn” button on your motor housing, which is often a small, colored square button located near the antenna wire.
- Press and release the “Learn” button quickly; you’ll see an LED indicator light turn on or start blinking, signaling that the unit is ready to accept a new code.
- Hold the desired button on your remote control for three seconds while the indicator light is active.
- Release the button once the motor’s main light flashes once or you hear two quick clicks, which confirms the signal was accepted.
- Test the remote by pressing the button again to ensure the door moves smoothly in the intended direction.
Tip: If the door doesn’t move on the first try, wait 30 seconds for the unit to exit learn mode and restart the process from step one.
Careful: Never stand directly under the door while testing the remote, as an incorrectly programmed unit might close the door unexpectedly.
Adjustment Factors for Different Systems
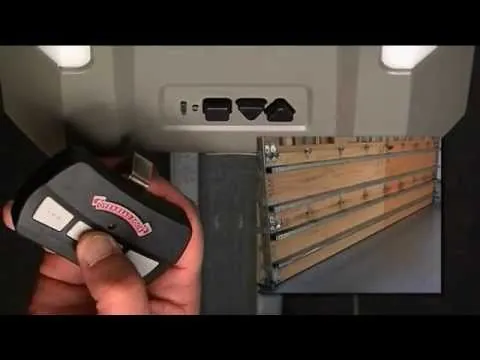
The time and effort required to sync your system vary based on the age and security features of your hardware. Newer systems often use rolling codes for security, while older models require physical switch settings.
| System Type | Setup Time | Difficulty | Watch For |
|---|---|---|---|
| Rolling Code | 2 Minutes | Very Low | Flashing LED |
| DIP Switch | 10 Minutes | Moderate | Matching Pins |
| Wi-Fi Enabled | 5 Minutes | Low | App Syncing |
| External Receiver | 15 Minutes | High | Wiring Errors |
If your remote has a row of small, numbered switches inside the battery compartment, you’re working with a DIP switch system. You must match the pattern on the new remote to the exact configuration found on the motor unit. A single misaligned switch will prevent the signal from reaching the receiver, costing you time in troubleshooting.
For rolling code systems, the motor unit typically has a “Learn” button. Press this button once and wait for the indicator light to glow steadily. If the light flashes rapidly during this process, the system has timed out, and you must restart the sequence from the beginning.
Always start with one remote to confirm the system is working before adding secondary devices. If you’re syncing more than five remotes, check your motor’s manual for a memory limit. Adding too many devices at once can lead to signal interference if the memory bank becomes full. When in doubt, clear the motor’s memory entirely before pairing your primary remote to ensure a clean connection.
Confirming a Successful Connection
A successful program means the door responds immediately to your remote without any hesitation or grinding noises. If you press the button and the motor hums but the door doesn’t move, the remote is likely paired correctly, but the door may be locked or obstructed. Check the manual release cord hanging from the trolley; if it’s pulled, the motor will run while the door remains stationary.
Poor performance often stems from low battery voltage in the remote, which weakens the signal strength. Always replace old batteries if the range of your remote feels shorter than it was previously. A common mistake is assuming the remote is broken when the actual culprit is a dying battery that can still trigger the signal at close range but fails at the end of the driveway.
If the door moves in the wrong direction, you may have accidentally reversed the travel limits. This requires a separate calibration process found in your manufacturer’s guide. If your system uses a wall-mounted control panel, look for a “learn” button that flashes in a specific sequence to confirm pairing.
If the light stays solid for five seconds after a button press, the connection is stable. If it blinks rapidly, the signal is intermittent and will likely fail during your next attempt.
Safety Standards and Maintenance
The American National Standards Institute (ANSI) requires that all residential garage door openers include an automatic reversal system to prevent injury. Test this feature monthly by placing a two-by-four piece of lumber flat on the floor in the center of the door’s path. If the door fails to reverse immediately upon contact, adjust the down-force sensitivity dial on the motor housing until it reacts reliably.
Ensure that your safety sensors are aligned and free of debris after you finish programming, as the motor won’t operate if the infrared beam is blocked. A blinking LED light on the sensor unit indicates a misalignment; adjust the bracket until the light remains solid.
Clear away any loose wires or tools from the tracks, and record the date of your successful programming in your maintenance log. Most systems remain programmed until the memory is manually cleared, but you should check the connection every six months. If you notice the door hesitating or stuttering during operation, lubricate the metal rollers and hinges with a silicone-based spray rather than grease, which attracts grit.
If your motor requires specific safety certifications, consult your local building department for compliance requirements. Always prioritize the manufacturer’s specific voltage ratings to avoid frying the circuit board during a power surge.
Alternative Methods for Synchronization
Using the Wall Console
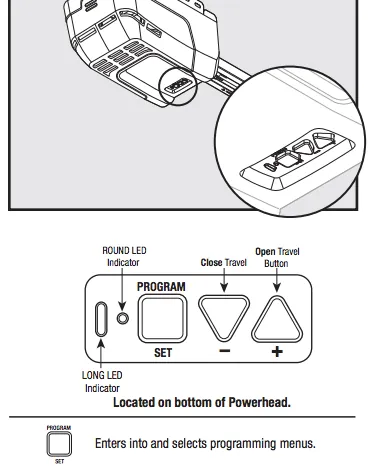
Many modern wall-mounted panels have a “Program” button that skips the need to climb a ladder. You simply press the button on the wall unit to put the motor into learn mode, then press the remote button. This is much faster but only works if your wall console is a compatible smart model.
Smartphone Integration
If your motor supports Wi-Fi, you can use a manufacturer-specific app to add remotes. This method allows you to manage all connected devices through your phone. It’s very convenient, but it requires you to have your Wi-Fi password and motor serial number ready during the setup.
Universal Bridge Kits
If your remote is too old to be compatible with your current motor, you can install a universal receiver kit. This involves wiring a small box to your motor terminals. It adds a new radio frequency to your old system, allowing you to use modern remotes with outdated motors.
Frequently asked questions
How long does it take to program an overhead door remote?
It takes about two to five minutes to program a standard remote when you have the ladder and remote ready. If you have an older system with dip switches, allow for ten minutes to match the internal pin settings correctly.
Is it safe to program an overhead door remote myself?
Yes, it’s safe as long as you use a stable ladder and keep your hands clear of the chain or belt drive. If you feel unsteady on a ladder, have a helper hold it or hire a professional to avoid the risk of falling.
What happens if the garage door doesn’t move after programming?
Check if the “Lock” button on your wall console is active, as this disables all remote signals for security. If the lock is off, verify that the safety sensors at the bottom of the door are aligned and that no objects are blocking the path.
Can I program a remote without a ladder?
You can only skip the ladder if your wall-mounted control panel has a “Learn” or “Program” button on it. If your wall unit is a simple push-button model, you must access the motor head unit directly to press the learn button.
How often should I reprogram my garage door?
You shouldn’t need to reprogram your door unless you’re adding a new remote or replacing the motor’s logic board. If your remotes stop working suddenly, it’s usually a sign of dead batteries rather than a loss of programming.
Conclusion
Once your remote works perfectly, test the safety sensors to ensure the door reverses if something blocks its path. It’s a smart way to keep your family safe. If you’re still having trouble, don’t hesitate to check the manual or call a local technician who’ll be happy to help you out.
