
You can fix most issues with your device by checking the power supply, the safety sensors, and the remote control batteries, as liftmaster garage door openers troubleshooting is often a matter of verifying simple connections. If your door stops suddenly or refuses to close, the most common cause is a misaligned safety sensor or an obstruction in the path of the beam. Before calling a professional, ensure the wall button and the main motor unit have a steady flow of electricity.
Fixing a LiftMaster garage door that won’t move
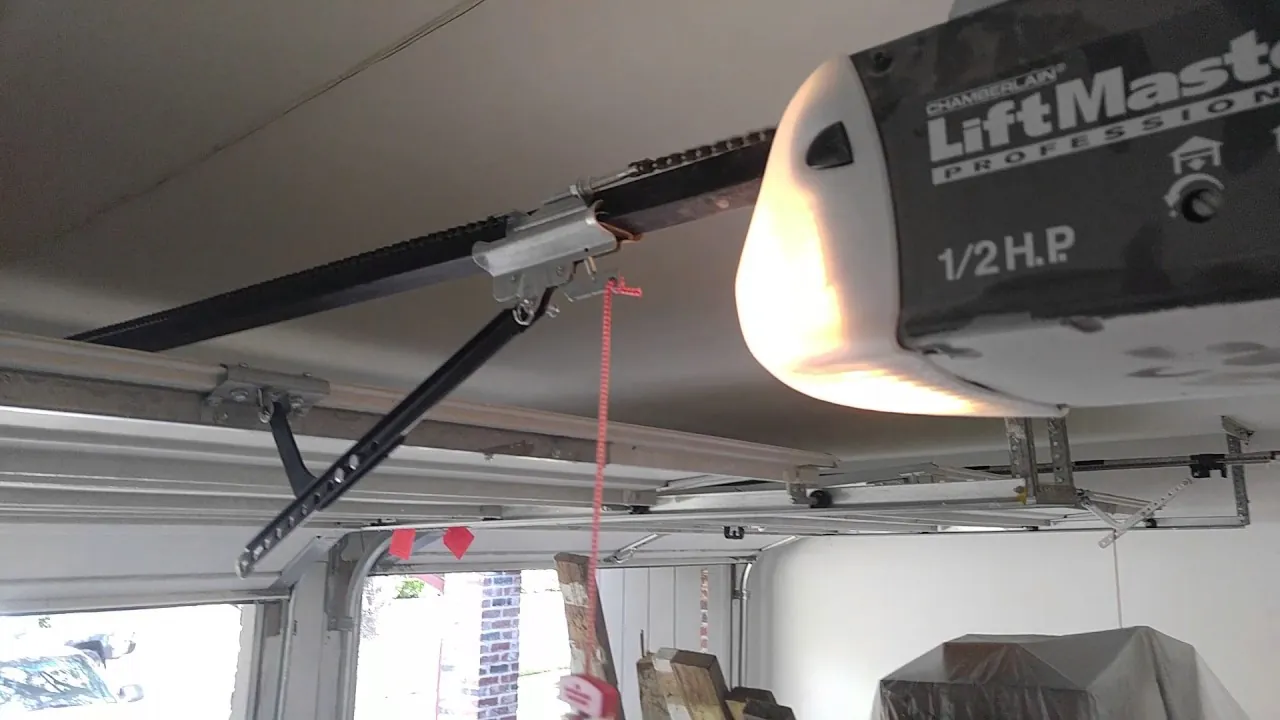
When your garage door stops working, it’s usually because the system’s safety features have been triggered by an external factor. The most frequent cause is a blocked or misaligned infrared sensor. These small units, located near the floor on both sides of the door frame, must “see” each other to allow the door to close. If they’re bumped, dirty, or blocked by debris, the system defaults to an open position to prevent accidents.
Another cause is a loss of power or a signal interference issue. If you notice the lights on the motor unit are flashing, the system is trying to communicate a specific error code. These codes often relate to the limit settings or travel distance of the door. When the motor senses that the door isn’t reaching its expected closed position, it may reverse automatically to protect the structure.
Finally, check the remote control and the wall-mounted keypad. If these aren’t responding, the issue is likely a drained battery or a lost connection between the remote and the receiver. Always check the LiftMaster support resources to see the specific flash patterns associated with your model, as these signals provide the most accurate diagnostic information for your particular unit.
Safety: Inside a mains-powered machine, the parts behind the outer cover can hold a dangerous electrical charge even after it has been unplugged — that’s why they sit behind a cover. Opening the housing, or testing or replacing anything behind it, is a job for a qualified technician, never a home repair.
Check the safety sensors first
If your door reverses immediately after starting to close, the safety sensors are the first place to look. These sensors require a clear line of sight to function. You can confirm they’re aligned by looking at the small LED lights on each sensor unit. Usually, one light will be solid green or amber when the connection is secure. If the light is blinking or off, the sensors are misaligned or the wiring is damaged.
To fix this, gently adjust the angle of the sensors until the indicator lights remain solid. Don’t tighten the mounting brackets too much, as this can make the sensors move out of place again when the door vibrates during operation. If the lenses are covered in dust or spiderwebs, wipe them off with a soft, dry cloth.
This fix is for homeowners who can safely reach the sensor brackets near the floor. If you find frayed wires or broken internal components, stop immediately and contact a qualified garage door technician. Working with electrical components or the high-tension springs of a garage door system carries a risk of injury or property damage, so leave internal motor repairs to the professionals.
Reset the remote and wall controls
When the motor unit is powered but the door doesn’t respond, verify the signal connection. Start by replacing the remote batteries with fresh ones. If the door remains unresponsive, the remote may have lost its programming link. Re-pair the device by pressing the “Learn” button on the motor unit, then clicking the remote button within 30 seconds.
Check the wall-mounted control panel for an active “Lock” feature. Many models include a button that disables all external remote signals. If the indicator light on the wall panel is flashing, the lock is engaged. Toggling this off restores functionality immediately. This simple oversight is the most common cause of service calls, often costing homeowners unnecessary technician fees for a feature they accidentally activated.
Test every remote you own. If none function, the receiver logic board inside the motor unit is likely failing. If only one remote fails while others work, the issue is isolated to that specific transmitter. In that case, check for physical damage to the internal battery contacts or a stuck button housing.
Don’t attempt to open the motor housing to inspect the circuit board yourself. You risk electric shock from the capacitor, and you’ll almost certainly void your manufacturer warranty. If the logic board is the culprit, contact the manufacturer to confirm if the part is covered under your existing coverage period. Always verify the model number on the motor casing before ordering replacement components to ensure compatibility with your specific frequency.
Test the door balance and limits
If the door moves slowly or makes loud grinding noises, the issue is often mechanical friction rather than an electrical fault. A healthy door must be easy to lift by hand once you pull the emergency release cord. If the door feels heavy, drags against the tracks, or falls shut the moment you let go, the springs have lost their tension.
Only attempt to operate the door manually if you can lift at least 40 pounds comfortably. If the door feels significantly heavier, stop immediately. Don’t attempt to adjust springs or cables yourself. These components are under extreme tension and can cause severe injury if they snap. Always hire a professional for spring work to avoid a catastrophic release of energy.
If the door remains balanced but stops short of the floor, the travel limits need a quick recalibration. Locate the limit adjustment screws on the side of your motor unit. Turn the “down” screw in small quarter-turn increments to increase the travel distance. Test the door after every single turn.
If your unit uses digital settings, look for the “set” button on the motor housing. Hold it until the indicator light flashes, then move the door to the desired closed position. If you set these limits too low, the door will strike the floor with enough force to damage the bottom seal or bend the panel. If the limit is too high, you leave a gap for pests to enter.
Common mistakes to avoid
Don’t use grease on the tracks. Lubricants attract grit and metallic debris, creating a paste that causes the door to bind or shudder during operation. If the door moves unevenly, clean the tracks with a dry cloth instead.
Avoid pulling the emergency release cord while the door is fully open. The door’s weight is greatest at this position, and the sudden loss of tension can cause the carriage to slam into the header or the door to collapse entirely. Only engage the release when the door is closed and resting on the floor.
Never hold the wall button to force a door shut. This action overrides the infrared safety sensors, turning the door into a guillotine that won’t stop for obstacles. If the sensors are misaligned, the light will blink; realign the eyes until the light stays solid rather than bypassing the safety circuit.
Don’t replace internal fuses. A blown fuse signals a short circuit in the logic board. Replacing it without fixing the underlying fault risks an electrical fire. If the unit is dead, unplug it and call a technician.
Keep the system running smoothly
The best way to prevent future issues is to perform a simple monthly inspection of your garage door hardware. You should monitor the state of the cables, rollers, and sensors to ensure the system remains reliable.
| If you’re doing this | Do this instead | Why |
|---|---|---|
| Greasing the tracks | Clean tracks with a dry cloth | Grease traps grit that ruins movement |
| Forcing the button | Check for sensor obstructions | Forced closing bypasses safety features |
| Ignoring slow movement | Check door balance manually | Unbalanced doors strain the motor |
| Using old batteries | Replace with fresh alkaline cells | Low voltage causes signal failure |
Test the door balance by disconnecting the opener and lifting the door halfway by hand. If it drifts downward or snaps upward, your springs are losing tension. A spring that’s even one turn off will eventually burn out your motor’s gears.
Never tighten the bolts on the bottom bracket while the door is under tension. This mistake can cause the cable to snap with enough force to shatter nearby glass or cause injury. If you notice frayed wires at the cable ends, replace the entire set immediately. A single broken strand indicates the cable is compromised and must be replaced immediately.
Related guides
- What Is a Flash Tank and How Does It Work: A Simple Guide
- Genie Silentmax 1000 Not Working: Simple Fixes for Your Opener
Frequently asked questions
How long do garage door openers last?
Most units last between 10 and 15 years, depending on usage and maintenance. If your system is over 15 years old and begins to fail, replacing the unit is often more cost-effective than frequent repairs. Note that high-frequency use will significantly shorten the lifespan of your door.
Is it safe to fix a garage door opener myself?
You can safely perform basic maintenance like cleaning sensors or changing remote batteries, but you should never attempt to service the springs or the motor’s internal wiring. These parts are under high tension or carry dangerous electrical currents. If your issue involves the springs, cables, or the internal circuitry of the motor housing, you must contact a qualified garage door technician to handle the repairs and ensure the safety of your home.
Why is my garage door light flashing?
A flashing light indicates a fault in the safety system, such as an obstruction or sensor misalignment. Count the flashes to identify the specific error code in your owner’s manual. Once you clear the obstruction or realign the sensors, the light should return to normal operation.
How do I know if my garage door sensors are bad?
If the sensor LED remains off after cleaning the lens and checking wiring, the sensor is likely faulty. You can confirm this by swapping wires from the working sensor to the non-working one to test for power. Always verify that the power supply is active before purchasing a replacement.
What happens if I pull the emergency release?
Pulling the red emergency release cord disconnects the door from the motor for manual operation during power outages or motor failure. To reconnect, move the door until the trolley clicks back into the drive. Always perform this while the door is closed to prevent it from dropping suddenly.
Conclusion
Regular maintenance is the most effective way to keep your system reliable. By keeping the sensors clean and the path clear, you avoid the most common causes of system failure and ensure your garage remains secure and functional throughout the year.
