
Yes, you can bake cookies in a camping oven as long as you account for the lack of precise temperature control and the high risk of hot spots. Because most portable ovens lack internal thermostats, you must monitor the heat manually to ensure the dough bakes through without burning the bottom. Your success depends on your ability to manage the flame intensity and your choice of baking surface, which helps distribute heat more evenly than a thin metal tray.
Different ovens require different techniques based on their design. A stovetop folding oven, which sits directly on a flame, behaves very differently than a Dutch oven placed in hot coals. This guide covers how to manage heat, choose the right equipment, and avoid common mistakes that lead to burnt or raw centers.
Can I bake cookies in a camping oven? Top models
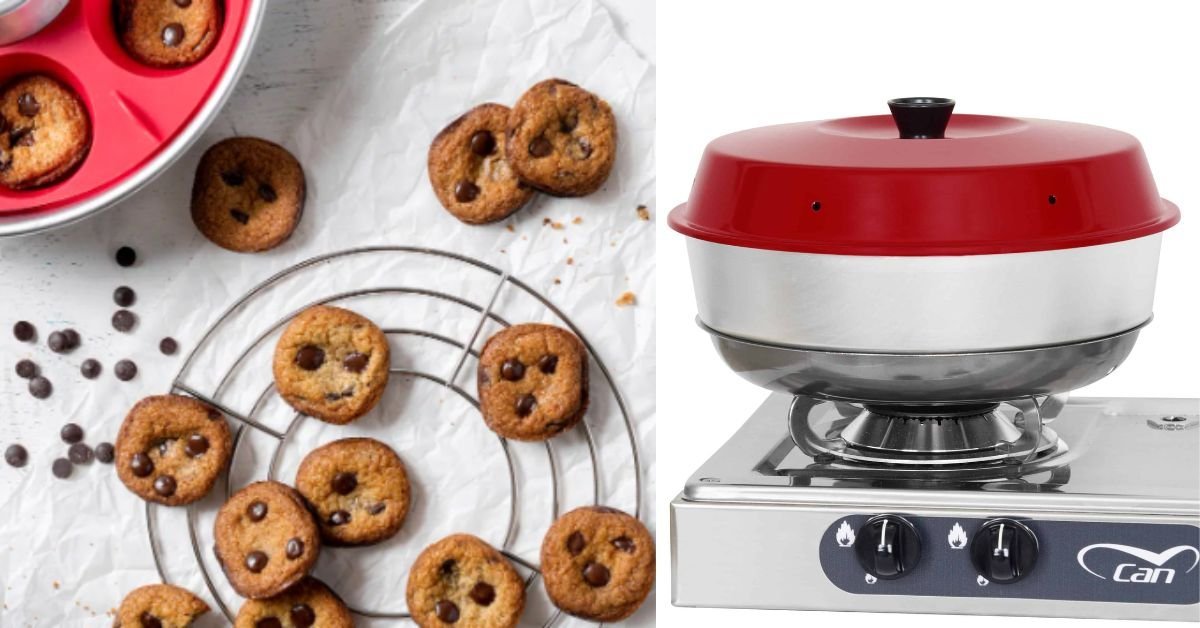
Baking in the wild is best suited for campers who prioritize fresh treats over gear weight. You likely already carry a portable stove or a sturdy cast-iron pot, and you have the patience to sit by your heat source for twenty minutes to ensure a steady burn. This activity isn’t for someone trying to save fuel or those who need a “set and forget” experience, as camping stoves don’t offer the digital precision of a home range.
We assume you’re using a standard propane or butane camping stove with a stable, flat grate. If you’re using an open campfire, the variables increase, and you must rely entirely on your ability to judge heat by hand. This article focuses on the controlled environment of a stove-top oven or a Dutch oven setup, as these provide the most consistent results for baked goods.
Factors that change your results
The heat source is the most important factor in your success. A propane stove provides a constant, adjustable flame, while wood fires fluctuate wildly as logs burn down. You must calibrate your flame to a low setting before placing your oven on the grate, as high heat will scorch the bottom of your cookies before the centers set.
The thickness of your baking pan matters significantly. A thin, disposable aluminum pan will conduct heat too quickly, creating dark, bitter spots on the bottom of the cookie. If you have a heavy-duty steel or cast-iron sheet, use it; these materials absorb and radiate heat gradually, which mimics the performance of a home oven.
Environmental conditions, specifically wind, will steal heat from your oven. If you don’t use a wind screen, the external air will drop the temperature inside the oven significantly. This forces you to turn your flame higher, which increases the risk of burning the bottom. Always shield your stove from the breeze to keep the internal temperature stable.
The amount of dough per batch changes the cooking time. A crowded oven prevents air circulation, leading to uneven baking. If you pack too many cookies into a small space, the ones near the edges will finish long before the center ones. It’s better to bake smaller, well-spaced batches to ensure consistent texture.
Baking your cookies outdoors
- Preheat your camping oven on the lowest setting for 5 to 10 minutes before adding the dough.
- Prepare your cookie dough into small, uniform balls, keeping them about 1 inch smaller than you would at home.
- Place the dough on a heavy-gauge baking sheet or a piece of parchment paper to prevent direct contact with the hot metal bottom.
- Set the sheet inside the oven, centering it on the rack to avoid direct flame hotspots.
- Close the lid and maintain a low, steady flame; if your oven has a thermometer, aim for 350°F, but don’t rely on it as the only indicator.
- Rotate your baking sheet 180 degrees halfway through the estimated time to compensate for uneven heat distribution.
- Check for doneness by looking for golden-brown edges and a set top, as these are visual signs of a finished cookie.
- Remove the tray immediately once the edges are brown, as the residual heat in a camping oven can continue to cook the bottom.
The most critical judgment call is knowing when to pull the tray out. Because camping ovens are small, the heat is intense and concentrated near the heat source. If you wait for the center to look perfectly dry, the bottom will likely be dark or burnt.
Variations in baking methods
| Situation | Method | Effort level | Watch for |
|---|---|---|---|
| Stovetop oven | Low flame, rotate often | Moderate | Burnt bottoms |
| Dutch oven | Coals on top and bottom | High | Ash contamination |
| Collapsible oven | Use heat diffuser plate | Low | Wind gusts |
| Cast iron skillet | Direct low heat | Low | Uneven browning |
| Solar oven | Full sun alignment | High | Cloud cover |
When using a stovetop oven, place a secondary metal rack or a layer of foil under your pan. This creates an essential air gap that prevents the direct flame from scorching the base before the center sets.
For Dutch ovens, maintain a two-to-one ratio of coals on the lid versus the base. This mimics an oven’s top-down heating element. If you see ash near the rim, wipe the lid edge with a damp cloth before lifting to keep grit out of your food.
Collapsible ovens lose heat rapidly in breezy conditions. If the ambient temperature drops below 50 degrees Fahrenheit, wrap the exterior in a reflective thermal blanket. This simple addition cuts fuel consumption by nearly 30 percent.
Cast iron requires a preheat period of at least ten minutes on the lowest setting. If the edges brown while the middle remains raw, your heat source is too concentrated. Move the skillet slightly off-center to distribute the thermal energy more evenly.
Solar ovens demand precise tracking. If your shadow shifts more than six inches from the base, your internal temperature will plummet. If you can’t maintain a direct angle, switch to a stovetop method immediately to avoid wasting ingredients on an under-baked result.
Achieving a quality bake
Controlling the heat source
Consistency is the primary difference between a professional-looking cookie and a charred mess. Experienced campers use a heat diffuser or a secondary metal plate between the flame and the baking pan. This simple barrier prevents the direct flame from hitting the bottom of the pan, which is the most common cause of failure. If you notice the smell of burning sugar within the first three minutes, turn your flame down immediately or move the pan to a higher rack position.
Managing moisture and airflow
Camping ovens often trap too much moisture, which can result in soft or doughy cookies rather than crispy ones. If you find your cookies aren’t browning on top, leave the oven lid cracked for the final two minutes of baking to let steam escape. Proper food safety is also essential; always check that your ingredients are handled safely, as USDA food safety guidelines remind us that raw flour and eggs can carry bacteria that require thorough cooking to neutralize.
Troubleshooting common issues
| What you notice | What it usually means | What to do first | How to stop it |
|---|---|---|---|
| Burnt bottom | Heat too direct | Move to higher rack | Use diffuser plate |
| Raw center | Oven too crowded | Reduce batch size | Space cookies wider |
| Pale top | Lack of reflected heat | Move to center | Use reflective lid |
| Dry edges | Overcooked | Reduce time | Pull out sooner |
| Uneven shape | Hot spots | Rotate pan | Use thicker tray |
If the bottom burns while the top remains raw, your heating element is likely too close to the rack. Move the tray up at least four inches to allow air circulation. If you lack space, place a second empty baking sheet on the rack directly below your cookies. This acts as a heat shield.
Raw centers often occur when the oven temperature is too high, causing the exterior to set before the middle cooks. Drop your temperature by 25 degrees Fahrenheit and extend the baking time by three minutes. If you’re baking multiple sheets at once, rotate them between the top and bottom racks halfway through the cycle.
Pale tops indicate the oven isn’t radiating enough heat downward. This forces hot air to circulate, browning the surface evenly. If the problem persists, tent the pan loosely with aluminum foil for the first half of the bake, then remove it to finish.
Dry edges are a sign of moisture loss. If your recipe calls for butter, ensure it’s room temperature rather than melted. Melted fat incorporates differently, often leading to a crumbly texture that dries out rapidly. Always pull the tray when the center looks slightly underdone; residual heat will finish the process while the cookies cool on the pan.
Regulatory and safety standards
Always check the manufacturer’s manual for your specific camping oven regarding maximum temperature ratings. Most portable ovens aren’t designed for the high-intensity heat that domestic ovens handle, and exceeding the recommended flame size can damage the metal housing or the hinges.
In many national parks, the use of stoves is regulated by fire danger levels. Check the park’s official website or visitor center before starting your stove. If a fire ban is in effect, it often includes all open flames, even those inside a portable camping oven.
A common mistake is assuming a contained flame is exempt from bans. If the local level is “High” or “Extreme,” even enclosed units are usually prohibited. You can verify your current status by checking the regional Interagency Fire Center map.
Never leave a lit stove unattended. A gust of wind can easily tip a lightweight unit or blow out the flame, creating a gas leak hazard. Always position your stove on a flat, non-combustible surface at least five feet away from nylon tents or dry brush to mitigate these risks.
Real costs of outdoor baking
Baking cookies in a camping oven costs more in fuel and time than it does in ingredients. A standard 16-ounce propane canister lasts about 2 to 4 hours on medium-high heat, but baking requires a low, steady flame that consumes fuel more slowly. The real expense is the time spent managing the flame and the effort of cleaning sticky pans without a kitchen sink. If you’re on a long trip, fuel efficiency becomes a concern, and you may find that baking uses up your reserves faster than boiling water for meals. Compare the cost of a pre-mixed cookie dough packet against the cost of fuel for your trip to see if the trade-off is worth it for your budget.
Long-term care for gear
After baking, ensure your oven has completely cooled before attempting to clean it. Grease and sugar residue can become permanent if they’re heated repeatedly on the metal surface. Use a mild soap and a non-abrasive sponge to wipe the interior, as harsh scrubbing can damage the finish or the reflective coating inside the oven.
If you used a cast-iron pan, wipe it clean and apply a thin layer of cooking oil to prevent rust while in storage. A common mistake is using olive oil, which turns rancid quickly; instead, use a high-smoke-point oil like grapeseed or flaxseed. If the surface feels sticky, you have used too much oil. Wipe it down until the metal looks matte, not glossy, before putting it away.
Store your oven in a dry, padded bag to prevent the delicate metal panels from denting or warping during transport. If you notice the door sits unevenly, check the hinges for debris before forcing it shut. A simple cleaning of the hinge track often prevents permanent structural failure.
When to avoid this method
Baking isn’t the right choice if you’re in a high-wind environment or if you’re using a lightweight, ultralight stove that lacks a stable base. These stoves are designed for boiling water, not supporting the weight and heat requirements of an oven, and they can easily tip over.
If your stove’s pot support diameter is less than four inches, don’t attempt to balance a baking kit on top. The center of gravity will be too high, leading to a spill that wastes fuel and ruins your meal.
If you’re in a group where fuel weight is strictly limited, skip the oven entirely and use a no-bake recipe. Carrying an extra canister just to sustain a thirty-minute bake is rarely worth the weight penalty compared to the caloric density of pre-packaged snacks.
Attempting to force a bake in extreme weather conditions usually leads to wasted fuel and ruined ingredients.
Choose an alternative like cold-prep desserts if the forecast shows heavy wind or rain. If your fuel canister feels cold to the touch before you even ignite it, the pressure is likely too low for a consistent bake. In that case, switch to a simple boil-in-bag meal instead.
Frequently asked questions
Can I use a regular baking sheet?
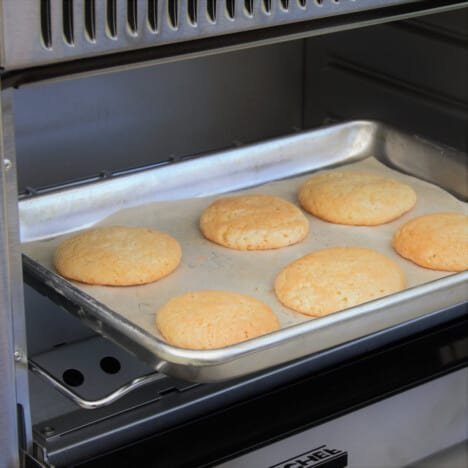
No, a standard thin baking sheet will likely burn your cookies because it conducts heat too quickly. You should use a thick, heavy-duty pan or a cast-iron skillet to help distribute the heat evenly. If you only have a thin pan, place a secondary metal tray or a heat diffuser underneath it to act as a buffer.
How long does it take to bake?
About 15 to 20 minutes is the average time needed for a batch of cookies in a camping oven. This assumes a stable, low flame and a preheated oven. Start checking your cookies at the 10-minute mark, as camping ovens vary by model and can fluctuate in temperature based on the wind.
Is it safe to bake in a camping oven?
Yes, it’s safe as long as you follow the manufacturer’s ventilation and fire safety guidelines for your specific stove. Always operate the oven on a flat, stable surface away from flammable brush. Ensure that you’re using the equipment in a well-ventilated area to prevent the buildup of carbon monoxide.
Why are my cookies raw in the middle?
Your heat is likely set too high, which cooks the exterior before the heat can penetrate the center. Lower the flame and increase the baking time to allow the heat to travel through the dough. Ensure you aren’t overcrowding the pan, as this prevents the necessary hot air circulation.
How do I stop the bottom from burning?
Use a heat diffuser plate or a secondary metal layer between the flame and your baking sheet. This creates an air gap that softens the direct heat. If you don’t have a diffuser, place your baking sheet on the highest rack position possible to move it away from the flame.
Can I bake cookies on a campfire?
Yes, but you must use a Dutch oven and rely on hot coals rather than direct flames. Place the pot on a bed of coals and put additional coals on the lid to create an even, top-down heating effect. This requires constant monitoring to ensure you don’t add too many coals at once.
Bake cookies, in short
Start by setting your stove to the lowest possible flame to preheat the oven. Once the oven feels warm to the touch, place your cookies inside and keep a close watch for the first sign of browning. If you notice the edges darkening too fast, turn your heat down further or move the rack up, as a perfectly golden cookie is the sign of a successful bake.
Related guides