
There are three main types of tongue and groove joints explained by their function and profile: standard, V-groove, and beaded. These joints use a protruding tongue on one board that fits into a matching groove on the edge of another. This guide covers how these profiles differ, how to cut them safely, and the specific applications where each type excels.
Different types of tongue and groove joints
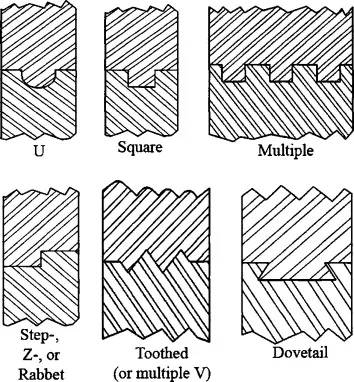
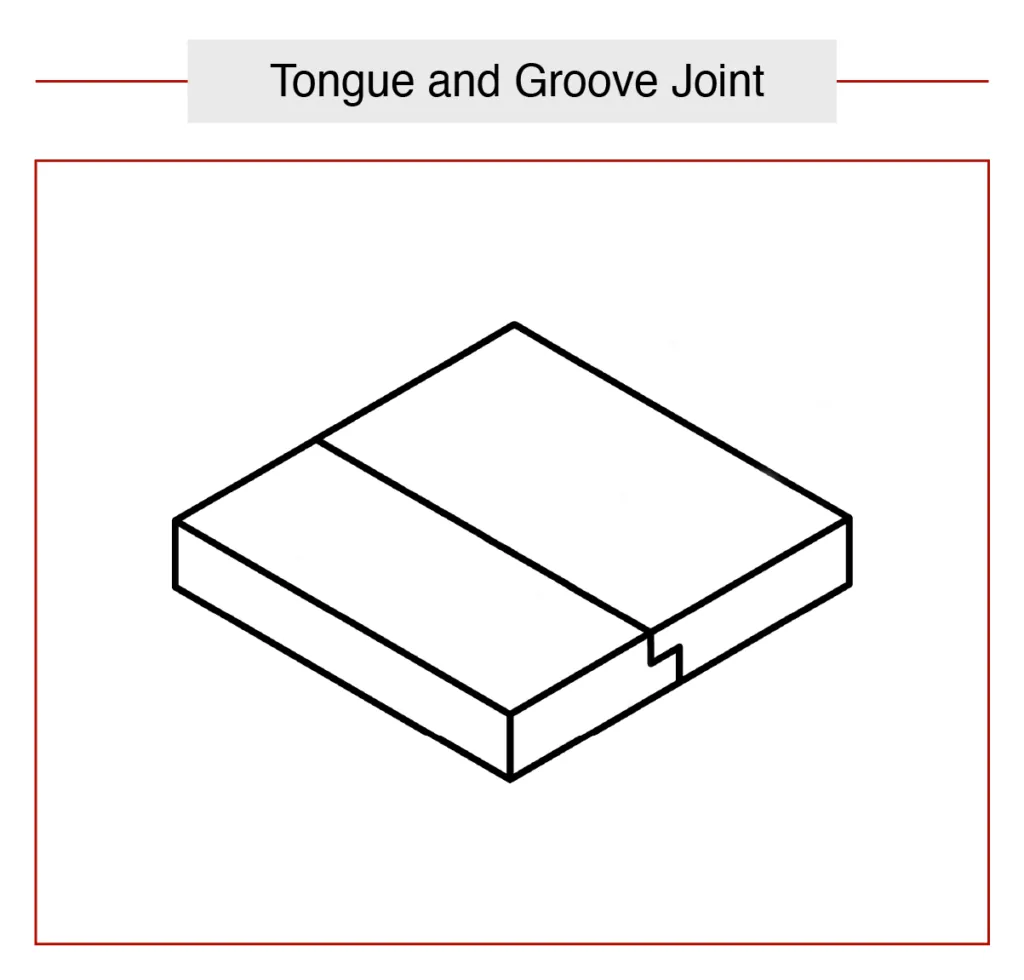
A tongue and groove joint is a mechanical connection where one edge of a board has a projection and the other has a slot. It’s primarily used in flooring, wall paneling, and tabletops to keep boards level while allowing for natural wood expansion. Many beginners assume this joint provides structural support, but it’s actually a system for alignment and surface flatness.
The mechanism works by locking the boards together to prevent cupping. If the wood is too wet, the joint will bind; if it’s too dry, it will gap. Always check the moisture content of your lumber before you start milling.
Milling boards for tight fit
To create these joints, you need a table saw or a router table. Follow these steps to ensure a professional result that stays flush under pressure.
- Align the fence so the blade cuts a centered groove.
- Run all boards through the saw to create the groove on one edge.
- Adjust the blade to cut the tongue, ensuring it’s slightly thinner than the groove.
- Test the fit on a scrap piece; it should slide together with light hand pressure.
- Use a featherboard to keep the stock tight against the fence during every pass.
The most important judgement call is the “fit tolerance.” If the tongue is too tight, the board will split when you drive it home. If it’s too loose, the floor will squeak. If you lack experience with power tools, consult a local cabinet shop or woodshop instructor before operating a table saw to avoid serious injury.
Comparison of joint variations
Choosing the right profile changes the look and durability of your project. This table breaks down the most common styles you’ll encounter in woodworking.
| Situation | What to use | What to watch for | | :— | :— | :— | :— | | Standard flooring | Square-edged tongue | Tightness of fit | | Decorative walls | V-groove | Depth of the bevel | | Formal paneling | Beaded tongue | Symmetry of bead | | Exterior siding | Long-tongue | Water drainage path | | Softwood boards | Oversized tongue | Material splitting |
Achieving high-quality results
Experienced woodworkers focus on the “registration” of the board. They keep the face side of the board against the table surface for both the tongue and the groove cuts. If you flip the board between cuts, any slight variation in thickness will cause the faces to be uneven, leaving you with a ridge that’s hard to sand flat.
Preparation is also about wood selection. You must rip your boards to a consistent width before you start the joinery process. If your stock varies by even 1/16th of an inch, the tongue and groove won’t align correctly across the entire run. Check the board width with a caliper after the initial rip cut to ensure total consistency across the whole batch.
Solving common joint issues
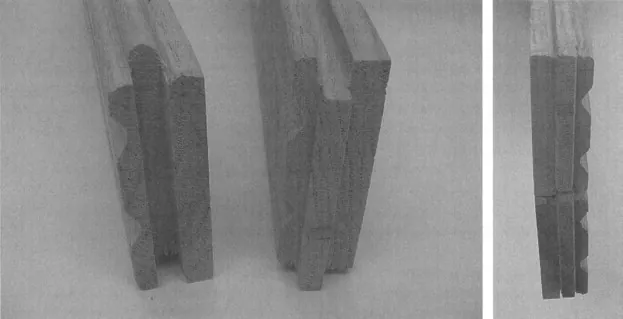
If your boards don’t sit flat, you likely have a depth or alignment issue. Use this table to troubleshoot your setup before you ruin your final stock.
| What you notice | What it usually means | What to do first |
|---|---|---|
| Board won’t slide in | Tongue is too thick | Lightly sand the tongue |
| Gap between faces | Debris in the groove | Vacuum the groove clear |
| Boards are uneven | Mismatched depth settings | Reset the blade height |
| Joint is loose | Wrong bit or blade width | Shim the fence slightly |
Most woodworkers make the mistake of forcing a tight joint with a mallet. This often splits the wood or crushes the delicate tongue fibers, rendering the piece useless. If the joint resists, stop immediately and test your setup on scrap material of the exact same thickness.
If the boards sit flat but the joint remains loose, check your router bit for wear. A bit that has lost its edge will deflect under pressure, creating a wider path than intended. If you’re working with softwoods, use a light coat of wax on the tongue to prevent binding. If you’re working with hardwoods, ensure your feed rate is consistent to avoid burning the edges.
Industry standards and regulations
Building codes often dictate the use of tongue and groove in subflooring to ensure a continuous load-bearing surface. The International Residential Code (IRC) requires that structural panels be supported by joists, and the tongue and groove design helps distribute weight between those supports.
If you’re building a structural floor, always follow the span ratings provided by the APA—The Engineered Wood Association. Using the wrong thickness or unsupported edges can lead to floor deflection or failure, which may violate local safety regulations.
Check your panel stamp for the specific span rating; if the joist spacing exceeds that number, the floor will bounce. Most inspectors require a minimum 1/8-inch gap at panel ends to allow for wood expansion. Skipping this gap often leads to buckled seams. If you encounter a moisture-heavy environment, upgrade to Exposure 1 rated panels to prevent long-term structural delamination.
Maintenance and long-term care
Once your boards are installed, you must allow them to acclimate to the room’s temperature and humidity for at least 72 hours. If you seal the wood too early, it will trap moisture and cause the joints to buckle.
To maintain the joint, avoid using excess water during cleaning. Moisture causes the wood to swell inside the slot, which permanently ruins the tongue-and-groove fit. Use a damp microfiber mop rather than a soaking wet rag.
If you notice a squeak, the wood has likely shrunk due to low humidity. Adding a small amount of powdered graphite or wood-friendly lubricant into the seam can stop the noise without damaging the finish.
If your home’s humidity drops below 30 percent during winter, run a whole-house humidifier. This prevents the gaps from widening beyond the point where lubricant can help. Without this step, you risk permanent structural separation.
When to avoid this method
Don’t use a standard tongue and groove joint for heavy-duty structural framing. For load-bearing beams or outdoor decking, use lap joints or mechanical fasteners like lag screws instead. These provide the lateral strength that a simple tongue can’t offer. Additionally, avoid using this joint on very thin veneers, as the wood will likely snap during the cutting process. Use a butt joint with a biscuit or dowel instead for thin materials to maintain structural integrity.
Related guides
Frequently Asked Questions
Can I cut a tongue and groove with a hand plane?
Yes, you can use a dedicated tongue and groove plane, though it requires significant practice. It’s slower than power tools but allows for precise adjustments on individual boards that don’t fit perfectly.
Is it safe to use tongue and groove for outdoor siding?
Yes, but you must ensure the groove points downward to shed water. If the groove faces up, water will collect inside the joint, which leads to rapid rot and wood decay over time.
How do I fix a broken tongue on a floorboard?
You can glue a new, thin piece of hardwood into the slot to recreate the tongue. Alternatively, if the board is loose, drive a finish nail through the tongue at an angle to anchor it to the subfloor.
What happens if the tongue is too long?
The boards won’t close completely, leaving a visible gap between the faces. You must trim the tongue slightly shorter than the depth of the groove to ensure the shoulder of the board seats firmly.
How long does a tongue and groove joint last?
It lasts for the lifespan of the wood, provided the humidity remains stable. In climate-controlled homes, these joints often remain tight for a significant duration without needing any secondary repairs or modifications.
Conclusion
Choosing the right profile makes your woodworking projects look professional and stay sturdy for years. Once you’ve picked the style that fits your vision, grab some scrap wood to practice your cuts before starting on the final pieces. You’ll find that a little patience goes a long way toward a perfect fit.
