
Finding the best hose bib timers for your home garden setup requires balancing your specific irrigation needs with the durability of the hardware. These devices act as automated gatekeepers for your outdoor water supply, allowing you to set precise schedules that conserve water while ensuring your plants thrive. Depending on the complexity, connectivity, and build quality, you can expect to pay between $25 and $120 for a reliable unit. Whether you’re managing a simple drip system or a complex multi-zone lawn arrangement, selecting the right model saves time, reduces utility costs, and prevents the common mistake of overwatering your landscape.
Key Takeaways
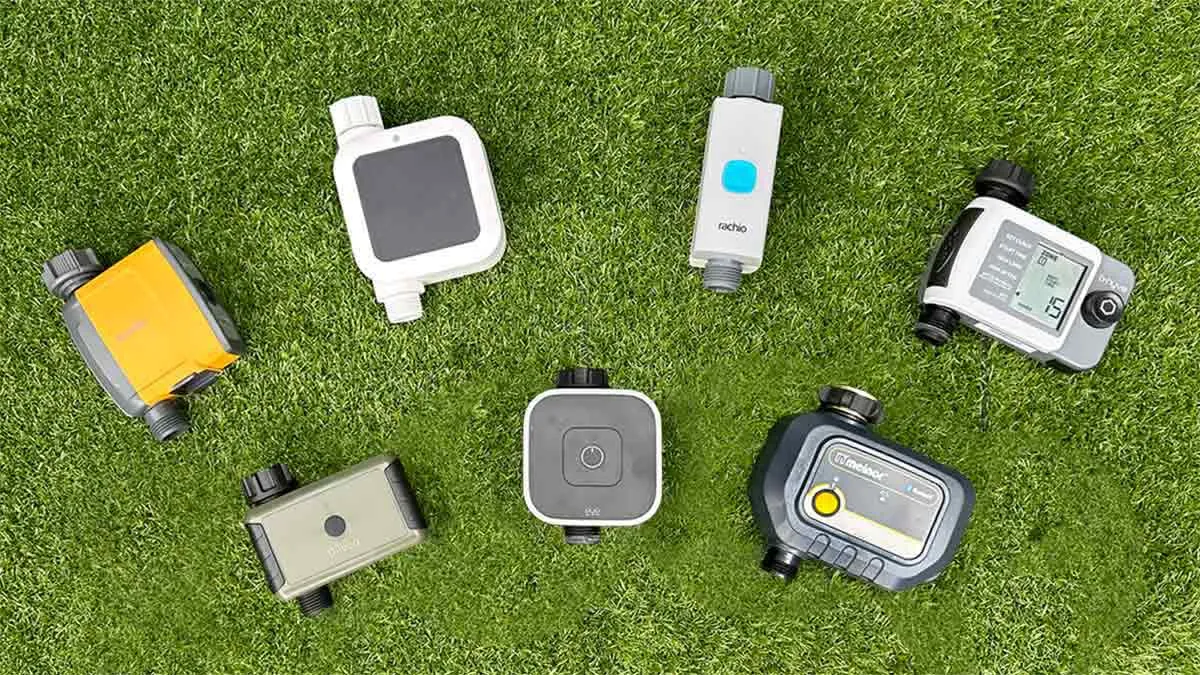
- Check your local water pressure; most timers require between 15 and 80 PSI to function correctly without leaking or failing.
- Prioritize brass-threaded connections over plastic to prevent cross-threading and seasonal wear-and-tear during installation.
- Always remove your timer before the first hard freeze of the year to prevent internal valve damage from expanding ice.
- Look for models with a manual override feature, allowing you to bypass the schedule instantly without reprogramming the device.
- Battery-operated units generally require high-quality alkaline or lithium batteries to maintain consistent valve performance throughout a full growing season.
Choosing the Best Hose Bib Timers
When evaluating the market, you’ll notice that most options fall into three distinct categories: mechanical, digital, and smart-enabled. Mechanical timers are essentially glorified kitchen timers that shut off the flow after a set duration. Digital timers allow for multi-day scheduling, while smart models offer remote control via smartphone applications.
To determine the optimal irrigation solution, consider your physical reach and technical comfort. If you have a simple raised bed, a basic digital timer is sufficient. For homeowners managing multiple zones, a multi-port manifold timer is essential. The durable build quality of a timer is often reflected in its weather-sealing rating; look for IP65 ratings or higher to ensure the internal electronics remain protected from heavy rain and direct sunlight.
| Feature Type | Mechanical Timers | Digital Timers | Smart/Wi-Fi Timers |
|---|---|---|---|
| Price Range | $15–$35 | $30–$70 | $60–$130 |
| Scheduling | Simple Duration | Daily/Weekly | Cloud/App-based |
| Power Source | None (Spring) | AA/AAA Batteries | Battery/AC Adapter |
| Best Use Case | Hand-watering | Drip Irrigation | Large Landscapes |
Mechanical Versus Digital Systems
Mechanical timers operate on a spring-loaded mechanism. They’re the most affordable option and require no batteries, making them ideal for areas without easy access to power. However, they lack the precision required for complex gardening needs. Digital timers, by contrast, offer granular control. You can set specific start times, durations, and even skip days based on rainfall forecasts.
The primary interface differences between these two systems come down to the screen and the input method. Digital units usually feature a small LCD display and a series of buttons. While these can be tricky to navigate in direct sunlight, they provide clear feedback on the current status of your watering cycle. Always verify that the valve construction is compatible with your water source, especially if you’re using recycled rainwater, which may contain debris that can clog small solenoids.
What to Look for in Hardware
Durability is the single most important factor when choosing a timer. Since these devices live outdoors, they’re subjected to UV radiation, temperature fluctuations, and moisture. A high-quality device should feature a reinforced, leak-proof seal at the hose connection point.
- Orbit B-hyve: Known for its robust app integration and reliable Bluetooth connectivity.
- Melnor AquaTimer: Offers a wide range of mechanical and digital options with user-friendly dials.
- Rain Bird 1ZEHTMR: A professional-grade digital timer focused on longevity and simple programming.
- Gardena Water Timer: Features a modular design that’s easy to service and maintain over several years.
Pro Tip: Apply a small amount of plumber’s tape to the threads of your spigot before attaching the timer to ensure a watertight seal and prevent drips that can lead to corrosion over time.
How Much Do These Timers Cost?
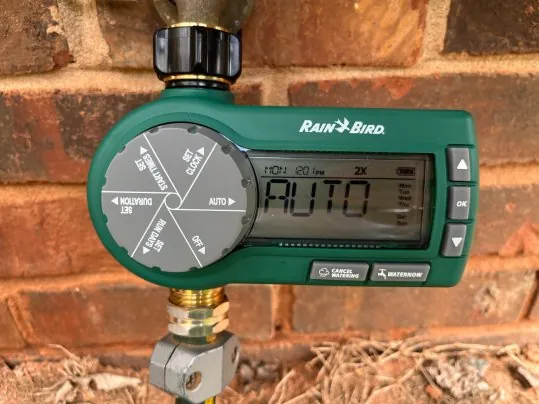
The financial commitment for a hose bib timer varies based on the level of automation. Entry-level mechanical units start around $15, while high-end smart systems that integrate with weather stations can reach $130 or more. You should also factor in the cost of batteries, as most digital models require fresh cells at the start of every season.
When calculating the long-term value, remember that a timer can significantly lower your water bill. The Environmental Protection Agency notes that outdoor water use accounts for nearly 30 percent of total household consumption, and automated timers help prevent the common issue of leaving the hose running for too long. By setting a strict schedule, you avoid the waste associated with manual irrigation.
Integrating Smart Wi-Fi Controllers
Smart timers are the current gold standard for homeowners seeking maximum efficiency. By connecting to your home Wi-Fi network, these devices can pull local weather data. If rain is in the forecast, the system will automatically pause the scheduled watering cycle, saving you money and preventing the over-saturation of your soil.
The remote control capabilities are particularly useful if you travel frequently. You can monitor your garden’s health from anywhere in the world using a dedicated mobile app. Ensure your Wi-Fi signal reaches the area where your hose bib is located; if the signal is weak, you may need a signal repeater or a Bluetooth-only model that connects directly to your phone when you’re within range.
Installing Your New Timer Properly
Installation is generally straightforward, but it requires attention to detail to avoid leaks. Start by clearing any debris from the spigot threads. Hand-tighten the timer onto the spigot—don’t use pliers, as over-tightening can crack the plastic housing of the unit.
- Inspect the internal rubber washer for cracks or missing material.
- Align the threads carefully to avoid cross-threading the connector.
- Turn on the water supply slowly to check for leaks at the connection point.
- Test the manual override button to ensure the valve opens and closes correctly.
- Program your schedule according to the manufacturer’s specific instructions.
Maintaining Your Irrigation Hardware
To extend the lifespan of your timer, you must perform seasonal maintenance. During the active growing season, check the battery compartment for signs of moisture or corrosion. If the display begins to fade, replace the batteries immediately to ensure the valve doesn’t get stuck in an “open” position, which could flood your garden.
Warning: Never leave your timer attached to the spigot during freezing temperatures. Water trapped inside the valve body will expand as it freezes, causing the plastic or metal casing to crack, which will permanently ruin the device and necessitate a full replacement.
How to Troubleshoot Common Issues
Even the most expensive timers can encounter issues. If your timer isn’t turning on, check the battery voltage first. Many units have a low-battery indicator on the screen. If the screen is blank, the connection between the battery terminal and the circuit board may be corroded.
- Low Flow: Check the mesh screen filter inside the inlet for sediment build-up.
- Leakage: Replace the rubber gasket; these are inexpensive and often the source of most drips.
- Valve Not Closing: If the water won’t stop, tap the side of the unit gently to dislodge any sand or debris stuck in the valve solenoid.
- Connectivity Drops: Reset the Wi-Fi or Bluetooth pairing process within the app to re-establish the handshake with your device.
Optimizing Your Watering Schedule
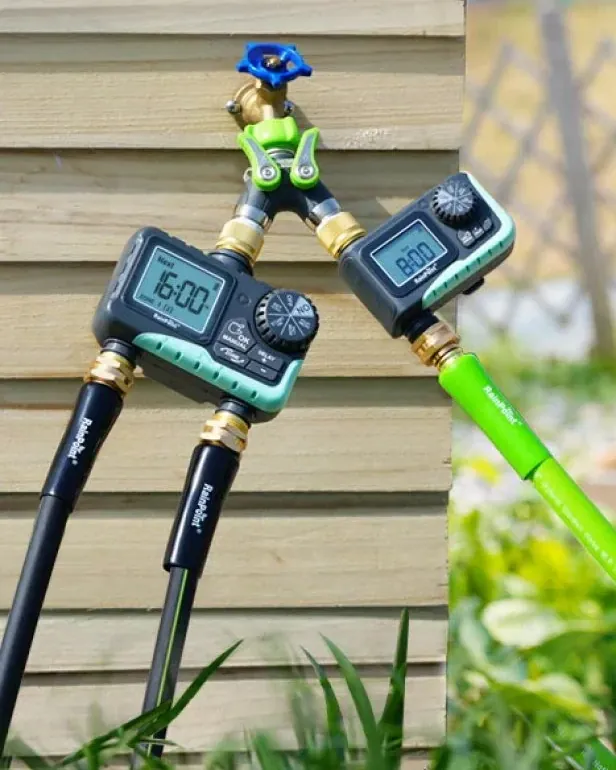
The best schedule depends on your local climate and the type of plants you’re growing. Early morning is the best time to water, as it reduces evaporation and allows the soil to absorb moisture before the heat of the day. Avoid evening watering, as it can encourage fungal growth on leaves and stems.
For most lawns and vegetable gardens, a deep, infrequent watering is superior to light, daily sprinkles. This encourages deep root growth, making your plants more resilient to drought. Use your timer to set a cycle that delivers one inch of water per week, adjusted for local rainfall, to maintain a healthy and vibrant landscape throughout the summer months.
Related guides
- 9 Best Router for Xfinity Picks for Every Home Setup in 2026
- How to Hide Wires in Home Office Setups: A Step-by-Step Guide
- How to Play Foosball: Rules, Setup, and Basic Strategy in 2026
Frequently Asked Questions
Do I need a professional to install these?
No, these devices are designed for DIY installation. You only need your hands to attach the unit to the spigot. No specialized plumbing tools or extensive knowledge of irrigation systems are required. Most manufacturers provide clear, step-by-step guides that walk you through the process, and the entire setup typically takes less than ten minutes to complete from start to finish.
Will a timer work with low water pressure?
Most standard hose bib timers require a minimum pressure of 15 PSI to operate the internal diaphragm correctly. If your home relies on gravity-fed water or a rain barrel system, a standard electronic timer may fail to open or close the valve. In these specific cases, you should look for a “gravity-fed” or “low-pressure” model designed to operate without the need for high-pressure line force.
Can I leave a timer out in the winter?
You should never leave a timer connected to an outdoor spigot during the winter if you live in a region that experiences freezing temperatures. Even a small amount of residual water left inside the valve will freeze and expand, which almost always results in a cracked housing or a damaged solenoid. Always disconnect, drain, and store your timer in a dry, indoor location during the winter months.
Are these devices compatible with all hoses?
Most timers come with standard 3/4-inch garden hose threads, which are the universal size for residential spigots and hoses in the United States. If you’re using specialized drip irrigation tubing or European-style quick-connect fittings, you may need to purchase an adapter. Most hardware stores carry a wide variety of brass or plastic adapters that can bridge the gap between your timer and your specific irrigation equipment.
How long do the batteries usually last?
Battery life depends on the frequency of the watering cycles and the quality of the batteries used. On average, a set of high-quality alkaline batteries will last for an entire growing season, which is typically four to six months. Smart or Wi-Fi models may drain batteries faster due to constant wireless connectivity, so using lithium batteries is often recommended to maximize the time between replacements.
Conclusion
Improving your garden management starts with choosing a reliable unit that fits your lifestyle. Assess your current water pressure, determine if you need smart features, and prioritize a model with a solid warranty. Pick up a compatible timer this weekend to begin automating your irrigation, and you’ll quickly see the benefits in both your plant health and your monthly utility savings.