
If your Shark vacuum isn’t working quite right, sometimes the easiest fix is to take it apart and check inside. But how do you unscrew a Shark vacuum without causing damage?
You might feel stuck or unsure where to start. Don’t worry — this guide will walk you through simple, clear steps to safely unscrew your Shark vacuum. By the end, you’ll have the confidence to open it up and get it back to perfect working order.
Keep reading to find out exactly what you need to do!

Credit: www.youtube.com
Tools Needed
To unscrew a Shark vacuum, having the right tools is key. The correct tools make the job easier and safer. You will avoid damage to the vacuum and save time. Below are the main tools you need to gather before starting.
Screwdrivers
A set of screwdrivers is essential for this task. Most Shark vacuums use Phillips head screws. A Phillips screwdriver fits perfectly into cross-shaped screws. Flathead screwdrivers are useful for some models too. Choose the right size to avoid stripping the screws. A magnetic screwdriver helps keep screws from falling.
Other Helpful Tools
Besides screwdrivers, some extra tools can help. A small flashlight brightens dark areas inside the vacuum. Tweezers or needle-nose pliers can pull out stuck parts. A soft cloth prevents scratches while handling parts. A container keeps loose screws safe and organized during the process.
Credit: www.youtube.com
Preparing The Vacuum
Preparing your Shark vacuum before unscrewing it is important for safety and ease. Taking a few simple steps helps avoid accidents and makes the process smoother. Follow the instructions below to get started.
Unplugging The Vacuum
First, always unplug the vacuum from the power outlet. This stops electricity from running through the machine. It prevents shocks and protects you during the repair. Never try to open the vacuum while it is plugged in.
Clearing The Area
Clear the space around your vacuum cleaner. Remove any objects or clutter nearby. This gives you enough room to work comfortably. A clean area reduces the risk of knocking things over. It also helps you find screws and parts easily.
Locating The Screws
Finding the screws on a Shark vacuum is the first step to open it. Screws hold parts tightly together. Knowing where they are saves time and effort. You can take the vacuum apart carefully without damage.
Some screws are easy to spot. Others hide under stickers or plastic covers. Examining your vacuum closely helps find all screws. A good light source also helps.
Common Screw Locations
Screws often sit around the vacuum’s base. Check near the brush roll area. Screws also appear on the handle and dustbin section. Some models have screws under rubber pads. Others hide behind the filter cover or under labels.
Look along edges and seams. These spots usually have screws holding parts together. Don’t miss tiny screws inside small compartments. Removing covers carefully reveals hidden screws.
Types Of Screws Used
Shark vacuums use mostly Phillips head screws. These screws have a cross shape on top. A Phillips screwdriver fits perfectly here. Some models may include Torx screws. These have a star shape and need a Torx driver. Few use flathead screws, with a simple straight slot.
Using the right screwdriver prevents stripping the screws. Stripped screws are hard to remove and can damage your vacuum.
Removing The Screws
Removing the screws is the first step to opening your Shark vacuum. These screws hold the parts tightly together. You need to remove them carefully to avoid damage. Taking your time helps keep everything safe and working well.
Proper Screwdriver Use
Choose the right screwdriver for the screws on your vacuum. Most Shark vacuums use Phillips-head screws. Match the screwdriver size to the screw head for a good fit. Turn the screwdriver counterclockwise to loosen each screw. Use steady pressure to avoid stripping the screws. Keep the screwdriver straight to prevent slipping.
Handling Stubborn Screws
Some screws may be hard to turn. Apply a little extra force but avoid breaking the screw head. Use a rubber band over the screw for extra grip. Tap the screwdriver gently with a small hammer to loosen tight screws. If screws are rusty, a drop of oil can help. Work slowly until the screws turn freely.
Separating Vacuum Parts
Separating the parts of your Shark vacuum is a key step to clean or repair it. Knowing how to take off the main pieces helps you reach inside and fix problems. This guide explains how to detach two important parts safely and easily.
Detaching The Dustbin
Start by turning off and unplugging the vacuum for safety. Locate the dustbin, usually near the handle or base. Press the release button or latch to unlock it. Gently pull the dustbin away from the vacuum body. Avoid using force to prevent damage. Empty the dustbin and clean it if needed before reattaching.
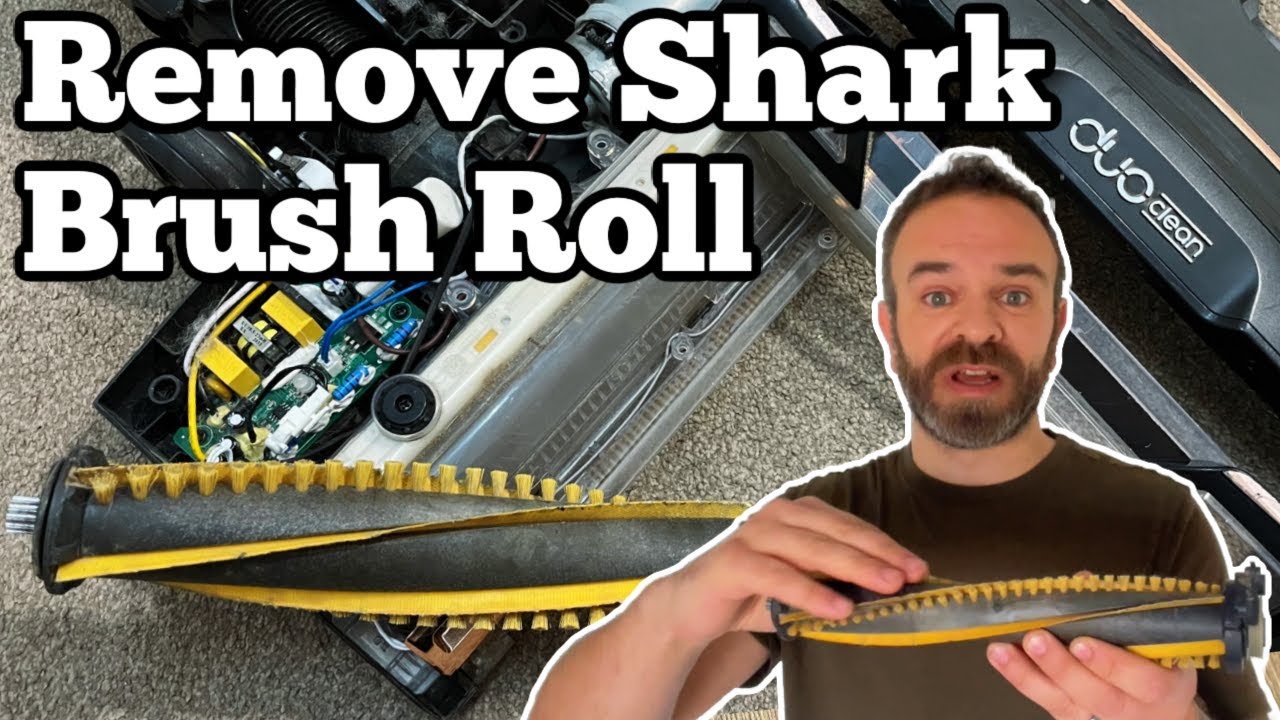
Removing The Brushroll Cover
Flip the vacuum to find the brushroll cover on the bottom. Use a screwdriver to remove any screws holding the cover in place. Keep the screws in a safe spot. Lift the cover carefully to expose the brushroll. This step allows you to clean or replace the brushroll easily. Make sure to put the cover back securely after maintenance.
Tips For Reassembly
Reassembling your Shark vacuum after unscrewing it requires care and attention. Following a few simple tips can make the process easier and help the vacuum work properly again. Take your time and keep everything organized.
Keeping Track Of Screws
Keep all screws in one place to avoid losing them. Use a small container or magnetic tray. Group screws by size and location. This helps you know where each screw goes when you put the vacuum back together.
Label the groups if possible. This saves time and prevents mistakes. Avoid mixing screws from different parts. It keeps the reassembly process smooth and stress-free.
Aligning Parts Correctly
Make sure each part fits exactly where it belongs. Check the shape and holes before screwing parts together. Align parts gently to avoid damage. Forcing parts can break clips or threads.
Work slowly and carefully during alignment. Double-check each connection before tightening screws. Correct alignment ensures the vacuum will work well and last longer.
Safety Precautions
Taking safety precautions before unscrewing a Shark vacuum is very important. It protects you from injury and prevents damage to the vacuum. Simple safety steps make the process easier and safer.
Avoiding Electric Shock
Always unplug the vacuum before starting any repair work. This stops electric current from flowing and reduces shock risk. Avoid touching any wires or metal parts inside the vacuum. Use tools with insulated handles to keep yourself safe. Never work on the vacuum if your hands are wet or damp.
Protecting Yourself During Repair
Wear safety gloves to protect your hands from sharp edges. Use eye protection to guard against dust or debris that may fall out. Work in a well-lit area to see clearly. Keep small screws and parts in a container to avoid losing them. Take your time to avoid mistakes and injuries.
Credit: www.reddit.com
Frequently Asked Questions
How Do I Remove The Shark Vacuum Brush Roll?
Locate the brush roll cover and press the release buttons. Lift the cover and pull the brush roll out carefully.
What Tools Are Needed To Unscrew A Shark Vacuum?
Usually, a Phillips head screwdriver is enough. Check the screws on your model before starting.
Can I Unscrew The Dustbin On A Shark Vacuum?
Yes, most dustbins have screws or clips. Unscrew or unclip them gently to remove the dustbin.
How To Avoid Damaging Parts When Unscrewing Shark Vacuum?
Use the right screwdriver size and apply gentle pressure. Turn screws slowly to prevent stripping.
Is It Safe To Unscrew A Shark Vacuum Without Unplugging?
No, always unplug the vacuum first. This prevents electric shock and accidental starts.
How To Find The Screws On A Shark Vacuum?
Look near the brush roll, dustbin, and base plate. Screws are usually small and recessed.
Can I Reassemble The Shark Vacuum After Unscrewing?
Yes, just reverse the steps carefully. Make sure all screws are tight but not over-tightened.
Conclusion
Unscrewing a Shark vacuum does not have to be hard. Follow each step with care and patience. Use the right tools to avoid damage. Keep track of all screws for easy reassembly. Take your time and work in a clean space.
This helps you fix or clean your vacuum easily. Remember, safety comes first—unplug the vacuum before starting. Now, you can maintain your Shark vacuum better and keep it working well. Simple steps make a big difference in vacuum care.