
If you’re trying to fix or replace your toilet flange, you’ve probably come across that stubborn Oatey toilet flange cap. It can feel impossible to break or remove, leaving you frustrated and stuck.
But don’t worry—this guide will show you exactly how to break that cap safely and easily. You’ll learn simple tricks and tools that save you time and effort. Keep reading, and you’ll have your toilet flange ready in no time.

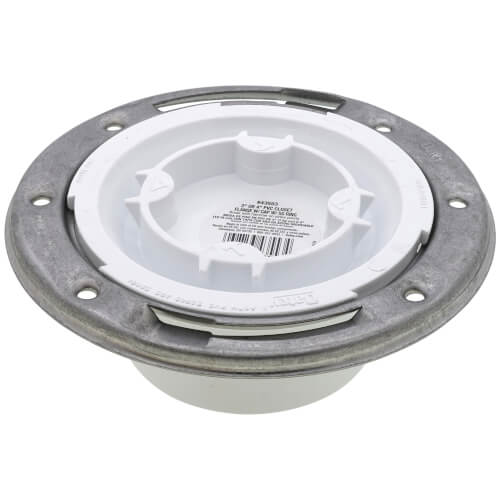
Credit: www.supplyhouse.com
Tools Needed
Breaking an Oatey toilet flange cap requires specific tools. Using the right tools makes the job easier and faster. It also helps prevent damage to the flange or surrounding parts. Preparing these tools before starting saves time and frustration.
Essential Tools
A flathead screwdriver is key for prying the cap loose. A utility knife helps cut any sealant or caulk around the flange. Needle-nose pliers assist in gripping and pulling stubborn pieces. A hammer may be needed to gently tap the screwdriver or pliers. Having a putty knife can help scrape away residue after the cap is removed.
Safety Gear
Wear safety glasses to protect your eyes from debris. Gloves keep your hands safe from sharp edges and chemicals. A dust mask prevents inhaling dust or particles during the process. Use knee pads if you need to kneel for a long time. Proper safety gear keeps you comfortable and injury-free while working.
Preparing The Area
Preparing the area is the first step in breaking the Oatey toilet flange cap. It helps keep the process safe and clean. Taking time to prepare makes the job easier and faster.
Start by clearing the space around the toilet. This gives you more room to work. It also protects your belongings from damage or dirt. A clean area helps you focus on the task.
Clearing The Space
Remove any rugs or mats near the toilet. These can get wet or dirty during the process. Take away any items on nearby shelves or counters. This prevents accidents or spills. Move furniture that might block your access. Clear space on the floor to place tools and parts. A tidy workspace reduces stress and mistakes.
Shutting Off Water
Turn off the water supply to the toilet. This stops water from leaking or flooding. Locate the shut-off valve behind the toilet. Turn it clockwise until it stops. Flush the toilet to empty the tank. This lowers the water level and reduces spills. Double-check the water is off before starting work.
Inspecting The Flange Cap
Inspecting the flange cap is the first step before breaking an Oatey toilet flange cap. Careful inspection helps avoid damage to the flange or toilet. It also ensures you use the right tools and methods to remove the cap safely. Take your time to examine the cap closely. This helps you understand its condition and material. Knowing these details makes the removal process easier and safer.
Identifying Material Type
The flange cap material affects how you break it. Common materials include plastic, metal, or rubber. Plastic caps are usually white or off-white and feel lightweight. Metal caps are heavier and may show signs of rust. Rubber caps are flexible and soft to touch. Identifying the material helps you choose the right tool. For example, plastic may crack easily, while metal needs stronger tools. Knowing the material type prevents damage to the flange.
Assessing Damage
Check the flange cap for cracks, breaks, or wear. A damaged cap may be easier to remove but needs careful handling. Look for signs of corrosion or rust on metal caps. These signs mean the cap could break into pieces during removal. For plastic caps, check for brittleness or cracks. Assessing damage helps decide if you can break the cap or need a different method. This step protects the flange and ensures a clean removal.
Breaking The Cap Safely
Breaking the Oatey toilet flange cap requires care. The goal is to avoid damage to the flange or surrounding pipes. Taking safety steps ensures a smooth removal process. Proper tools and techniques make the job easier and safer. Follow these methods to break the cap without causing harm.
Using A Hammer And Chisel
Place the chisel edge at the cap’s edge. Hold it firmly to avoid slipping. Tap the chisel gently with the hammer. Small, controlled strikes work best. Avoid hitting too hard to prevent pipe damage. Move the chisel around the cap gradually. This loosens the cap bit by bit. Wear safety glasses to protect your eyes. Gloves help protect your hands from sharp edges. This method requires patience but is effective.
Applying Heat For Easier Removal
Heat softens the material of the flange cap. Use a heat gun or hair dryer for this. Keep the heat source moving to avoid overheating one spot. Warm the cap for several minutes. Check if the cap feels softer or more flexible. Use a chisel or flat tool to pry the cap gently. Heat reduces the effort needed to break the cap. Avoid using an open flame, which can damage pipes. Allow the cap to cool before touching it again. This method helps reduce the risk of cracking the flange.
Removing Residue
Removing residue from the Oatey toilet flange cap is a key step in the repair process. Leftover material can stop new parts from fitting well. Clean surfaces ensure a tight, leak-free seal. Take time to clear away all dirt and grime before moving on.
Cleaning Flange Surface
Start by wiping the flange surface with a dry cloth. This removes loose dust and small debris. Use a putty knife to scrape off any soft residue. Avoid using metal tools that could damage the flange. A gentle approach keeps the flange in good shape.
Next, dampen a rag with warm soapy water. Wipe the area to get rid of grease and sticky spots. Rinse with clean water and dry completely. A clean, dry flange helps adhesives stick better.
Dealing With Stubborn Debris
Some residue may not come off easily. Apply a small amount of rubbing alcohol or acetone on a cloth. Gently rub the tough spots until they start to lift. Use a plastic scraper for any hardened buildup.
Be patient and work slowly to avoid damage. Repeat cleaning steps if needed. Clear flange surfaces make repairs last longer and prevent leaks.
Replacing The Flange Cap
Replacing the flange cap is a key step after breaking the Oatey toilet flange cap. A good replacement ensures the toilet stays sealed and stable. It prevents leaks and odors from coming up through the floor. Choosing the right part and installing it well saves time and money later. This guide covers how to pick the right flange cap and install it properly.
Choosing The Right Replacement
Choose a flange cap that matches your toilet flange size. Most flange caps fit standard 4-inch pipes. Check the material of your flange. Plastic caps suit plastic flanges. Metal flanges need metal or heavy-duty plastic caps. Pick a cap with a strong seal to stop leaks. Some caps come with extra gaskets for a tighter fit. Avoid cheap or weak caps to prevent damage.
Proper Installation Tips
Clean the flange area before installing the new cap. Remove any old glue or debris. Place the cap so it fits snugly over the flange. Make sure the cap’s sealing surface is even and smooth. Press down firmly to secure the cap in place. Use waterproof plumber’s putty or silicone to seal edges. Tighten any screws evenly to avoid cracking the cap. Double-check that the cap does not move before reinstalling the toilet.
Common Mistakes To Avoid
Breaking an Oatey toilet flange cap can be tricky for beginners. Mistakes can cause damage or make the job harder. Knowing what to avoid helps save time and effort.
Many people rush or use wrong tools. This often leads to broken parts or unsafe conditions. Careful steps make the process smooth and safe.
Using Excessive Force
Applying too much force can crack the flange or pipe. The cap needs steady pressure, not brute strength. Gentle tapping or twisting is better than hammering hard.
Wrong Tool Selection
Using the wrong tools risks slipping or damaging the flange. A proper wrench or pliers fit the cap snugly. Avoid screwdrivers or tools that don’t grip well.
Ignoring Safety Gear
Skipping gloves or eye protection increases injury risk. Flange caps can break suddenly and send debris flying. Always wear gloves and goggles before starting.
Not Cleaning The Area First
Dirt and grime hide screws or cracks. Cleaning the flange area helps spot problems early. It also allows tools to grip better and work more smoothly.
Forcing The Cap To Turn
The cap may be stuck due to corrosion or sealant. Forcing it causes damage to the flange or pipe. Use penetrating oil and let it sit to loosen tight caps.
Credit: www.supplyhouse.com
Maintenance Tips
Maintaining your Oatey toilet flange cap helps avoid breakage and costly repairs. Regular care extends the life of the flange and keeps your toilet secure. Small actions can prevent big problems later.
Regular Inspections
Check the flange cap every few months for cracks or wear. Look for signs of water damage around the toilet base. Tighten any loose screws or bolts gently. Use a flashlight to see inside tight spaces. Early detection stops damage from getting worse.
Preventing Future Damage
Do not overtighten bolts on the flange cap. Use the correct tools to avoid cracking the plastic. Avoid using harsh chemicals near the flange area. Keep the bathroom floor dry to prevent rust and rot. Replace the flange cap promptly if you notice any damage.

Credit: www.homedepot.com
Frequently Asked Questions
What Tools Do I Need To Break An Oatey Toilet Flange Cap?
You will need a utility knife, flathead screwdriver, and pliers to break the cap safely. These tools help cut and pry the flange without damage.
How Can I Safely Remove The Oatey Flange Cap?
Cut around the cap’s edge with a utility knife, then gently pry it up with a screwdriver. Work slowly to avoid cracking the flange.
Why Is Breaking The Oatey Toilet Flange Cap Necessary?
Breaking the cap allows access to the drain pipe and flange for repairs or replacement. It also helps in clearing clogs or inspecting the flange condition.
Can I Reuse The Oatey Flange Cap After Breaking It?
No, the flange cap is designed for one-time use and should be replaced after removal. Reusing it can cause leaks or poor sealing.
How Do I Avoid Damaging The Toilet Flange While Breaking The Cap?
Use a sharp utility knife and gentle prying motions to prevent flange cracks. Avoid using excessive force or metal tools that can cause damage.
What Should I Do If The Oatey Flange Cap Is Stuck?
Apply a little heat with a hairdryer to soften the plastic, then try cutting and prying again. Patience is key to avoid breaking the flange.
How Long Does It Take To Break And Remove The Oatey Flange Cap?
It usually takes 5 to 10 minutes depending on experience and tool availability. Taking your time ensures the flange stays intact for reuse or repair.
Conclusion
Breaking an Oatey toilet flange cap does not have to be hard. Use the right tools and take your time. Apply steady pressure and avoid rushing the process. Doing this helps prevent damage to your toilet and plumbing. Always stay safe and wear gloves and eye protection.
With patience and care, you can remove the flange cap easily. This small step can make your toilet repair or replacement smoother. Keep these tips in mind for your next plumbing task. Simple actions lead to good results.