
You can fix a stalled unit by unplugging the refrigerator for 60 seconds to reset the electronic control board. If that doesn’t work, manually toggling the wire shut-off arm or checking the water supply line are the most common solutions. Resetting Amana ice maker functions is simple once you identify whether your model uses a mechanical arm or a digital control panel, as the steps vary by hardware.
Items needed to reset your Amana ice maker

You don’t need specialized repair equipment to perform a reset, but having the right items on hand makes the process safer and faster. Keep these supplies nearby before you start:
A sturdy step stool to reach the ceiling-mounted ice maker. Don’t use a swivel chair or rolling ladder, as the height requires a stable, non-slip base to prevent falls.
A high-lumen flashlight to inspect the back of the freezer and the water line connections. Phone lights often cast shadows that hide hairline cracks in the plastic housing.
A flat-head screwdriver to gently nudge the shut-off arm. Avoid using a butter knife, as the lack of a proper handle grip often leads to slipping and scratching the freezer liner.
A thick, absorbent towel to catch water that spills during the inspection. A thin rag will fail to soak up the volume of water trapped in the supply line.
A large bowl to collect any ice that falls during the reset. If the ice maker is jammed, expect up to two pounds of frozen cubes to dislodge suddenly.
If you’re unsure about your model’s specific layout, check the Amana product support page for your manual. Never use sharp metal tools to pry the ice tray, as this may puncture the cooling coils and trigger a total system failure. If the water supply line feels brittle or shows white stress marks, call a plumber immediately to avoid a major kitchen flood.
Steps to Reset Your Unit
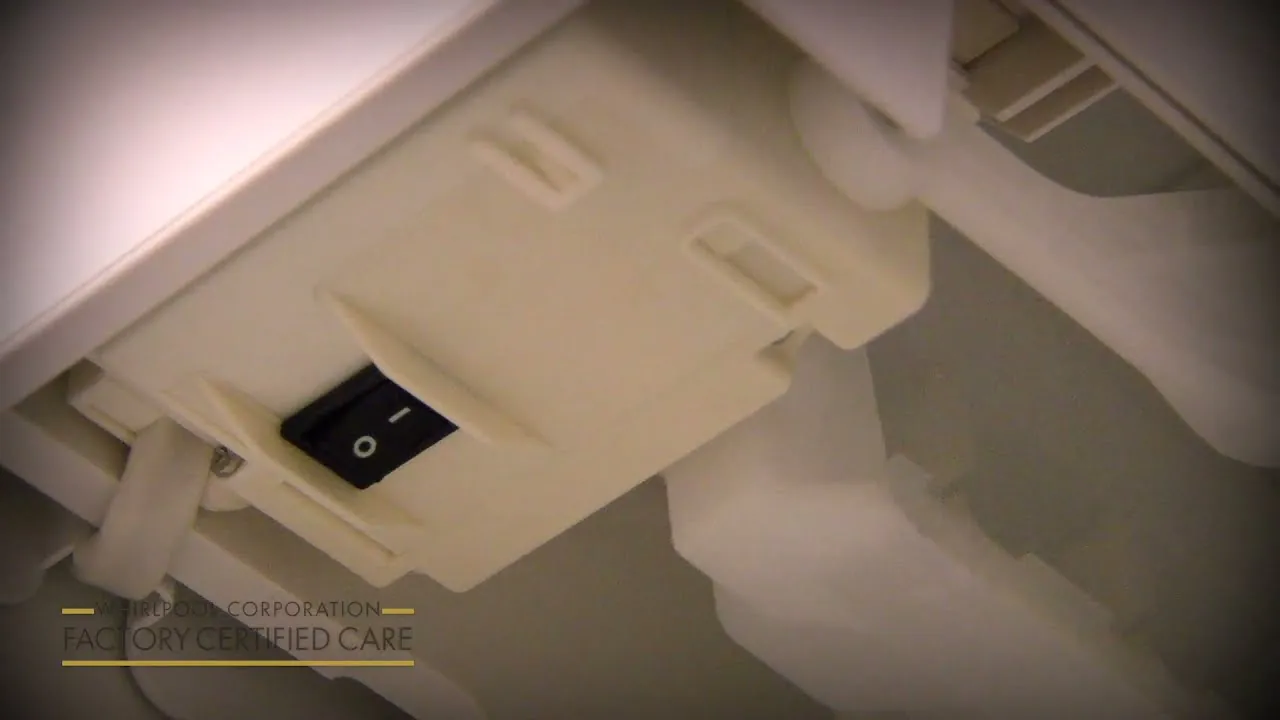
- Locate the wire shut-off arm on the side of the ice maker. If the arm is in the “up” or “locked” position, push it down firmly to the “on” position.
- Unplug the refrigerator from the wall outlet. Wait 60 seconds to allow the control board to clear its memory, then plug it back in.
- Check the freezer temperature. The internal temperature must be at 10°F or lower for the ice maker to trigger a harvest cycle.
- Inspect the water line at the back of the fridge. Ensure there are no kinks or bends preventing water from reaching the unit.
- Press the small reset button located on the side or bottom of the ice maker housing if your model has one. You may need to hold it for 3 to 5 seconds until you hear a click.
- Observe the unit for 24 hours. Most systems take a full day to reach the correct temperature and start producing consistent ice again.
Tip: If you hear a grinding noise, stop immediately and check for an ice jam in the ejector fingers. Careful: Never force the ice maker motor to turn by hand, as this can strip the internal gears and require a full unit replacement.
Situation-Based Reset Requirements
Ice maker performance varies based on your home environment and the settings you choose. Adjust your expectations based on the conditions below:
| Situation | Time Needed | What Changes | Watch For |
|---|---|---|---|
| First installation | 24 hours | Initial cooling time | Water leaks |
| After power outage | 1-2 hours | System rebooting | Error lights |
| High humidity | 48 hours | Slower freezing rate | Clumping ice |
| Low water pressure | 3-5 hours | Longer fill cycles | Small cubes |
If your ice cubes are hollow or misshapen, the water pressure is likely the culprit. Check your home’s main water valve to ensure it’s fully open before assuming the ice maker is broken. A half-open valve restricts flow, leading to incomplete cycles that trigger premature sensor shut-offs.
Always start by checking the easiest components like the power cord and the shut-off arm before moving to more complex internal resets. Overshooting by pressing every button or forcing components usually leads to mechanical failure rather than a quick fix. If the system remains unresponsive after the listed reset window, unplug the unit for ten minutes to clear the control board’s volatile memory. This hard reset often resolves ghost errors that simple power cycling misses.
Verifying a Successful Reset
A successful reset results in the unit beginning a new harvest cycle, which usually sounds like a mechanical hum followed by the sound of water filling the tray. If the ice maker starts producing ice within 24 hours, the system is working correctly. A poor result is indicated by the unit remaining silent or the water valve failing to open, which often happens if the water filter is clogged.
The most common quality issue is “hollow” or small ice cubes, which occurs when the water supply is restricted. If you see these cubes, check the water pressure at the supply line; it must be at least 20 psi to trigger the valve. If the line is kinked or the pressure is low, the valve won’t open regardless of the reset.
Prevent this by changing your water filter regularly. Because the necessary frequency depends on your specific usage, consult your owner’s manual for the correct schedule. If the ice maker still fails to function after a full reset and filter change, the internal thermostat or the water inlet valve may be faulty and will require a professional service technician to replace.
Safety Standards and Maintenance
All refrigerator ice makers must follow the safety guidelines set by the Association of Home Appliance Manufacturers regarding electrical grounding and water pressure limits. After you finish the reset, ensure the refrigerator is pushed back into its original position without pinching the water line. A kinked line creates a slow, hidden leak that often warps subflooring before you notice the moisture.
Record the date of your reset in a logbook. If the unit needs another reset within 30 days, you’re likely dealing with a failing control board or a faulty thermistor rather than a simple glitch. This recurring cycle is a clear sign that a component requires professional repair.
If you aren’t comfortable working with electrical appliances or water lines, contact an authorized service center immediately. Attempting to repair internal electrical components without proper training voids your warranty and poses a risk of electrical shock.
Always keep the area around the refrigerator clear of heavy items that could block airflow. Proper ventilation is essential for the ice maker to maintain its freezing temperature. If the coils are covered in dust or blocked by boxes, the compressor works harder, which can lead to premature ice maker failure. If you can’t reach the coils with a vacuum attachment, call a technician.
Alternative Repair Methods

Manual Water Flush
If the water line is frozen, you can use a hair dryer on a low, cool setting to gently warm the plastic tube behind the freezer. Don’t use high heat, as it will melt the tubing. This clears blockages caused by slow water flow, which often stops the ice maker from filling.
Filter System Bypass
If you suspect the water filter is the bottleneck, remove it and install the bypass plug that came with your fridge. If the ice maker starts working immediately, the old filter was likely clogged or incompatible. This confirms the issue is the filter, not the ice maker itself.
Valve Testing
If you have a multimeter, you can test the solenoid valve for continuity. This requires technical knowledge of appliance wiring. If the valve shows no continuity or an incorrect resistance reading, it’s likely faulty and needs replacing. Only attempt this if you’re confident working with live circuits or have disconnected the power.
Related guides
Frequently asked questions
How long does a reset take to work?
The unit requires 24 hours to complete its full cooling and harvest cycle after a reset. The system must reach a steady temperature of 10°F or lower before releasing the first batch of ice. Note that immediate results aren’t possible, as the thermostat must signal the water valve to open once the freezer is sufficiently cold.
Is it safe to reset the ice maker while the unit is on?
No, you should always unplug the refrigerator for 60 seconds to ensure the electronic control board fully resets. If you try to force a reset using only the buttons while the power is connected, the board may not clear the existing error codes. Unplugging the unit is the safest way to ensure that the internal computer restarts without the risk of electrical surges damaging the control panel.
What happens if the ice maker still doesn’t work?
If the unit remains unresponsive after a reset, the internal water inlet valve or the control module is likely faulty. You should check the water supply line for kinks and ensure your home water pressure is within the manufacturer’s specified range. If these basic checks don’t solve the problem, you’ll need to schedule a service call with a technician to test the electrical components safely.
How often should I reset my ice maker?
You should only reset the ice maker when it stops producing ice or gets stuck in a cycle. It isn’t a routine maintenance task and shouldn’t be done frequently. If you find yourself resetting the unit more than once a month, it’s a clear sign that a physical part, such as the thermostat or the water valve, is wearing out and needs to be replaced.
Can a dirty filter stop the ice maker from working?
Yes, a clogged water filter is one of the most common reasons an ice maker fails to produce ice. When the filter becomes restricted, the water flow is insufficient to fill the ice mold, causing the system to stall or produce tiny, hollow cubes. You can identify this by removing the filter; if the unit begins working properly without it, you simply need to replace the filter with a new, compatible model.
Why is my ice maker making a loud clicking sound?
A clicking sound usually indicates that the ice ejector fingers are obstructed by ice or that the motor gear is stripped. You should manually inspect the mold for blockages and ensure the shut-off arm is clear. If clicking persists after removing obstructions, the internal motor is likely damaged and requires professional repair.
Conclusion
Regularly cleaning the freezer and checking the water supply will help keep your appliance running smoothly for years to come. If you encounter persistent issues, consult your owner’s manual or reach out to the manufacturer’s support team for parts that may need replacement.
