
The best choice for most home plumbing projects is pex a vs pex b tubing, as the A version offers better flexibility and kink resistance. If you’re working in a tight space or a cold climate, the flexible nature of PEX-A makes the job significantly easier. However, if your budget is the primary concern and you’re installing simple, straight-line runs, the more rigid PEX-B is often the better value for your money.
Comparing PEX-A vs PEX-B tubing options
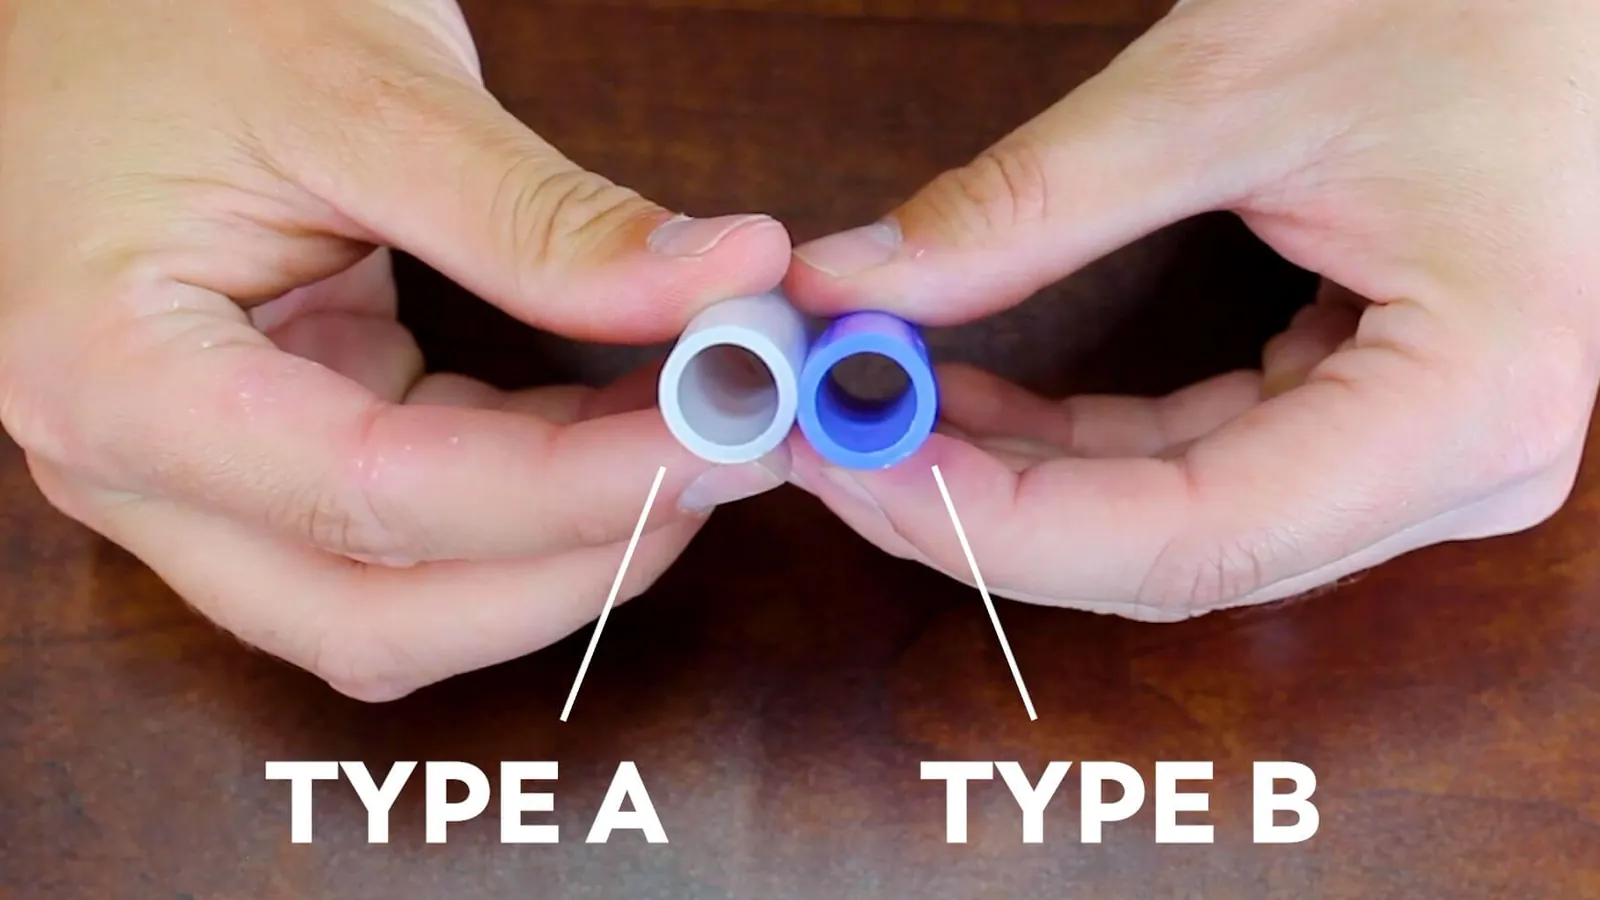
Choosing the right material depends on your installation method and the specific needs of your home’s layout. Each type has distinct properties that affect how you connect them and how they handle pressure over time.
| Method | How long | Effort | Cost | Best for |
|---|---|---|---|---|
| PEX-A | Long | Low | High | Tight corners |
| PEX-B | Medium | Medium | Low | Straight runs |
| PEX-C | Short | High | Low | Repairs |
PEX-A is manufactured using the Engel method, which creates a highly cross-linked structure. This makes it expand under pressure rather than cracking, which is why it’s often chosen for areas with cold winters. PEX-B, by contrast, uses a silane process that results in a stiffer pipe. Because it’s less flexible, you’ll need more elbows and connectors to navigate around obstacles during your installation.
If you’re working in a space where the pipe must snake through tight joists, choose PEX-A. Its memory allows it to return to its original shape after being stretched, which prevents structural fatigue. Use PEX-B only for straight, unobstructed runs where you can minimize the number of fittings. Every added fitting is a potential leak point that increases your long-term maintenance risk.
Novices often make the mistake of using PEX-C for entire new installations because of the lower price. This is a false economy. PEX-C is prone to kinking during installation and has a shorter lifespan under high-pressure conditions. Reserve this grade strictly for short, accessible repairs where you can easily inspect the connection annually.
Working with PEX-A
This material uses an expansion method to create a secure connection. Because the pipe is highly flexible, it’s very difficult to kink, and if you do cause a bend, you can often fix it with a heat gun. Apply heat evenly until the white stress mark disappears, but stop immediately to avoid overheating or melting the material.
- Cut the pipe to your required length using a specialized PEX cutter.
- Slide an expansion ring over the end of the pipe.
- Use an expansion tool to stretch the pipe end and the ring together.
- Insert the fitting quickly before the pipe shrinks back to its original size.
If you’re working in temperatures below 45 degrees Fahrenheit, the pipe will shrink back to its original shape much faster than in a warm room. In these conditions, you have roughly five seconds to seat the fitting completely. If you fail to push the fitting all the way to the shoulder of the ring, the connection may fail under pressure.
This method creates a strong, permanent seal that’s resistant to leaks. It’s excellent for complex plumbing layouts where you need to weave pipe through floor joists. However, the specialized tools required for expansion are expensive, which makes this method cost-prohibitive for small, one-off home repairs. If you lack the proper expansion tool, you must rent one or hire a professional to ensure the connections are secure.
Installing PEX-B
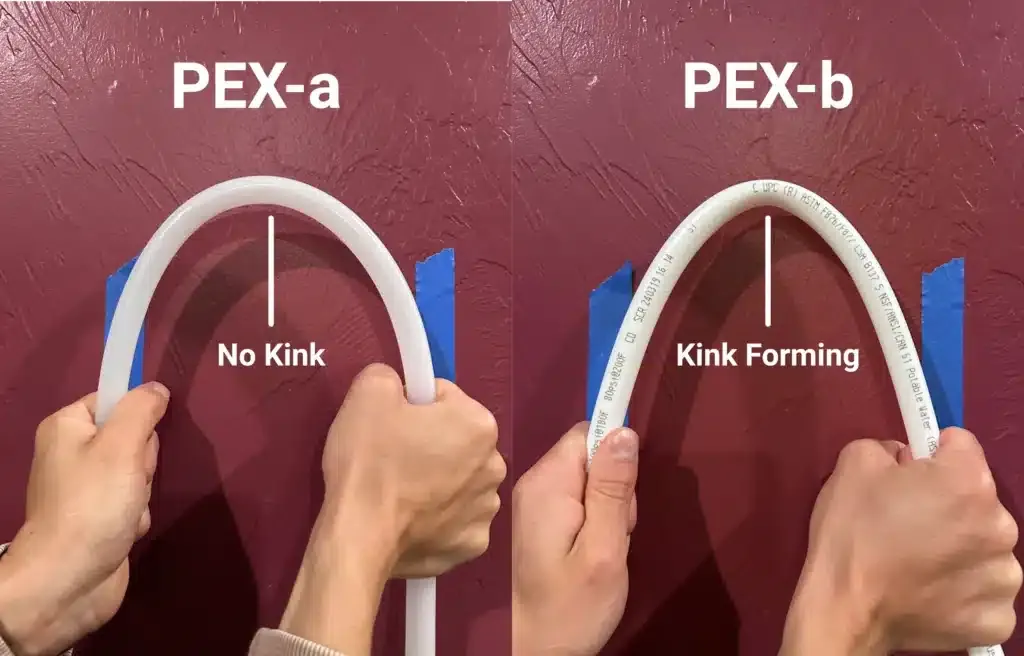
PEX-B is a rigid pipe typically connected using copper crimp rings or stainless steel cinch clamps. It’s the preferred choice for DIYers because the installation tools are affordable and available at most hardware stores.
- Measure your pipe run and cut the section with a standard rotary pipe cutter.
- Slide a copper crimp ring over the pipe end before inserting the fitting.
- Push the barbed brass or plastic fitting fully into the pipe until it bottoms out against the shoulder.
- Position the crimping tool squarely over the ring and squeeze the handles until they lock.
This material is durable and holds its shape, which is helpful when running pipes along open basement joists. However, the stiffness of PEX-B makes it difficult to navigate tight spaces. If you attempt to force a sharp bend, the pipe will kink, permanently weakening the wall. When a turn is necessary, use a 90-degree elbow fitting rather than bending the pipe beyond its minimum radius, which is typically eight times the pipe’s outside diameter.
Always verify that your fittings meet NSF International plumbing standards for safety and pressure ratings. Using mismatched brands of rings and tools often leads to slow leaks that remain hidden behind drywall for months. If the crimp tool leaves a visible gap or over-compresses the ring, cut the section out and start over.
Understanding PEX-C
PEX-C is the most affordable version of these pipes, but it’s also the most prone to kinking during installation. It’s generally used for short, simple runs where the pipe doesn’t need to navigate complex framing or tight bends.
- Unroll the pipe and allow it to sit in a warm area to soften.
- Use standard crimp rings to secure the pipe to your fittings.
- Keep the pipe as straight as possible to avoid permanent kinks.
- Support the pipe every 32 inches for horizontal runs to prevent sagging over time.
PEX-C is fine for basic projects, but it isn’t recommended for high-pressure systems or long-term structural use. The material is thinner than A or B, meaning it’s more likely to develop pinhole leaks if handled roughly. Most professionals avoid this for main water lines because the risk of failure is higher than with more robust alternatives. If you’re unsure about the pipe grade, check the markings printed directly on the side of the tubing.
Selecting the right tubing
Choosing the right material depends on your specific installation goals and your comfort with different plumbing tools.
- When in a hurry: Use PEX-B with stainless steel clamps. The setup is fast, and the tools are easy to use even if you aren’t a professional.
- When doing this for the first time: Choose PEX-B. The crimping method is very forgiving, and the materials are inexpensive if you make a mistake and need to cut a piece out and start over.
- When you want the best result: Use PEX-A. The expansion method is the gold standard for leak prevention, and the flexibility of the pipe reduces the total number of connections, which lowers the overall risk of a future leak.
The trade-off is always between the ease of installation and the long-term reliability of the system. If you choose the cheapest material, you’ll likely pay more in labor and extra fittings to complete the job. If you invest in higher-quality pipe, you spend more upfront but get a system that’s more resistant to freezing temperatures and accidental damage.
Rules for all plumbing projects
Regardless of the material you pick, you must follow local building codes to ensure your home remains safe. Most jurisdictions follow the International Residential Code, which dictates how pipes must be supported and how far they can be from heat sources.
Always prepare your workspace by clearing away debris and ensuring you have enough room to operate your tools. If you’re working with water lines, turn off the main supply and drain the pipes completely before starting. It’s a common mistake to skip the deburring step after cutting the pipe. Failing to smooth the cut end can damage the O-rings inside your fittings, leading to slow leaks that you might not notice for several months.
If you’re unsure about your local requirements, check the building department website for your city or county. They often publish specific guides regarding the types of pipes allowed in your area. If a project involves moving main supply lines or working with gas lines, you should always consult a licensed plumber. Attempting to modify these systems without proper training risks voiding your home insurance policy or causing significant water damage.
Related guides
- Mini Pebble vs Pebble Tec: Which Pool Finish Wins in 2026
- Pleatco vs Unicel: Which Pool Filter Lasts Longer? in 2026
- Spa Frog vs Nature 2: Which Mineral Sanitizer Wins in 2026
Frequently asked questions
Can I mix PEX-A and PEX-B in the same system?
Yes, you can mix them as long as you use the correct fittings for each type. PEX-A uses expansion fittings, while PEX-B generally uses crimp or clamp fittings. Never try to use a crimp fitting on PEX-A pipe if the manufacturer doesn’t explicitly list it as compatible. If you’re unsure, stick to one type throughout the entire project to avoid confusion and ensure all your connections remain consistent and secure.
How long does PEX tubing last?
PEX tubing is designed to last at least 50 years when installed correctly within a home’s normal temperature and pressure ranges. The actual lifespan depends on your local water quality, as high levels of chlorine or extremely acidic water can degrade the material faster. Check the manufacturer’s warranty information for your specific brand to see the estimated lifespan, as this varies based on the specific chemical additives used during the manufacturing process.
Is it safe to use PEX for hot water?
Yes, all standard PEX tubing is rated for hot water use, typically up to 200 degrees Fahrenheit. You must check the specific temperature rating printed on the side of your pipe to ensure it meets your water heater’s output settings. If your water heater is set to a very high temperature, you should install a tempering valve to lower the water temperature before it enters the PEX lines to prevent material damage.
What happens if the PEX pipe freezes?
PEX-A is highly resistant to bursting because the material expands to accommodate the ice. PEX-B and PEX-C are more rigid and are more likely to crack under the same pressure. If you live in an area where pipes are likely to freeze, you should insulate them properly regardless of the type. If a pipe does freeze, thaw it slowly using a hair dryer or heat wrap, never an open flame.
How often should I support PEX pipe?
Support PEX pipe every 32 inches for horizontal runs and at every floor level for vertical runs, per the Plastic Pipe Institute. Proper support prevents sagging, which causes water to pool in low spots. Without this, sediment buildup can eventually restrict your water flow.
How do I know if my PEX is type A or B?
Identify your PEX type by checking the manufacturer’s markings printed along the tubing. PEX-A is noticeably more flexible and rubbery, while PEX-B feels stiffer and more plastic-like. If you can’t find a label, avoid using the pipe for critical repairs until you confirm the type.
Conclusion
Ultimately, your decision comes down to the specific needs of your layout and how much you want to spend. Don’t worry if you’re still feeling unsure; just grab a small sample of each type from the hardware store. You’ll quickly see which one feels right for your hands and your home.