
Universal plastic or metal levers are the best toilet flush handles because they fit most standard tanks and offer reliable performance. These components trigger the flush valve with a simple downward motion. Always check your tank’s mounting position and the existing hole size, which is typically 5/8 inch to 7/8 inch, before buying a replacement.
Comparison of common toilet flush handles
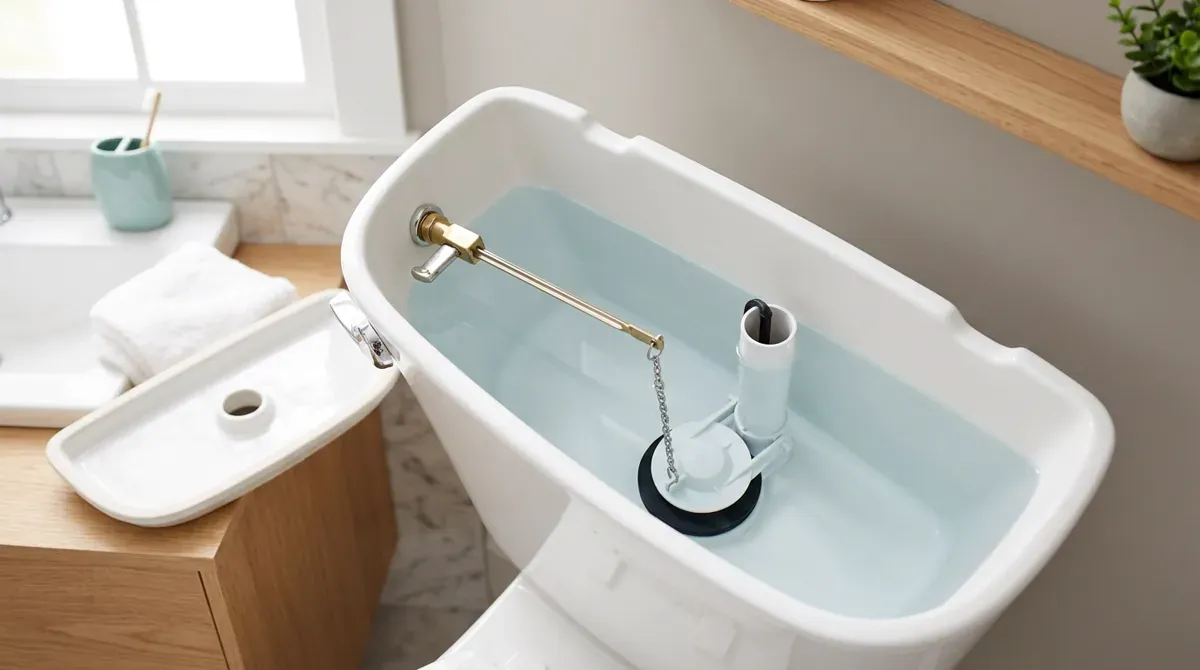
The following table summarizes the most common types of handles found in modern bathrooms. You can use this guide to identify which style fits your specific toilet tank configuration and material preference.
| Handle Type | Best For | Concrete Example |
|---|---|---|
| Plastic lever | Budget repairs | White plastic front-mount |
| Brass arm | High durability | Chrome-plated brass lever |
| Side-mount | One-piece toilets | Side-lever trip handle |
| Angle-mount | Curved tank walls | Angled brass flush arm |
| Decorative metal | Aesthetic upgrades | Oil-rubbed bronze lever |
Prioritize brass arms over plastic if your household exceeds four people. Plastic levers often snap at the pivot point after roughly 5,000 flushes due to material fatigue. A brass replacement is inexpensive relative to the alternative and lasts for the life of the tank.
Check your tank wall before buying. If the wall curves sharply near the mounting hole, a standard straight arm will strike the porcelain before the flapper opens fully. In these cases, you must use an angle-mount handle to ensure a complete, single-flush cycle.
Most users mistake mounting position for compatibility. If your handle sits on the side, you can’t use a front-mount lever, even if the hole size matches. Side-mount handles require a specific internal cam mechanism to lift the chain vertically. Installing a front-mount lever here will cause the chain to bind, leading to a “running” toilet that wastes hundreds of gallons monthly.
Opt for solid brass or stainless steel components. If the handle feels gritty when pressed, apply a small dab of silicone-based grease to the pivot point. This simple step prevents the internal nut from vibrating loose over time.
Plastic lever handles
Plastic lever handles are the most common choice for basic home repairs because they’re affordable and simple to install. They suit homeowners who need an immediate, low-cost fix for a broken handle without needing special tools. These levers are lightweight, which reduces stress on the mounting nut over time.
They resist corrosion in humid bathroom environments, unlike cheap plated metals that often flake or pit within two years. The installation process is fast, usually requiring only a wrench to tighten the plastic nut. They feature a universal design that fits most standard rectangular tank holes.
A typical installation involves removing the old nut by turning it counter-clockwise, as most are standard-threaded, and sliding the new arm into the tank. You should ensure the chain has enough slack so the flapper closes completely after each flush.
If your tank wall is exceptionally thin, the plastic nut may crack if overtightened. Hand-tighten the nut until it seats firmly, then add only a quarter-turn with a wrench. If you feel the plastic begin to deform or hear a clicking sound, stop immediately.
Check the angle of the lift arm before tightening the nut. If the arm hits the side of the tank during a flush, the handle will bind and stay stuck in the open position. You can usually bend the metal arm slightly to clear the obstruction, but do this before securing the nut.
If your toilet has a curved or decorative tank front, a standard plastic lever won’t sit flush. In these cases, the gap allows water to seep behind the handle and drip onto your floor. Use a metal lever with a rubber gasket for curved surfaces instead.
Always test the flush three times before leaving the room. If the handle feels sluggish, the chain is likely too short, pulling the flapper at an angle that prevents a clean seal.
Brass arm handles
Brass arm handles provide superior strength and longevity compared to plastic versions, making them ideal for high-traffic bathrooms. They suit people who are tired of replacing flimsy plastic parts that snap under repeated pressure. While the handle itself may be decorative, the internal brass arm resists bending when you apply force.
The rigidity of brass ensures the lift chain pulls the flapper straight up every time. Plastic arms often flex under tension, which causes the flapper to drag against the side of the flush valve and create a ghost leak. If you notice your toilet running intermittently, check the arm material before replacing the entire valve assembly.
A brass arm also eliminates the “wobbly” feeling common in cheaper fixtures. Because brass threads don’t strip as easily as plastic, the handle maintains a tight, premium connection to the tank lever for years. If the handle feels loose despite a tight nut, the square mounting hole in the porcelain may have worn down; in this case, use a rubber gasket or a metal washer to bridge the gap.
Choose a finish that matches your existing faucet hardware, such as polished chrome, brushed nickel, or matte black. Consistency in the bathroom creates a cohesive aesthetic that elevates the entire room.
A common mistake is over-tightening the mounting nut, which can crack the porcelain tank wall. Tighten the nut by hand until it’s firm, then use a wrench for only a quarter-turn more. If you hear the porcelain creak, stop immediately.
If your tank wall is exceptionally thin or curved, install a plastic spacer between the nut and the tank. This distributes the pressure across a wider surface area, preventing the brass hardware from biting into the ceramic. You can test the fit by gently rocking the handle; if there’s any lateral movement, add a thin rubber washer to the interior side to lock the assembly in place.
Side-mount flush handles
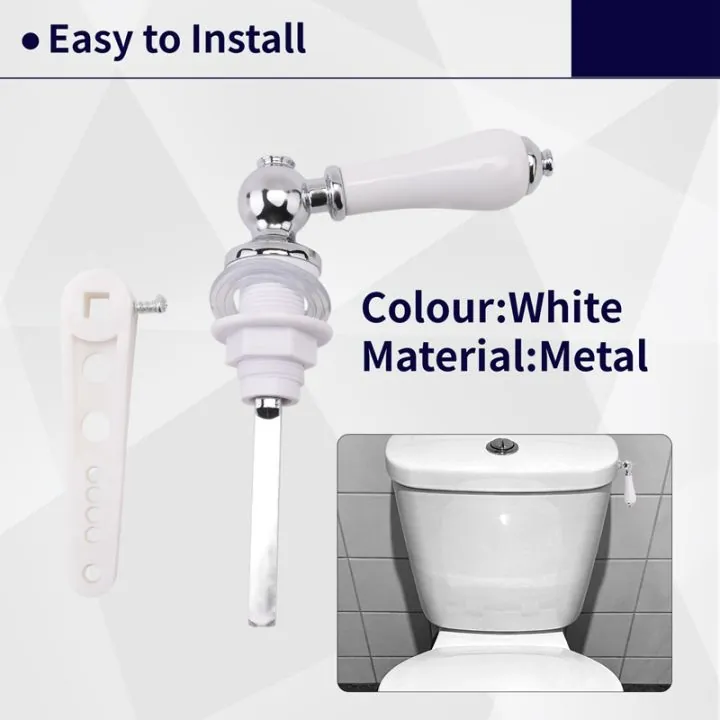
Side-mount handles are designed specifically for toilets where the lever is located on the side of the tank rather than the front. They suit users with one-piece toilets or specialized tanks where a front-facing handle would interfere with the toilet lid. These handles use a different internal geometry to reach the flush valve properly.
- They allow for a natural downward pull on the side of the tank.
- The design works well for toilets with limited space for front-mounted hardware.
- They ensure the lift chain pulls the flapper vertically, preventing it from getting stuck.
One important limit is that these aren’t interchangeable with front-mount units. The internal mechanism is unique to the side-mounting orientation. If your toilet is a high-efficiency model, check the manufacturer’s manual to ensure the handle length matches the specific tank displacement requirements, as the wrong arm length won’t lift the flapper high enough to complete a full flush.
Angle-mount flush handles
Angle-mount handles feature a bent or angled arm that compensates for the curved or slanted walls of certain toilet tanks. They suit toilets where a straight arm would hit the side of the tank before the valve could fully open. These handles are essential for maintaining the correct leverage for a powerful flush.
Before purchasing, measure the interior clearance of your tank. If the distance from the mounting hole to the nearest side wall is less than three inches, a standard straight arm will likely bind against the porcelain. You can verify this by observing the current handle’s travel; if the lever feels stiff or stops abruptly before the flapper fully lifts, the arm is almost certainly striking the tank wall.
The most common mistake is assuming all universal handles are interchangeable. A straight arm installed in a curved-wall tank forces the user to push the handle further than intended, which snaps the plastic nut or strips the mounting threads over time. If your tank has an internal shelf or a molded curve near the lever, choose a handle with a pre-bent arm to avoid this mechanical fatigue.
These handles provide enough clearance to ensure the flapper fully detaches from the flush valve. The angled design prevents the arm from rubbing against the porcelain tank wall, which eliminates the friction that causes handles to stick in the “down” position. They’re available in both plastic and metal to match your existing trim.
If you’re replacing a handle on a high-efficiency toilet, check the angle of the bend against your old part. A bend that’s too sharp will cause the chain to pull at an awkward diagonal, leading to a misaligned flapper that leaks.
If the chain hangs vertically from the arm, you have the correct angle. If the chain pulls sideways, you need a handle with a shallower bend to ensure the flapper seats perfectly level every time. This simple adjustment prevents the phantom flushing that wastes hundreds of gallons of water per month.
Other handle styles
Universal fit handles feature adjustable arms with multiple holes, allowing you to change the length and angle to fit almost any tank. They’re the best choice if you’re unsure which specific model your toilet requires. Before buying, measure the distance from the mounting hole to the edge of the tank. If that gap is less than three inches, verify the arm won’t strike the internal fill valve.
Most homeowners make the mistake of tightening the mounting nut until it cracks the porcelain. Hand-tighten the nut until snug, then add only a quarter-turn with pliers. This prevents hairline fractures that lead to slow, invisible leaks.
Touchless flush kits replace the mechanical lever with an infrared sensor for hands-free operation. These are ideal for households prioritizing hygiene, though they require battery power and cost significantly more to install. Most kits run on four AA batteries, which typically last six to nine months under normal use.
If your toilet uses a canister flush valve rather than a traditional flapper, check the kit’s compatibility list before purchasing. Many touchless systems are designed exclusively for flapper-style chains. If you have a canister system, you must select a kit that includes a specific adapter cable to pull the valve upward.
When installing, ensure the sensor is placed where it won’t trigger every time someone walks past the bathroom door. A sensor facing directly into the room often causes phantom flushes. Position the sensor at a slight angle or place it on the side of the tank facing the wall to ensure it only activates when a hand is intentionally placed over the unit.
Selecting your replacement handle
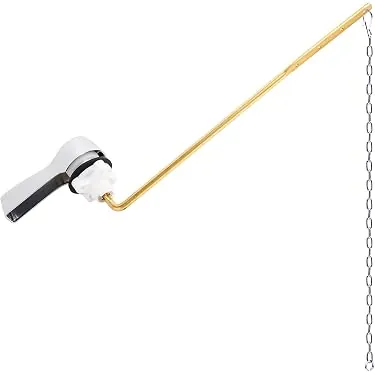
Choosing the right handle depends on three factors: the mounting position, the tank wall shape, and your desired finish. First, check where your current handle is located; if it’s on the front, buy a front-mount handle, and if it’s on the side, buy a side-mount. Second, look at the inside of your tank to see if the wall is curved or flat. If the wall curves sharply, you must pick an angle-mount handle to ensure the arm has enough room to move freely.
Finally, decide on the finish that matches your faucet and towel bars. If you’re replacing a metal handle, try to stick with the same metal type to avoid galvanic corrosion where two different metals touch in water. Most standard handles can be used individually, but touchless kits usually replace the entire mechanical lever assembly, meaning you can’t combine them with your existing manual handle.
Related guides
Frequently asked questions
How long do toilet flush handles last?
Lifespan is heavily influenced by local water quality, as hard water causes mineral buildup that stiffens internal mechanisms. Note that excessive force can cause premature snapping.
How do I know if my flush handle is broken?
A broken handle is identified by a loose feel or failure to lift the flapper. If the arm remains still when the lever is pressed, the internal connection has snapped. You should verify this by removing the tank lid to inspect the arm while pressing the lever.
Is it safe to replace a toilet flush handle myself?
Replacing a flush handle is a simple task that requires no professional plumbing experience. It’s safe for any homeowner as long as you avoid over-tightening the mounting nut against the porcelain tank. Be careful, as over-tightening can cause cracks in the porcelain.
What happens if I buy the wrong size handle?
Buying the wrong size handle results in a weak flush or an inability to install the part. If the arm is too short, the flapper won’t lift high enough to empty the tank. Always compare the new handle’s specifications to your existing tank hole diameter.
Does the material of the handle affect the flush?
Metal handles provide a firmer, more durable pull than plastic alternatives. While both materials flush the same amount of water, metal is less likely to bend or break under heavy use. Brass or stainless steel is recommended for high-traffic toilets to ensure long-term reliability.
How do I stop my toilet handle from sticking?
A sticking handle is usually caused by mineral deposits or a misaligned chain catching on internal parts. Cleaning the assembly with a vinegar solution or adjusting the chain length often resolves the issue. If the internal bushing is worn, you must replace the entire handle assembly.
Conclusion
Start by removing your tank lid to inspect the current handle’s mounting hole and arm length. Once you have identified the mounting position and confirmed the necessary arm style, purchase a replacement that matches your existing finish for a clean look. You’ll know the installation was successful when the handle moves smoothly without touching the tank wall and the flapper rises fully to allow a complete flush.