
The best time to self clean oven features is during the day when you’re home, awake, and able to keep windows open for ventilation. This process reaches extreme temperatures that can produce smoke and odors, so scheduling it when the house is empty or while you’re sleeping is a significant safety risk. You should choose a day with mild weather to allow for cross-ventilation, as the high heat can trigger smoke detectors and release fumes from burnt food residue.
Who needs this cleaning method
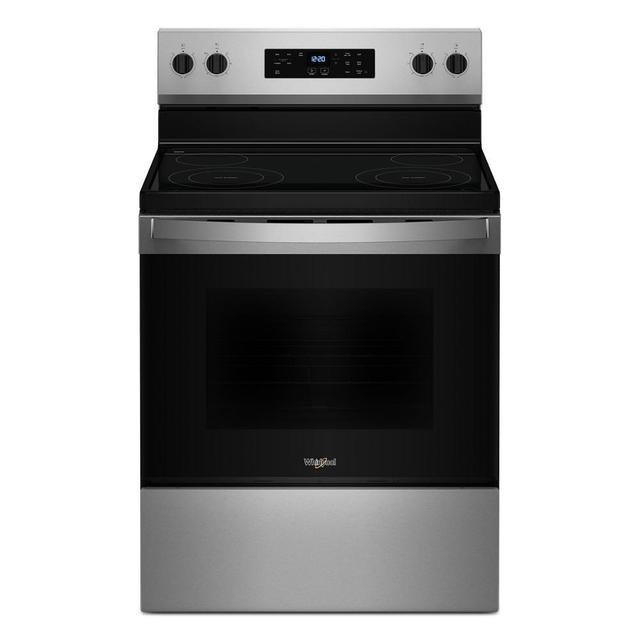
Homeowners who use their appliances for heavy roasting or baking often deal with stubborn, burnt-on grease that standard wipes can’t remove. These users typically own modern units with a dedicated “self-clean” setting that locks the door and heats the interior to approximately 900°F. If you’re a casual user who only bakes occasionally, you likely don’t need this feature; a simple vinegar and baking soda scrub is usually enough to maintain your appliance.
This page serves owners of standard electric or gas ranges who are unsure about the safety protocols required for high-heat cleaning. If you have an appliance with a steam-clean feature instead of a full pyrolytic cycle, this guide isn’t for you. Steam cleaning is a much lower-heat process that works differently and takes only about 30 to 60 minutes. This article assumes you have a traditional high-heat unit that requires a locked door and several hours to complete the cycle. If you have pets, specifically birds, you must understand that the fumes released during this cycle can be toxic to them. Always move birds to a different part of the house or a separate building before starting the cycle.
What decides the outcome
The condition of your interior surfaces is the biggest factor in how much smoke the process will create. If you have large spills or thick layers of grease, the cycle will produce more smoke than a lightly used oven. Before you start, manually remove as much loose debris as possible using a plastic scraper.
Ventilation is the second most important factor that prevents indoor air quality issues. You should open every window in the kitchen and set your range hood to the highest fan setting. If you live in a small apartment without adequate airflow, the smoke may become overwhelming and trigger your fire alarm.
The age and model of your appliance dictate the cycle length and the required cooling time. Some units lock for three hours, while others may require five hours total. Always check your official manufacturer operating manual to see the specific duration recommended for your exact model. Ignoring the manufacturer’s suggested time can lead to door latch failures or excessive heat damage to the control board.
The presence of non-removable racks is a common mistake that ruins the finish of your equipment. Many people leave standard chrome racks inside during the high-heat cycle, which causes them to discolor and lose their ability to slide smoothly. Always remove all metal racks and pans before you engage the lock.
How to manage the cycle
- Remove all racks, pans, and thermometers from the interior.
- Use a damp cloth to wipe out loose crumbs or large pieces of burnt food.
- Secure the oven door and ensure the latch is fully engaged.
- Select the “self-clean” button on your control panel.
- Set the duration based on the soil level; three hours is standard for moderate buildup.
- Press start and verify the “locked” light illuminates on the display.
- Keep the kitchen windows open and the exhaust fan running throughout the entire process.
- Wait for the unit to finish the cycle and cool down completely until it unlocks.
- Wipe out the remaining white ash with a damp sponge once the interior is cool to the touch.
The judgment call here is knowing when the interior is cool enough to open. Never force the latch if it remains stuck. If the door doesn’t unlock after the cooling period, the internal sensor may still detect heat. Wait another 30 minutes before trying again. If it still refuses to open, you must call a professional technician. Never attempt to bypass the door lock mechanism, as this can cause the glass to shatter or the control board to fail.
The variations at a glance
| Situation | What to do | What it takes | What to watch for |
|---|---|---|---|
| Light soil | Short cycle | 2 hours | Check for smoke |
| Heavy grease | Long cycle | 5 hours | Fire alarm triggers |
Ensuring a successful outcome
Preparation and safety
Experienced users know that preparation prevents the most common problems. They never use chemical oven cleaners before running a self-clean cycle, as the combined heat and chemicals can damage the interior coating. They also ensure the area around the appliance is clear of flammable items like dish towels, oven mitts, or plastic containers. Leaving these items on the stovetop during the cycle is a major fire hazard.
Monitoring the process
Successful cleaning requires you to stay in the home while the unit is hot. If you notice thick, black smoke pouring from the vents, you must cancel the cycle immediately and allow the unit to cool. Never spray water inside a hot oven to put out a fire, as this creates steam that can cause severe burns. Most people who experience issues with the cleaning cycle are those who leave the house unattended, which prevents them from catching minor smoking issues before they become emergencies.
What goes wrong, and what to do
| What you notice | What it usually means | What to do first | How to stop it happening |
|---|---|---|---|
| Heavy smoke | Too much grease | Cancel cycle | Remove debris manually |
| Alarm goes off | Venting issues | Open windows | Run exhaust fan |
| Door won’t open | Still too hot | Wait 30 minutes | Don’t force |
| Burnt smell | Residual food | Wipe interior | Clean spills daily |
| Unit shuts off | Overheat safety | Check breaker | Reduce cycle time |
Most users mistake a safety shutdown for a mechanical failure. If the unit loses power mid-cycle, check the internal temperature sensor before calling for repairs. If the exterior casing feels hot to the touch, the unit is working correctly by preventing a fire. Simply wait for the cooling fan to cycle off.
The most common error is ignoring the “burnt smell” during preheat. This usually indicates carbonized sugar or oil on the heating element. If you ignore it, the residue will bake into a permanent crust that requires professional chemical cleaning. Wipe the element with a damp cloth once the unit is fully cold.
Use this decision rule for venting alarms: If the alarm triggers within the first five minutes, your kitchen ventilation is insufficient. If it triggers near the end of the cycle, you’re likely overloading the capacity. Reduce the load by 20 percent to improve airflow.
Finally, never force a locked door. The locking mechanism relies on a thermal latch that releases only after the chamber drops below 150 degrees Fahrenheit. Forcing it will snap the solenoid pin, a repair that often exceeds the cost of a cheap part and labor. Always prioritize the cooldown period over your immediate schedule.
The rules that apply
The high-heat cleaning process is governed by strict safety standards set by the Consumer Product Safety Commission regarding the exterior surface temperatures of household appliances. Manufacturers must ensure that the outer housing of the appliance doesn’t reach a point that would cause severe burns during the cycle.
However, these rules assume the appliance is installed correctly with the manufacturer’s required clearance from walls and cabinets. If your unit is missing its heat-shielding trim or is installed too close to flammable wood cabinets, the heat buildup can pose a serious fire risk.
Always consult your installation guide to confirm your unit meets these clearance requirements. If you notice discoloration on adjacent cabinets or walls after a cycle, stop using the self-clean feature immediately. This darkening is a primary indicator that the internal insulation has failed or the unit is improperly vented.
Contact a licensed appliance technician to inspect your installation before running another cycle. Never attempt to repair the door seals or thermal insulation yourself. These parts are critical to containing the extreme temperatures within the chamber. A DIY patch job often fails to withstand the 900-degree spikes common in these cycles. If the gasket feels brittle or shows visible gaps when the door is latched, the seal is compromised. Replacing these components requires specialized heat-rated adhesives that hardware store alternatives can’t replicate. Using the wrong sealant can release toxic fumes or ignite when the oven hits its peak temperature.
What it costs you
The cost of this process is measured primarily in electricity consumption and your time. A high-heat cycle can consume between 3 to 6 kilowatt-hours of electricity, depending on the size of your appliance and the length of the cycle. At an average national rate, this typically adds a small amount to your utility bill per cycle. The true cost, however, is the wear on the heating elements and the potential for premature failure of the door lock sensor. By avoiding frequent use of this feature and only running it when absolutely necessary, you extend the lifespan of your appliance’s control board. If you find yourself needing to run the cycle more than regularly, you’re likely not cleaning up spills as they happen, which is a habit that costs you more in appliance longevity than the price of a bottle of soap.
Keeping it right afterwards
After the cycle finishes and you wipe away the ash, the interior is effectively “reset.” To keep it this way, perform a quick wipe of the bottom surface after every heavy roasting session. If you notice a spill, treat it immediately with a damp cloth while the unit is cool. You don’t need to use harsh cleaners, as the surface is designed to be wiped clean if the grease hasn’t been baked on for multiple cycles.
The primary mistake users make is waiting until the next self-clean cycle to address a spill. This mistake costs you the integrity of the enamel, as high-heat carbonization can fuse sugary residues directly into the coating, creating permanent dark spots.
If you see signs of peeling enamel or rust on the interior floor, stop using the self-clean cycle entirely. High heat will accelerate this structural failure, causing flakes to detach into your food. If the damage is limited to a small, localized patch, you can continue to use the unit by placing a heavy-duty baking sheet on the bottom rack to catch drips.
However, if the rust covers more than two square inches, the structural integrity of the cavity is compromised. In that case, switch to a non-abrasive, pH-neutral cleaner and a soft sponge for all future maintenance. By avoiding the extreme thermal stress of the self-clean function once the coating begins to degrade, you can safely continue to use the appliance for years without further damage. Always prioritize a manual wipe-down over a high-heat cycle if you detect any compromised enamel.
When this is the wrong approach
If your appliance has visible damage to the interior enamel or the door gasket, you should never use the self-clean feature. The extreme heat can cause the damaged enamel to chip or the gasket to fail, which allows heat to escape and potentially damage the control knobs or nearby cabinetry.
In these cases, use a commercial, cold-applied oven cleaner that doesn’t require heat. Always follow the label instructions carefully and wear gloves to protect your skin.
If you have an appliance manufactured before 2005, avoid the self-clean cycle entirely. These older units lack the advanced thermal fuses and door-locking sensors found in modern models. Without these safety redundancies, a failed thermostat can cause the oven to exceed 900 degrees Fahrenheit, posing a significant fire risk.
You can identify your unit’s age by checking the serial plate, usually located inside the door frame or on the side of the unit. If the plate is missing or illegible, assume the unit is unsafe for high-heat cycles.
The decision rule is simple: if you see bubbling, peeling, or exposed metal inside the cavity, manual cleaning is mandatory. Attempting to “burn off” heavy, caked-on grease in a damaged oven often results in permanent smoke damage to your kitchen walls. If the buildup is beyond your ability to manage safely with a scraper and non-toxic cleaner, hire a professional. It’s far cheaper than replacing a melted control board or repairing fire damage.
Frequently asked questions
Can I stay in the house while the oven self cleans?
Yes, you should stay in the house while the cycle is running to monitor for excessive smoke or fire. Never leave the appliance unattended during this process, as you need to be available to cancel the cycle if something goes wrong.
How long does a self clean cycle usually take?
Most cycles last between three and five hours, depending on the specific model and the level of soil you select. You must also account for an additional hour or two of cooling time before the door will safely unlock.
Is it safe to use the self clean feature if I have a bird?
No, it isn’t safe to use this feature if you have birds in the house. The fumes released by the high-heat cycle are often toxic to avian respiratory systems and can be fatal even at low concentrations.
What happens if the power goes out during self clean?
If the power cuts out, the door will remain locked until the internal temperature drops to a safe level. Don’t attempt to force the door open, as the internal locking mechanism is designed to stay engaged until the heat dissipates to prevent burns.
Does self cleaning damage the oven?
It can cause damage if the unit has pre-existing issues like cracked enamel or a failing door gasket. The extreme heat stresses the internal components, and frequent use may lead to premature failure of the electronic control board or the door locking sensor.
How often should I self clean my oven?
Regular spot cleaning after each use is a much better way to maintain the appliance and avoid the risks associated with high-heat cycles.
Time self, in short
Start by checking your owner’s manual to confirm your specific model supports a high-heat cycle and to identify any unique safety warnings. If you decide to proceed, clear the kitchen, open your windows, and monitor the process until the cycle completes and the unit cools. If you encounter excessive smoke or a locked door that won’t release after cooling, stop everything and contact a professional technician for help.
Related guides