
AcuRite, La Crosse Technology, and Taylor are the best brands of outdoor thermometers because they consistently provide accurate, weather-resistant sensors for home monitoring. These companies specialize in consumer-grade environmental equipment that balances affordability with durability in harsh conditions.
Your choice depends on how you want to read the data. Some users prefer a simple glass tube for a backyard garden, while others need a digital console that tracks humidity and pressure trends inside their living room.
What are the best brands of outdoor thermometers to buy
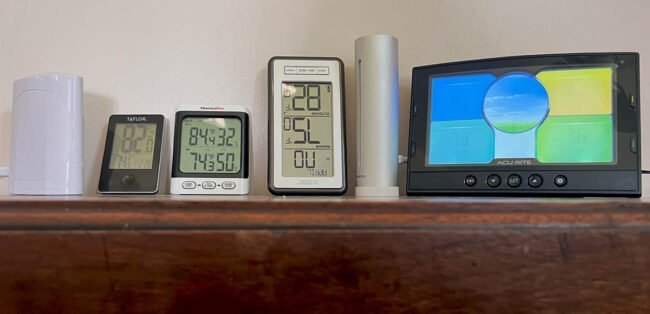
You’re likely looking for a thermometer because you want to know if you need a jacket before stepping outside or if your garden plants are at risk of a frost. These buyers usually fall into three camps: the casual gardener, the home weather enthusiast, and the person who just wants a quick glance at the current temperature.
The casual gardener typically needs a simple, analog thermometer that mounts to a wall or a deck post. They don’t care about digital logs or Wi-Fi connectivity. The home weather enthusiast, however, wants a system that connects to a console. They need to see trends, such as how fast the temperature is dropping, which helps them anticipate weather changes. Finally, the quick-glance user wants a large display they can read from ten feet away through a glass door.
This article serves the home enthusiast and the quick-glance user best. If you only need a basic glass thermometer for a decorative purpose, you should look for simple hardware store options rather than advanced digital stations. We assume you want a device that lasts through at least two full seasons of rain and heat without failing. If you live in an area with extreme sub-zero winters, your needs move toward specialized probes that can handle freezing conditions without cracking.
What decides the outcome
The accuracy of your reading depends on where you place the sensor. Most people make the mistake of putting the unit in direct sunlight, which causes the thermometer to report temperatures much higher than the actual air temperature. To get a true reading, place your sensor in a shaded area, preferably facing north, at least five feet above the ground.
The type of sensor technology is the next factor. Analog thermometers use bimetallic strips or colored spirits, which are reliable but slow to react to temperature swings. Digital sensors use thermistors, which are faster and more precise. If you want to track high and low records, you must choose a digital model; analog units only tell you the temperature at that exact moment.
Connectivity distance matters if you’re using a wireless model. If you have thick brick walls or metal siding, your range will drop significantly. Check the manufacturer’s manual for the maximum line-of-sight distance, which is typically 100 to 300 feet, and assume you’ll get about half that if you have obstacles in the way.
Battery life is the hidden cost of digital systems. A sensor tucked under a deck roof is hard to reach. Look for a model that states it has a two-year battery life in the technical specifications. If you live in a cold climate, lithium batteries are recommended because they perform significantly better than alkaline batteries in sub-zero temperatures.
Installation and setup
- Choose a location that stays in the shade throughout the entire day.
- Mount the sensor to a post or wall using the included screws or adhesive.
- Insert fresh, high-quality batteries into the outdoor sensor first.
- Power on the indoor console so it can find the signal from the sensor.
- Wait for the signal icon to stop blinking on your console display.
- Verify the temperature matches a local weather report for your specific zip code.
- Adjust the console settings for your preferred unit of measure, such as Fahrenheit or Celsius.
- Check the display every hour for the first day to ensure the signal remains stable.
The judgment call that separates a good install from a poor one is the final placement of the sensor. If you mount it too close to a house wall, the heat radiating from your home will skew the results by several degrees. Always use a mounting bracket that holds the sensor at least six inches away from any structure to allow for natural airflow. If you aren’t comfortable using power tools to mount the sensor, use a heavy-duty outdoor adhesive strip, but ensure it’s rated for humidity and extreme temperature swings.
Device performance comparison
The following table compares common types of outdoor thermometers based on their typical use cases and strengths.
| Situation | Best Choice | Primary Need | Watch for |
|---|---|---|---|
| Garden monitoring | Analog tube | No batteries | Glass breakage |
| Indoor console | Digital station | Large display | Signal range |
| Data logging | Smart sensor | App access | Wi-Fi stability |
| Extreme cold | Industrial probe | Lithium power | Cable damage |
| High accuracy | Shielded sensor | Airflow | Sun exposure |
Choose an analog tube thermometer only if you require a set-and-forget solution for remote garden beds. These units rely on liquid expansion, meaning they never fail due to battery drain. However, they’re fragile; a single stray stone from a mower can shatter the glass housing instantly.
For indoor consoles, prioritize signal range. Most digital stations operate on the 433 MHz frequency, which struggles to penetrate thick brick or stone walls. If your sensor sits more than 50 feet from the console, expect intermittent data drops.
Smart sensors excel at data logging, but they require a stable 2.4 GHz Wi-Fi connection. If your router is located at the far end of your home, the device will likely disconnect during heavy storms.
When measuring temperatures below -20°F, standard alkaline batteries experience significant voltage drops and may cease to power the device. Always switch to lithium-based power cells, which maintain voltage in sub-zero conditions.
Finally, accuracy depends entirely on your mounting location. A shielded sensor must be placed in the shade at least five feet above the ground. If you mount it in direct sunlight, the casing will absorb heat, causing your readings to spike by as much as 10 degrees.
Ensuring accurate readings
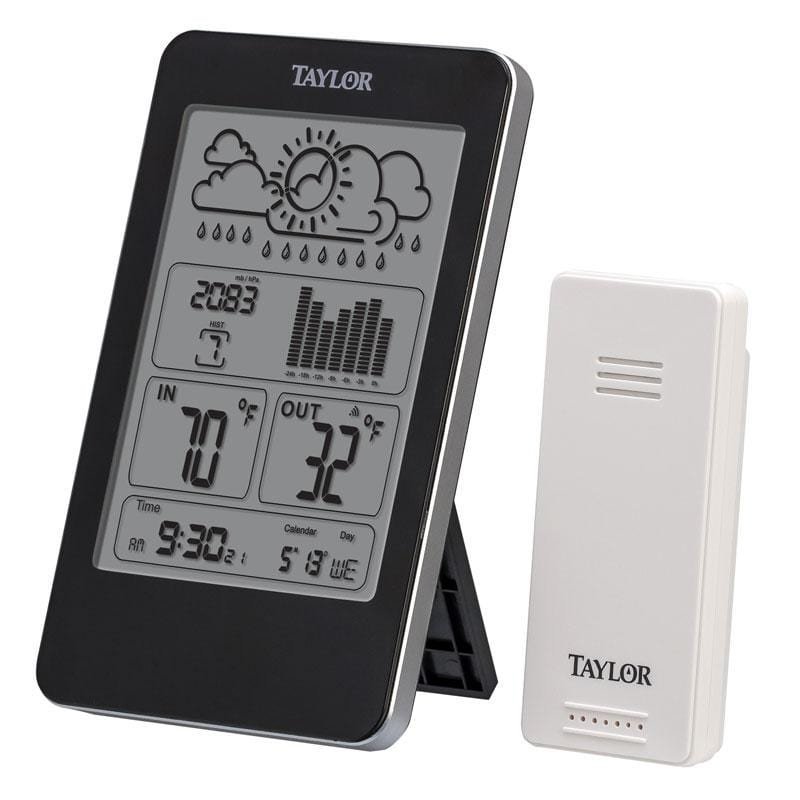
Placement and protection
You must protect the sensor from direct sunlight to get an accurate reading. Even a high-quality sensor will report a temperature ten degrees higher than reality if it sits in the sun. If you can’t find a naturally shaded spot, build a small, vented cover over the sensor. This cover allows air to flow freely while blocking direct solar radiation.
Calibration and maintenance
Check your sensor against a known accurate thermometer if you suspect the reading is wrong. Most consumer units don’t allow you to adjust the calibration, so if the reading is consistently off by more than two degrees, the sensor is likely failing. Clean the sensor housing regularly to remove spider webs and dust. These blockages prevent the air from reaching the sensor, which leads to slow or incorrect updates.
Common issues and fixes
If your thermometer stops working, follow this table to identify and resolve the problem.
| What you notice | What it usually means | What to do first | How to stop it |
|---|---|---|---|
| No signal shown | Battery failure | Replace batteries | Use lithium cells |
| Incorrect temperature | Sun exposure | Move to shade | Build a screen |
| Frozen display | Low power | Reset the console | Check voltage |
| Erratic data | Signal interference | Relocate console | Avoid thick walls |
| Blank screen | Dead battery | Replace console cells | Yearly replacement |
Most users assume a blank screen indicates a total hardware failure. In reality, 90% of these cases result from terminal corrosion caused by leaking alkaline batteries. If you see white crust around the terminals, clean them with a dry brush or a specialized contact cleaner.
Erratic data often points to a conflict with neighboring Wi-Fi routers. If your console is within three feet of a router, move it to a different room. If the readings remain jumpy, the sensor is likely struggling to penetrate dense masonry. A simple rule applies here: if your signal strength icon shows fewer than two bars, move the sensor to a line-of-sight position.
Incorrect temperature readings are rarely a sensor defect. If your thermometer sits in direct sunlight for even twenty minutes, the plastic casing absorbs heat, inflating the reading by as much as ten degrees. Always mount sensors on the north side of your home to ensure consistent accuracy. If you must mount it elsewhere, build a small, vented wooden box to shield the unit from direct UV rays.
Standards and requirements
The accuracy of these devices isn’t regulated by a single government body for home use, but many manufacturers follow the standards set by the International Organization for Standardization for electronic components. You should check the user manual for the “accuracy range.” A good thermometer should be accurate to within two degrees Fahrenheit.
If you’re using these for professional agricultural or legal purposes, you must purchase a device that comes with a certificate of calibration from an accredited laboratory. These certificates specify the exact variance at three distinct temperature points, such as freezing, room temperature, and boiling. Without this document, your data may be legally inadmissible or insufficient for regulatory audits.
Don’t use consumer-grade thermometers for critical infrastructure, such as monitoring vaccines or sensitive equipment, as they lack the necessary redundancy and certification to guarantee safety. A common mistake is assuming that a device with a high-resolution digital display is inherently more precise. In reality, resolution only indicates the smallest increment shown, not the margin of error. If you’re monitoring perishable goods, look for the NIST-traceable designation. If the device isn’t labeled as NIST-traceable, it’s intended solely for general household monitoring. If you require a device that can trigger an alarm during a power failure, you must select a model with an independent battery backup and data-logging capabilities.
The true cost of ownership
The initial price of an outdoor thermometer is only the starting point. You’ll spend money on batteries, which can be a recurring cost if you use high-quality lithium versions.
If you choose a smart, Wi-Fi-enabled model, you must also consider the cost of your time spent troubleshooting network connectivity issues. If your home network uses a 5GHz band, confirm the device supports it; many units only connect to 2.4GHz, which may require you to ensure your router is broadcasting on that frequency.
A simple analog thermometer costs almost nothing to maintain, while a digital station requires regular attention to signal quality and battery levels. If you decide to upgrade to a system with an app, ensure the manufacturer has a history of keeping their software updated. A device that works perfectly but loses its app support becomes a paperweight in just a few years.
The decision rule is simple: if you want a “set it and forget it” tool, buy analog. If you require remote data logging, prioritize brands that have existed for at least a decade. Avoid startups with no track record. A cheap app-based thermometer might save you money today, but it will cost you the entire replacement price within three years when the server support inevitably vanishes.
Maintaining your equipment
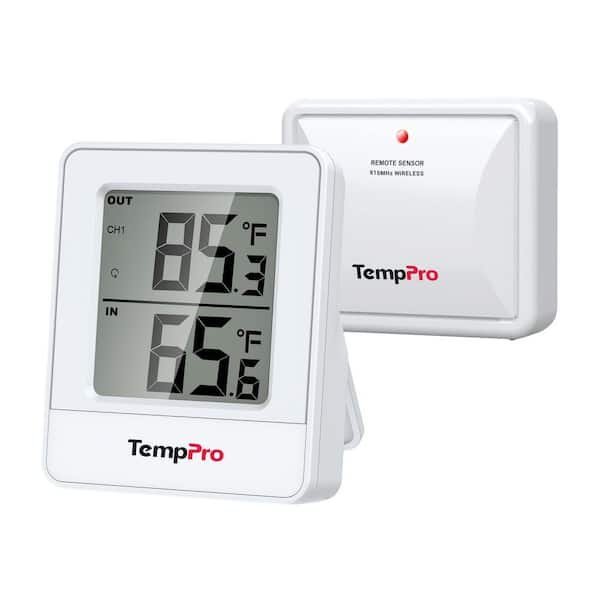
To keep your thermometer working for years, you must replace the batteries before they leak. Inspect the battery compartment every spring when you clean the unit. If you see any corrosion, clean it with a cotton swab and a small amount of vinegar. If the sensor is wireless, keep the indoor console away from other electronics like routers or microwaves, which can interfere with the signal. If the display on your console starts to fade, it’s usually a sign that the console batteries are dying, not the sensor. Replace the batteries in the console first before you try to reset the outdoor sensor. If the unit is exposed to heavy rain or snow, check the rubber seals around the battery door once a year to ensure they’re still soft and flexible. If a seal looks cracked, apply a tiny amount of silicone grease to keep moisture out.
When to avoid this project
Don’t rely on a standard outdoor thermometer if you need to monitor high-stakes environments like a walk-in freezer, a laboratory, or a greenhouse where crop failure means financial loss. These setups require high-precision sensors with alarm capabilities and data-logging features that record every minute of activity. If you need to monitor a space where human health is at risk, you should consult a professional contractor who specializes in environmental control systems. They use calibrated, industrial-grade sensors that are tested and certified to meet specific accuracy standards. Attempting to use a standard home thermometer in these high-stakes scenarios can lead to dangerous errors. If you find yourself needing to track temperatures for compliance or safety, stop using consumer hardware and look for professional-grade monitoring services instead.
Is it safe to leave my thermometer outside all year?
Yes, most modern outdoor thermometers are designed to handle rain, snow, and sun. Check your specific model’s manual to confirm the operating temperature range, as some budget digital units will stop functioning when the temperature drops below zero degrees Fahrenheit.
How do I know if my thermometer is accurate?
You can test your thermometer by placing it next to a known accurate source, such as a high-quality glass laboratory thermometer, for one hour. If your device consistently shows a reading more than two degrees different than the reference, it’s likely inaccurate and should be replaced.
Why does my outdoor temperature change so slowly?
It changes slowly because the sensor is housed in a protective casing to prevent moisture damage, which creates a slight delay in reading air temperature changes. This is normal and ensures the sensor lasts through the seasons without failing due to humidity or debris.
Can I mount the sensor on a metal fence?
No, mounting the sensor directly on a metal surface will cause the metal to heat up or cool down faster than the air, leading to false temperature readings. Always use a wooden or plastic spacer to keep the sensor at least one inch away from any metal surface.
How often should I change the batteries?
You should change the batteries regularly to prevent them from leaking inside the sensor housing. If you live in a climate that stays below freezing for long periods, use lithium batteries and replace them annually.
Does the distance between the sensor and console matter?
Yes, the distance matters because the radio signal strength decreases as it passes through walls, trees, and other obstacles. Always test the connection by placing the sensor in your desired spot and checking the console before you permanently mount the unit to a wall or post.
Start by placing your sensor in a shaded, well-ventilated location at least five feet above the ground. You’ll know the setup is successful when the indoor console displays a consistent temperature that matches local weather reports. If the temperature reading fluctuates wildly or the console loses the signal, check the batteries and move the sensor to a spot with fewer obstructions between it and your home.