
A professional range hood installation cost typically ranges from $300 to $800 for basic labor, though total project expenses often reach $1,500 or more when you include ductwork and electrical modifications. The total price for a professional range hood installation depends heavily on whether you’re replacing an existing unit or creating a new ventilation path through your roof or exterior wall.
This price varies by region, the complexity of your kitchen layout, and the specific model you choose, so check your local contractor estimates for the most accurate figures.
Determining your professional range hood installation type
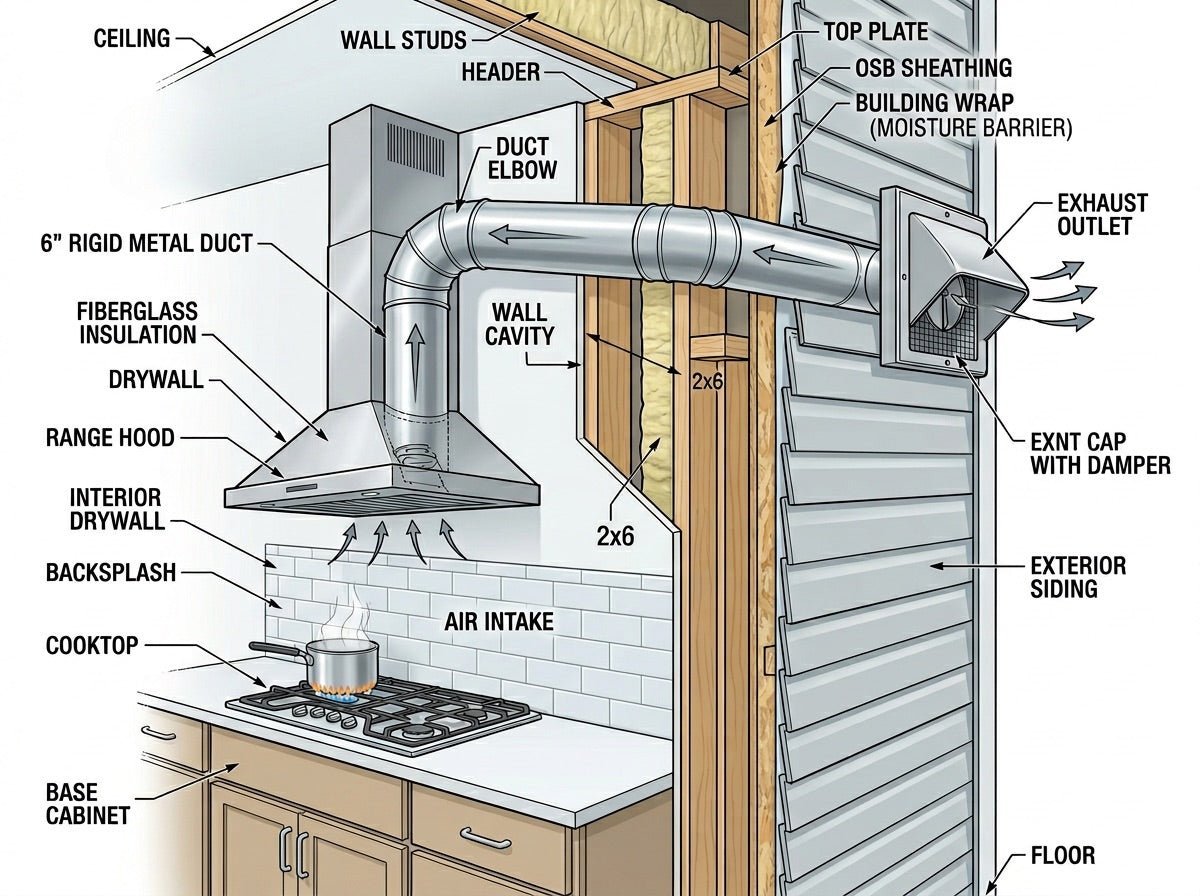
Homeowners choosing between various ventilation systems often have different starting points for their projects. You might be a person replacing a broken over-the-range microwave with a dedicated hood, which is usually a straightforward swap. Alternatively, you could be a homeowner renovating a kitchen layout and moving the cooking station to an island, which requires entirely new ducting and electrical circuits.
This page serves readers who need a professional to handle the technical requirements of kitchen ventilation. It assumes that you’re looking for a licensed contractor, such as an HVAC technician or a general carpenter, rather than attempting a DIY project. If you’re a builder or a professional contractor looking for industry-wide labor rates, you should consult your local labor union or trade association data instead of general consumer pricing guides.
We assume your home has standard wall construction and that you possess a functional electrical junction box near the installation site. If your home is older or has unique structural challenges, the labor time will increase significantly. Readers who want to understand the code requirements for residential kitchen exhaust systems should review the International Residential Code ventilation standards for exhaust duct sizes and materials.
Factors affecting total project price
The primary factor driving your cost is the need for new ductwork. If your kitchen already has a vent pipe that aligns with the new hood, the job is simple and stays at the lower end of the price spectrum. If the installer must cut through studs, install a new roof cap, or route metal ducting through cabinets, the labor cost will double or triple due to the hours required for precision carpentry and sealing.
Electrical requirements represent the second major variable. Most basic under-cabinet hoods use a simple plug-in cord, but high-end professional wall-mount or island hoods often require a hardwired connection to a dedicated circuit. If your current wiring isn’t up to modern safety standards or lacks the necessary amperage for a high-CFM motor, you’ll need to pay an electrician to update the circuit.
The type of hood you buy significantly changes the installation effort. A simple under-cabinet unit is lightweight and mounts with a few screws. In contrast, heavy stainless steel pro-style hoods or custom wood-enclosed hoods require structural blocking inside the wall to hold the weight. Most people make the mistake of buying the hood first without checking the weight capacity of their wall, which can lead to expensive last-minute framing repairs.
Finally, the height and accessibility of the kitchen ceiling play a role. If your installer needs to build scaffolding to reach a high ceiling or work in a cramped, narrow island space, the hourly rate remains the same but the billable hours will increase. This varies by model — check the label for specific mounting height requirements, as improper spacing can void your manufacturer warranty.
Installing the ventilation unit
- Turn off the power to the kitchen circuit at the main breaker box to ensure you aren’t working with live wires.
- Remove the old unit by unscrewing the mounting brackets and disconnecting the electrical wiring and duct connection.
- Measure the distance between your cooktop and the bottom of the new hood to confirm it matches the manufacturer’s recommended height range.
- Install the mounting bracket or template provided by the manufacturer, ensuring it’s perfectly level against the wall or cabinet base.
- If you’re using a ducted system, attach the transition piece to the top of the hood and secure it with metal foil tape.
- Lift the hood into position, securing it to the wall studs or cabinet frame using the hardware specified in the manual.
- Connect the electrical wiring inside the junction box, matching the black, white, and ground wires to the house supply.
- Attach the ductwork from the hood to your existing wall or roof vent, ensuring all joints are sealed tight with metal tape.
- Install the grease filters and test the fan speeds and lighting to confirm everything operates smoothly.
- Restore power at the breaker and run the unit for one minute to check for vibration or air leaks.
The single judgement call that separates a professional job from a amateur one is the quality of the duct sealing. An installer who uses proper metal foil tape rather than cheap duct tape ensures that grease-laden air stays inside the vent and doesn’t leak back into your wall cavities, which prevents fire hazards.
Estimated cost breakdown
The following table summarizes the typical costs you can expect for a standard range hood installation project in a residential kitchen.
| Situation | Estimated Labor | Time Needed | What to watch for |
|---|---|---|---|
| Simple replacement | $300 – $450 | 2 – 3 hours | Existing duct alignment |
| Hardwired upgrade | $450 – $650 | 4 – 6 hours | Circuit breaker capacity |
| New duct routing | $600 – $1,200 | 1 – 2 days | Roof structural integrity |
| Custom wood hood | $800 – $1,500 | 2 – 3 days | Cabinetry matching needs |
| Island mount hood | $700 – $1,400 | 1 – 2 days | Ceiling support blocking |
Most homeowners underestimate the cost of ductwork transitions. If your new hood requires a different diameter pipe than your existing venting, expect to add $150 to $300 for professional metal fabrication.
Check your current circuit breaker before purchasing a high-CFM model. If your kitchen circuit is already near its 15-amp limit, you’ll need a dedicated line. Failing to upgrade this causes frequent tripping, which eventually damages the hood’s motor.
Use this simple decision rule: if the new hood matches your existing footprint, budget for a replacement. If you’re changing the location or venting path, treat it as a renovation project. Always verify that your installer includes the cost of the exterior roof cap in their bid, as this often adds $100 to the total.
Quality of the final installation
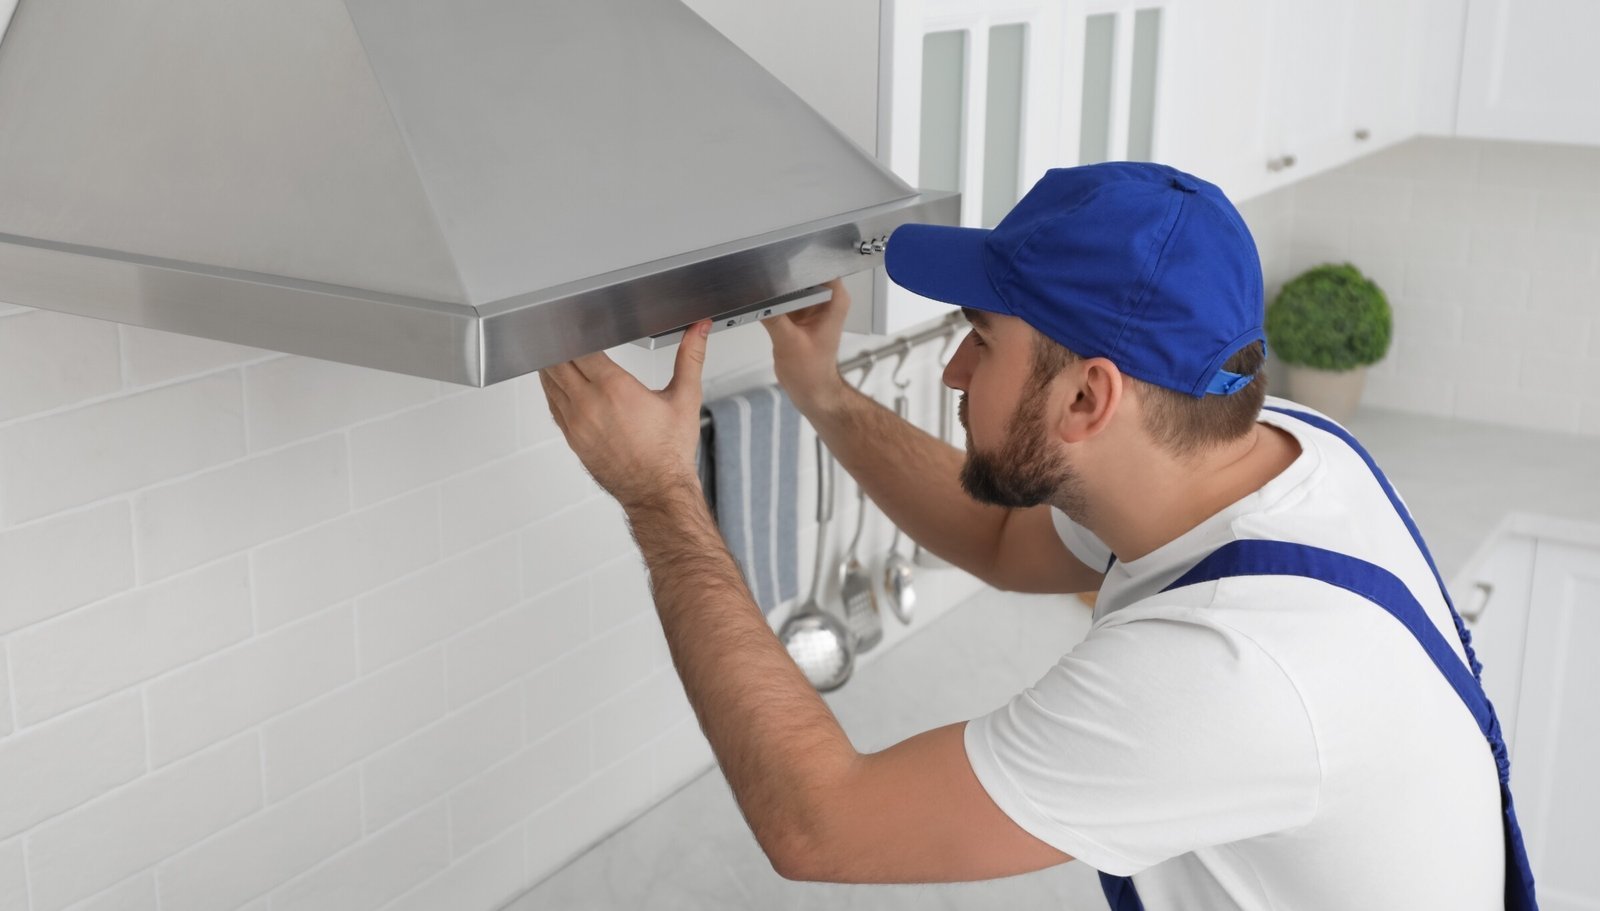
Proper duct sealing and support
Professionals prioritize the integrity of the air path. They use rigid metal ducting whenever possible because flexible plastic hoses are prone to sagging, which traps grease and creates a fire risk. A good installer will secure the ducting to the wall framing to stop the unit from rattling when the fan runs on its highest setting. They also check the exterior vent cap to ensure it has a backdraft damper that stays closed when the fan is off, preventing cold air and pests from entering your kitchen.
Electrical and structural safety
A quality installation respects the electrical load of the motor. Experienced installers verify that the wire gauge is sufficient for the hood’s power draw and that the unit is grounded properly to the home’s electrical system. They also check the wall structure behind the drywall. If they find that the wall is just thin plaster or drywall, they will add wood backing or metal supports to ensure the heavy unit doesn’t pull away from the wall over time.
Troubleshooting common installation issues
| What you notice | What it usually means | What to do first | How to stop it happening again |
|---|---|---|---|
| Loud rattling noise | Loose mounting screws | Tighten all wall bolts | Use rubber vibration washers |
| Weak air suction | Blocked or kinked duct | Check exterior vent cap | Use rigid metal ducting |
| Fan runs but no air | Backdraft damper stuck | Clear debris from vent | Clean vent cap seasonally |
| Lights flickering | Loose wire connection | Inspect junction box | Use proper wire nuts |
| Grease dripping down | Duct condensation | Insulate the duct pipe | Slope duct toward outside |
If you hear a grinding sound rather than a rattle, the motor bearings are likely failing. Don’t attempt to grease these yourself, as most modern units use sealed, maintenance-free housings. You must replace the motor assembly immediately to prevent a fire hazard.
When checking ductwork, look for gaps at the joints. Never use standard cloth duct tape, as the adhesive dries out and peels within months.
If the unit vibrates excessively, verify that the wall studs aren’t hollow. You should always mount the bracket into solid wood or use heavy-duty toggle bolts. If you’re unsure whether you hit a stud, use a magnetic stud finder before drilling. Skipping this step often leads to drywall failure and expensive wall repairs.
Regulatory requirements for ventilation
Building codes in the United States are governed by the International Residential Code, which sets the rules for how much air your hood must move based on the size of your range. These codes specify the required duct diameter to maintain proper airflow and prevent the motor from burning out due to backpressure. You can find the specific requirements for your state or city by visiting the building department website for your local municipality.
If your project involves cutting through a roof, you must follow local roofing standards to maintain the water-tightness of your home. Any work that involves modifying the structure of your house or changing the electrical circuits usually requires a permit and a follow-up inspection. Never bypass these rules, as an unpermitted installation can lead to insurance claim denials if a fire occurs. If you aren’t comfortable working with high-voltage electricity or roof flashing, hire a licensed contractor who carries professional liability insurance.
Understanding the real project costs
The cost of your project isn’t just the price of the hood itself. You must factor in the hourly labor rate of a skilled worker, which typically ranges from $75 to $150 per hour depending on the complexity of the task. If you’re hiring an independent handyman, the cost might be lower, but ensure they have experience with ventilation systems, as a poorly installed vent can cause moisture buildup and mold in your attic.
Hidden costs often include the materials for the duct run, such as elbows, rigid pipe, and roof or wall caps, which can add $100 to $300 to your total bill. If you’re installing a high-end range hood, the manufacturer may require specific duct sizes that aren’t standard at local hardware stores, requiring special-order parts. Always ask your installer for a written estimate that itemizes labor, materials, and the cost of any necessary permits. If the estimate seems too low, ask if it includes the cost of the electrical work or if that’s a separate charge from a licensed electrician.
Long-term maintenance and care
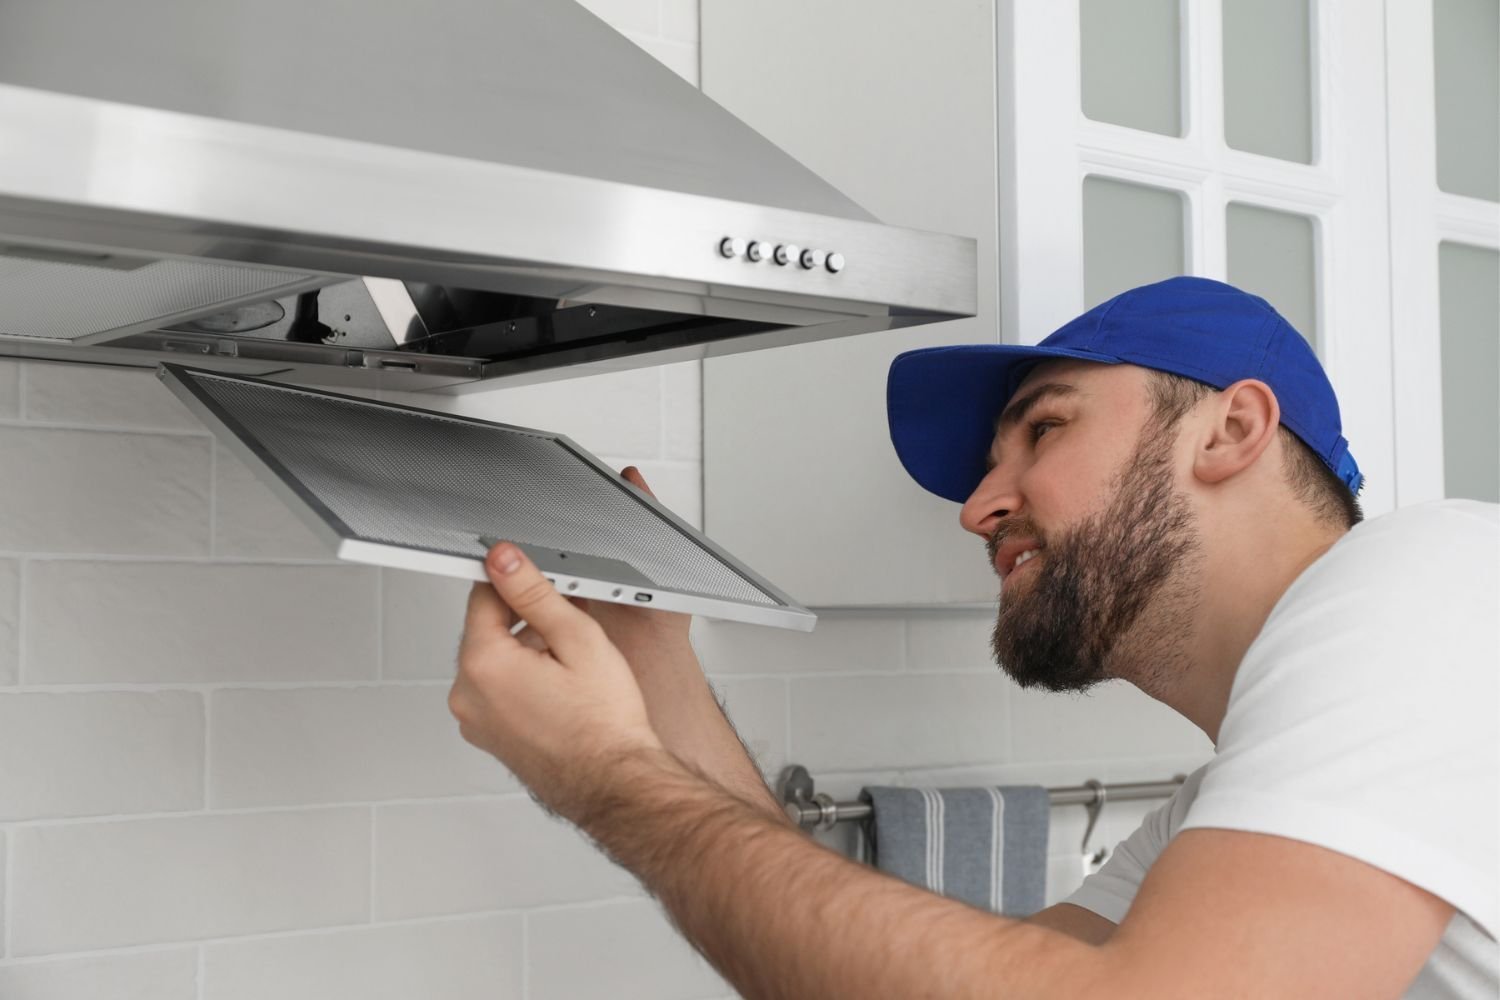
Once the installation is complete, your primary task is keeping the grease filters clean. Most metal mesh filters can go into the dishwasher, but check your manual to ensure they aren’t made of aluminum, which can turn gray or pit when exposed to harsh alkaline detergents.
Listen for changes in the sound of the motor. A healthy fan has a consistent hum; if it starts to make a grinding or high-pitched sound, it usually means the bearings are wearing out or debris is stuck in the fan blades. Neglecting this noise often leads to total motor burnout, which can cost three times more than a simple cleaning or bearing replacement.
Never spray cleaning chemicals directly into the motor housing, as this can damage the electrical components or cause a short circuit. If the unit stops working, check the breaker first, then look for a hidden reset button on the hood itself before calling a technician. If the fan runs but suction is absent, inspect the external vent cap for obstructions like bird nests or lint buildup.
When to hire a different specialist
If your kitchen renovation involves moving a gas range to a new location, this isn’t a job for a standard hood installer. Moving gas lines requires a certified plumber or gas fitter who must verify that the new location meets safety distances from windows and combustible surfaces. Attempting to move gas lines without the proper credentials creates a significant risk of leaks and explosions.
Similarly, if you’re installing a high-CFM professional-grade hood that exceeds 400 CFM, you may be required by local code to install a “make-up air” system. This system brings fresh air into the house to replace the air the hood pushes out, preventing carbon monoxide from being pulled back into the home from your furnace or water heater. This is a complex HVAC project that requires a professional engineer or a specialized ventilation contractor. If you find yourself in these situations, stop the process and call a licensed professional to handle the design and safety compliance.
How much does professional installation cost?
Professional installation generally costs between $300 and $800, though costs increase if new ductwork or electrical circuits are required. You should get at least three quotes from local contractors to compare labor rates, as these can vary significantly based on your local market and the specific complexity of your kitchen layout.
Is it safe to install a range hood myself?
Yes, it’s safe if you have basic carpentry and electrical skills, provided you follow the manufacturer’s manual and local building codes. You must turn off the power at the breaker before starting and ensure the wall structure can support the weight of the unit before you drill any holes.
How long does a professional range hood installation take?
A professional installation typically takes between two and four hours for a simple replacement. If the job requires cutting into walls, installing new ductwork, or performing complex electrical wiring, the work can extend to a full day or longer depending on the structural challenges found behind your cabinets.
Does the cost include the range hood itself?
No, the installation cost almost never includes the price of the range hood unit. You’re responsible for purchasing the hood, the filters, and any specific duct transition pieces, while the contractor provides the labor, tools, and general mounting hardware like screws and sealant.
What happens if I don’t use a professional for installation?
You risk voiding your manufacturer’s warranty and creating potential fire or moisture hazards if the ductwork isn’t sealed correctly. If you don’t have the necessary permits, you may also face legal issues or insurance claim denials if the improper installation causes damage to your home later.
Does the duct size matter for the installation cost?
Yes, the duct size is critical because it dictates the amount of work required to adapt your home’s existing vents to your new hood. If your new hood requires a six-inch duct but your home has a four-inch vent, the installer will charge more to replace or adapt the pipe to ensure the fan works correctly.
Is a permit required for range hood installation?
Permits are often required if you’re modifying electrical circuits or cutting through your home’s structure to create a new vent path. Check with your local city building department to see if your specific project needs a permit, as this varies by location and the extent of the work being performed.
Start by measuring your current space and checking the manufacturer’s manual for your new unit to see exactly what mounting and ducting requirements exist. If the requirements match your current setup, you can proceed with confidence, but if you need to move vents or electrical lines, contact a licensed contractor to handle the work. If you notice structural damage or gas lines while inspecting the area, stop work immediately and consult a professional.