
A welded connection is a structural joint created by melting the base metal and adding a filler material to fuse two separate parts into one solid piece. This process uses intense heat to create a bond that’s often stronger than the original metal itself. By melting the edges of the parts, engineers ensure that the load transfers smoothly across the entire joint, making it essential for heavy construction and manufacturing.
The success of this joint depends on the heat input and the cooling rate of the metal. If the heat is too low, the metal won’t fuse properly, leaving a weak joint that could crack under stress. If the heat is too high, it changes the internal grain structure of the metal, making it brittle. The most common mistake people make is skipping the cleaning process, which leads to trapped gases and weak spots known as porosity.
How a welded connection works
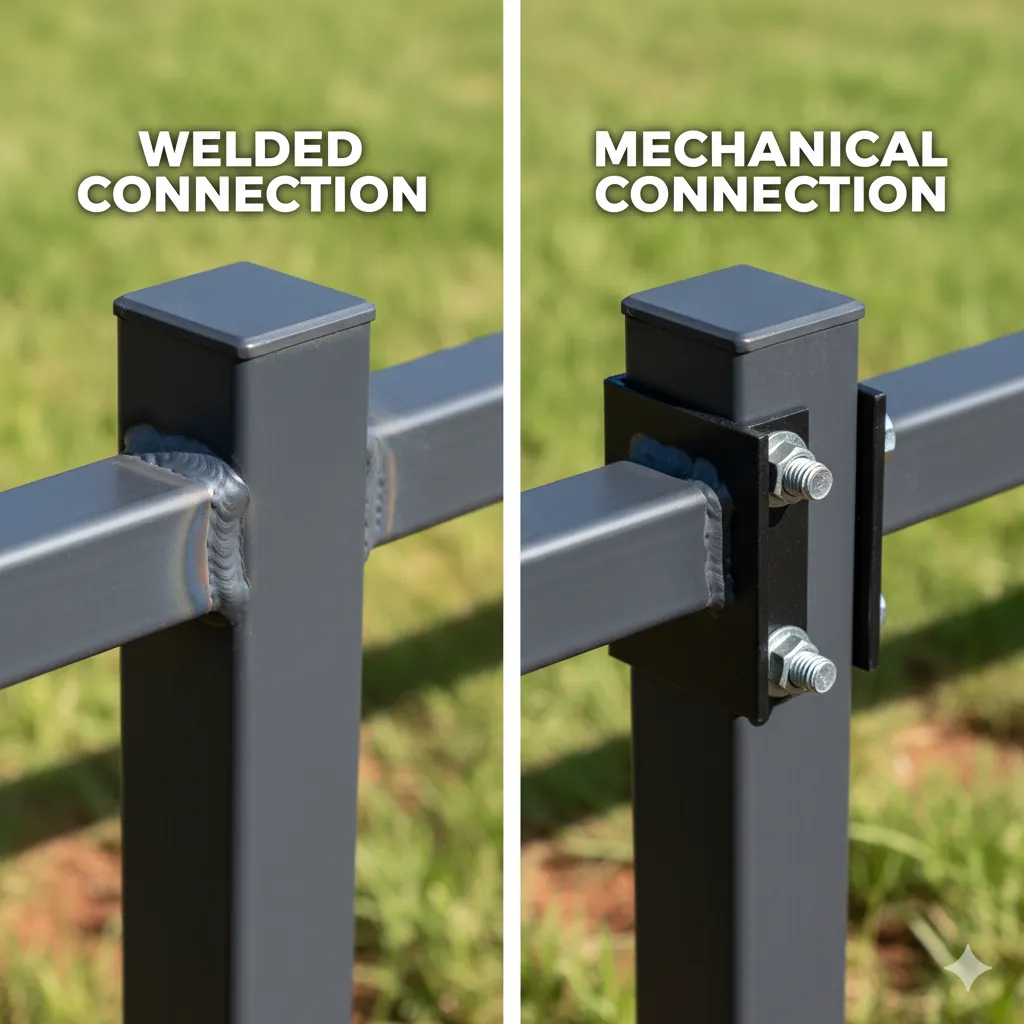
Clean the metal surfaces thoroughly using a wire brush or grinder to remove rust, paint, or oil. If you can see discoloration or flaking, keep grinding until you reach bright, shiny base metal. Contaminants left behind create gas pockets that weaken the weld from the inside out.
Align the two pieces of metal carefully, using clamps or magnets to keep them in place. Tack weld at both ends before running the full bead to prevent the metal from pulling or warping as it heats.
Set your welding machine to the correct amperage based on the thickness of your metal. If you’re unsure how to calibrate these settings, consult a professional technician. If the puddle is too fluid and burns through, drop your amperage by five-amp increments. If the bead sits on top like a caterpillar without biting into the edges, increase the heat.
Strike the arc and maintain a steady travel speed, keeping the electrode at a consistent angle. Allow the joint to cool slowly in the air. Never use water to speed up the process, as rapid quenching makes the steel brittle and prone to cracking.
Inspect the bead for holes or uneven edges. If you see pinholes, you have trapped gas. Grind that section out and re-weld it immediately.
Factors Affecting Weld Time
The total time needed to finish a connection depends on the thickness of the material and the type of equipment used. While a simple tack weld might take only seconds, a full structural joint requires careful preparation and multiple passes to build up the necessary strength.
| Situation | How long | What changes it | What to watch for |
|---|---|---|---|
| Thin sheet metal | 2-5 minutes | Low heat settings | Burning through the metal |
| Medium steel pipe | 10-20 minutes | Multi-pass requirements | Slag inclusion |
| Thick structural beam | 1-2 hours | Pre-heating needs | Distortion and warping |
If the process takes much longer than these estimates, you’re likely dealing with poor surface preparation or an unstable arc. Check your ground clamp connection to ensure it’s tight and clean, as a loose ground is the most common reason for a slow or sputtering arc.
Checking for a Quality Bond
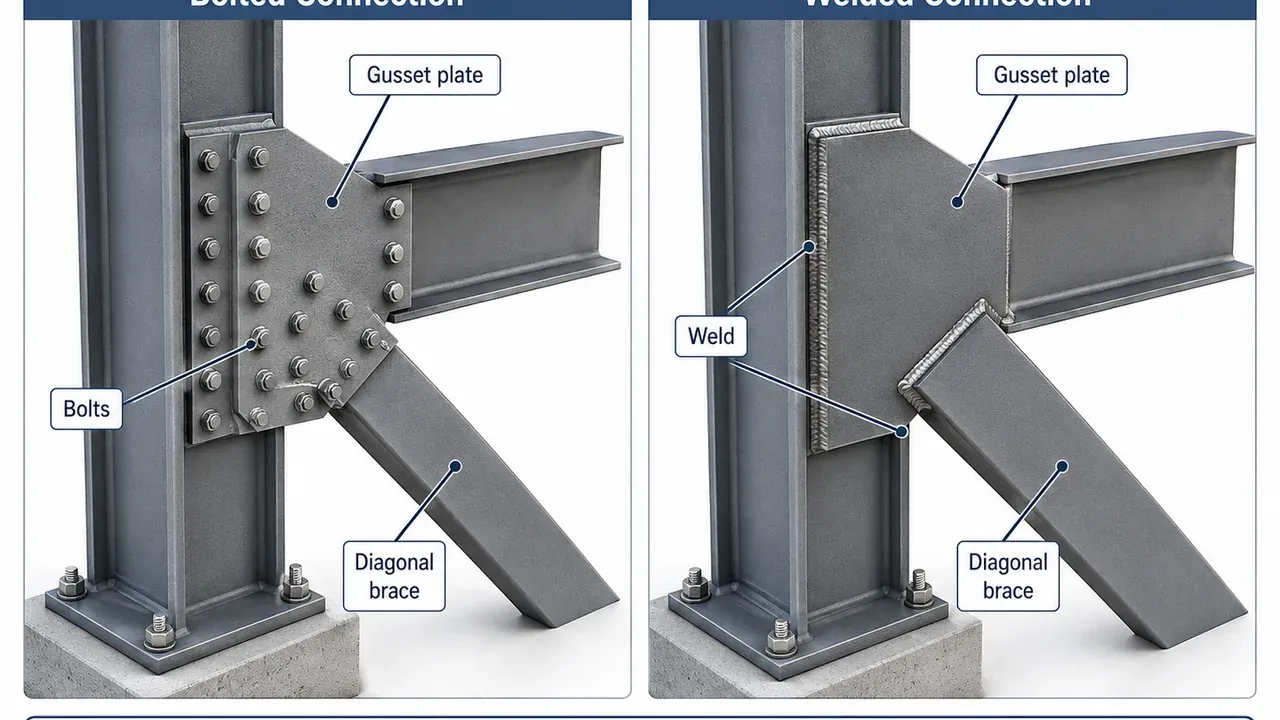
You can tell a weld is done well by looking at the bead shape and the surrounding metal. A high-quality bead should look like a stack of dimes, with a consistent width and height along the entire length. The edges of the bead must blend smoothly into the base metal without any sharp gaps or deep valleys.
If you’re unsure about the internal strength, look for signs of undercut, where the metal has been eaten away at the edge of the weld. This creates a stress riser that could cause the joint to snap later. Most beginners mistake a tall, thick bead for a strong one, but excessive height often indicates poor penetration. If the bead sits on top of the metal rather than biting into it, the bond is superficial.
For critical projects, use a dye penetrant test kit to reveal tiny cracks that are invisible to the naked eye. If the bead is uneven or porous, it isn’t safe for structural use and must be ground out and redone. If you see pinholes, stop immediately; this indicates shielding gas contamination, which ruins the weld’s integrity.
Errors That Weaken Connections

Improper surface cleaning: Leaving grease or mill scale on the metal causes gas bubbles to form inside the cooling weld. These bubbles create voids that significantly reduce the load-carrying capacity of the connection. Use a mechanical grinder or a dedicated wire brush to reach a bright, shiny finish before you begin. If you can see discoloration or oil residue, your weld will likely suffer from porosity that significantly weakens the structural integrity.
Incorrect travel speed: Moving too fast prevents the filler metal from melting into the base material, while moving too slowly builds up too much heat. This imbalance causes the base metal to lose its strength or fail to fuse. Adjust your speed so the weld pool stays consistent in size. If the bead looks ropey and narrow, you’re moving too fast; if it begins to sag or undercut the edges, you’re moving too slowly.
Poor fit-up: Trying to weld parts that have large gaps makes it difficult to bridge the space without adding excessive material. This puts extra stress on the joint and often leads to warping. Aim for a gap of no more than 1/16 of an inch. If your gap exceeds this, don’t try to fill it with weld metal alone. Instead, bridge the gap with a backing plate or recut your material to ensure a snug fit.
Related guides
- 7 Best Sealant for Drop In Sink Options for Every Connection in 2026
- Septic Tank vs Sewer Connection: Which System Is Right for You in 2026
Frequently asked questions
Can I weld two different types of metal together?
Yes, you can join different metals, but you must use a compatible filler material and the right heat settings. If you use the wrong filler, the joint will be brittle and fail almost immediately under pressure. You should check the manufacturer’s charts for your specific metals to see which filler rods provide the necessary chemical bond for your application.
How long does a welded connection last?
A proper weld can last for the entire life of the structure if kept free from corrosion. The actual lifespan is determined by how well the joint is protected from the elements and how much vibration or stress it handles daily. If the metal starts to rust at the weld line, the connection will lose its integrity much faster than the surrounding steel.
Is it safe to weld without a professional mask?
No, it’s never safe to weld without a proper auto-darkening helmet because the intense ultraviolet light will cause permanent eye damage. The light emitted during the process is strong enough to burn your retinas and skin in just a few seconds of exposure. Always wear a helmet rated for the specific arc intensity you’re using to ensure complete protection.
What happens if I weld in the rain?
If you attempt to weld in the rain, the moisture will turn to steam instantly, causing massive porosity and hydrogen cracking. This ruins the structural integrity of the joint and makes it impossible to achieve a clean, strong bond. Always work in a dry, sheltered environment to ensure the metal remains stable during the heating and cooling process.
How do I know if the weld is deep enough?
You can confirm the depth by checking the penetration profile, which should reach through the full thickness of the base metal. If you aren’t sure, you can look at the backside of the material to see if the weld has pushed through, or “crowned,” slightly. For professional work, ultrasonic testing is the only way to measure the exact depth of the fusion without destroying the part.
Conclusion
Welding is a trade that rewards patience and precise preparation. By focusing on the cleanliness of your materials and the consistency of your movement, you’ll create connections that stand the test of time. Always prioritize safety equipment and follow the recommended settings for your specific metal thickness to ensure your work remains secure and reliable.
