
Choosing between pvc vs cpvc pipe depends primarily on the temperature of the water they will carry, as cpvc handles hot water while standard pvc is limited to cold systems. If you’re installing a cold-water supply or drainage, standard pvc is the cost-effective choice; however, if you’re working on hot-water lines, you must use cpvc to avoid pipe deformation and failure.
Differences between PVC and CPVC pipe
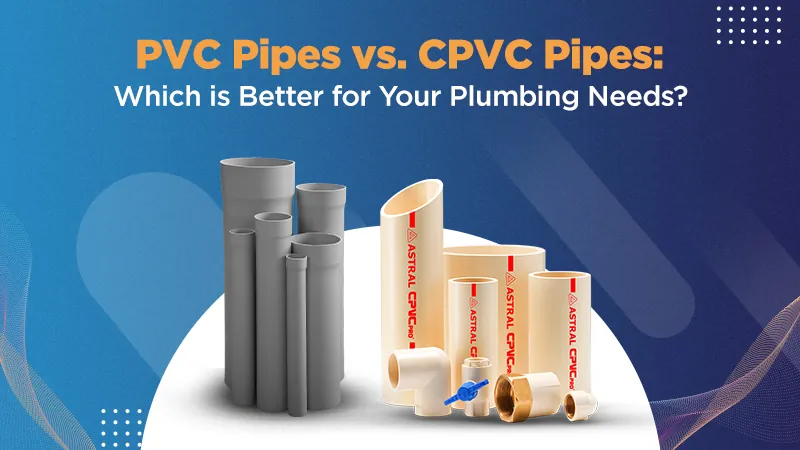
Selecting the right material ensures your plumbing system remains leak-free and compliant with local building codes. While both materials are rigid plastics, they’re designed for different environments and pressure requirements.
| Method | How long | Effort | Cost | Best for |
|---|---|---|---|---|
| PVC | Long | Low | Low | Cold water, drainage |
| CPVC | Long | Medium | Medium | Hot/cold water |
Standard PVC is widely used for cold-water main lines and vent stacks because it’s inexpensive and easy to cut. It becomes brittle under sustained heat, however, which can lead to catastrophic cracking if used for hot water supply lines.
In contrast, CPVC is chemically treated to withstand higher temperatures, making it the standard for residential hot-water plumbing. If your project involves potable water, look for the “NSF-61” stamp on the pipe surface. This indicates the material has been tested to ensure it doesn’t leach harmful chemicals into your supply.
A common mistake is using PVC for interior supply lines because it’s cheaper. This choice often forces a full system replacement within five years as the plastic degrades under thermal cycling. If you’re working on a main supply line buried underground, use Schedule 40 PVC for its impact resistance.
If you’re running lines through wall cavities for showers or sinks, use CPVC to handle the heat. Always verify your local amendments, as some municipalities strictly prohibit plastic for interior hot-water distribution in favor of copper or PEX.
Working with standard pvc
Installing standard PVC requires basic tools and a solvent welding process to create a permanent, leak-proof bond. You start by cutting the pipe to the required length using a fine-tooth hacksaw or a plastic pipe cutter.
After deburring the edges, apply a purple primer to both the pipe end and the inside of the fitting to soften the plastic. Finally, apply a thin layer of solvent cement, push the two pieces together with a quarter-turn, and hold them for 30 seconds.
If you skip the deburring step, the jagged plastic shavings will scrape the solvent off the fitting during insertion. This creates a dry spot that inevitably leads to a pinhole leak under pressure. Always use a chamfering tool or a utility knife to create a smooth, beveled edge before applying any chemicals.
This material is excellent for irrigation systems and underground drainage because it doesn’t corrode or rust like metal pipes. It’s also lightweight, which makes it easy to transport and install in tight spaces. However, it isn’t suitable for hot water, as it will soften and lose structural integrity when exposed to temperatures above 140°F.
If your project involves high-pressure industrial lines or complex drainage slopes, consult a licensed plumber to ensure your installation meets local safety codes. If you’re working in cold weather, allow the joints to cure for twice the recommended time. Solvent cement relies on evaporation, which slows significantly when the ambient temperature drops below 50°F. If the pipe feels brittle or has a white, chalky appearance from sun exposure, discard that section rather than attempting to bond it.
Installing cpvc piping
The installation process for CPVC is similar to PVC but requires specific solvents and cement designed for higher heat resistance. Always use a one-step or two-step cement labeled specifically for CPVC; using standard PVC glue will result in a joint that fails under thermal expansion. Cut the pipe square using a specialized ratchet cutter to ensure a flush fit against the fitting stop. A jagged edge creates turbulence and potential leaks.
Apply a thin, even coat of primer to the pipe end and the inside of the fitting. Immediately follow with cement while the primer is still wet. Push the pipe into the fitting with a quarter-turn to distribute the solvent, then hold it firmly for 30 seconds to prevent the pipe from backing out. If the ambient temperature is below 40°F, double the manufacturer’s recommended set time to ensure a proper chemical bond.
This material is highly effective for residential hot-water distribution because it resists scaling and doesn’t transfer heat as quickly as copper. It also offers a quieter plumbing system, as it doesn’t produce the same “water hammer” noise often found in metal pipes.
One significant weakness is that CPVC becomes brittle if exposed to prolonged direct sunlight. If you must run a line through an attic or crawlspace near a vent, wrap the pipe in UV-resistant insulation or paint it with a light-colored, water-based latex paint. Never use oil-based paints, as the chemical solvents will degrade the plastic and cause the pipe to crack prematurely.
Choosing the right material
When you need to finish a job in a hurry, PVC is the better choice because the materials are available at almost any hardware store and the welding process is faster. If you’re doing this for the first time, PVC is also more forgiving and cheaper to replace if you make a cutting error.
However, if you want the best possible result for a home hot-water system, CPVC is the only professional choice despite the higher price. CPVC is rated for temperatures up to 200 degrees Fahrenheit, whereas standard PVC begins to soften and deform at just 140 degrees. If your water heater is set to the standard 120 degrees, PVC might survive, but any surge or thermostat failure will cause the pipe to sag and eventually burst.
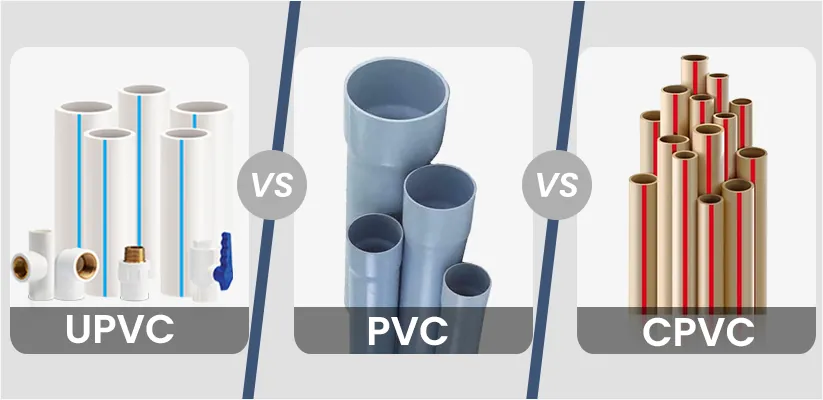
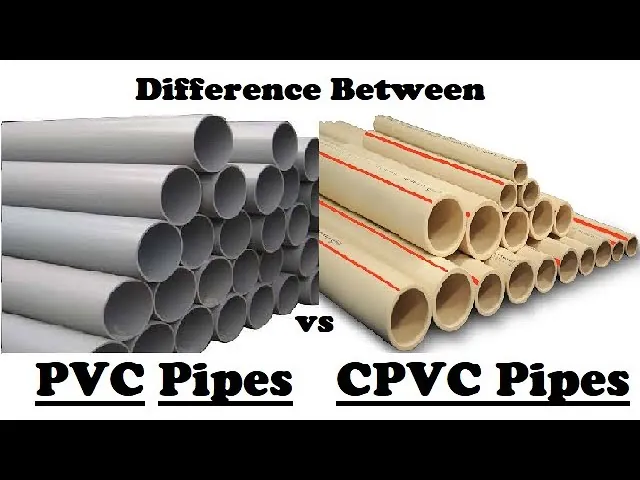
The trade-off is simple: you gain heat resistance with CPVC, but you sacrifice the low cost and wide availability of standard PVC. Always check the color of the pipe before you buy. CPVC is typically a distinct off-white or yellowish cream, while standard PVC is bright white. If you see a label marked “Schedule 40” but it lacks a temperature rating, don’t use it for hot water.
If you’re unsure about the specific requirements for your building, check the plumbing code guidelines provided by your local municipal building department. Using the wrong material for a hot-water line can lead to catastrophic leaks that may void your home insurance policy. If the pipe wall feels brittle or thin, choose the higher-rated material to avoid a costly flood.
Rules for all plastic piping
Regardless of the pipe you choose, you must follow basic safety and installation rules to ensure a long-lasting system. Always verify that your pipe and fittings share the same pressure rating, as mixing components creates weak points. Always verify that your pipe and fittings share the same pressure rating, as mixing components with different pressure ratings can create weak points in the system.
Before you begin, confirm that the pipe is clean and dry. Moisture prevents solvent cement from creating a proper chemical weld, leading to slow leaks that may not appear for months. If the pipe surface feels oily or slick, wipe it down with a dedicated primer before applying any adhesive.
Always use a deburring tool to smooth the edges of the pipe after cutting. Rough edges act like a plow, pushing the cement out of the fitting socket during insertion and leaving a dry, unsealed gap. If you lack a deburring tool, use a half-round file to remove internal and external burrs.
If you’re working on a main water supply, consult your local building department. Most jurisdictions require a permit for any modification to the main line, and failing to secure one can complicate future home sales or insurance claims.
If you’re unsure about the local code, check the pipe’s printed certification. If it lacks an NSF-61 stamp, it isn’t rated for potable water and should never be used for supply lines. If you aren’t comfortable working with pressurized water, contact a licensed professional to handle the connection to the main supply.
Related guides
- 5 Best Drain Cleaner for Plastic Pipes Picks for Safe Plumbing in 2026
- Pipe Insulation Foam vs Heat Tape: Which One Do You Need in 2026
- How Much Does Plumbing Repair Cost? Typical Price Ranges in 2026
Frequently asked questions
Can I use pvc pipe for hot water?
No, you can’t use standard pvc for hot water because it’s only rated for temperatures up to 140°F. Exposing standard pvc to water above this temperature will cause the pipe to soften, deform, and eventually burst. If your project involves hot-water lines, you must use cpvc or another material specifically rated for high-temperature service, as these are engineered to maintain their strength under thermal stress.
Is cpvc safe for drinking water?
Yes, cpvc is safe for drinking water provided it’s certified by a body like the NSF. These pipes are tested to ensure they don’t leach harmful chemicals into the water supply under normal residential operating conditions. Always look for the NSF-pw or similar certification mark printed directly on the side of the pipe to ensure it meets the necessary health and safety standards for potable water.
How long does cpvc cement take to dry?
The set time for cpvc cement is typically 15 to 30 minutes for the joint to handle initial pressure, but it requires 24 hours to reach a full cure. These times assume an ambient temperature of 70°F; if your workspace is colder or more humid, you must allow extra time for the solvent to evaporate completely. Never pressurize the system before the recommended curing time has passed.
Can I connect pvc to cpvc?
Yes, you can connect the two using a transition fitting, but you should never use standard pvc fittings on a hot-water line. Transitioning requires a specialized adapter or transition coupling because standard solvent cement can’t chemically bond PVC to CPVC. If you’re joining them, ensure the transition fitting is rated for the maximum temperature and pressure of the hottest section of the system to prevent a failure at the joint.
Is it safe to glue these pipes in a closed room?
No, it isn’t safe to work with solvent cement in an unventilated area because the fumes are flammable and can cause dizziness. You must always work in a well-ventilated space, preferably with a window open or a fan running to clear the vapors. If you find yourself feeling lightheaded, step outside immediately and ensure the area is fully aired out before you return to your work.
How do I know if my pipe is pvc or cpvc?
You can identify the material by looking at the markings printed along the length of the pipe. Pvc is usually white and clearly labeled as “PVC,” while cpvc is often a light cream or yellow-tan color and will be explicitly labeled as “CPVC.” If the markings are worn off, the color difference is usually the most reliable way to tell them apart before you start your project.
Conclusion
Before you head to the hardware store, double-check your local building codes to ensure you’re using the right material for your specific project. It’s always better to be certain before you start cutting and gluing. You’ll save yourself a lot of trouble if you get the job done correctly the first time.